Portable Workbench “Woodshop in a Box”
This portable workbench stores the tools with it! It can be stored under the bed, and easily pops up to become a sturdy workbench. We love it for builders in apartments, small spaces, or on the go. You can build this portable workbench for about $40 with basic tools. This is a quick and easy project with free step by step diagrams, shopping and cut list and video tutorial.
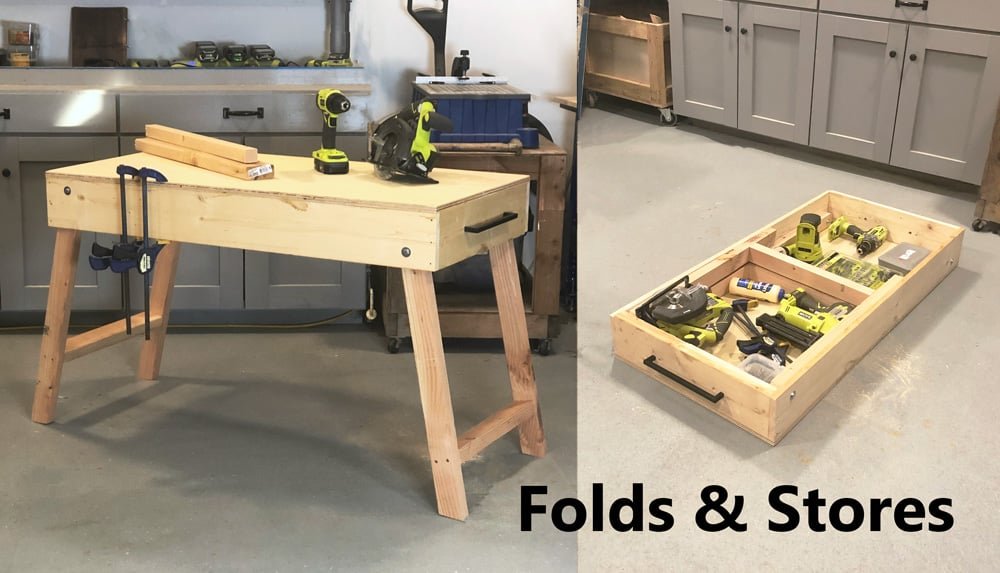
Specifications
| Project type | Workshop and Garage Plans |
|---|---|
| Room | Garage and Workshop |
| Difficulty | Beginner Projects |
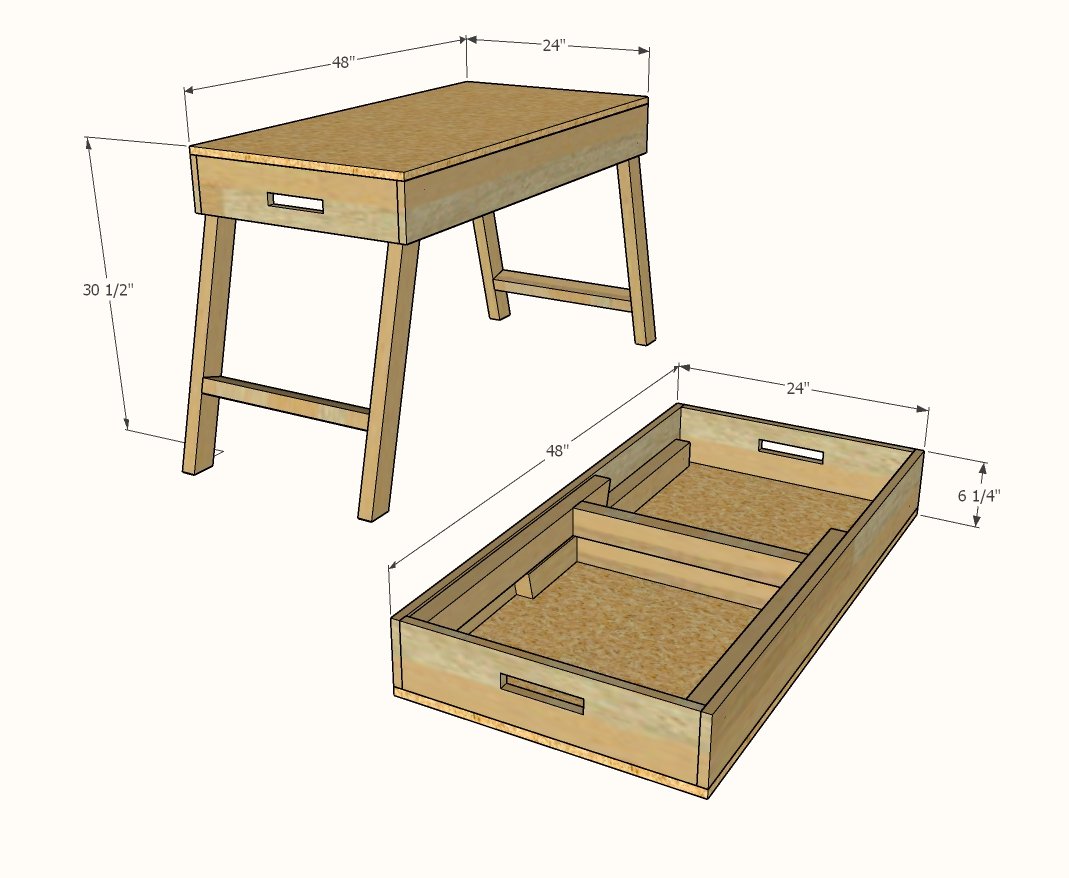
Dimensions
Use the size-specific shopping and cut lists below.
Shopping List
- 2 - 1x6 @ 6 feet long
- 2 - 2x3 @ 8 feet long or stud length
- 1 - 1/2" or 3/4" thick plywood panel, 24" x 48"
- 4 - 3" bolts
- 4 - matching locking nuts
- 12 - matching washers (three per bolt, one on each end and one in between wood)
- 16 - 2" self tapping wood screws
- 16 - 1-1/4" self tapping wood screws
- wood glue
- 2 - handles (optional)
Cut List
- 2 - 1x6 @ 48" or length of plywood
- 2 - 1x6 @ 22-1/2" or width of plywood minus 1-1/2"
- 1 - 1/2" or 3/4" thick plywood project panel measuring 24" by 48"
- 2 - 2x3 @ 28-1/4" - longest point measurement, one end cut at 15 degrees off square
- 2 - 2x3 @ 31" - longest point measurement, one end cut at 15 degrees off square
- 2 - 2x3 @ 19-1/4"
Tools
- measuring tape
- square
- pencil
- safety glasses
- hearing protection
- drill
- circular saw
Step-by-step Instructions
Step 1
Measure the length and width of your plywood. Adjust measurements in cut list if your plywood does NOT measure 24" x 48" Attach sides to ends with three 2" self tapping screws and glue. Optional handles can be cut on ends.
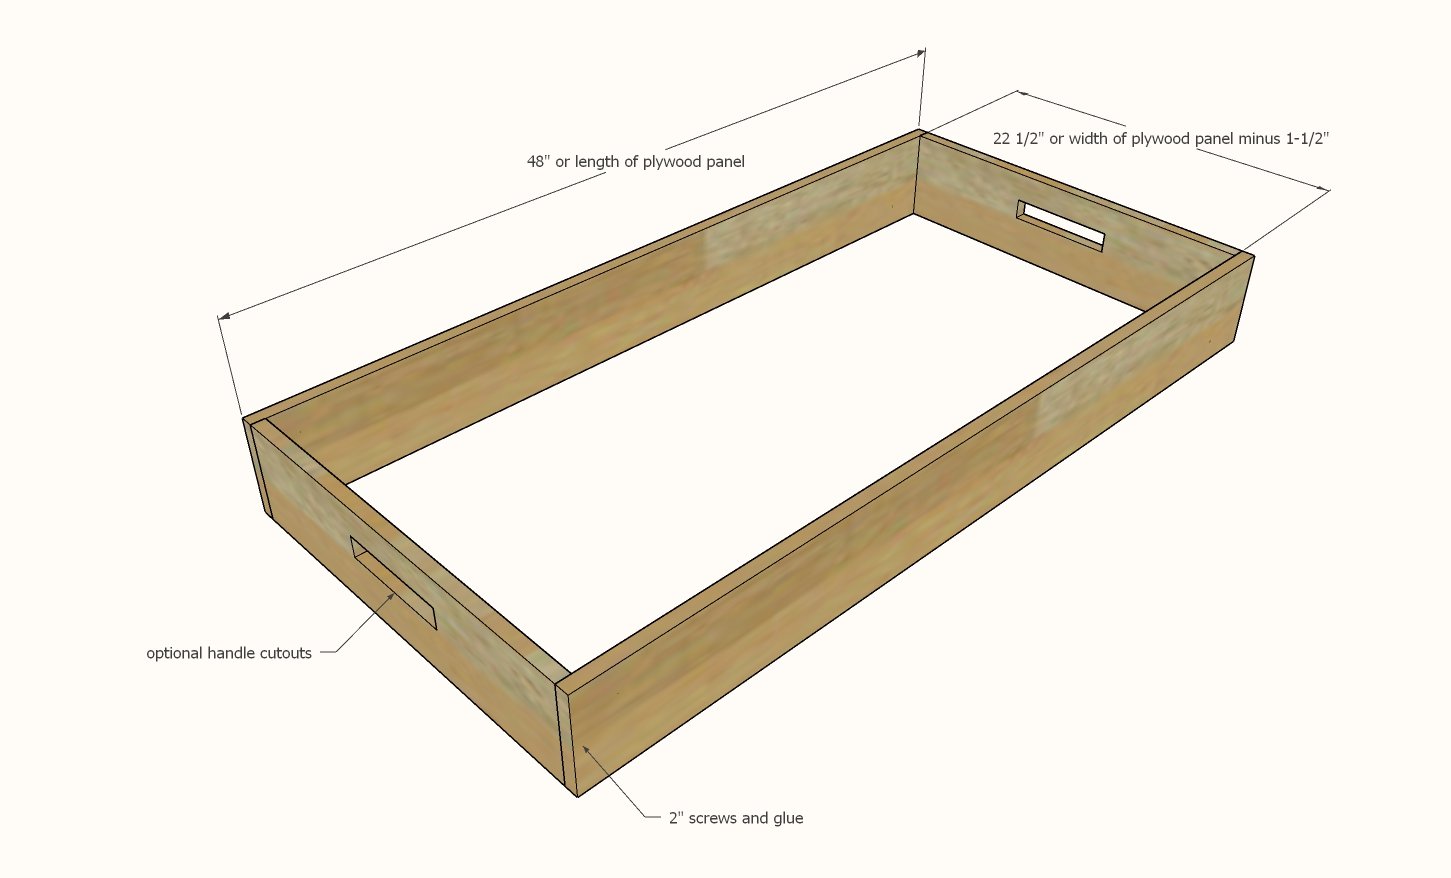
Apply glue to bottom edge of 1x6 box.
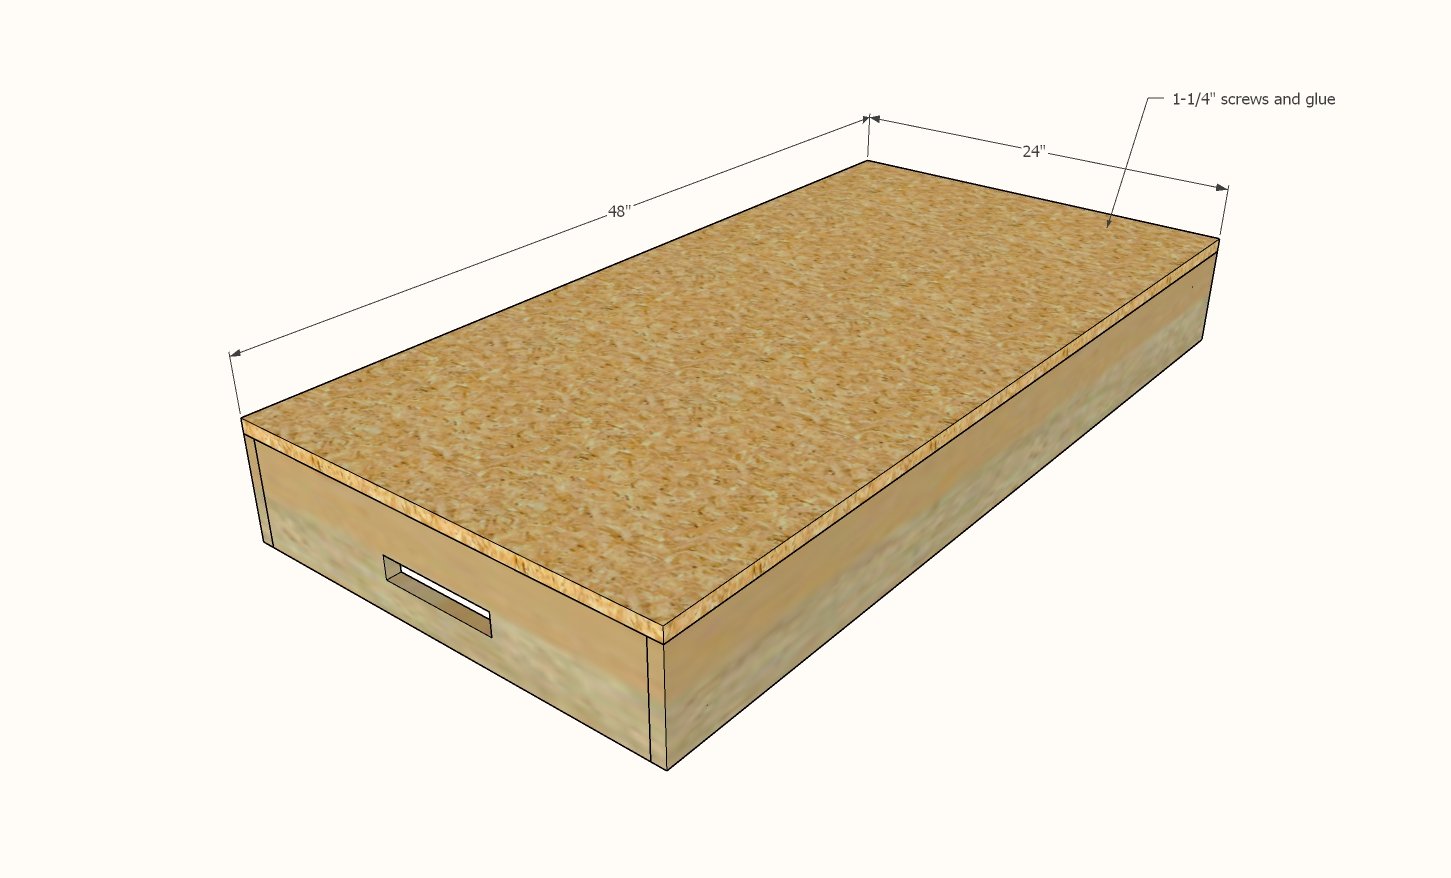
Attach plywood to bottom with 1-1/4" screws, the screw heads should be slightly below the surface of the plywood. Screw at least every 12" and on all ends/corners.
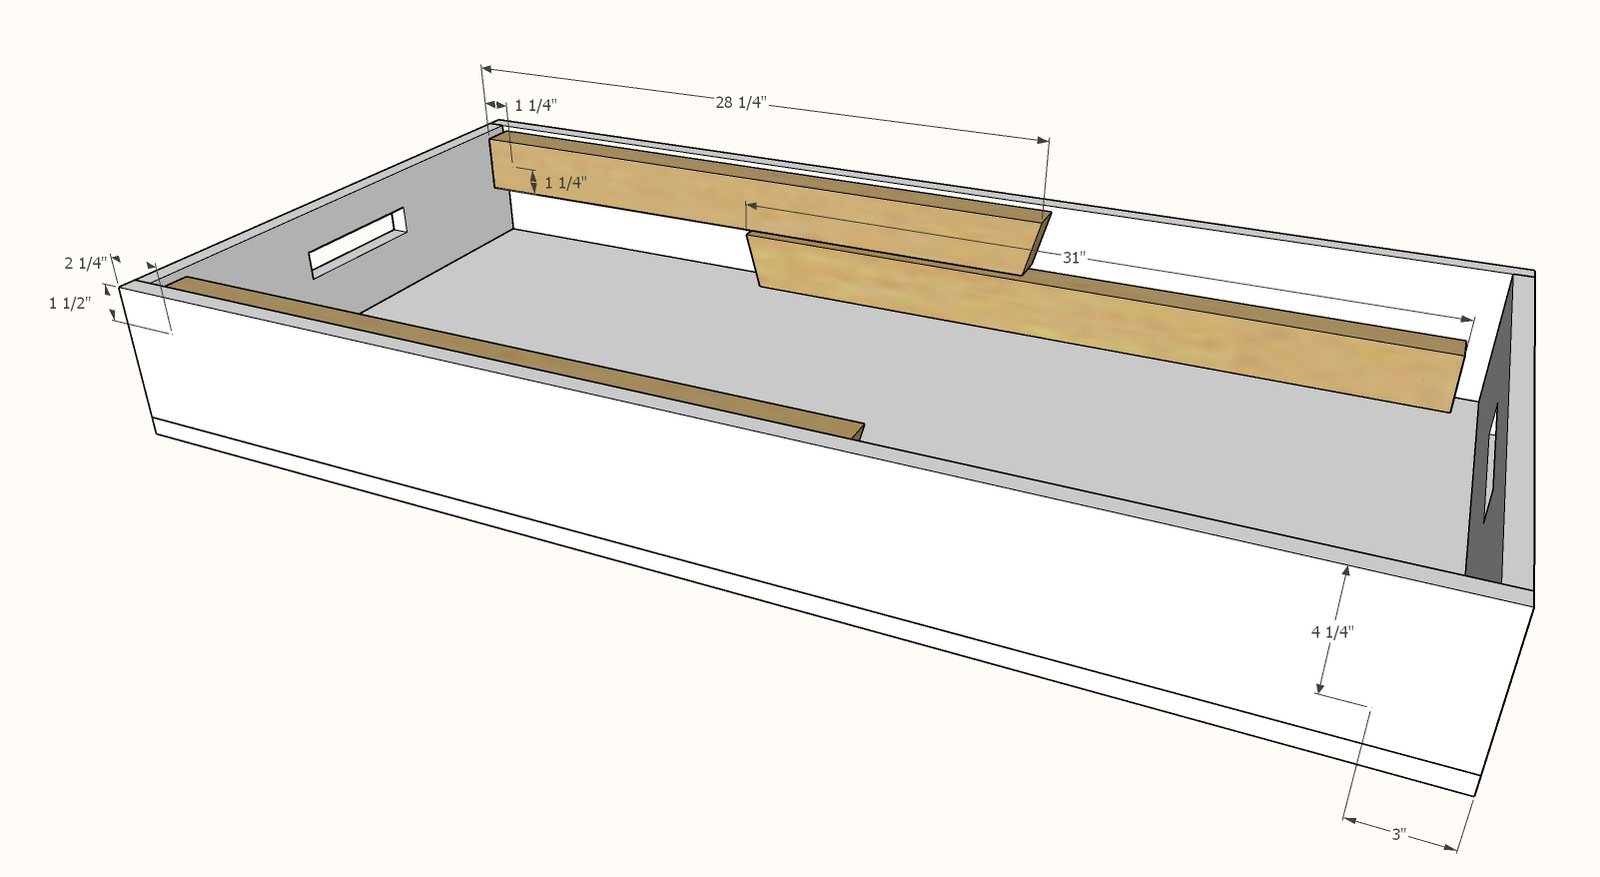
Cut 2x3 legs with bottoms at 15 degree angle off square.
Mark out square cut end 1-1/4" down and 1-1/4" in and drill holes sized for your bolts. Nip off corners as done in video to allow the leg to rotate and not catch on the corners. Drill holes in side 1x6 as shown, the same on both sides, with a drill bit sized for your bolt. Insert the bolt with a washer at the front, in between the 1x6 side and the leg, and then just before the nut. Tighten nut to secure.
Step 4
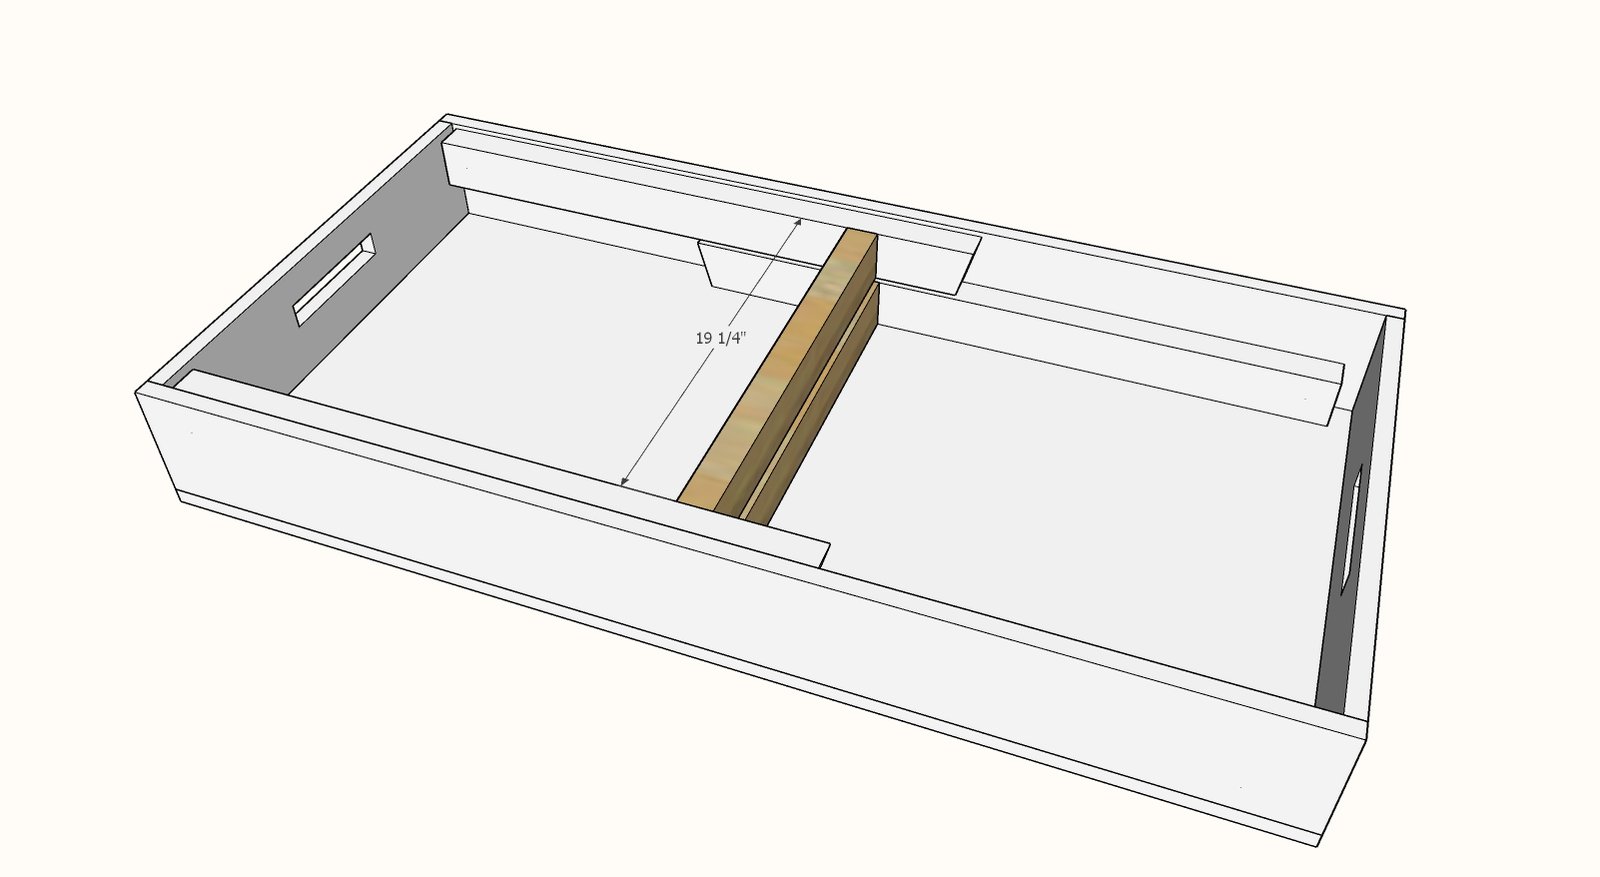
Position the leg supports on top of each other, centered on the storage compartment, as shown in diagram. Mark with pencil. Attach legs to center divider with 2" or longer screws.
Finishing
Sand all surfaces, starting with a medium grit and finishing with fine. Wipe off the dust, fill any holes or gaps with wood filler, and sand smooth once dry. Apply primer if you're painting, then finish with your choice of paint or stain and seal with a durable clear topcoat. For outdoor projects, use exterior-rated primer, paint or stain, and sealer so the piece stands up to the weather.
Source (temporary): https://www.ana-white.com/woodworking-projects/portable-workbench-woodshop-box