Princess and the Pea Bed
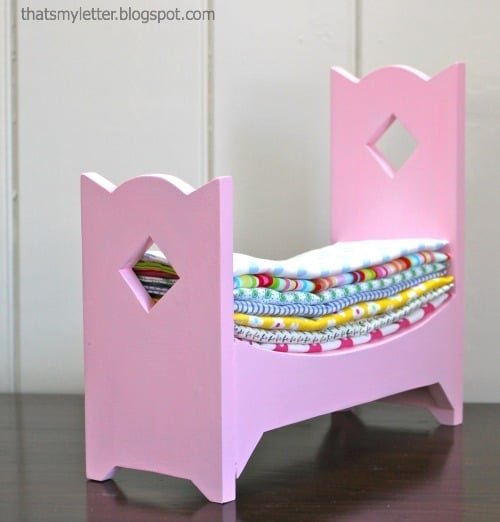
Build your own princess and the pea playset from
Specifications
| Project type | Toys |
|---|---|
| Room | Kids and Toys |
| Style | Children's and Kid's Room Furniture and Toy Plans |
| Difficulty | Intermediate |
| Estimated cost | scraps |
Dimensions
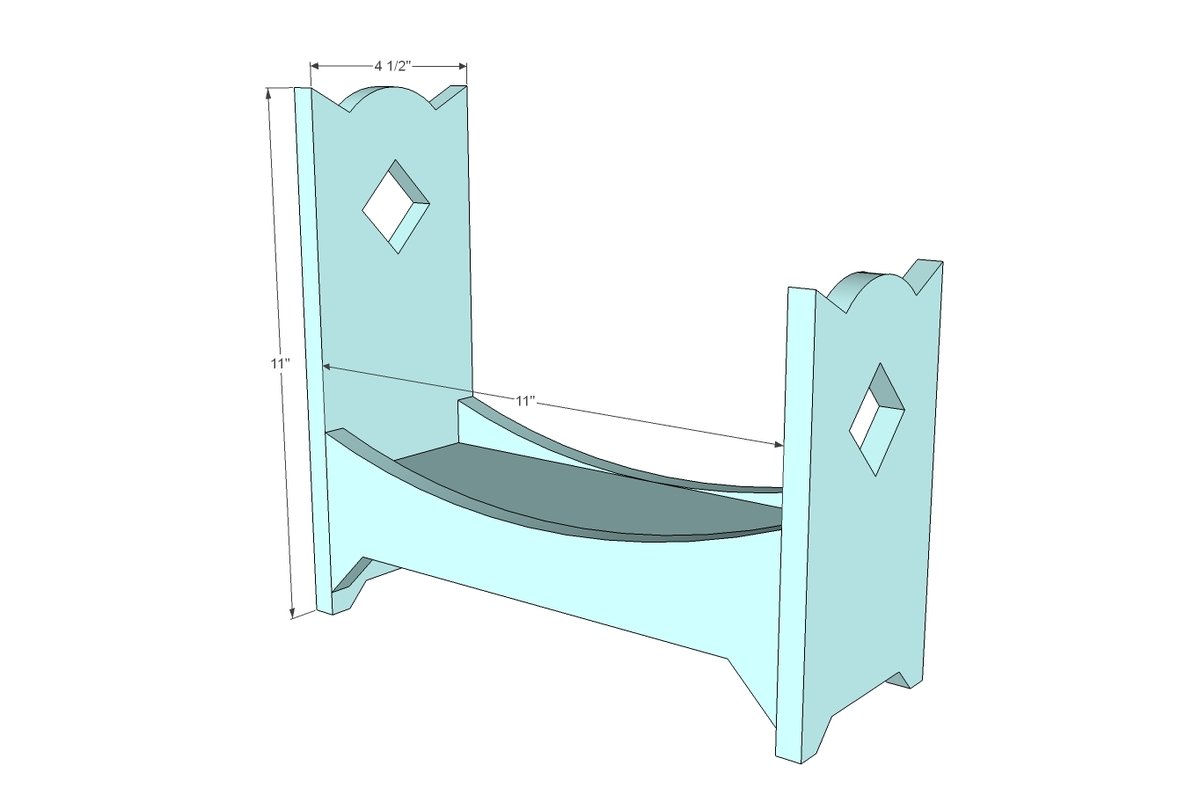
Use the size-specific shopping and cut lists below.
Shopping List
1/2" plywood - you won't need much, about 2 square feet
1 - 1x4 @ 11" (could also use 1/2" plywood)
nails or staples and glue OR Hot Glue
spray primer and paint recommended
Cut List
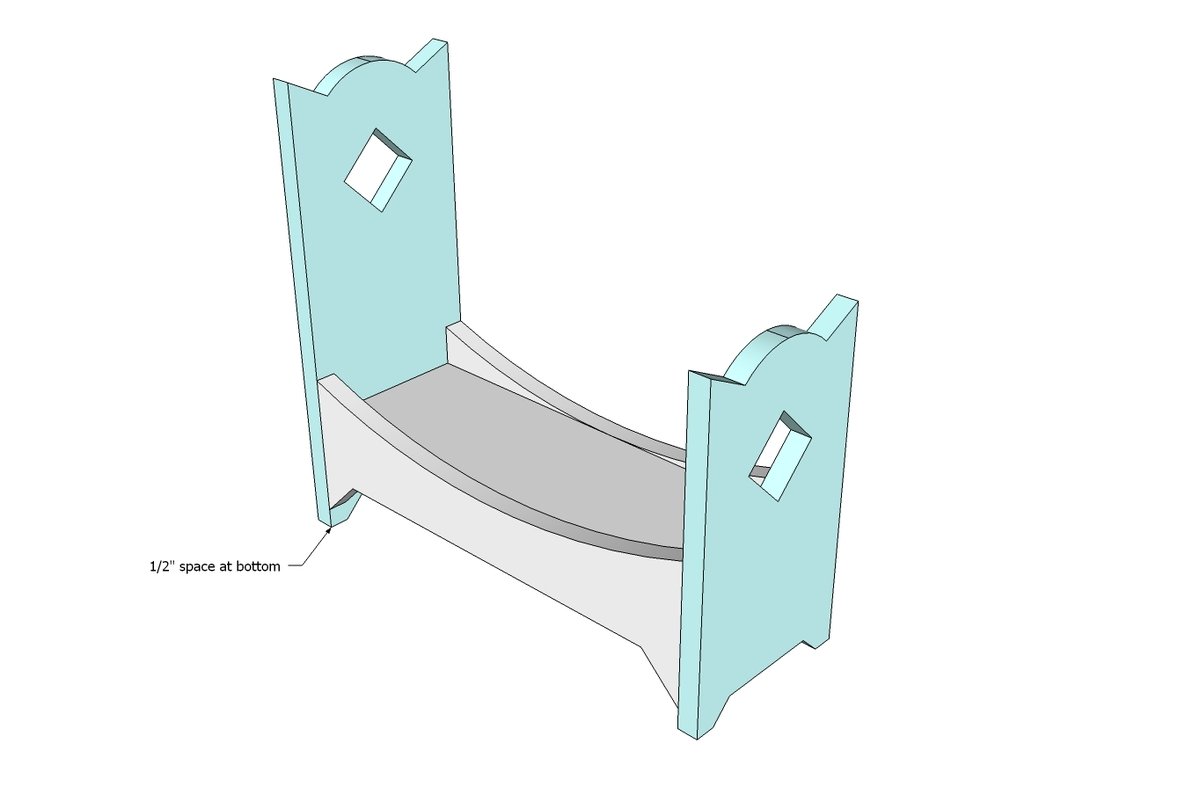
1 - 1/2" thick plywood or MDF @ 4-1/2" x 11" (headboard)
1 - 1/2" thick plywood or MDF @ 4-1/2" x 8" (footboard)
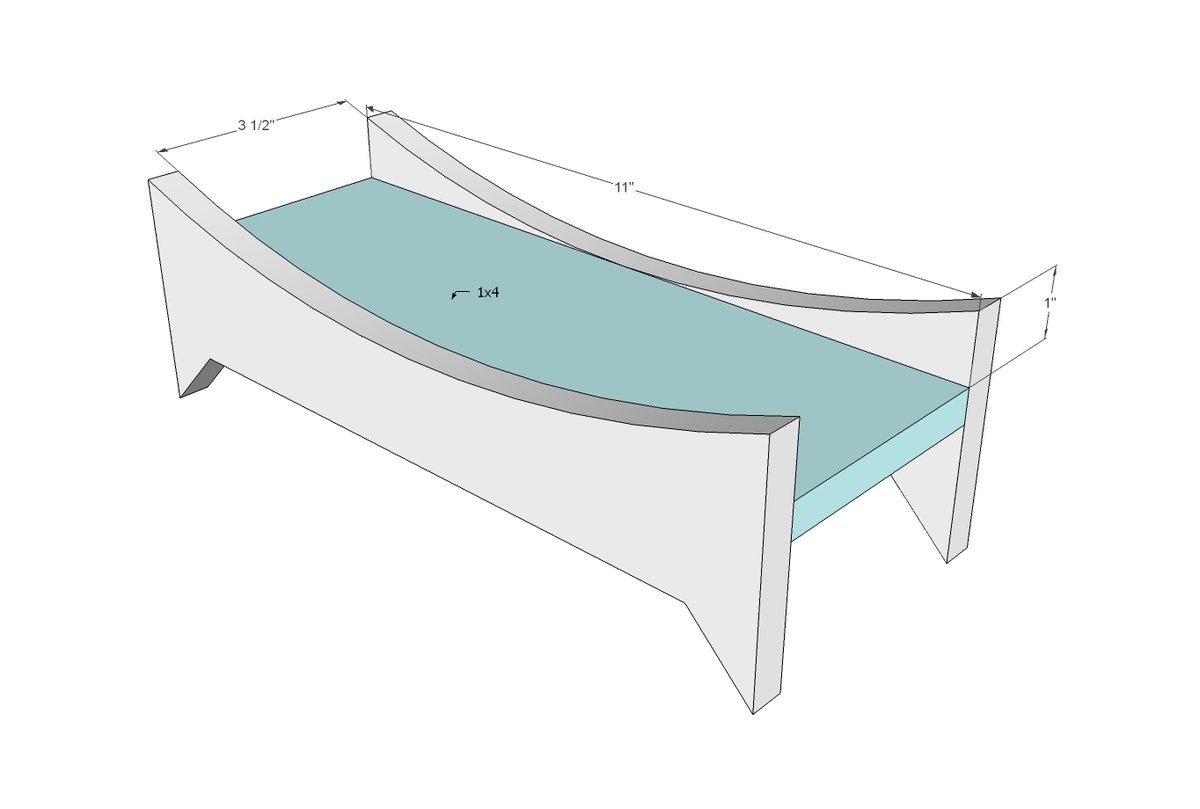
2 - 1/2" thick plywood or MDF @ 3-1/2" x 11" (siderails)
1 - 1x4 @ 11" OR 1/2" thick plywood @ 3-1/2" x 11" (the 1x4 would give you more to attach too so it's preferred)
Tools
- measuring tape
- square
- pencil
- safety glasses
- hearing protection
- jigsaw
Step-by-step Instructions
Step 1
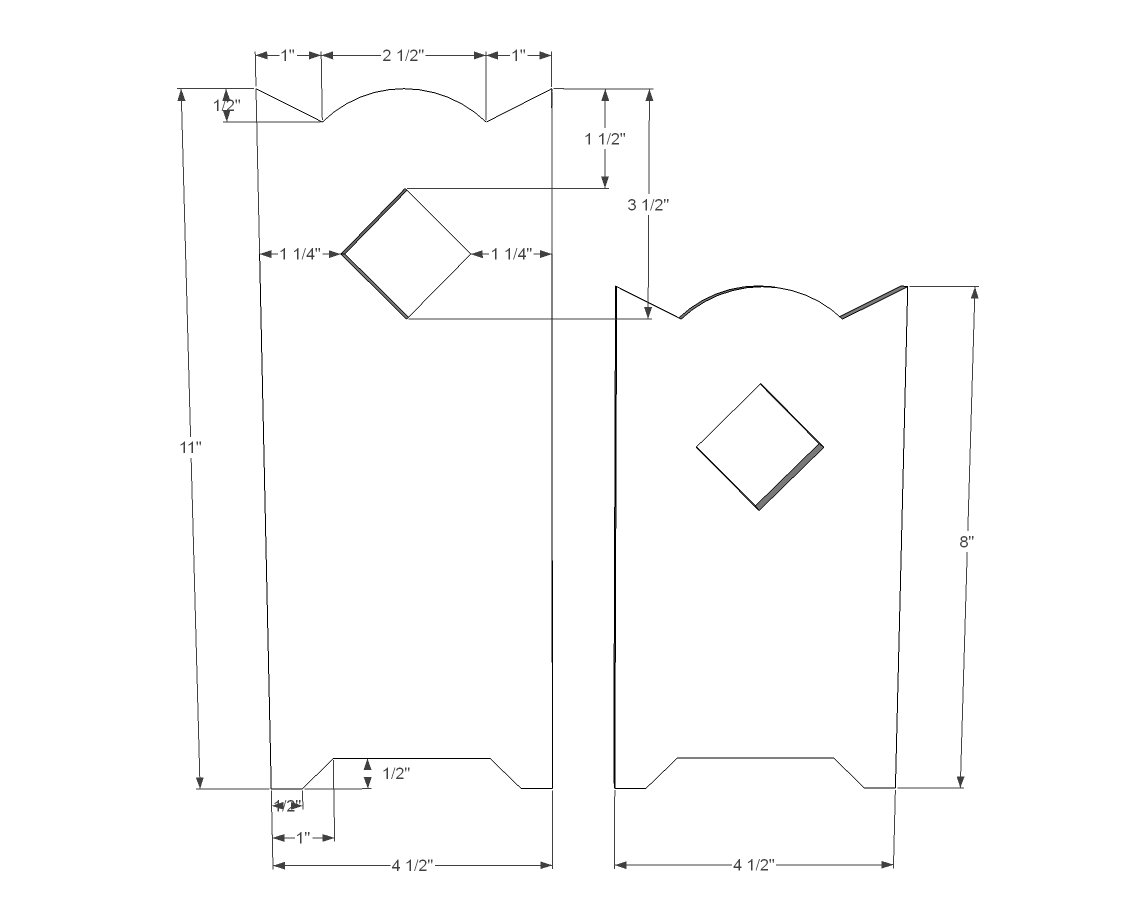
Start with the rectangle pieces for the headboard and footboard. Mark and cut out with a jigsaw.
Step 2
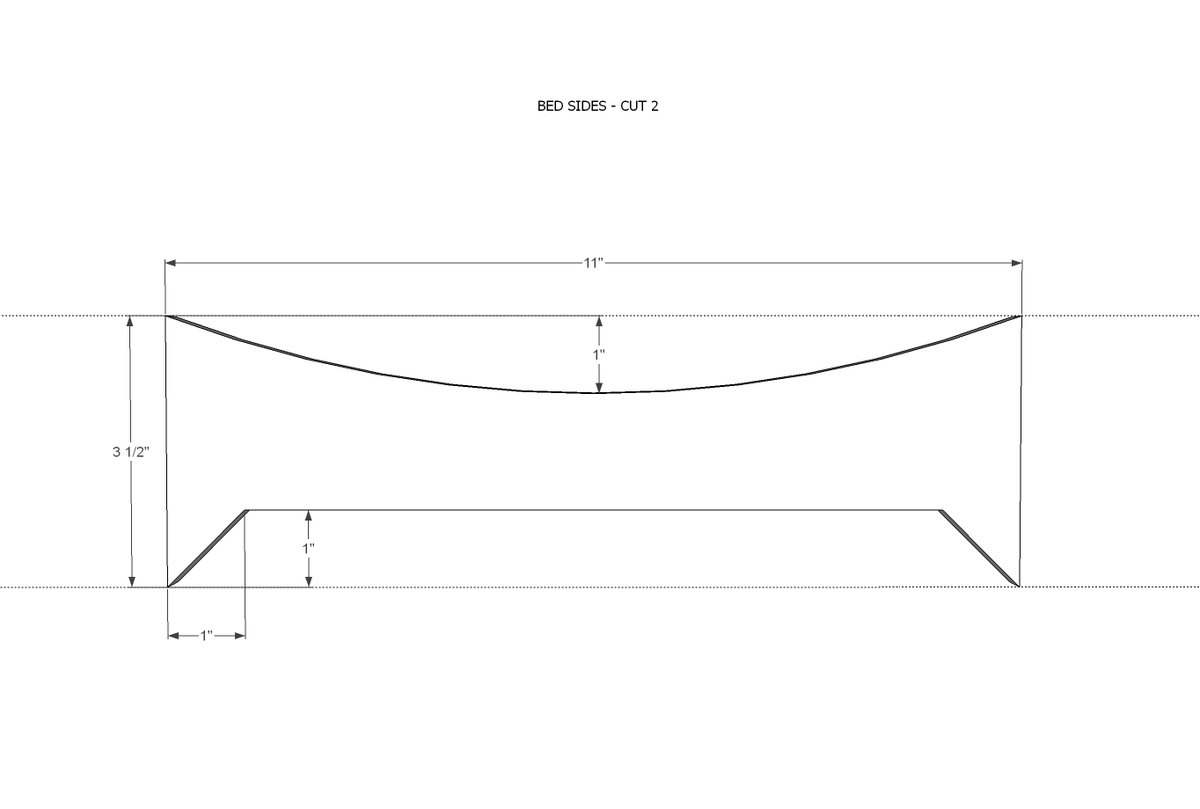
Do the same for the two siderails.
Step 3
Attach siderails to the 1x4 in the center with nails, staples or hot glue.
Attach headboard and footboard to 1x4 and siderails.
Prime, paint and gift!
Finishing
Sand all surfaces, starting with a medium grit and finishing with fine. Wipe off the dust, fill any holes or gaps with wood filler, and sand smooth once dry. Apply primer if you're painting, then finish with your choice of paint or stain and seal with a durable clear topcoat. For outdoor projects, use exterior-rated primer, paint or stain, and sealer so the piece stands up to the weather.
Source (temporary): https://www.ana-white.com/woodworking-projects/princess-and-pea-bed