Printer's Console Table
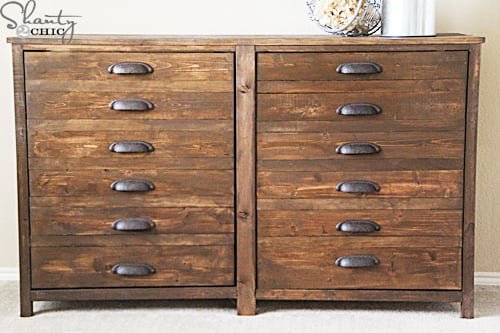
This easy to build console table features large shelves behind doors. The doors look like smaller drawers, for a vintage printers cabinet feel. from
Specifications
| Project type | Media and Entertainment Centers |
|---|---|
| Room | Storage Solutions |
| Style | Farmhouse Furniture |
| Difficulty | Advanced |
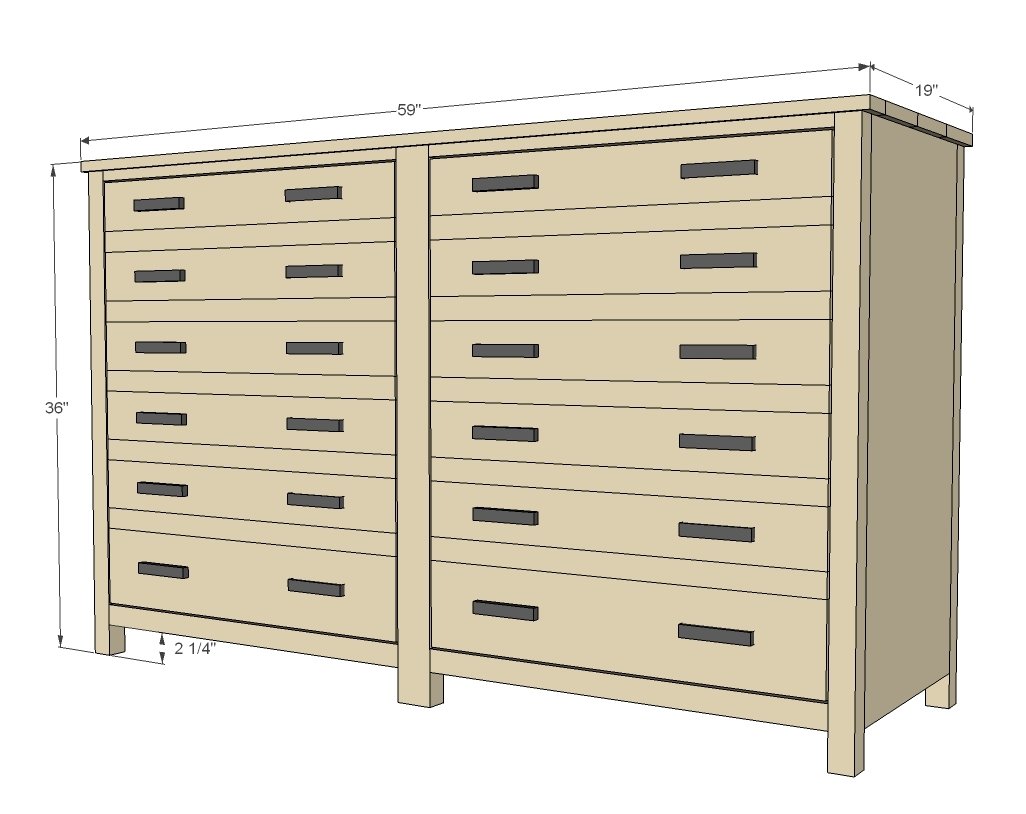
Dimensions
Use the size-specific shopping and cut lists below.
Shopping List
- 2 – 2x2 @ 8 feet long
- 1 – 2x2 @ 8 feet or stud length
- 5 – 1x2 @ 8 feet long
- 2 – 1x4 @ 12 feet long
- 2 – 1x6 @ 10 feet long
- 2 – 1x3 @ 8 feet long
- 1 sheet 3/4" plywood cut into strips 15 ¾” wide (referred to as 1x16 throughout plan) x 8 feet long
- Optional back 1 ¼” PH screws
- 1 ¼” brad nails
- 2 sets euro style inset hinges or narrow profile hinges (installed in gap between door and face frame)
- Optional ¼” plywood for back
- 24 knobs or handles
Cut List
FACE FRAMES
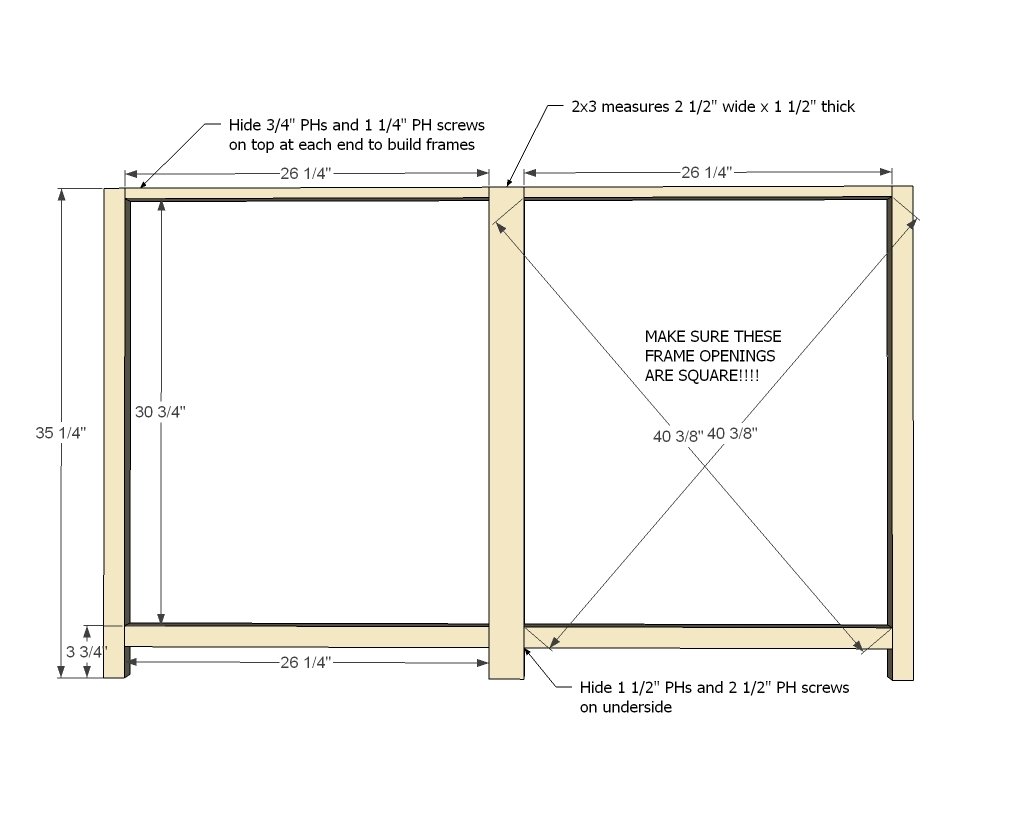
- 4 – 2x2 @ 35 ¼”
- 2 – 2x3 @ 35 ¼”
- 4 – 1x2 @ 26 ¼”
- 2 – 2x2 @ 26 ¼”
DRAWER FACES
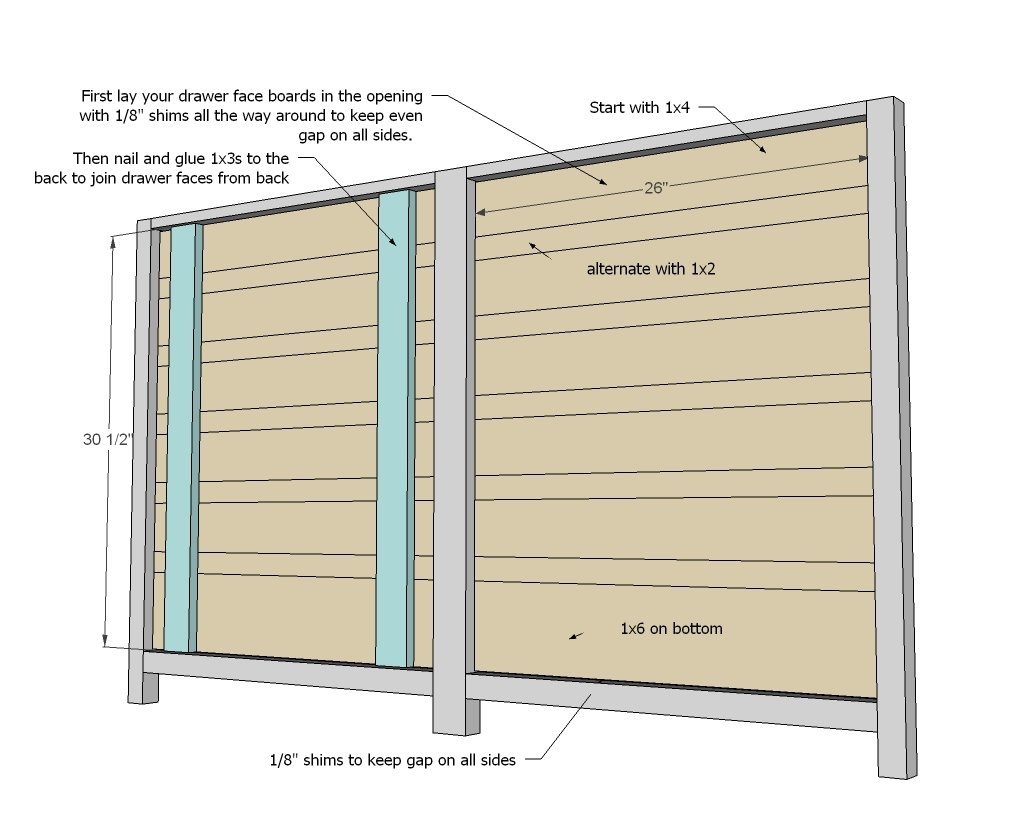
- 10 – 1x4 @ 26”
- 2 – 1x6 @ 26”
- 10 – 1x2 @ 26”
- 4 – 1x3 @ 30 ½”
BOX
- 2 – 1x16 @ 56 ½”
- 2 – 1x16 @ 33”
- 1 – 1x6 @ 30 ¾”
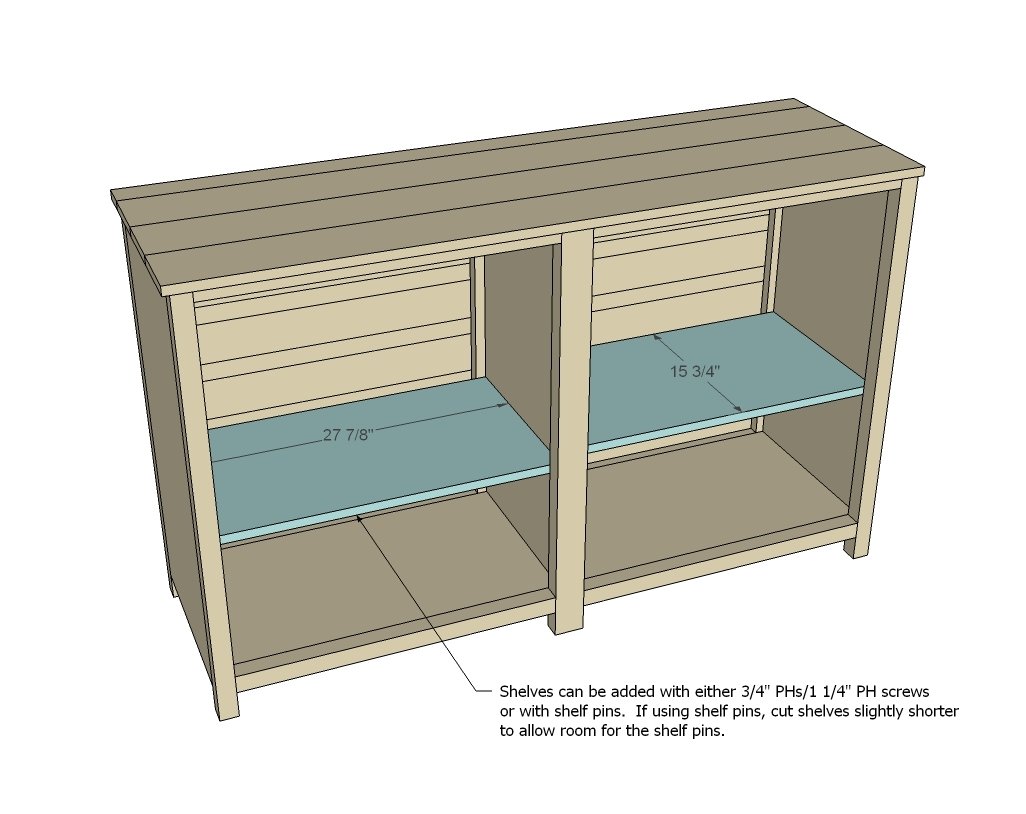
- 2 – 1x6 @ 27 7/8” (shelves)
TOP
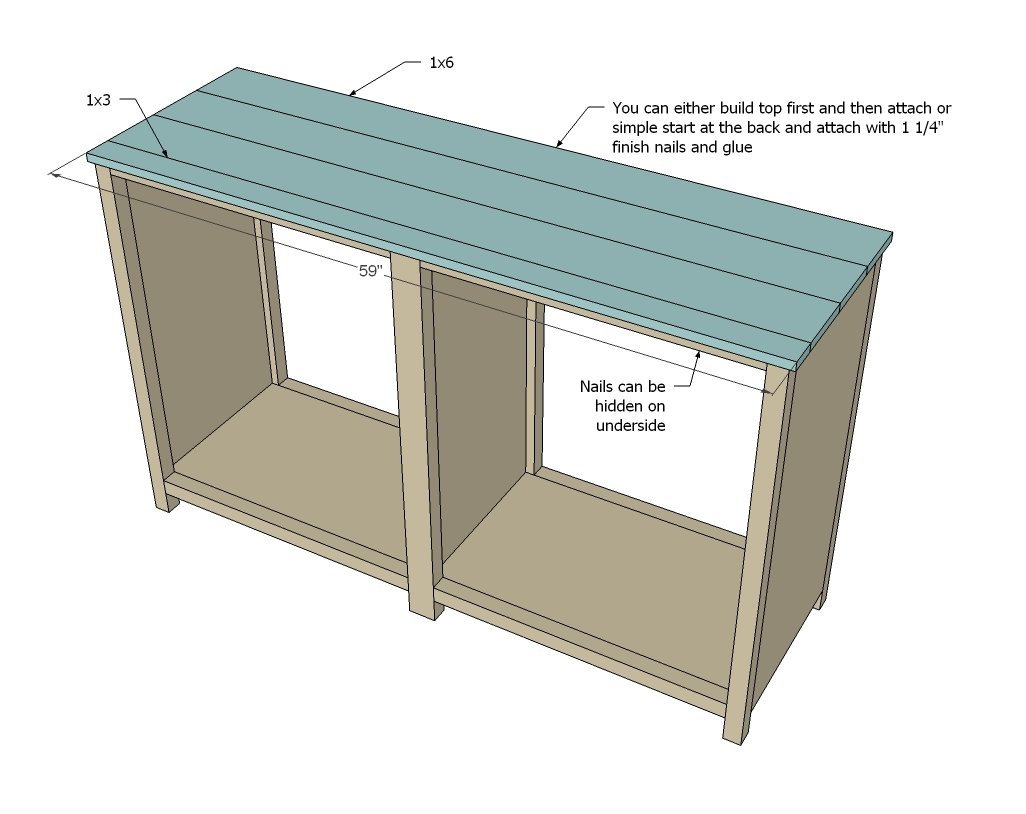
- 3 – 1x6 @ 59”
- 1 – 1x3 @ 59”
BACK
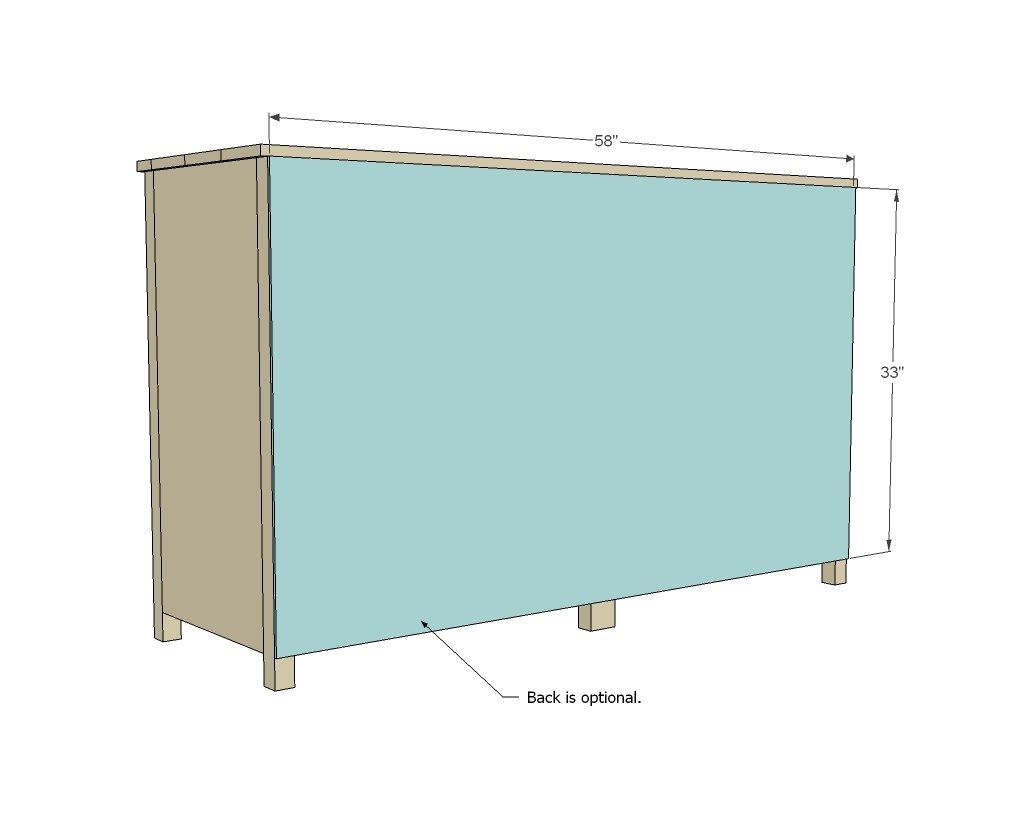
- 1 – ¼” plywood 58” x 33”
Tools
- measuring tape
- square
- pencil
- safety glasses
- hearing protection
- kreg-jig
- drill
- circular saw
- nailer
- sander
- countersink drill bit
Step-by-step Instructions
Step 1
You'll want to build the face frames first so you can make sure those drawers fit in there good!
Step 2
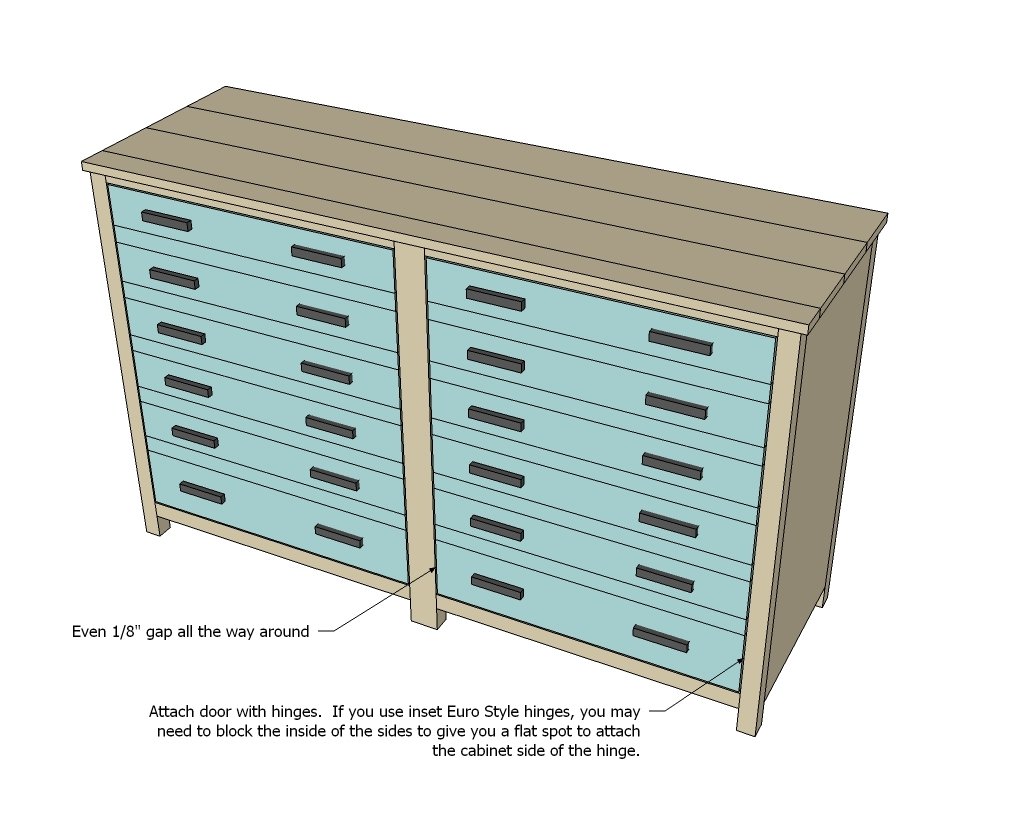
And then build your doors to fit the openings. You can even attach with hinges and keep in place with catches. It will certainly be much easier to do this now than later! REMEMBER what door goes in what opening:)
Step 3
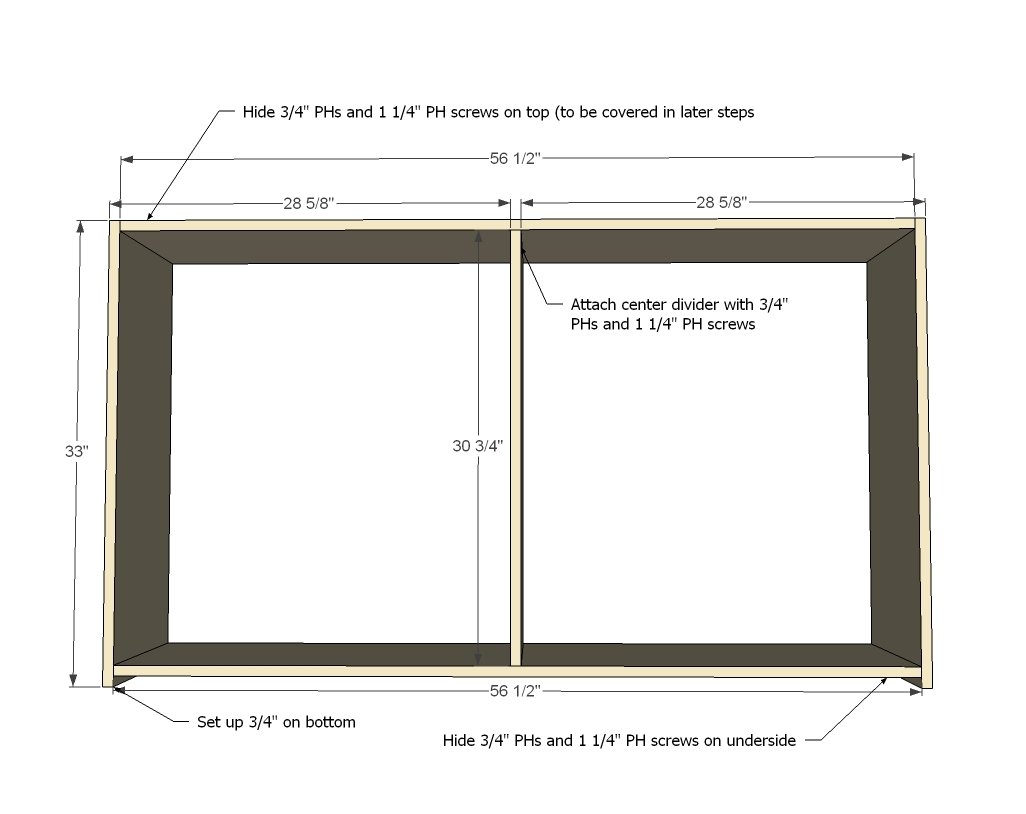
IMPORTANT!!!! Before attaching ANY of the box pieces, drill ¾” PHs on front and back edges of all box pieces so you can attach face frame easily in later steps. Hide PHs on inside, underside or top of cabinet.
Step 4
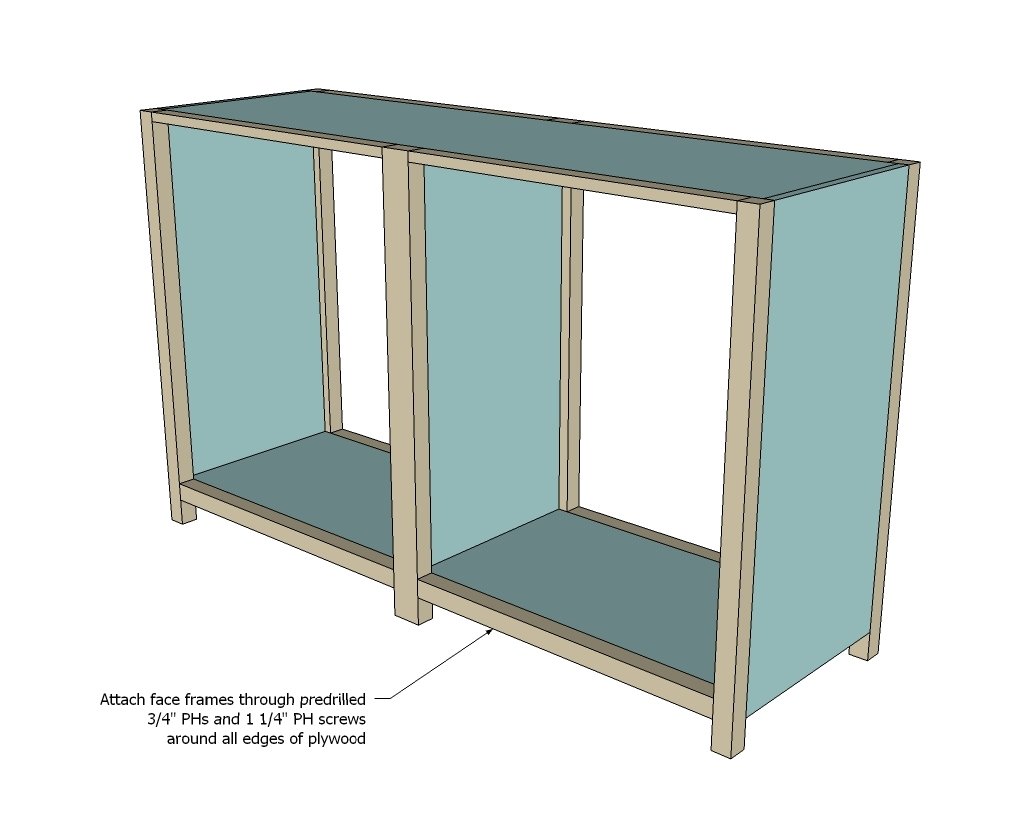
Now attach those face frames to the box....
Step 5
Step 6
Step 7
Add shelves if desired at desired locations.
Step 8
And then a back in desired.
Finishing
Sand all surfaces, starting with a medium grit and finishing with fine. Wipe off the dust, fill any holes or gaps with wood filler, and sand smooth once dry. Apply primer if you're painting, then finish with your choice of paint or stain and seal with a durable clear topcoat. For outdoor projects, use exterior-rated primer, paint or stain, and sealer so the piece stands up to the weather.
Source (temporary): https://www.ana-white.com/woodworking-projects/printers-console-table