Privacy Planter
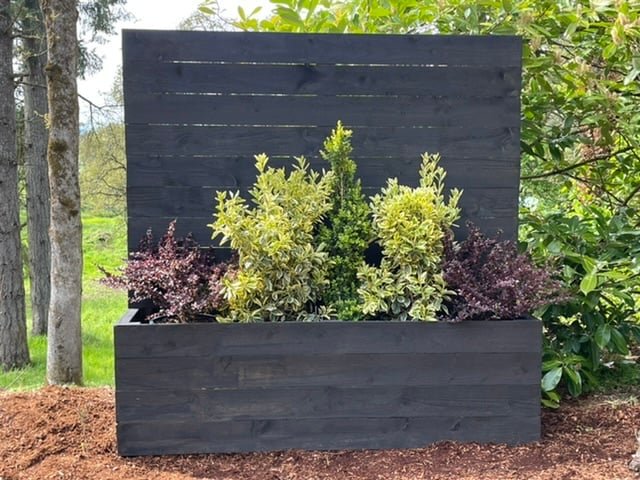
Simple to build planter with tall back can add privacy to your space or hide unattractive objects. This is a free project plan with step by step diagrams. Built using 2x4s and cedar fence pickets.
Specifications
| Project type | Planters, Garden Beds, and Greenhouses |
|---|---|
| Room | Outdoor |
| Difficulty | Beginner Projects |
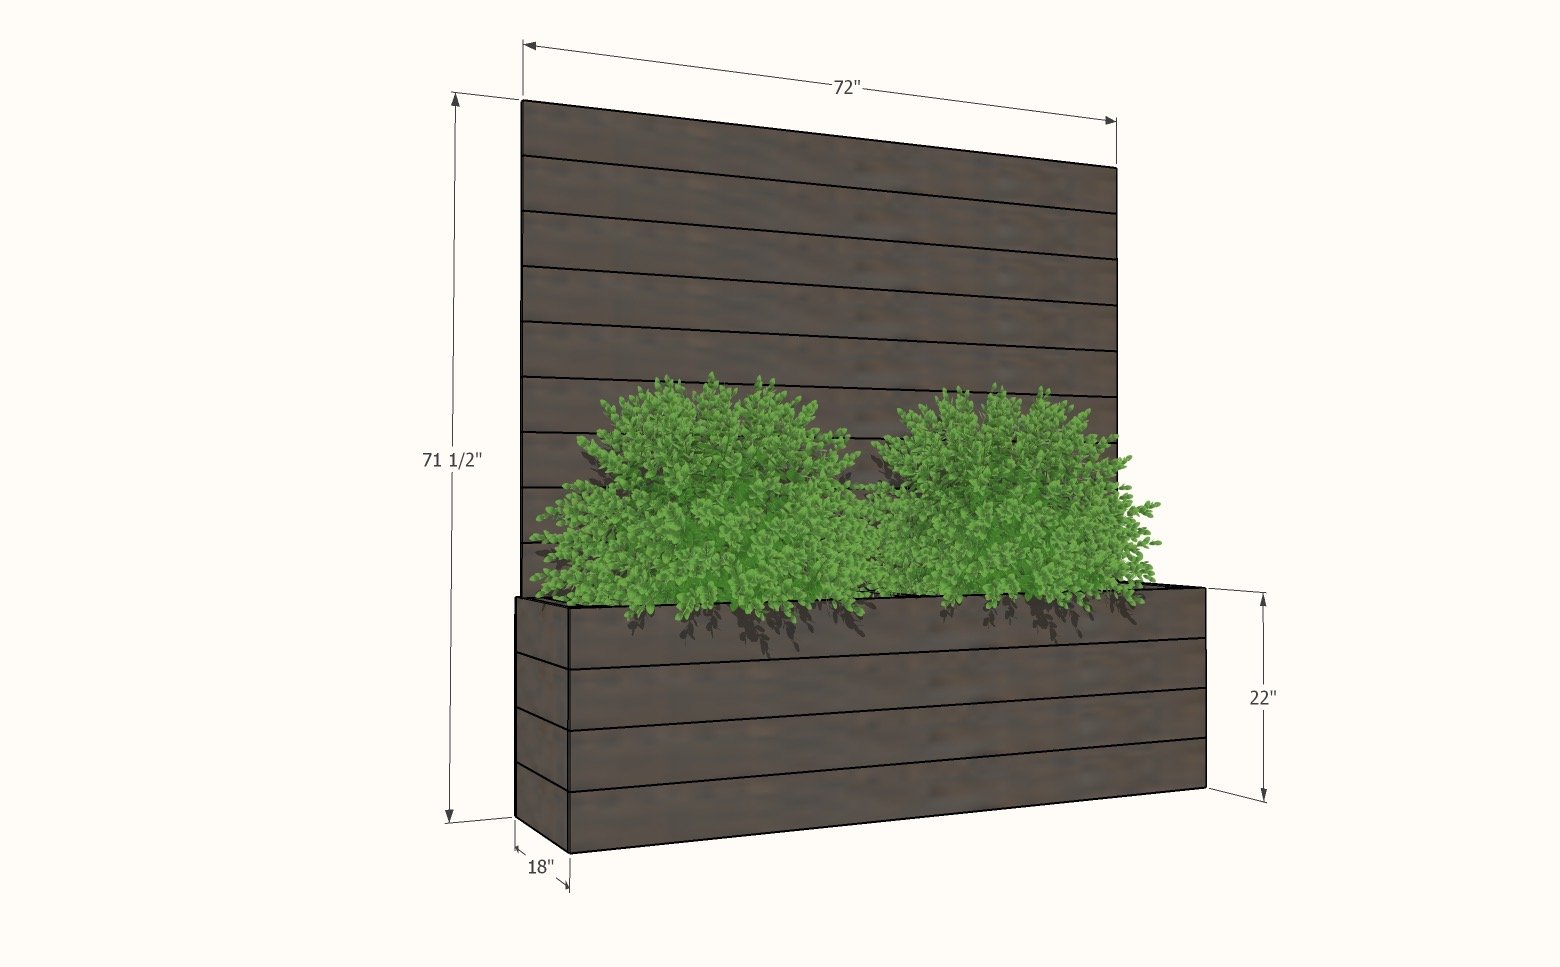
Dimensions
Use the size-specific shopping and cut lists below.
Shopping List
21 - fence pickets 5-1/2" x 72" (not dog eared)
4 - 2x4x8 (cut the longest pieces first to get everything to work out
2-1/2" self tapping screws (about 25)
1-5/8" self tapping screws (about 100)
waterproof planting liner (or plastic paper)
Cut List
3 - 2x4 @ 71-1/2"
3 - 2x4 @ 22"
6 - 2x4 @ 14"
8 - cedar fence pickets @ 17"
17 - cedar fence pickets @ 72"
2 - 70" - measure and cut to fit
Tools
- measuring tape
- square
- pencil
- safety glasses
- drill
- circular saw
- sander
Step-by-step Instructions
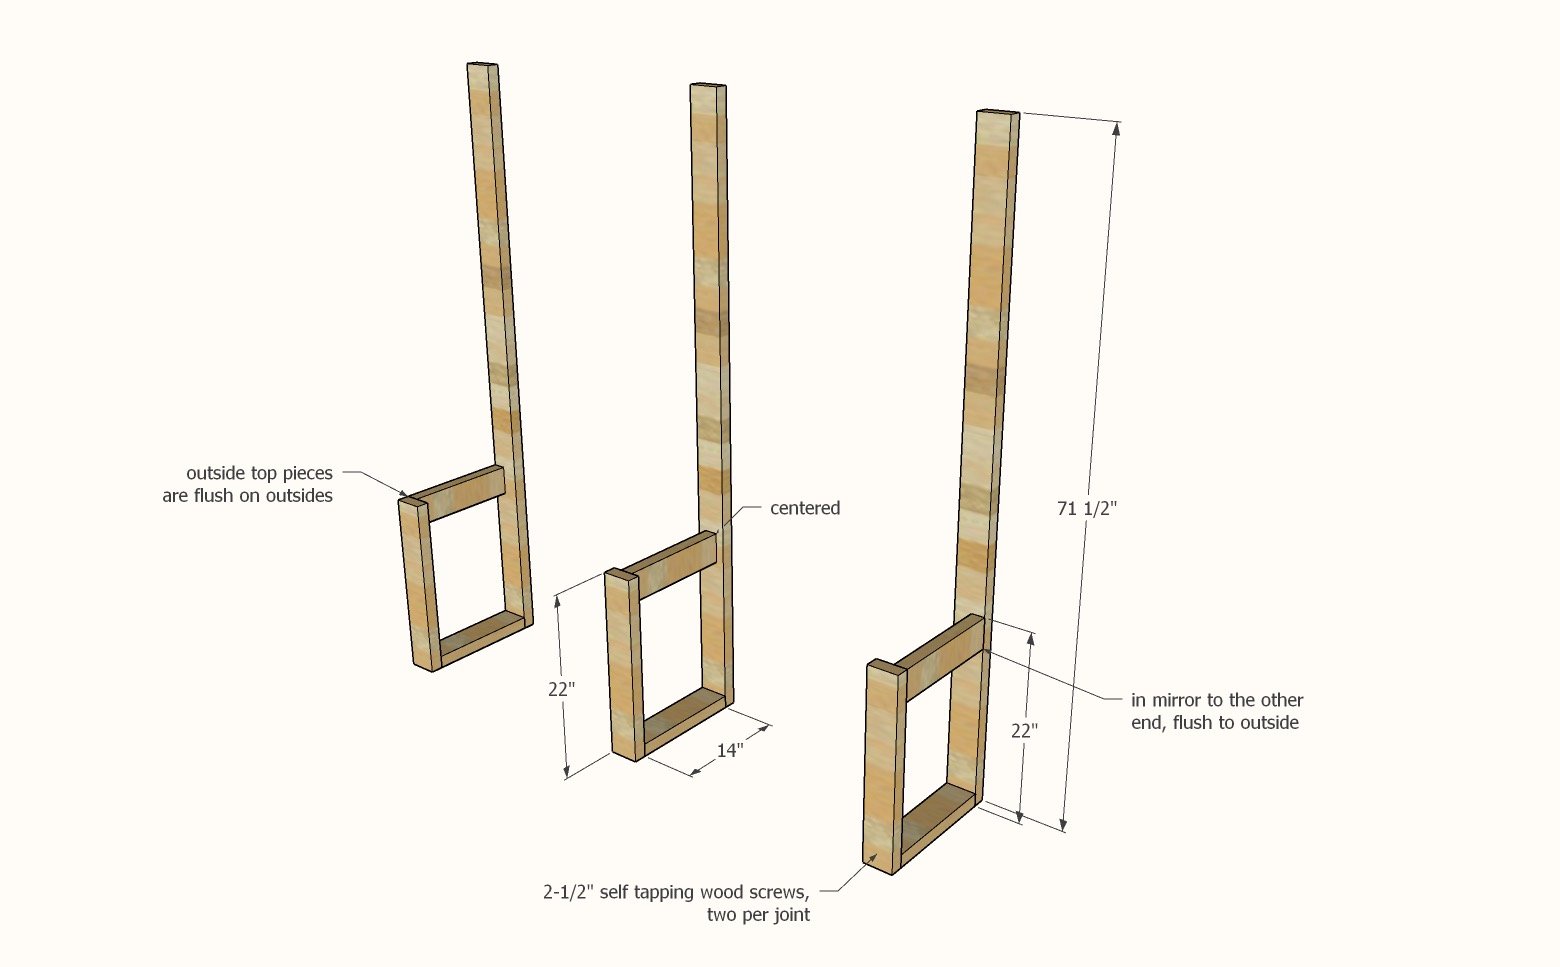
Build the three frames out of the 2x4s.
Note that the inside and outside frames have the horizontal top pieces on the outside, in mirror. The center frame has the pieces in the center. Use the longer screws, two screws per joint.
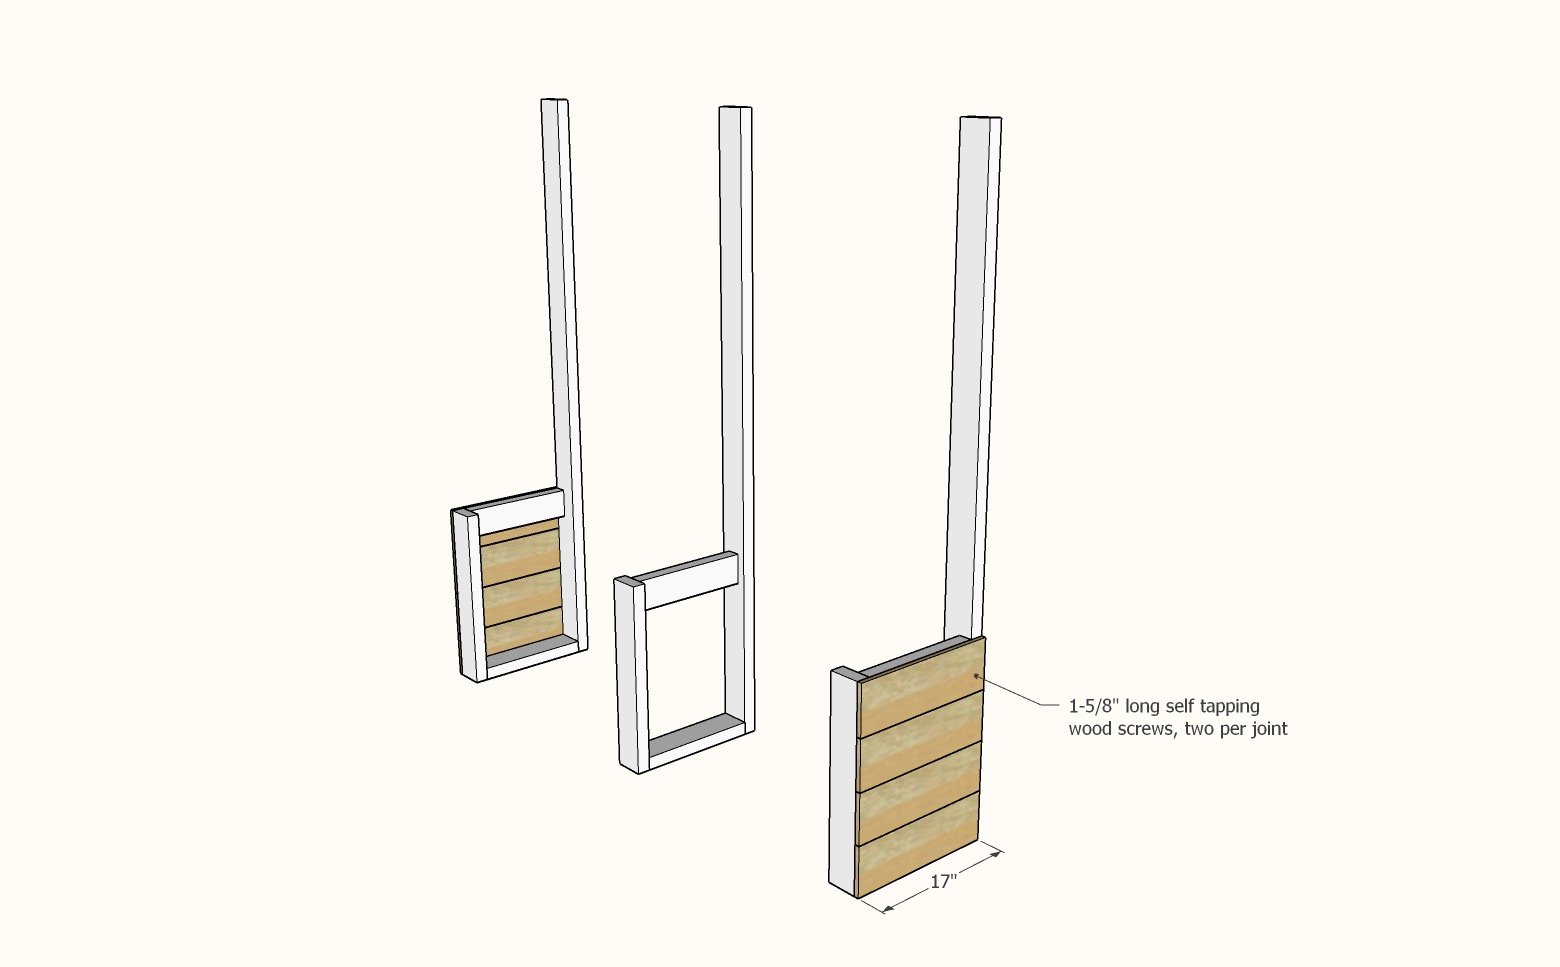
Step 2
Attach the smaller pieces of cedar fence pickets to the outsides, using the shorter screws.
Step 3
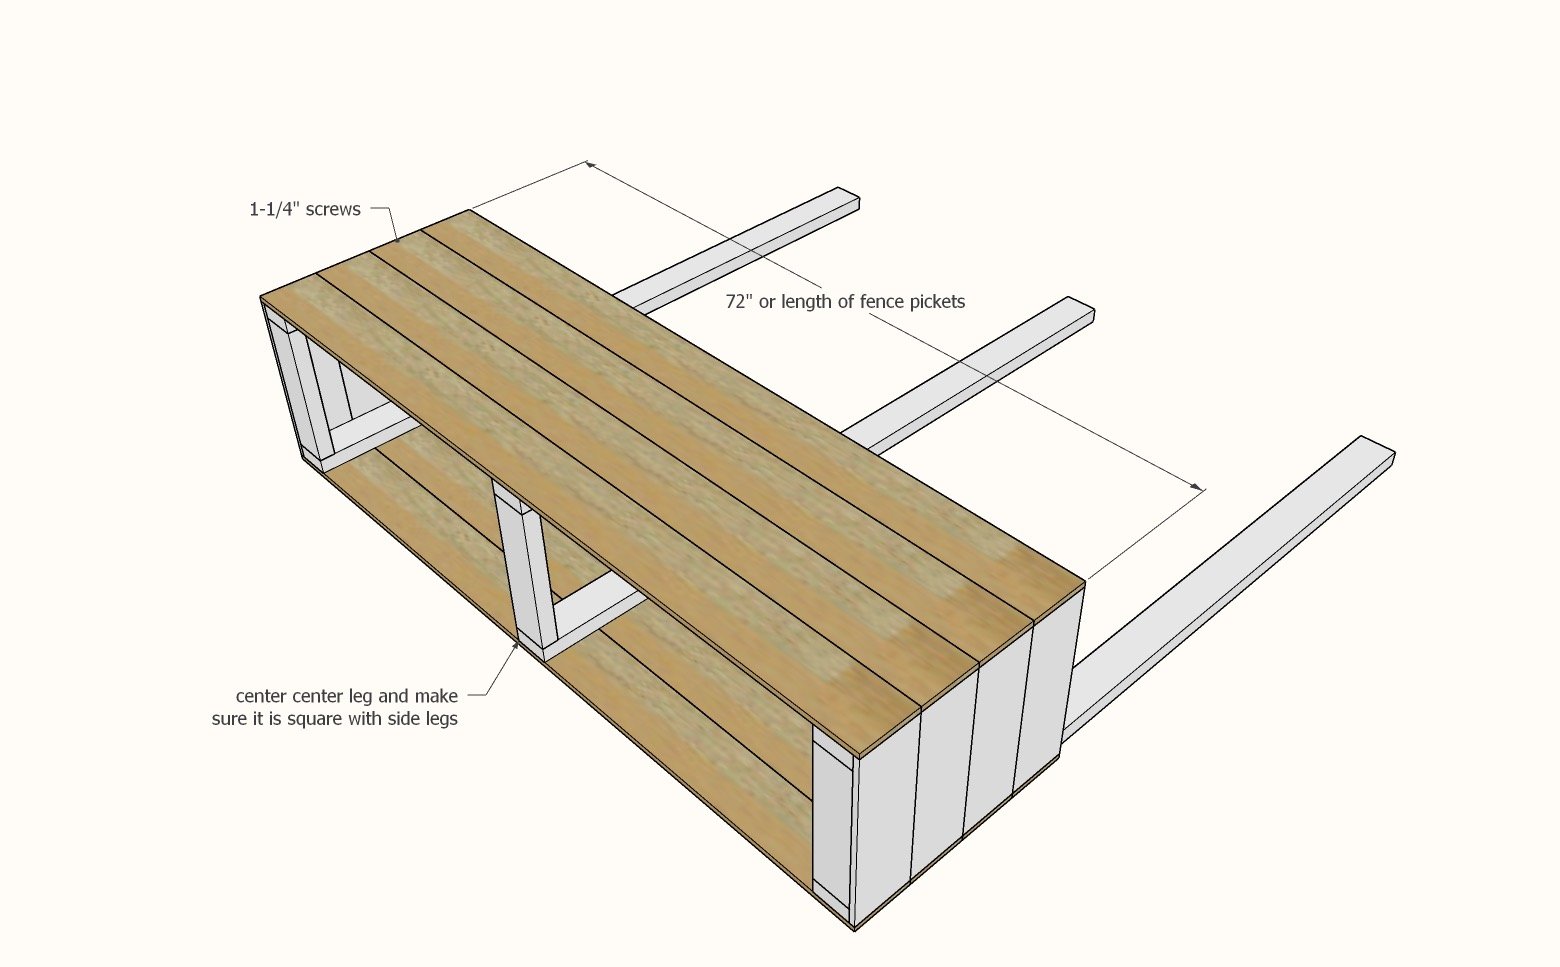
Add cedar fence pickets to the front and back of the privacy planter, centering the center frame.
Step 4
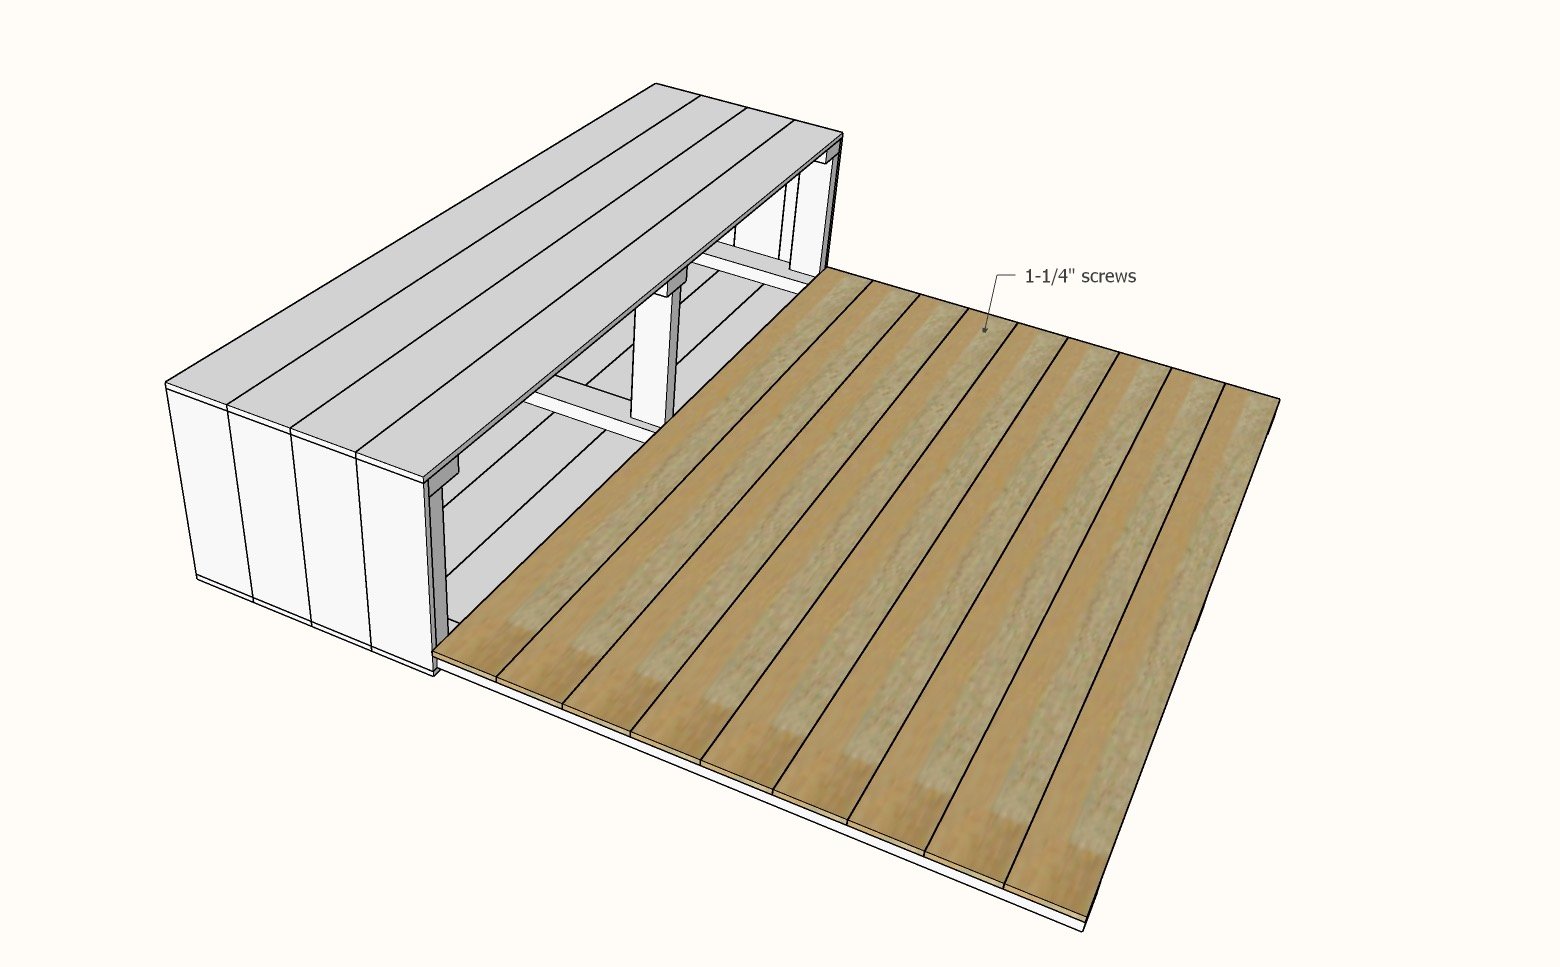
Add the back pieces to the back of the planter using the smaller screws.
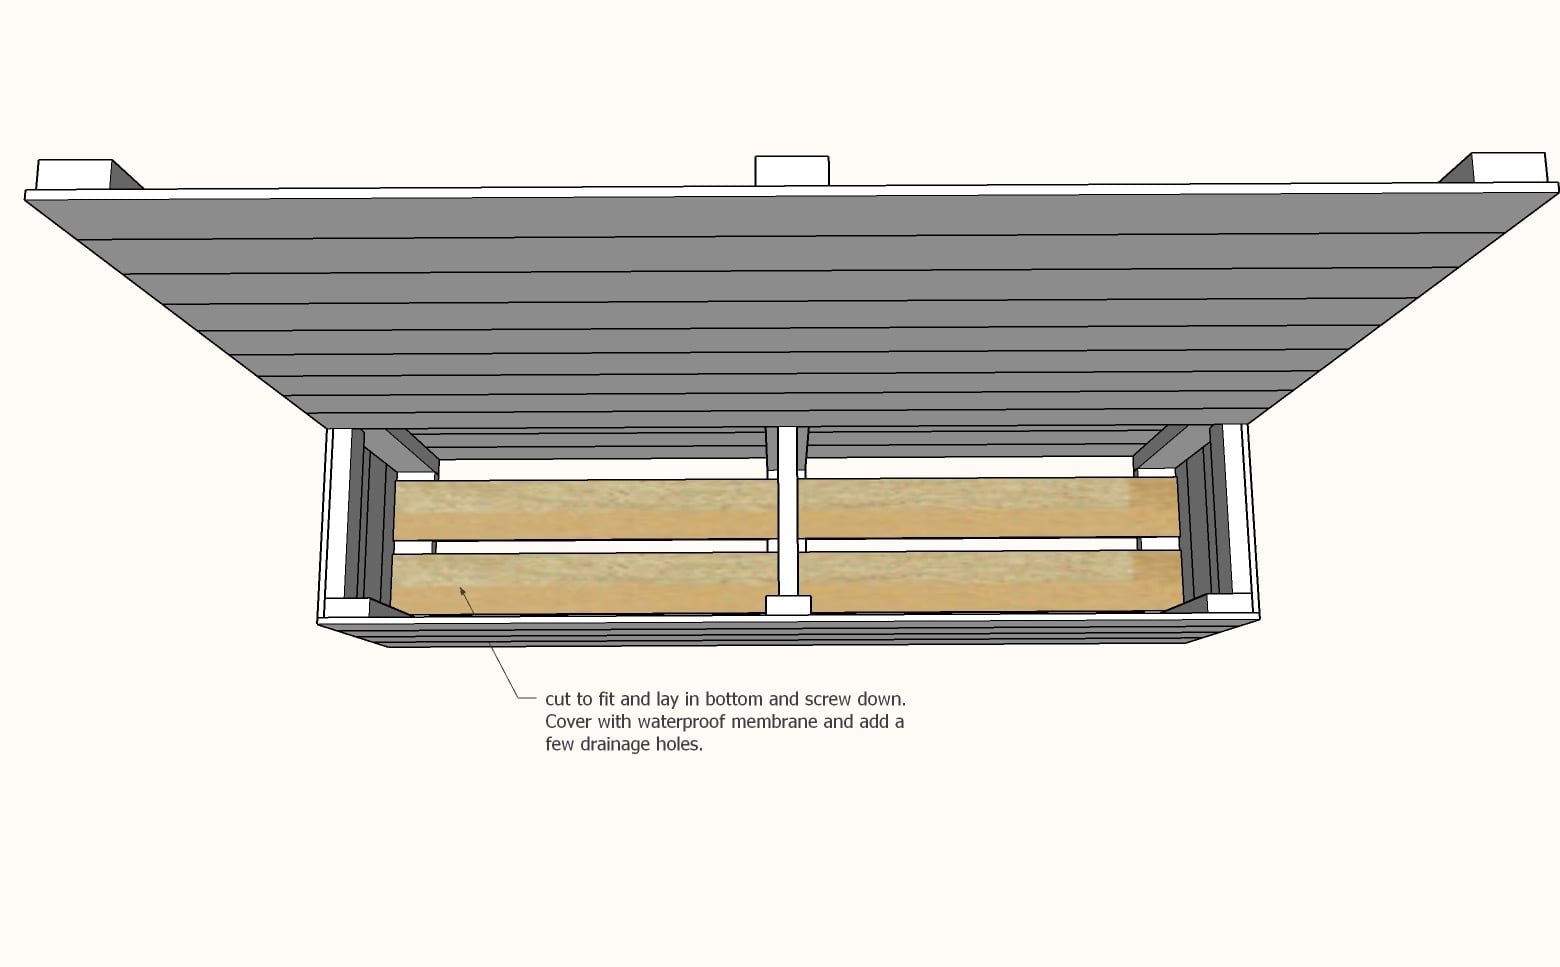
Measure and cut two cedar fence pickets to fit in the bottom.
Lightly sand the entire project. Finish the entire privacy planter with a finish suitable for fencing or decking. I recommend a penetrating stain. Use a waterproof landscaping fabric to cover the bottom and keep soil inside the planter. Add a few holes for water drainage. Move the planter to it's final location, as it will become very heavy with soil. Fill the planter with soil (you want the base to be heavy to anchor the planter). Plant your plants and enjoy.
Finishing
Sand all surfaces, starting with a medium grit and finishing with fine. Wipe off the dust, fill any holes or gaps with wood filler, and sand smooth once dry. Apply primer if you're painting, then finish with your choice of paint or stain and seal with a durable clear topcoat. For outdoor projects, use exterior-rated primer, paint or stain, and sealer so the piece stands up to the weather.
Source (temporary): https://www.ana-white.com/woodworking-projects/privacy-planter