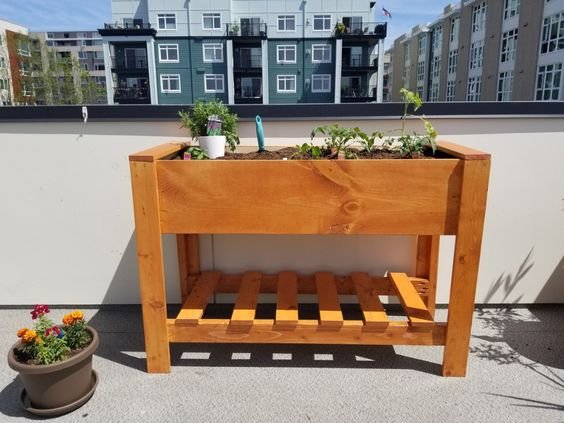
Raised Planter Box with Bottom Shelf
to build your own raised planter with bottom shelf. Plans
Specifications
| Project type | Planters, Garden Beds, and Greenhouses |
|---|---|
| Room | Outdoor |
| Style | Modern Style Furniture Plans |
| Difficulty | Intermediate |
| Estimated cost | $20 - $50 |
Dimensions
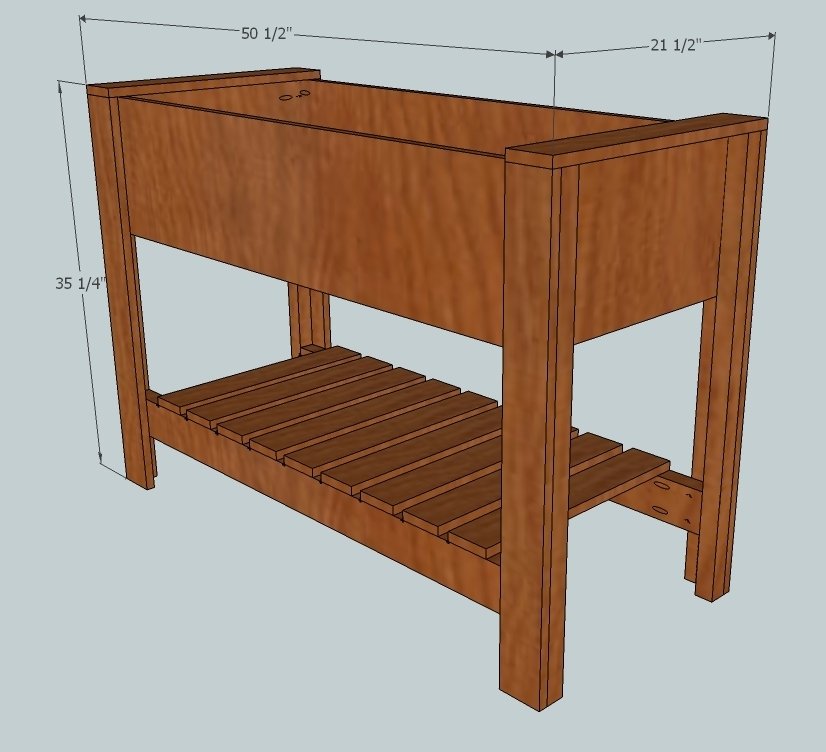
Use the size-specific shopping and cut lists below.
Shopping List
- (4) 1 x 4 x 8' cedar boards
- (1) 2 x 2 x 8' cedar boards
- (1) 2 x 2 x 6' cedar board
- (3) 2 x 4 x 8' cedar boards
- (1) 1 x 12 x 8' cedar board
- (1) 1 x 12 x 6' cedar board
Cut List
- 4) 1 x 4 @ 34 1/2" (front and back box cladding) "A"
- 9) 1 x 4 @ 20" (shelf slats) "B"
- 2) 1 x 4 @ 21 1/2" (post caps) "C"
- 4) 2 x 2 @ 34 1/2" (legs) "D"
- 2) 1 x 12 @ 47 1/2" (front and back of box) "E"
- 2) 1 x 12 @ 18 1/2" (sides of box) "F"
- 2) 2 x 4 @ 46" (box supports & shelf supports) "G"
- 2) 2 x 4 @ 47 1/2" (bottom shelf supports) "H"
- 5) 2 x 4 @ 15 1/2" (box supports) "I"
Tools
- measuring tape
- square
- pencil
- hammer
- safety glasses
- hearing protection
- kreg-jig
- drill
- circular saw
- compound miter saw
- nailer
- sander
- countersink drill bit
Step-by-step Instructions
Step 1
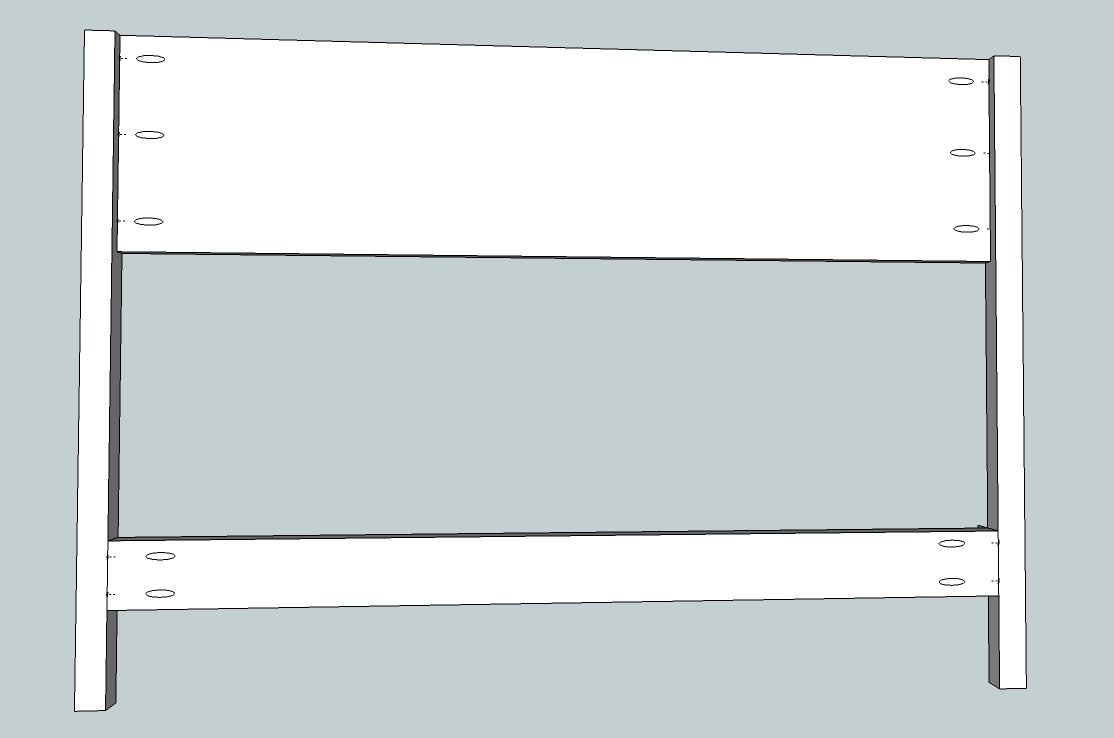
Make 2 of these panels and set them aside. Keep piece "E" flush to the front of the "D" pieces and attach using 1 1/4" pocket hole screws. Attach "H" 5" up from the bottom of "D" - so the bottom of the cross beam ("H") should be at the 5" mark from the bottom.
Step 2
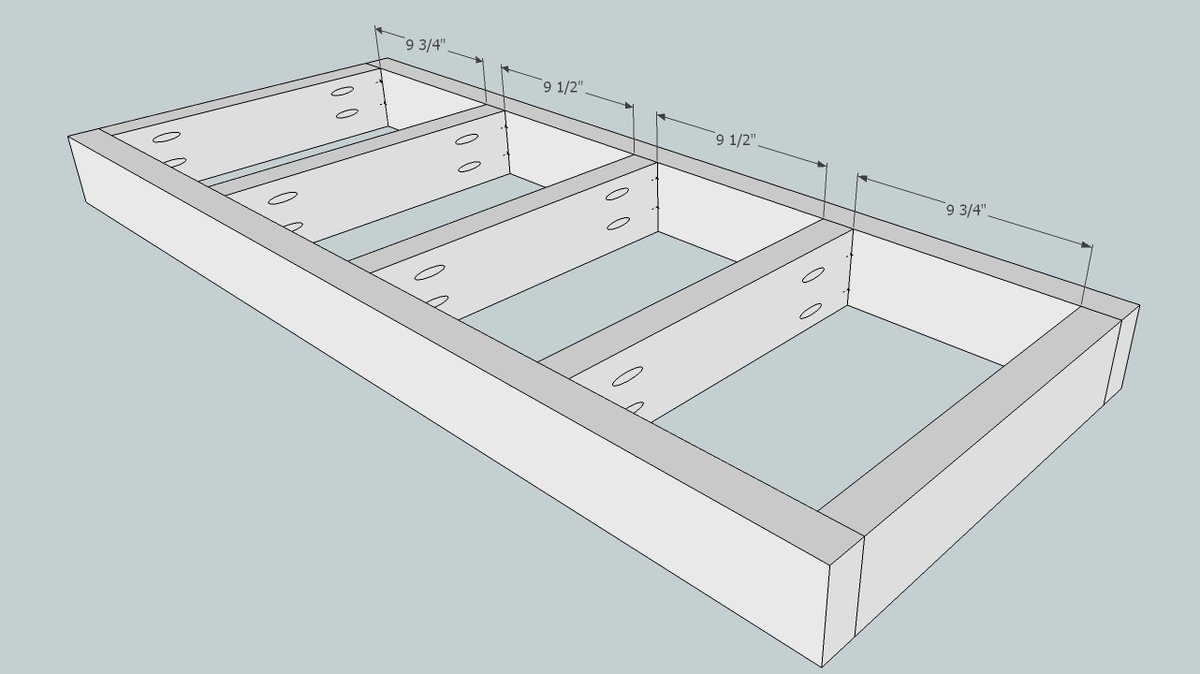
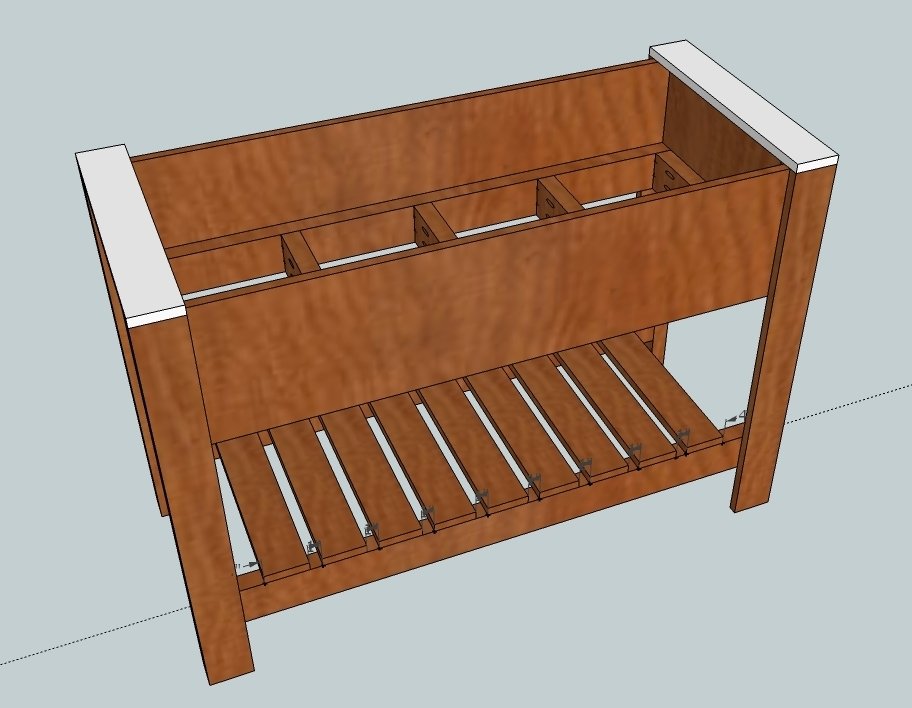
Create the box supports using the diagram above, use pieces "G" & "I"
Step 3
Attach the box support to one of the panels making sure to leave a 3/4" gap between the box support and the 2x2 ("D") Use 2" screws through the face of the 2x4's
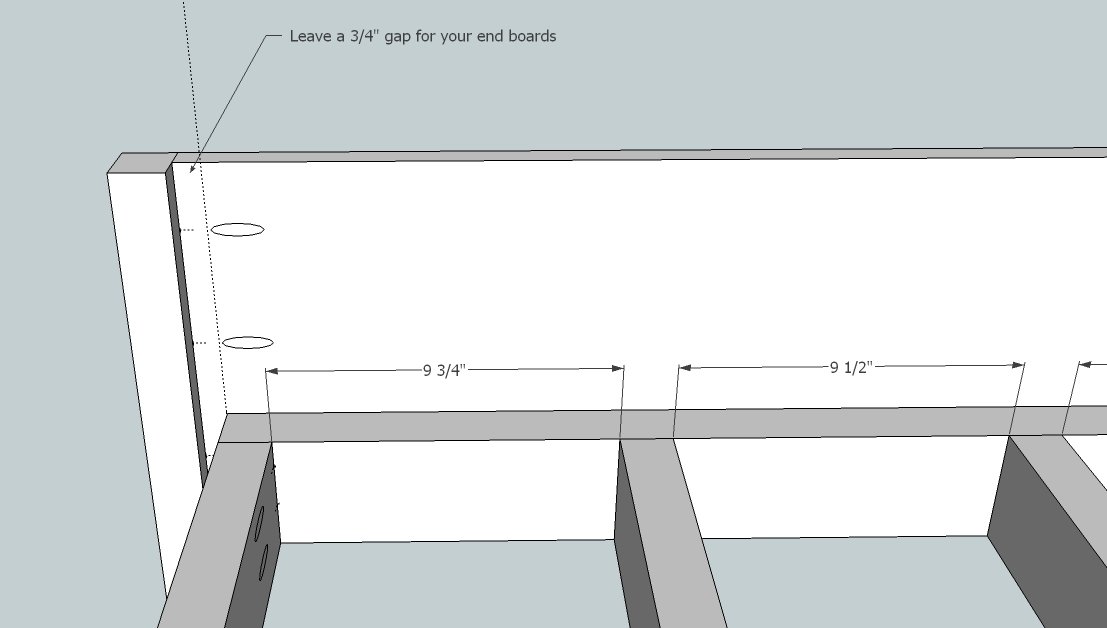
Step 4
Attach the other panel to the box support using glue and 2" screws through the face of the 2x4's
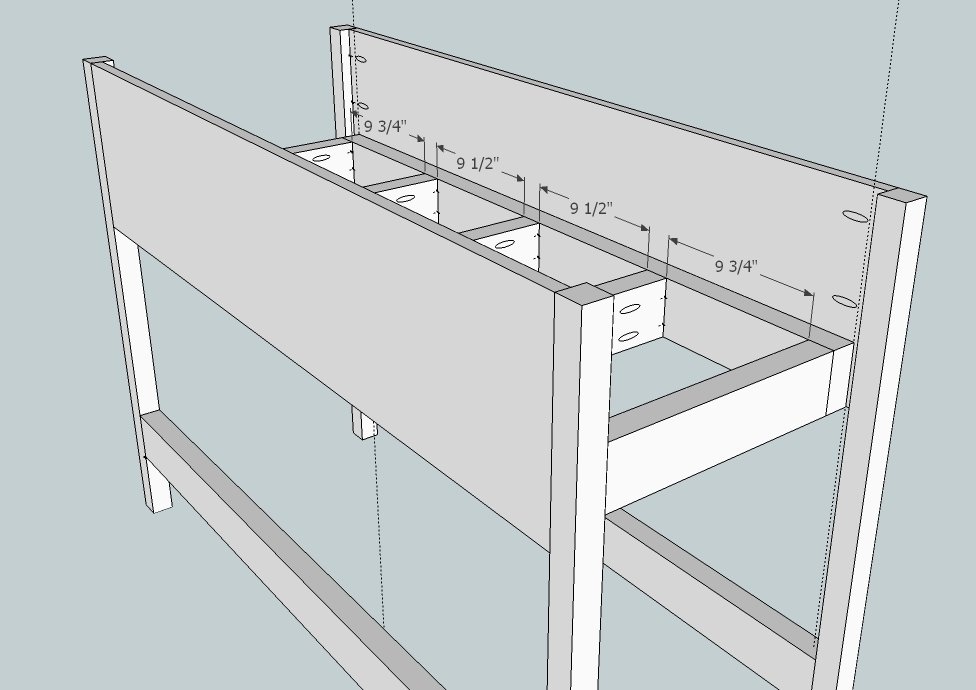
Step 5
Cut and attach end panels to finish end of planters.
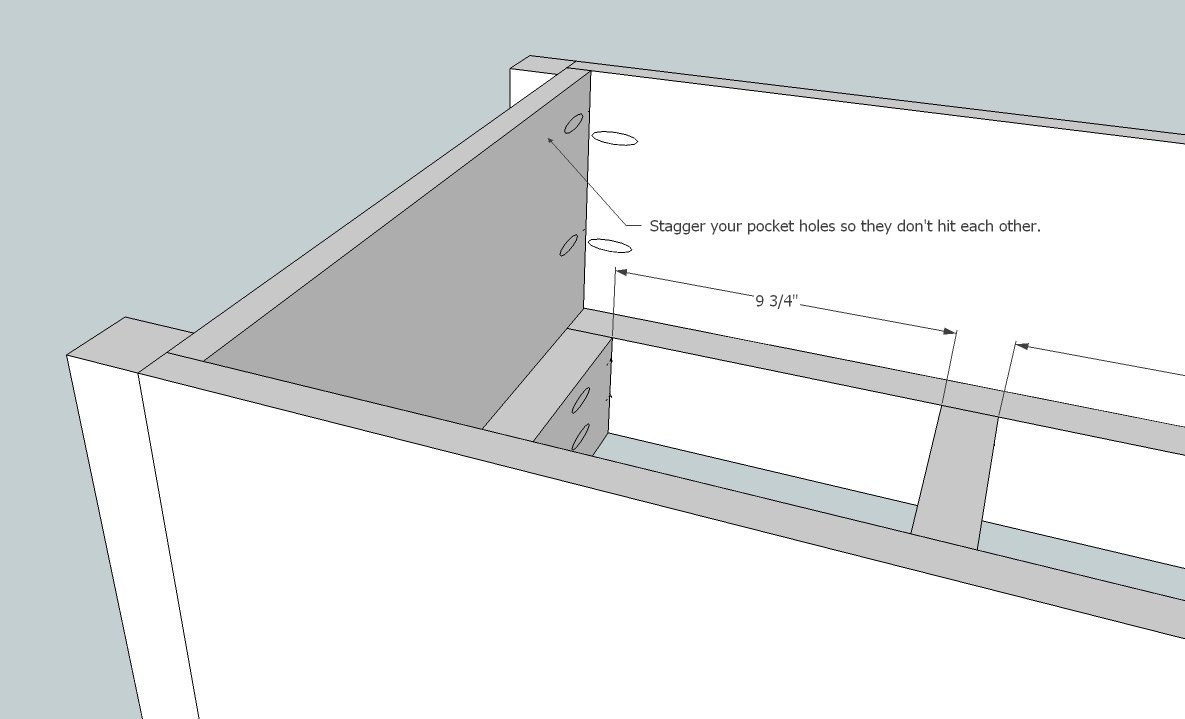
Step 6
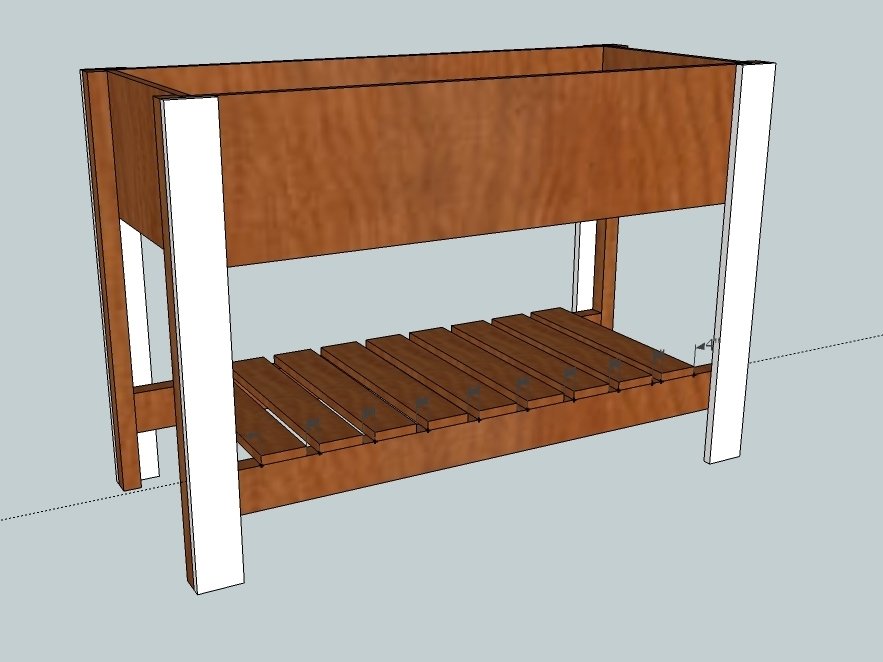
Measure 4" from the legs to start your slats making sure to leave an 1" gap between slats as you go across. Slats are "B" pieces
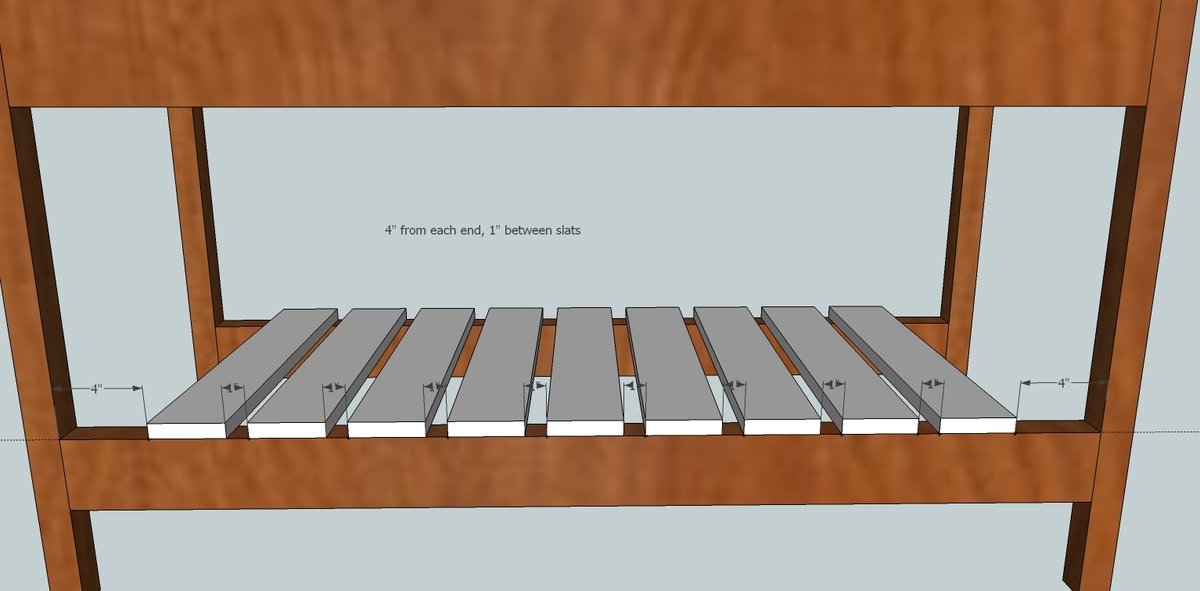
Step 7
Add pieces "A" to assembly
Step 8
Finally, add the post caps and you're done! To use, you'll need to either add plastic tubs for planting or you can put in a piece of 1/2" plywood and plastic lining.
Finishing
Sand all surfaces, starting with a medium grit and finishing with fine. Wipe off the dust, fill any holes or gaps with wood filler, and sand smooth once dry. Apply primer if you're painting, then finish with your choice of paint or stain and seal with a durable clear topcoat. For outdoor projects, use exterior-rated primer, paint or stain, and sealer so the piece stands up to the weather.
Source (temporary): https://www.ana-white.com/woodworking-projects/raised-planter-box-bottom-shelf