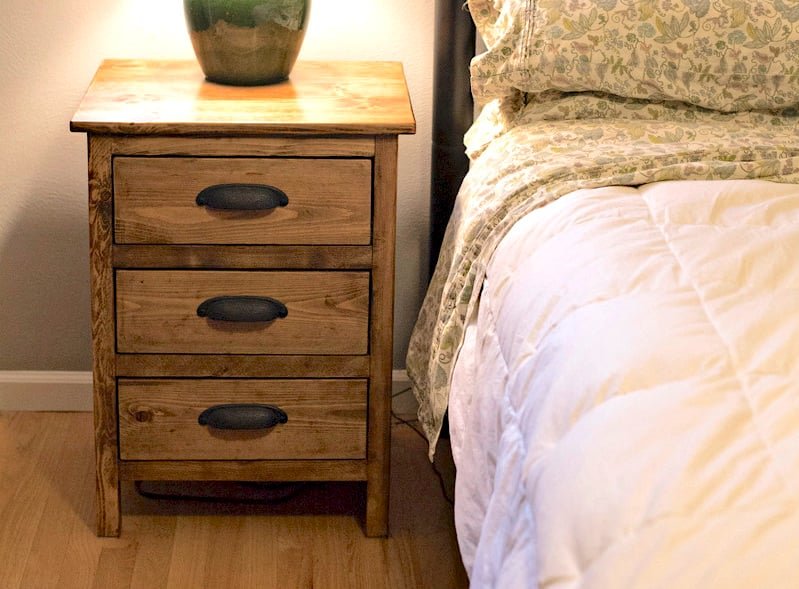
Reclaimed Wood Look Bedside Table
Rustic bedside table or nightstand - farmhouse style. from
Specifications
| Project type | Nightstands |
|---|---|
| Room | Bedroom |
| Style | Cottage Style Furniture Plans |
| Difficulty | Intermediate |
| Estimated cost | $50 - $100 |
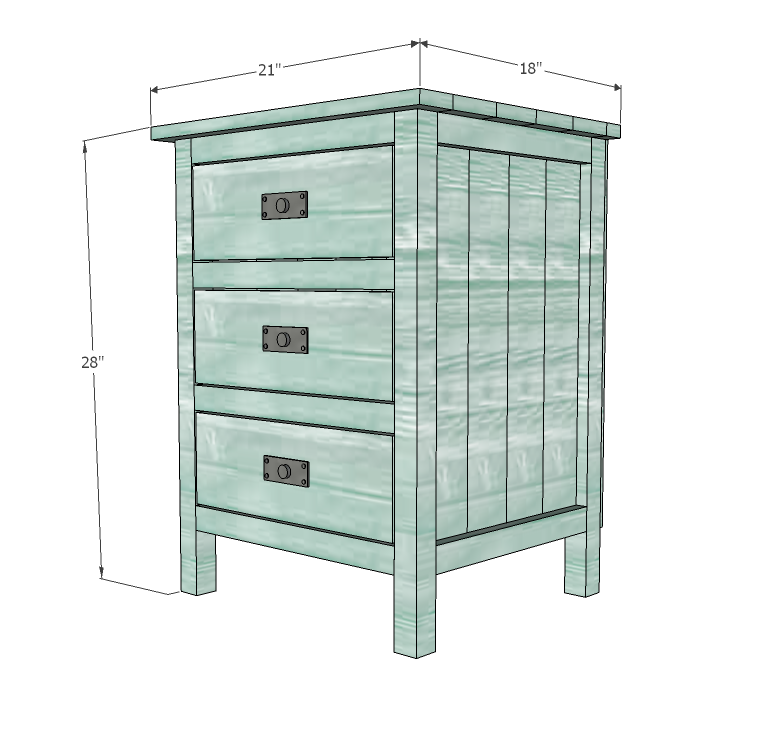
Dimensions
Use the size-specific shopping and cut lists below.
Shopping List
- 3 - 2x2 @ 8 feet long
- 1 - 1x2 @ 8 feet long
- 3 - 1x4 @ 8 feet long
- 1 - 1x6 @ 8 feet long
- 2 - 1x3 @ 10 feet long
- 1/4" plywood for back
- 3 knobs or pulls
- 3 sets 16" White Euro style drawer slides like shown in this plan
Cut List
- 4 - 1x2 @ 14" (Side Trim)
- 8 - 1x4 @ 23 1/4" (Side Panels)
- 4 - 2x2 @ 27 1/4" (Legs)
- 6 - 2x2 @ 16" (Front/Back Tie ins)
- 1 - 2x2 @ 14" (Center Tie In)
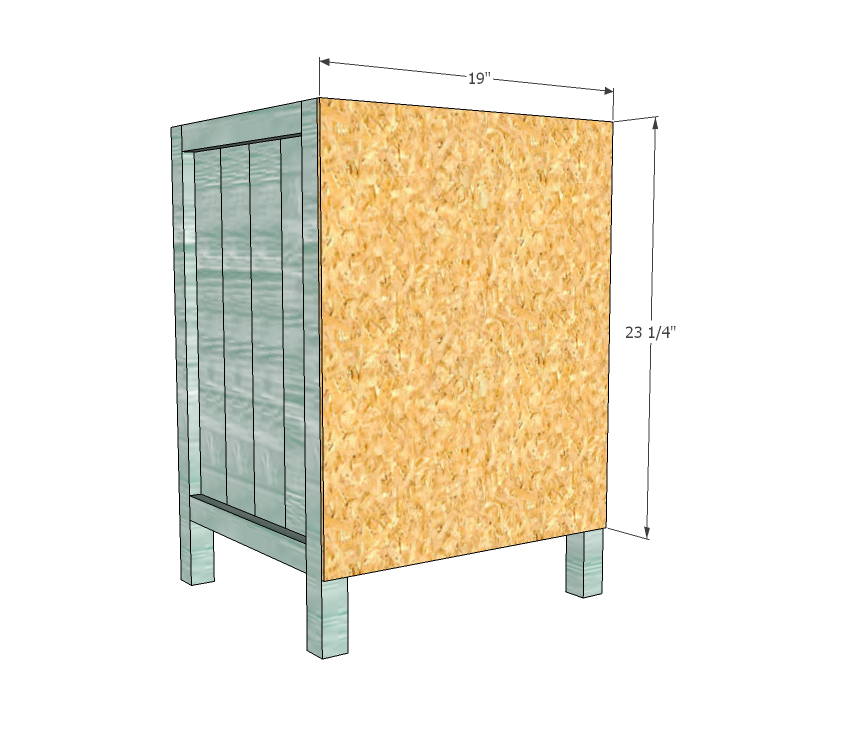
- 1 - 1/4" plywood @ 19" x 23 1/4" (Back)
- 1 - 1x2 @ 21" (Top)
- 4 - 1x4 @ 21" (Top)
- 1 - 1x3 @ 21" (Top Front) Drawer cut list in plan
Tools
- measuring tape
- square
- pencil
- safety glasses
- hearing protection
- kreg-jig
- drill
- circular saw
- nailer
- sander
- level
- countersink drill bit
Step-by-step Instructions
Step 1
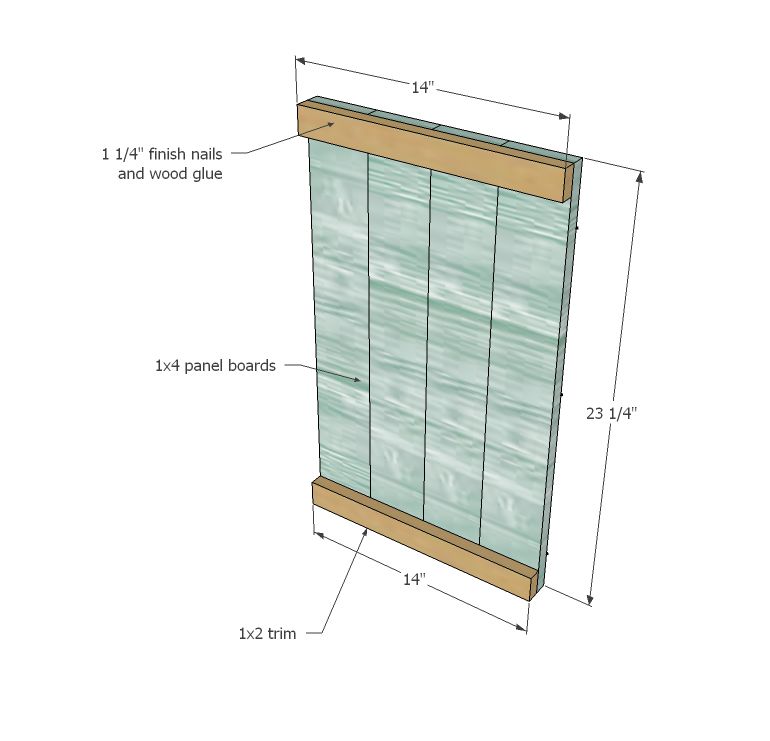
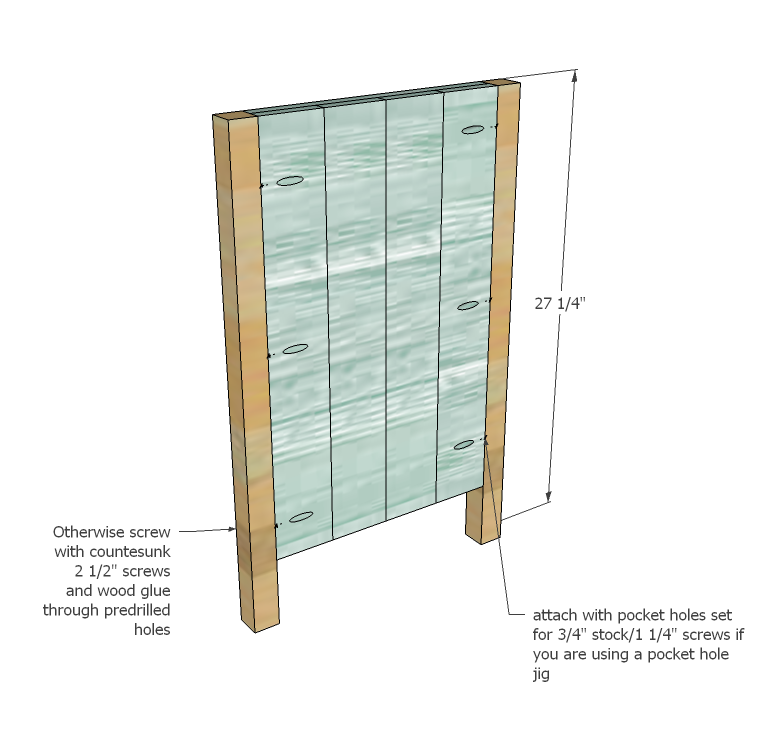
If you have a Kreg Jig, attach the panel boards to each other first with 1 1/4" pocket hole screws, with your jig set for 3/4" stock. This will make the panel a solid piece. Attach with 1 1/4" finish nails and wood glue the panel trim, flush to top and bottom. Ensure that your panels are square (very important!) If your panel boards are not coming out flat, do this sort of thing with additional 1x2s - lined up with the front tie ins.
Step 2
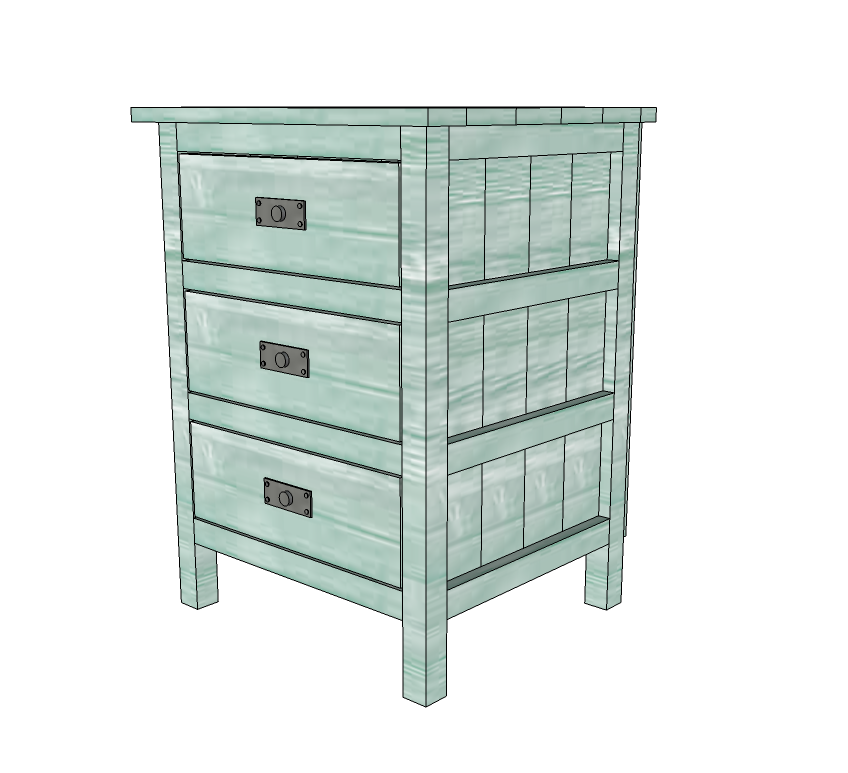
Now attach legs to ends of panels as shown in diagram, flush to tops.
Step 3
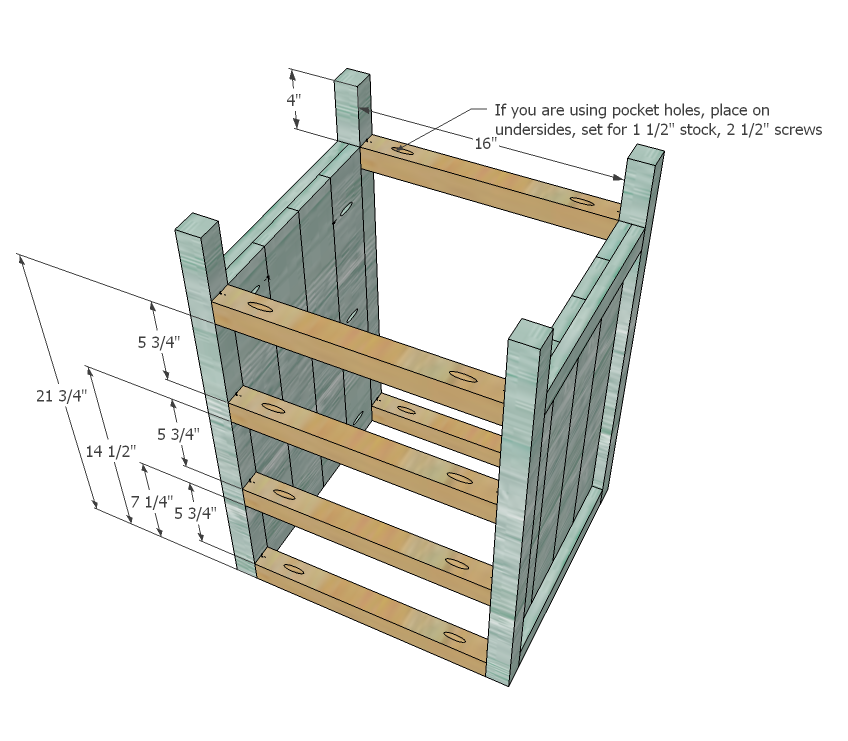
Whenever you build for drawers it is crucial that your project is very very square, or your drawers will not slide correctly. Attach the front/back tie ins, and check the entire project for square, measuring from opposite leg to opposite leg on both the top and bottom of the legs. You can also use 2 1/2" screws and wood glue to attach tie ins, with predrilled screws and wood glue.
Step 4
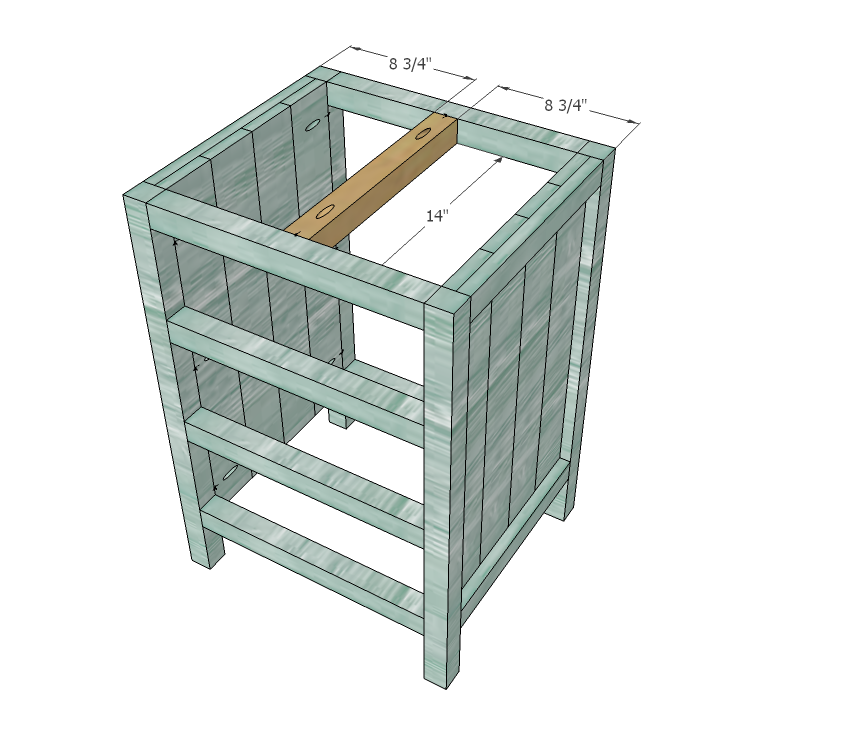
Add the center support as shown above.
Step 5
Step 6
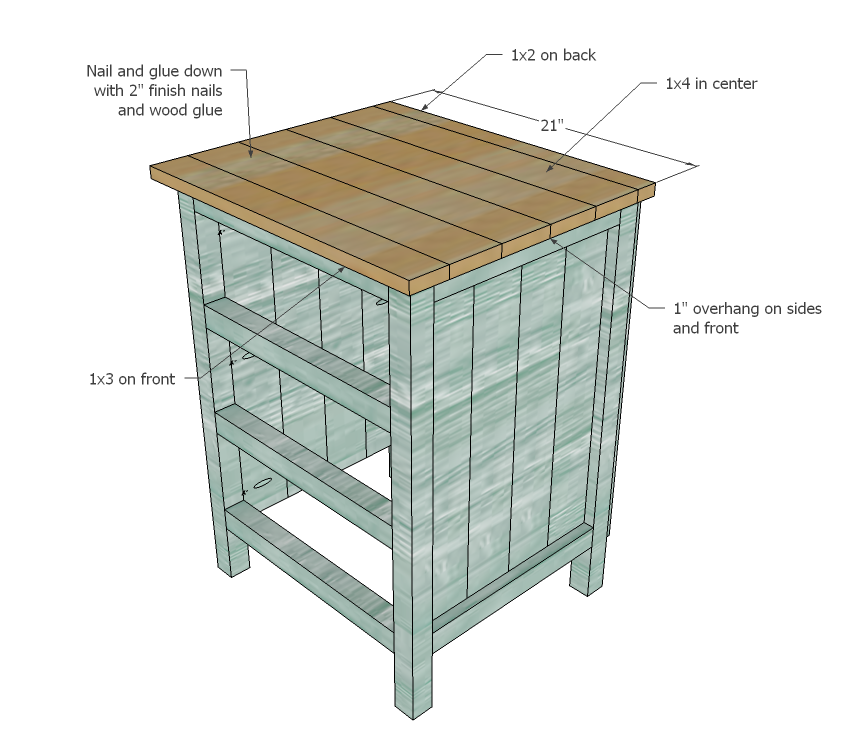
Now the top, start at the back with the 1x2 and attach flush to the back, 1" overhangs on both sides. Continue adding 1x4s, and finally, the front is a 1x3... Would be super cute to leave the top wood and paint the base a distressed finish.
Step 7
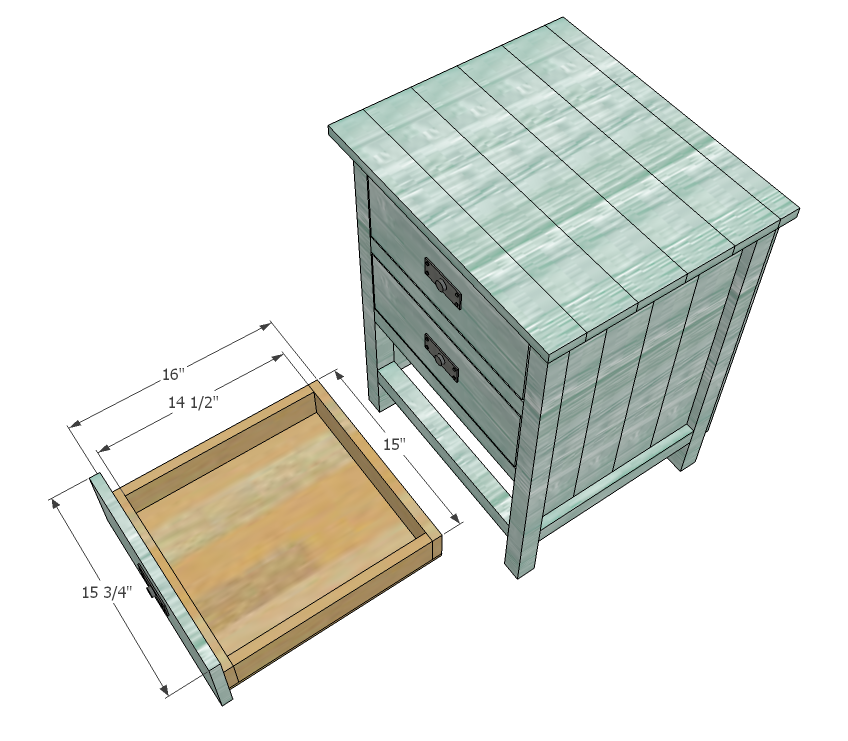
Now the drawers... Super important to build square drawers. Your drawer boxes should be built 1" less in width than the drawer housing (the interior of the project) to give clearance for drawer slides. The "perfect" measurements are shown here, but you may need to adjust for differing board thicknesses 6 - 1x3 @ 14 1/2" (Sides) 6 - 1x3 @ 15" (Fronts and Backs) 3 - 1/4" Plywood @ 16" x 15" (Drawer Bottoms) 3 - 1x6 @ 15 3/4" (Drawer Faces) Don't add the drawer faces quite yet. For a drawer with higher sides, you can also use 1x4s.
Step 8
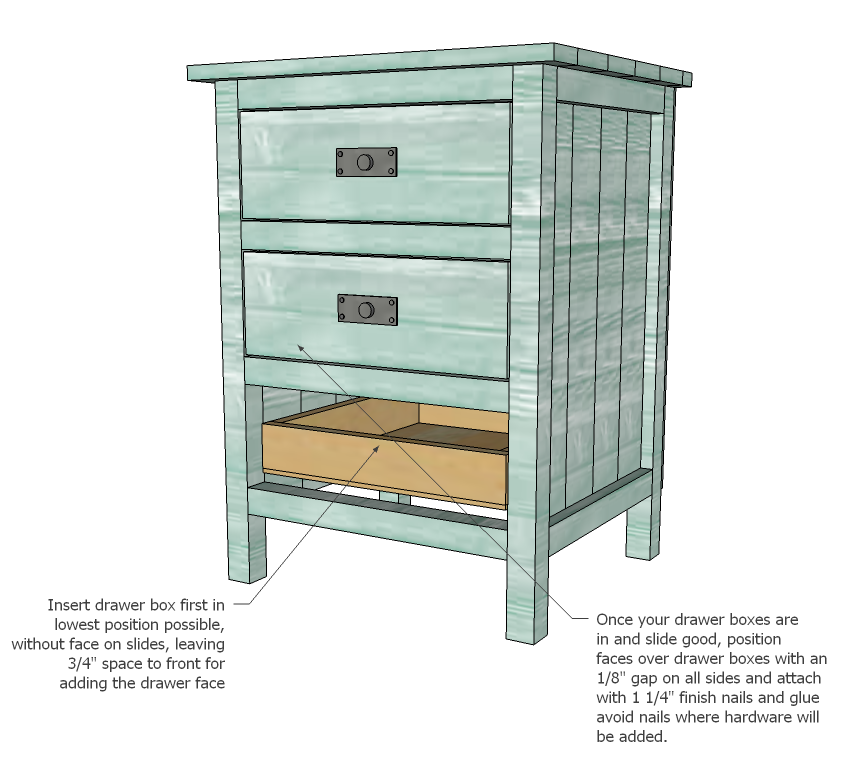
Install drawer boxes as shown above, inset by 3/4" from the front of the project. Make sure your drawers slide well. Then position the drawer faces over the drawer boxes until there is an even 1/8" gap on all sides and nail drawer faces on. Be aware of hardware locations so you don't have to drill through nails later.
Finishing
Sand all surfaces, starting with a medium grit and finishing with fine. Wipe off the dust, fill any holes or gaps with wood filler, and sand smooth once dry. Apply primer if you're painting, then finish with your choice of paint or stain and seal with a durable clear topcoat. For outdoor projects, use exterior-rated primer, paint or stain, and sealer so the piece stands up to the weather.
Source (temporary): https://www.ana-white.com/woodworking-projects/reclaimed-wood-look-bedside-table