Rectangles Day Bed
A modern style daybed, featuring a modern pattern on back and arms. to save you money off West Elm furniture.
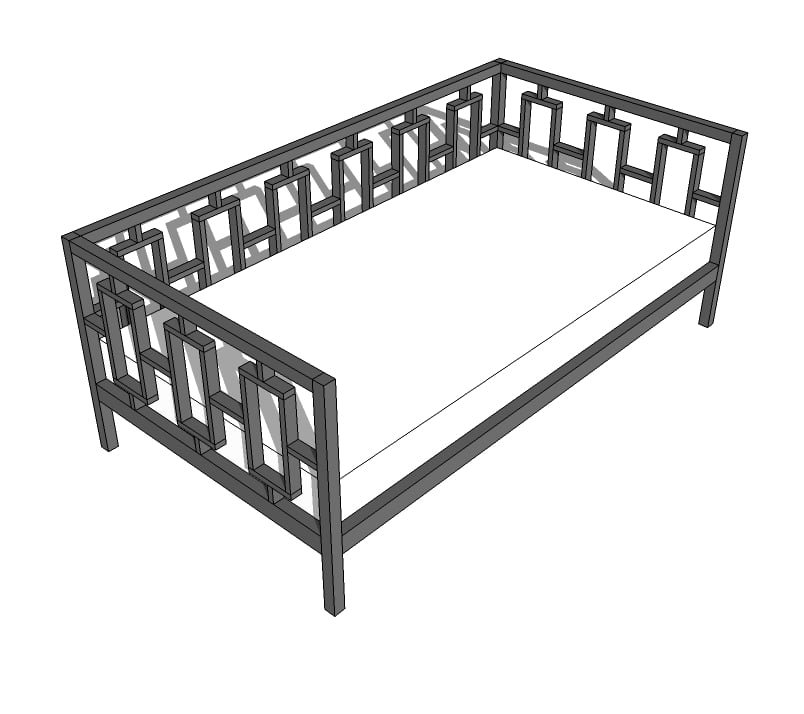
Specifications
| Project type | Daybed |
|---|---|
| Room | Bedroom |
| Style | Modern Style Furniture Plans |
| Difficulty | Intermediate |
| Estimated cost | $20 - $50 |
Dimensions
Use the size-specific shopping and cut lists below.
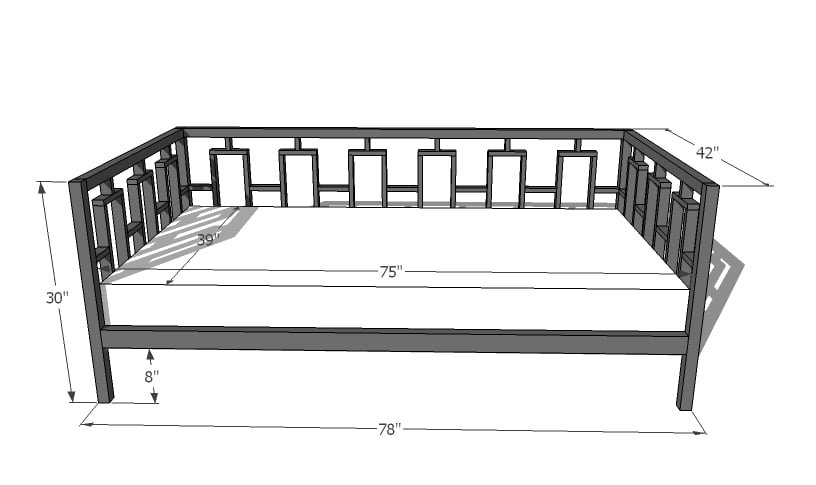
Shopping List
3 - 2x3 @ 8 feet long
7 - 1x2 @ 8 feet long
6 - 2x2 @ 8 feet long
Use either pocket hole screw or regular screws
Cut List
24 - 1x2 @ 12" (Sides of Rectangles)
9 - 1x2 @ 5 1/2" (Rectangle to Rectangle Joiners)
6 - 1x2 @ 4 1/4" (End Joiners)
24 - 1x2 @ 6 1/2" (Tops and Bottoms)
3 - 2x2 @ 75" (Back Top and Cleats)
2 - 2x3 @ 75" (Aprons)
4 - 2x2 @ 30" (Legs)
2 - 2x2 @ 39" (Arm Top)
2 - 2x3 @ 39" (Arm Aprons)
Tools
- measuring tape
- square
- pencil
- safety glasses
- hearing protection
- kreg-jig
- drill
- circular saw
- sander
- level
- countersink drill bit
Step-by-step Instructions
Step 1
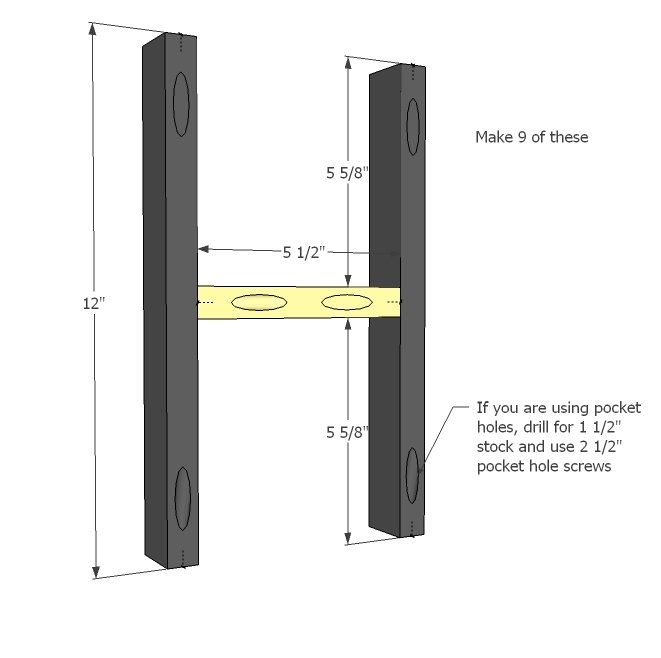
You are probably wondering why in the H are we starting by building an H? Why not start by building the rectangles? Well, there's good reason (unless you own a Kreg Jig, and then you can do whatever the H you want - or rectangle for the matter). See what happens is you won't have room to fit your drill in to screw additional pieces on. Then you are just stuck. So build 9 Hs. Just like this one. If you have a Kreg Jig, go ahead and drill all pocket holes set for 1 1/2" stock and fasten with 2 1/2" screws and glue.
Step 2
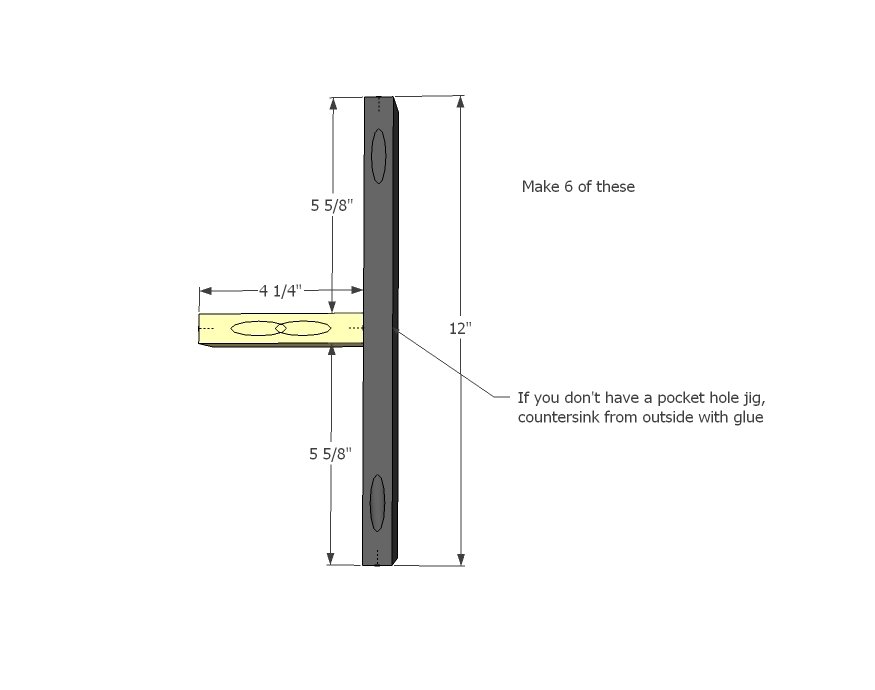
Now we are going to build some sideways Ts. Six of them.
Step 3
Now add the tops and bottoms as shown in diagram above. See what I mean about being able to get your drill in there to predrill holes and drive screws? Make sure you are working on a flat, level surface, and DEFINITELY check for square (or rectangle) in this case.
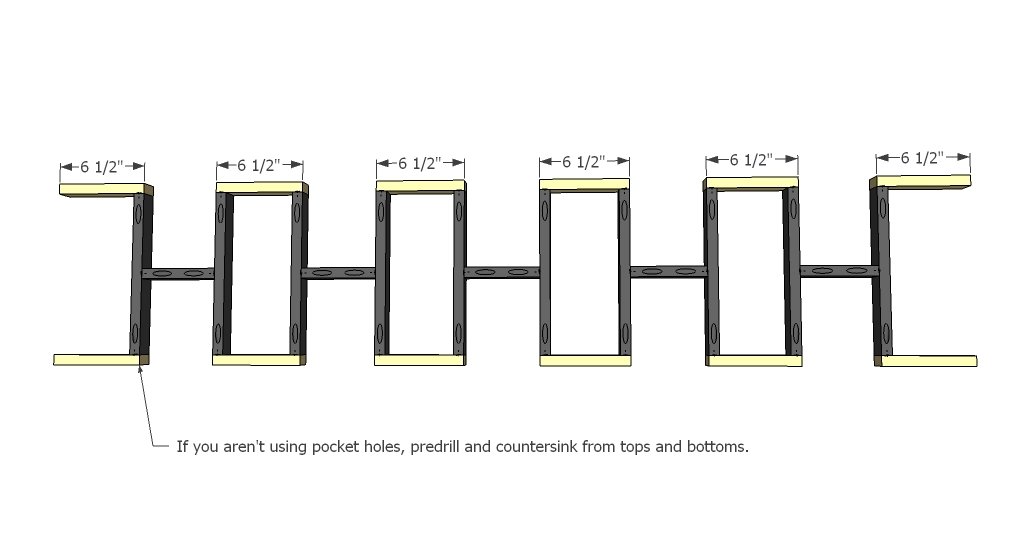
Step 4
Now add the Ts to the ends.
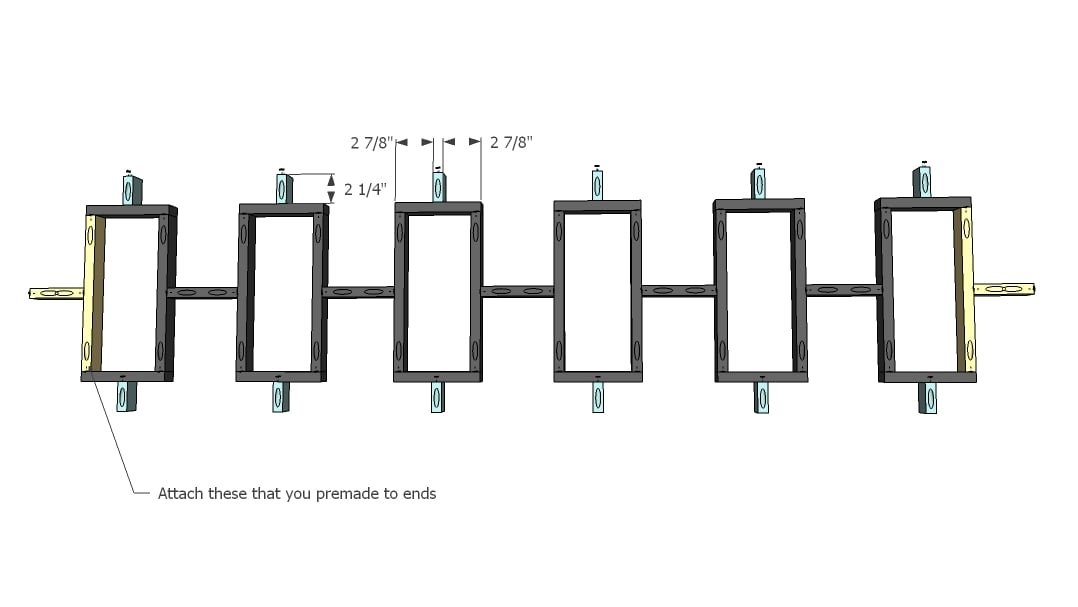
Step 5
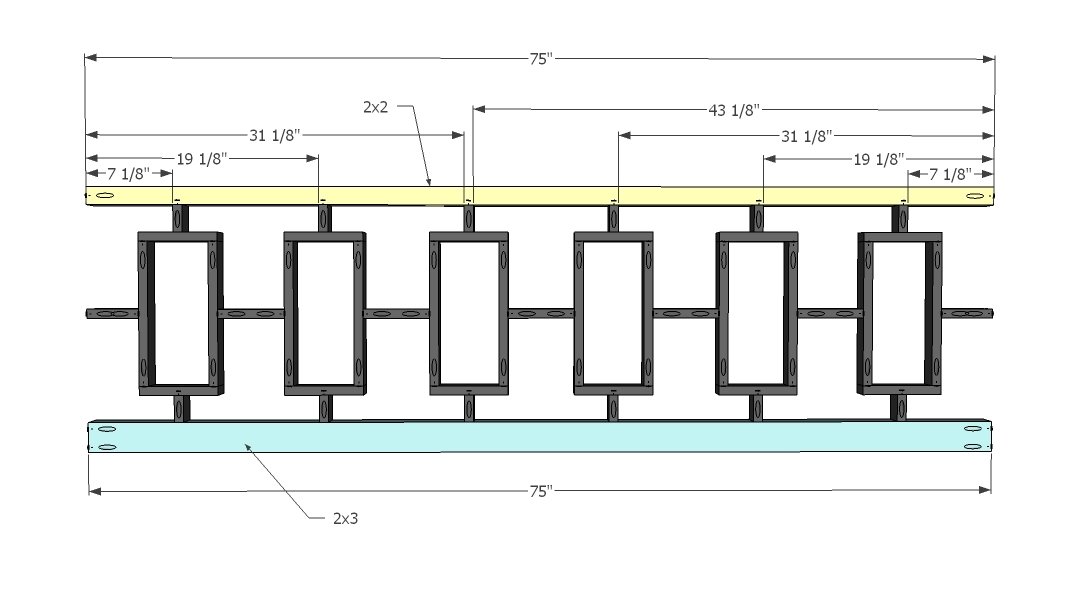
Step 6
Now the legs.
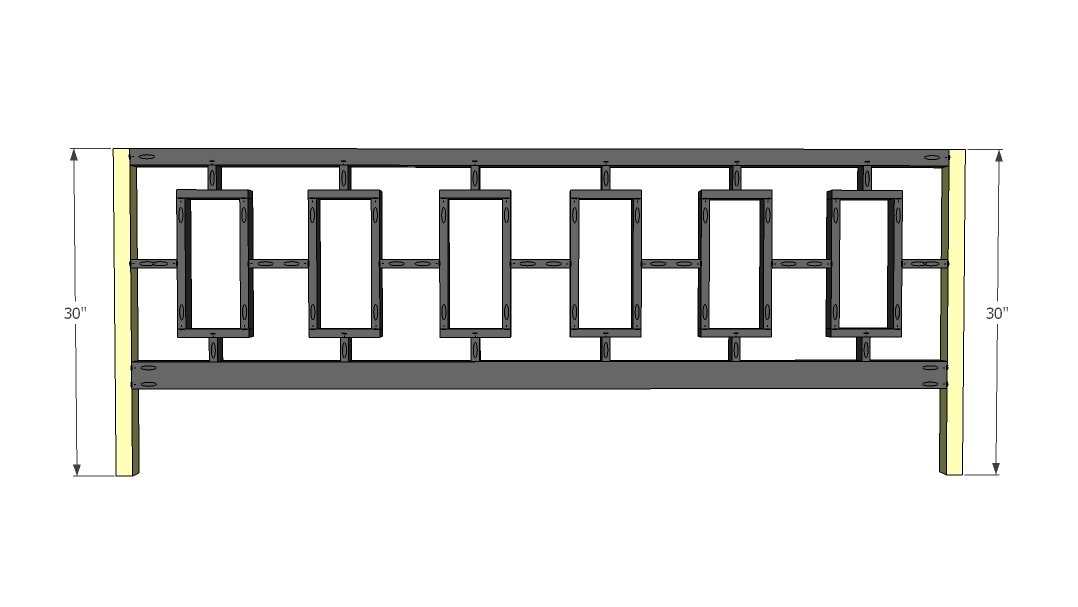
Step 7
By now, you are a pro, rock star builder, whippin' this thing out! One thing to consider, especially if you are using pocket holes, is to mirror the two ends so your pocket holes are on the outsides for both arms.
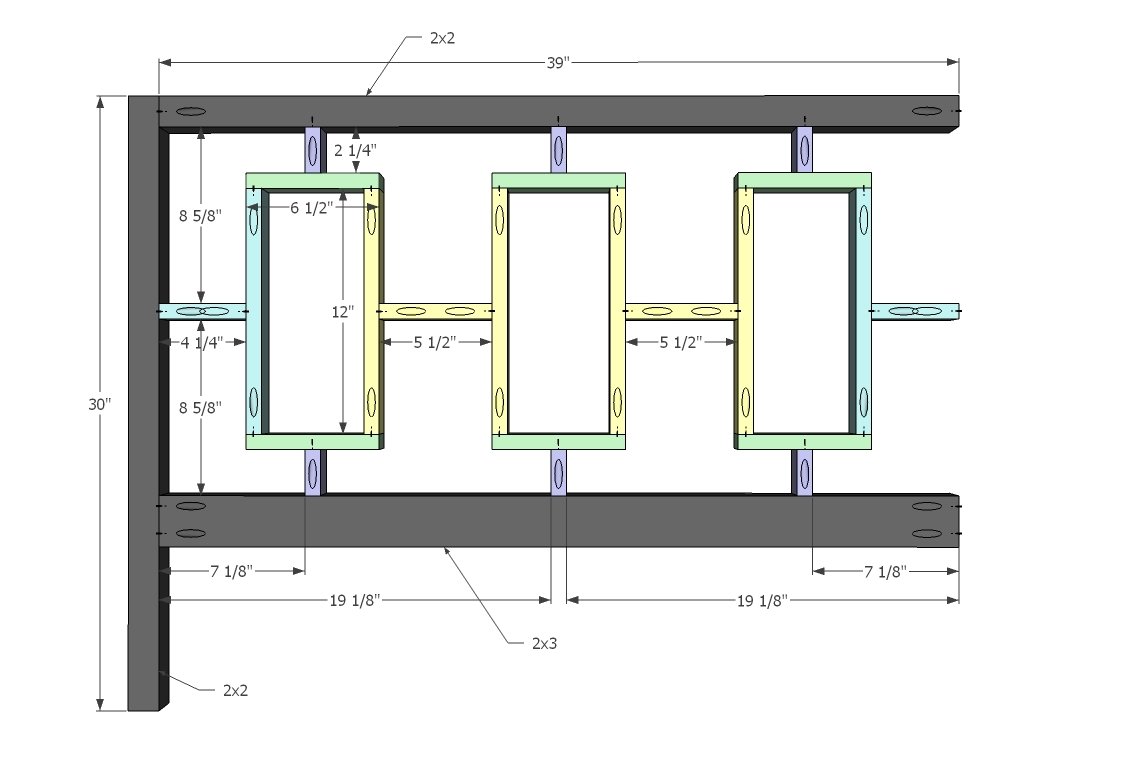
Step 8
Front apron should be an easy step.
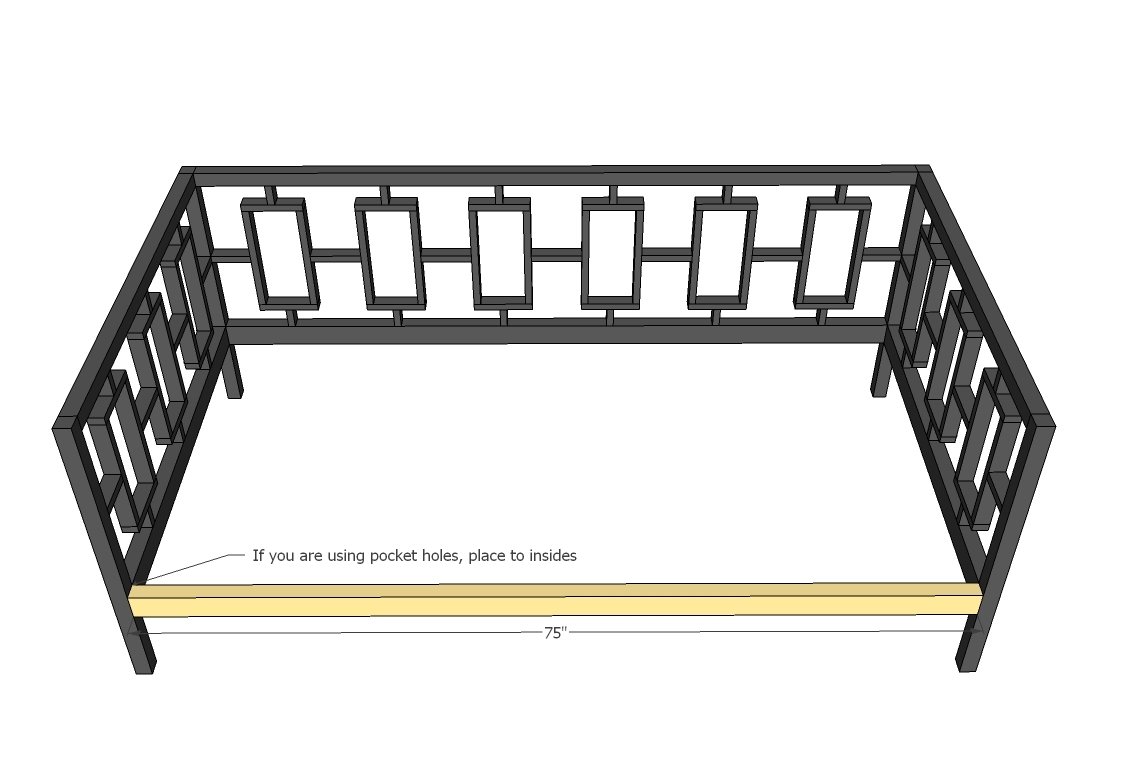
Step 9
Use 2 1/2" screws and wood glue to attach cleats to aprons, flush to the bottoms.
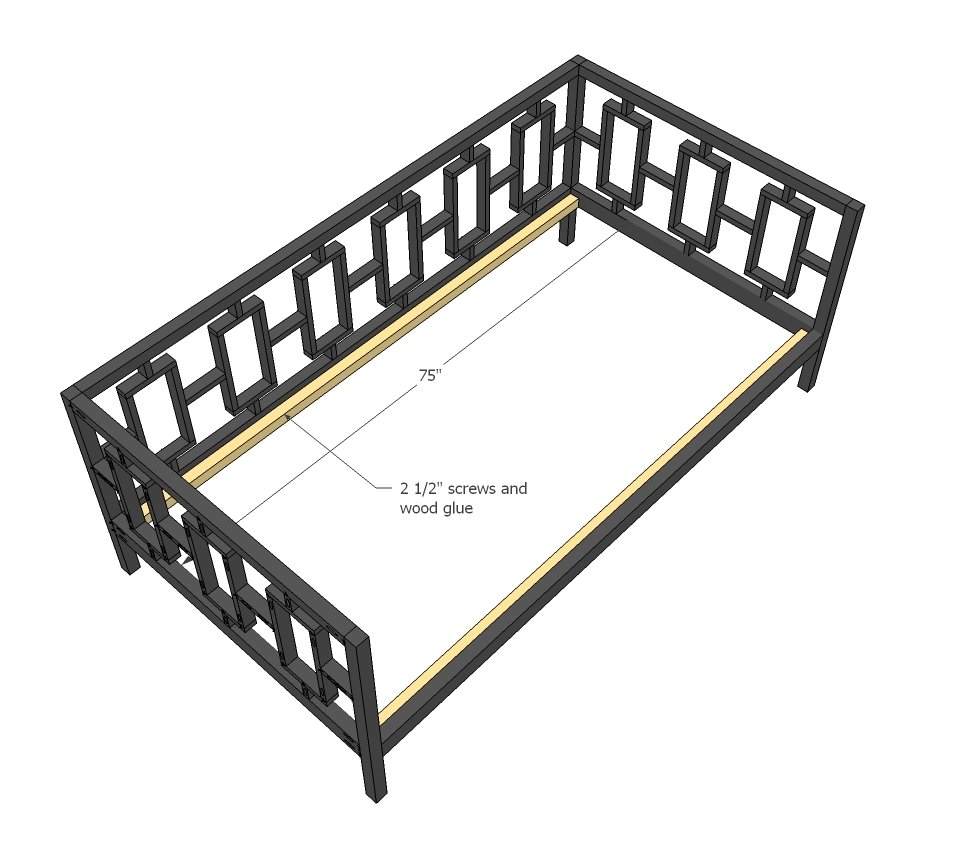
Step 10
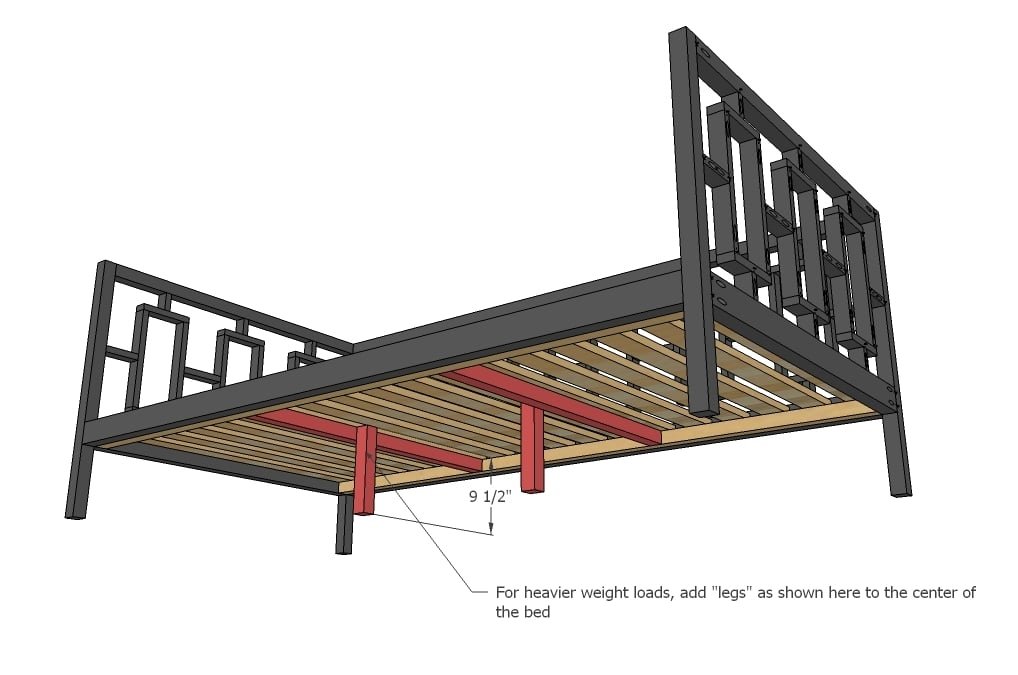
You can either use a bunkie board, metal bed spring, or a box spring, or slats as shown above. Always refer to the recommendation of your mattress for slat spacings.
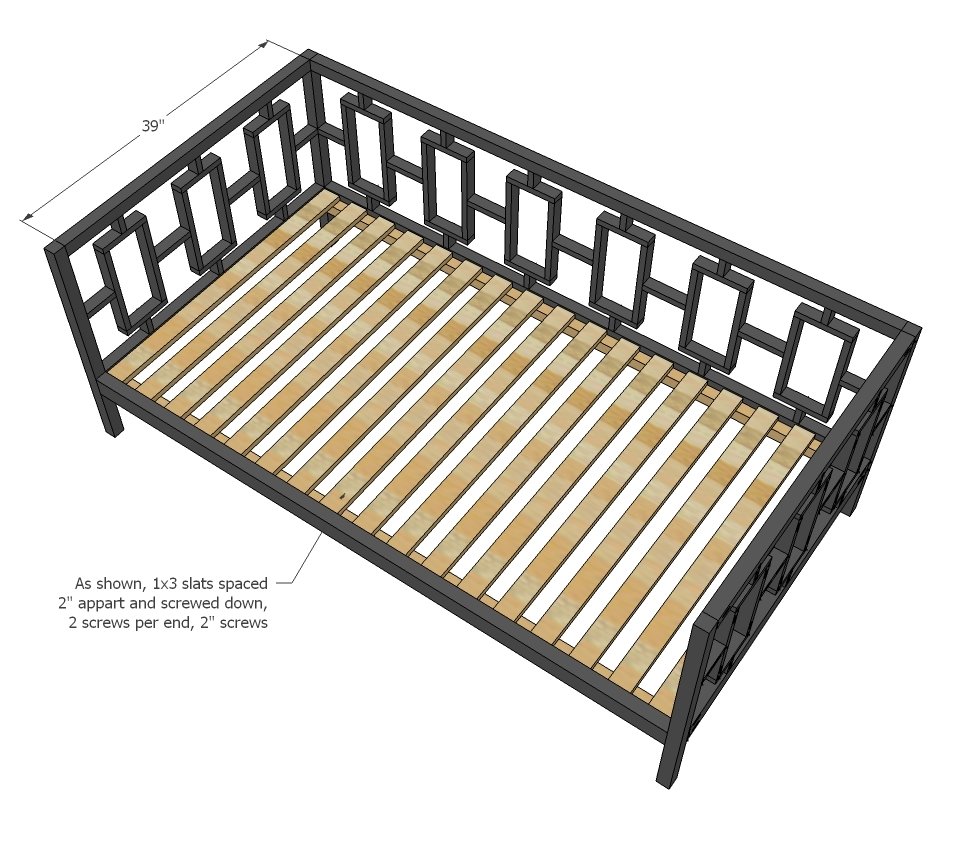
Step 11
And if you expect a heavier load, this is how you would "beef up" the bed.
Finishing
Sand all surfaces, starting with a medium grit and finishing with fine. Wipe off the dust, fill any holes or gaps with wood filler, and sand smooth once dry. Apply primer if you're painting, then finish with your choice of paint or stain and seal with a durable clear topcoat. For outdoor projects, use exterior-rated primer, paint or stain, and sealer so the piece stands up to the weather.
Source (temporary): https://www.ana-white.com/woodworking-projects/rectangles-day-bed