Refined Printer Cabinet
So you know what to do - go check out Jen's building post here, and then get the following! And please share when you make yours - we'd love to see how you customize and finish your printer table too!
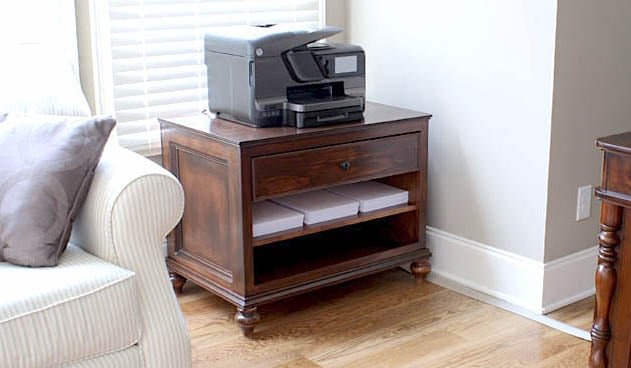
Specifications
| Project type | Side and End Table Plans |
|---|---|
| Room | office |
| Style | Tradditional Style Furniture Plans |
| Difficulty | Advanced |
| Estimated cost | $150 - $200 |
Dimensions
Use the size-specific shopping and cut lists below.
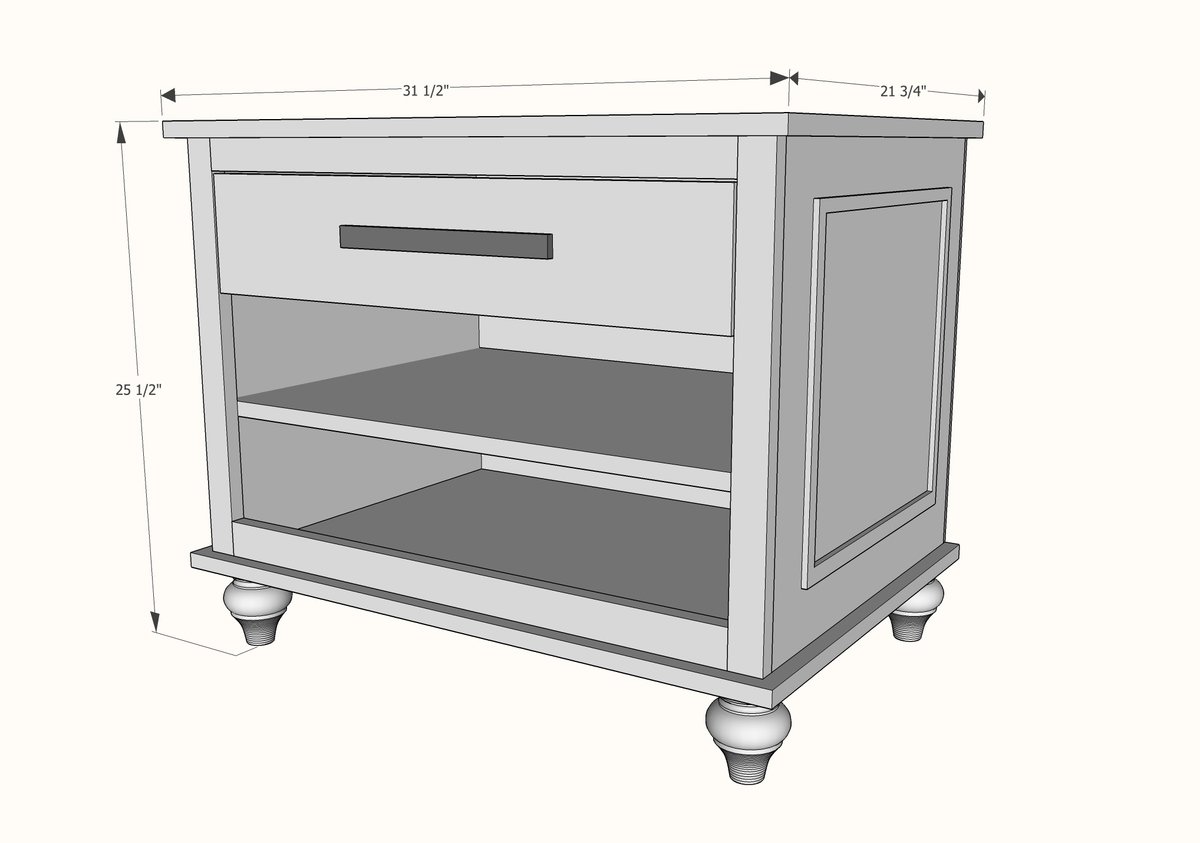
Shopping List
- 1 sheet of 3/4" hardwood plywood
- 1 - 1x2 @ 10 feet long
- 1 - 1x3 @ 27"
- 1 - 1/4" plywood (24x48 inch panel will work)
- 1 - 1x4 @ 8 feet long
- 1 - 1x6 @ 27" (drawer face) 4 Bun Feet
Cut List
CUT LIST
- 2 - 3/4" plywood @ 20" x 20-3/4" (sides)
- 2 - 3/4" plwyood @ 20" x 28-1/2" (shelves)
- 2 - 1x2 @ 20-3/4" (side trim for face frame)
- 1 - 1x2 @ 27" (top trim for face frame)
- 1 - 1x3 @ 27" (bottom trim for face frame)
- 2 - 1x2 @ 20" (drawer cleats)
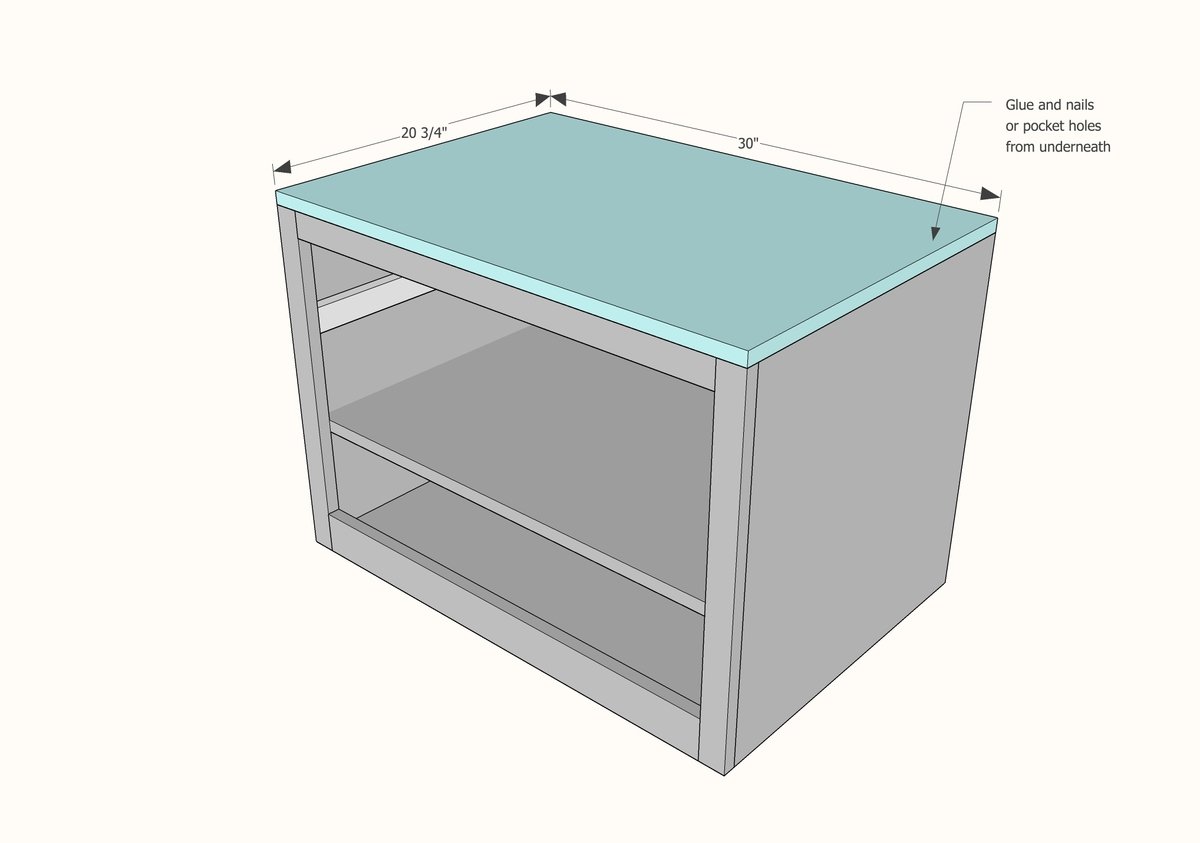
- 1 - 3/4" plywood @ 20-3/4" x 30" (top)
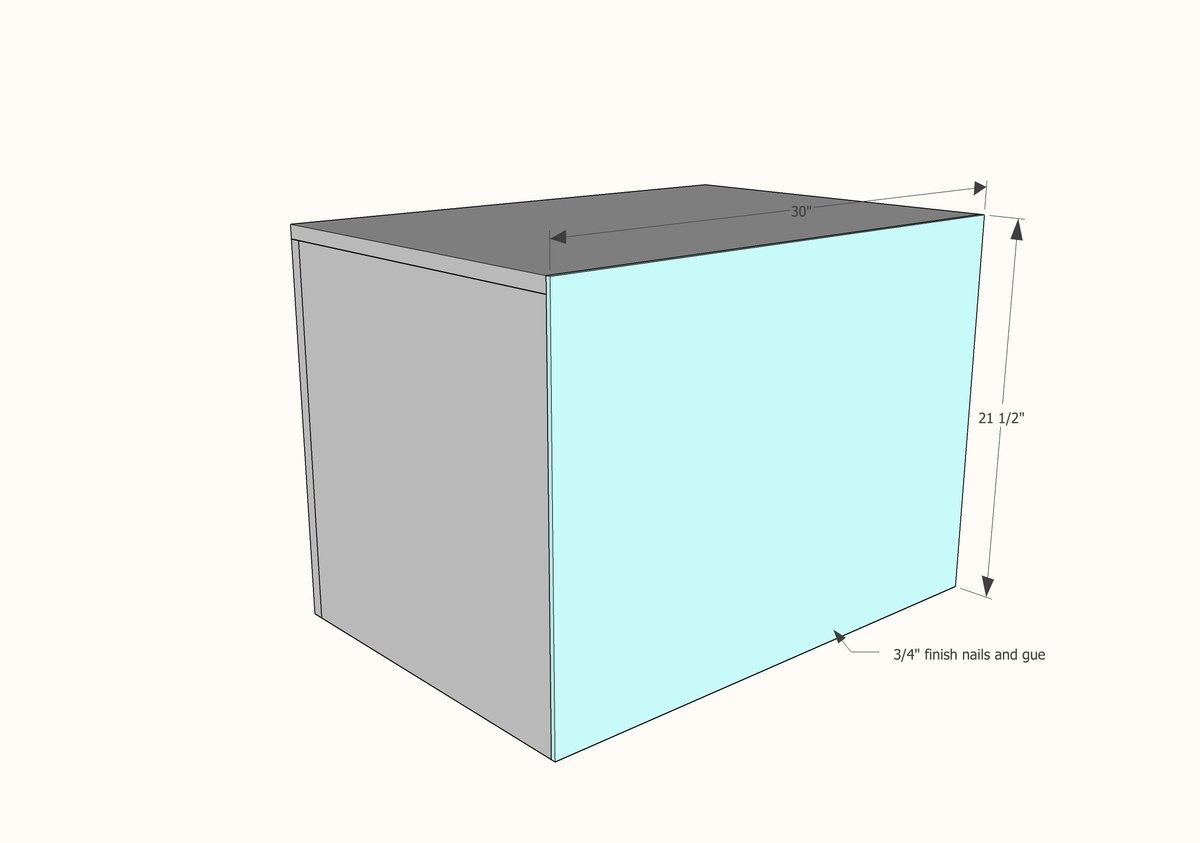
- 1- 1/4" plywood @ 30" x 21-1/2" (back)
DRAWER - Cut to fit your opening and drawer slides and opening
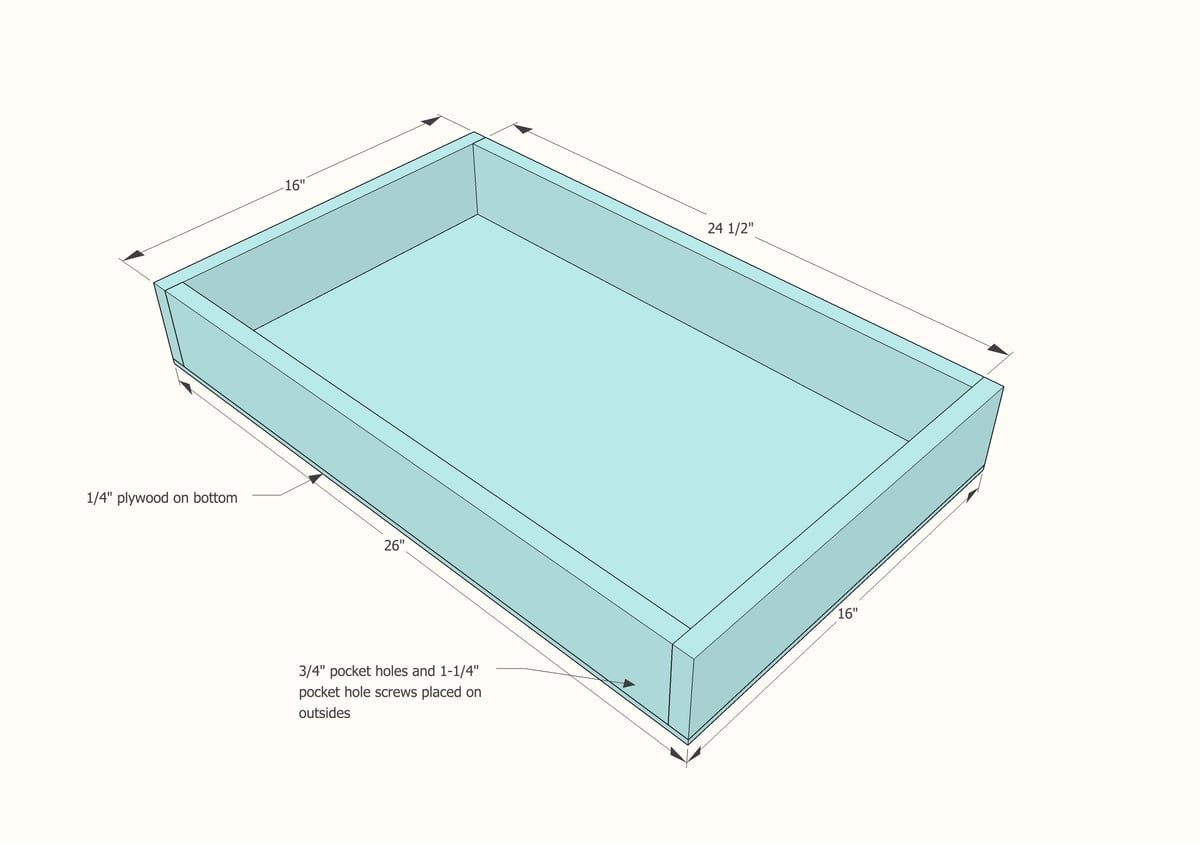
- 2 - 1x4 @ 24-1/2" (front and back)
- 2 - 1x4 @ 16" (sides)
- 1 - 1x6 @ 26-3/4" (drawer face)
Tools
- measuring tape
- square
- pencil
- safety glasses
- hearing protection
- kreg-jig
- drill
- compound miter saw
- table saw
- nailer
- sander
Step-by-step Instructions
Step 1
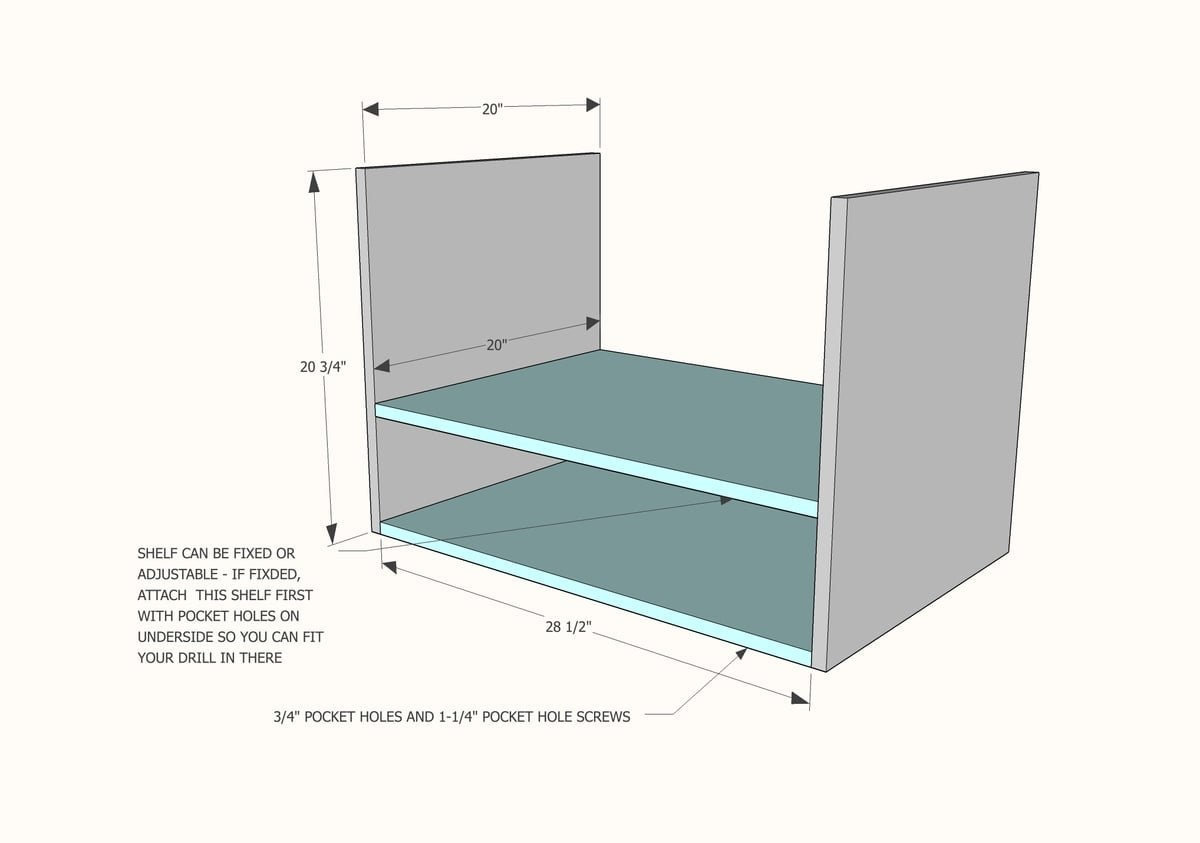
Drill 3/4" pocket holes facing upward on the insides of the sides for attaching the top in later steps. Attach shelves to the sides - middle shelf can be fixed or floating (added later with shelf pins). NOTE for perfectionists - to get the shelf just right, consider cutting off a 1/4" on the front edge and applying edge banding to the front edge of the shelf.
Step 2
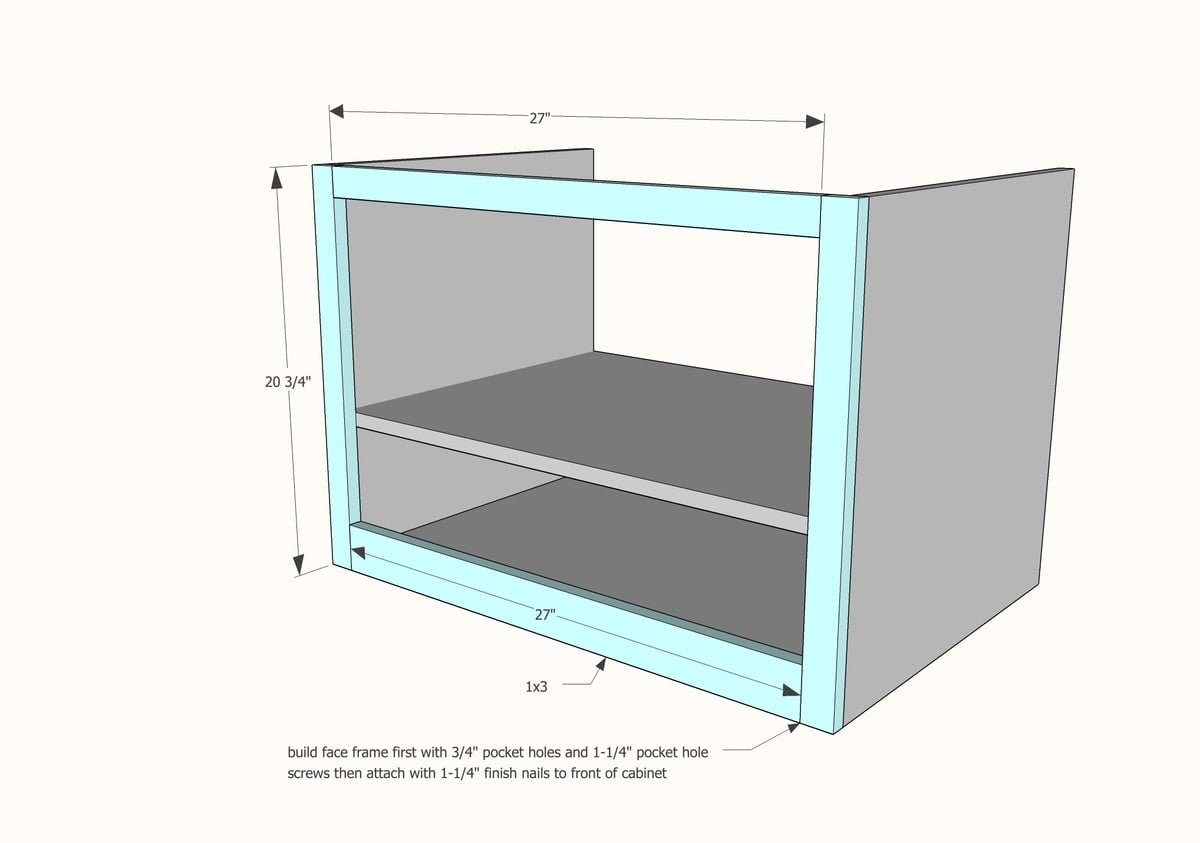
Build your face frame first with 3/4" pocket holes and 1-1/4" pocket hole screws and glue. Attach to front of cabinet with 1-1/4" finish nails and glue.
Step 3
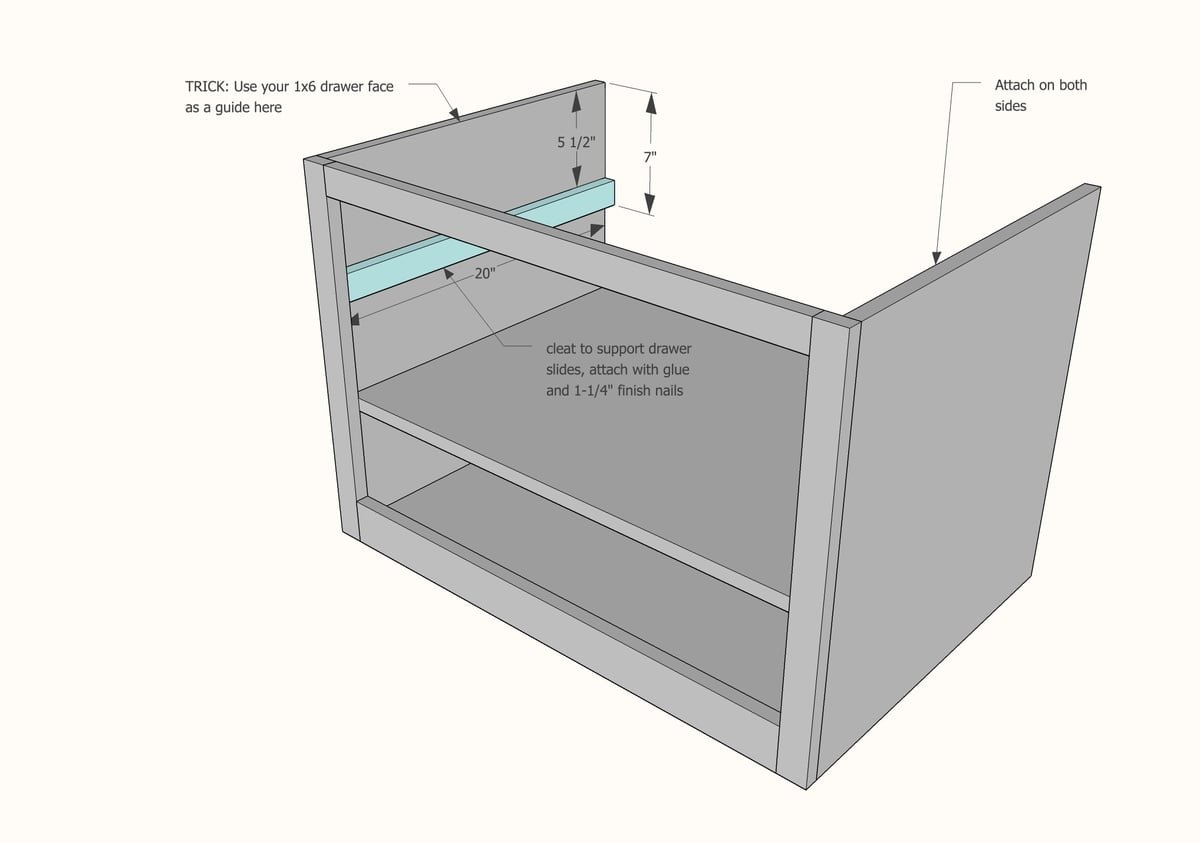
You'll need to bring the sides of the cabinet in for the drawer slides. Attach 1x2 to insides with 1-1/4" finish nails and glue.
Step 4
Attach top through pocket holes drilled in step 1 with 1-1/4" pocket hole screws.
Step 5
Step 6
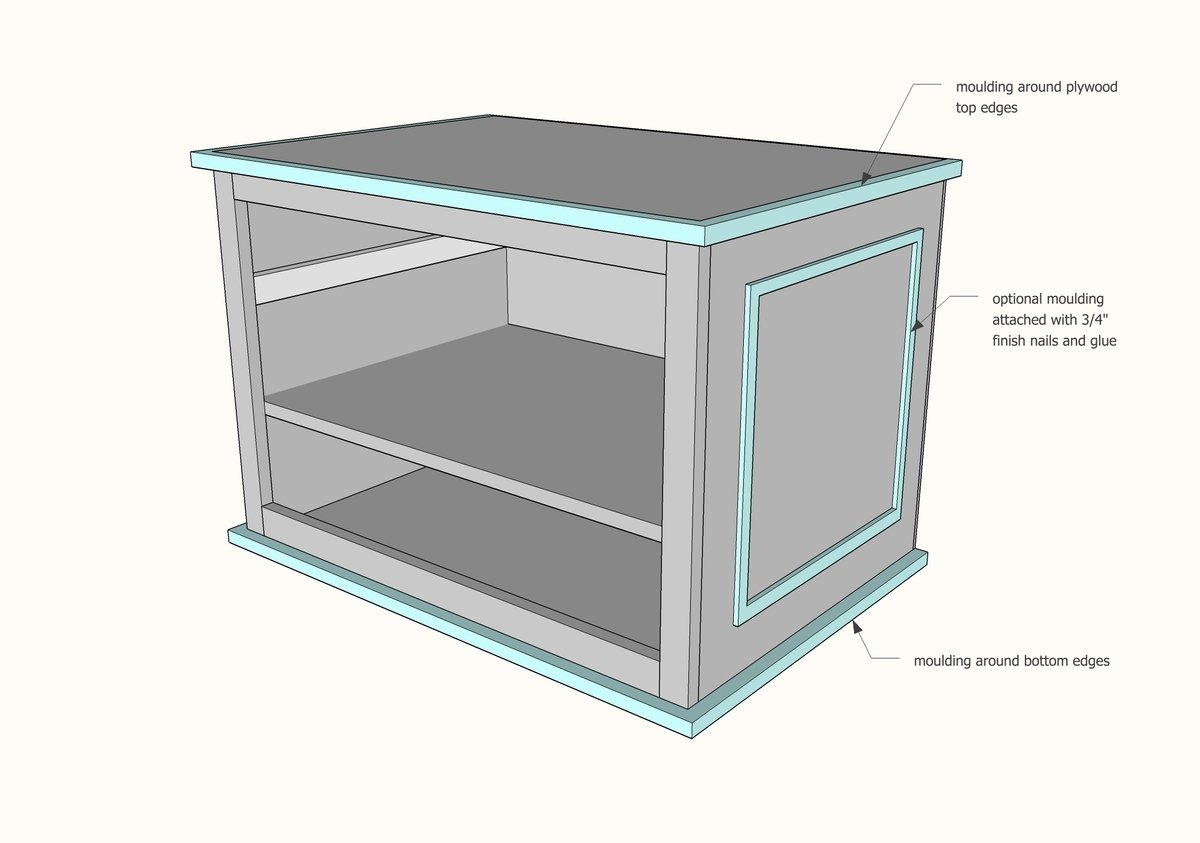
Add moulding around the sides for added detail.
Step 7
Attach feet to base.
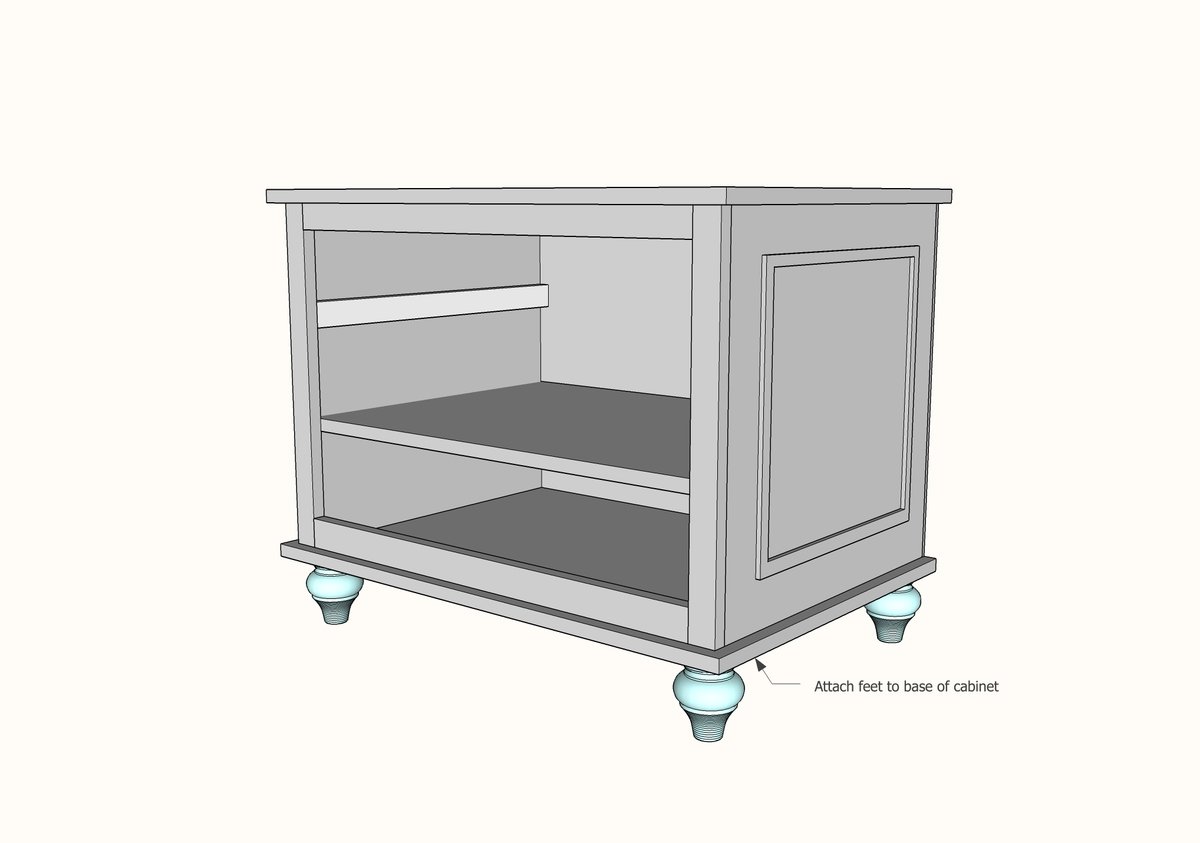
Step 8
Measure the opening of your drawer area in the cabinet. Read the instructions with your drawer slides and check the clearance needed (normally 1/2" per side for a total of 1"). Build your drawer to fit with the sides cut to the length of the slides, and the front and back cut to the desired width minus 1-1/2".
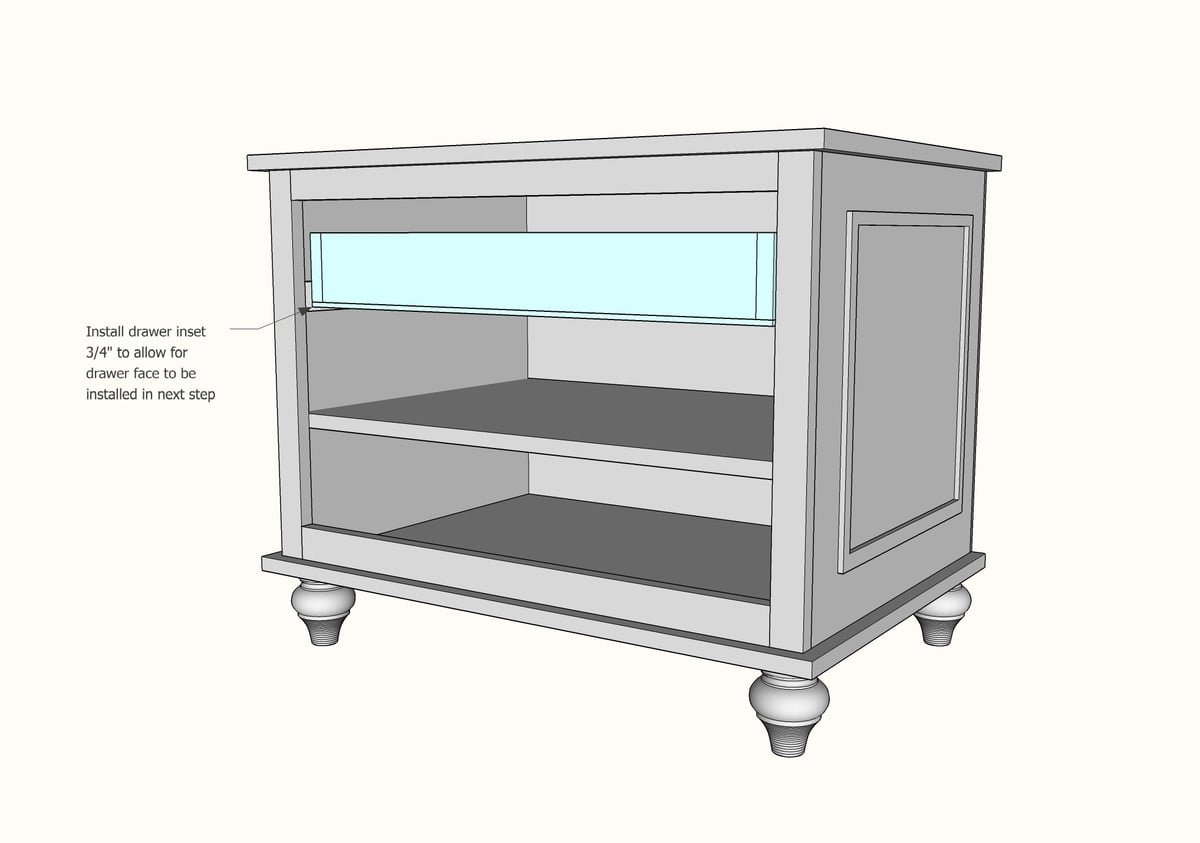
Step 9
Install the drawer on drawer slides inside the cabinet.
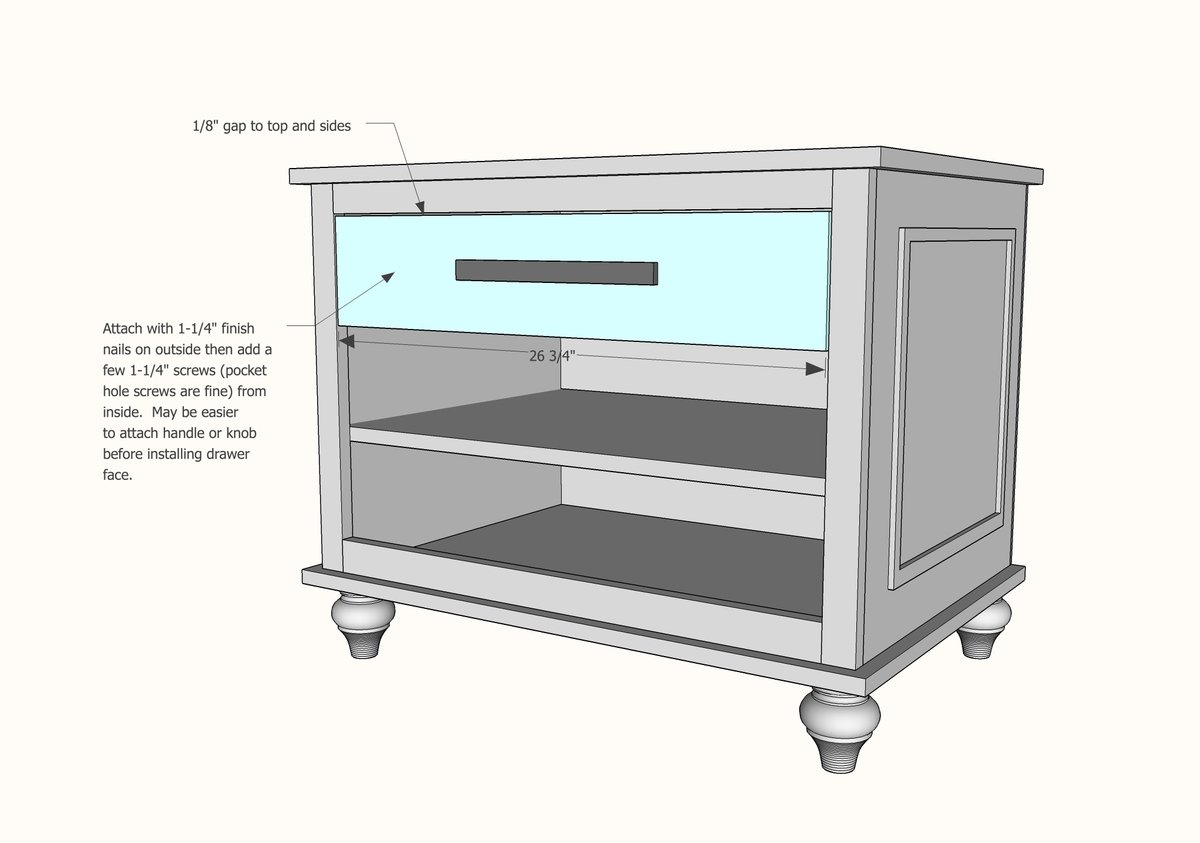
Step 10
Place drawer face over the drawer box with an even gap to sides and top. Nail and glue to drawer box. Then add a few 1-1/4" (pocket hole screw are fine here) from the inside. NOTE: It may be easier to add your handle before installing the drawer.
Finishing
Sand all surfaces, starting with a medium grit and finishing with fine. Wipe off the dust, fill any holes or gaps with wood filler, and sand smooth once dry. Apply primer if you're painting, then finish with your choice of paint or stain and seal with a durable clear topcoat. For outdoor projects, use exterior-rated primer, paint or stain, and sealer so the piece stands up to the weather.
Source (temporary): https://www.ana-white.com/woodworking-projects/refined-printer-cabinet