Reindeer Rocking Chair
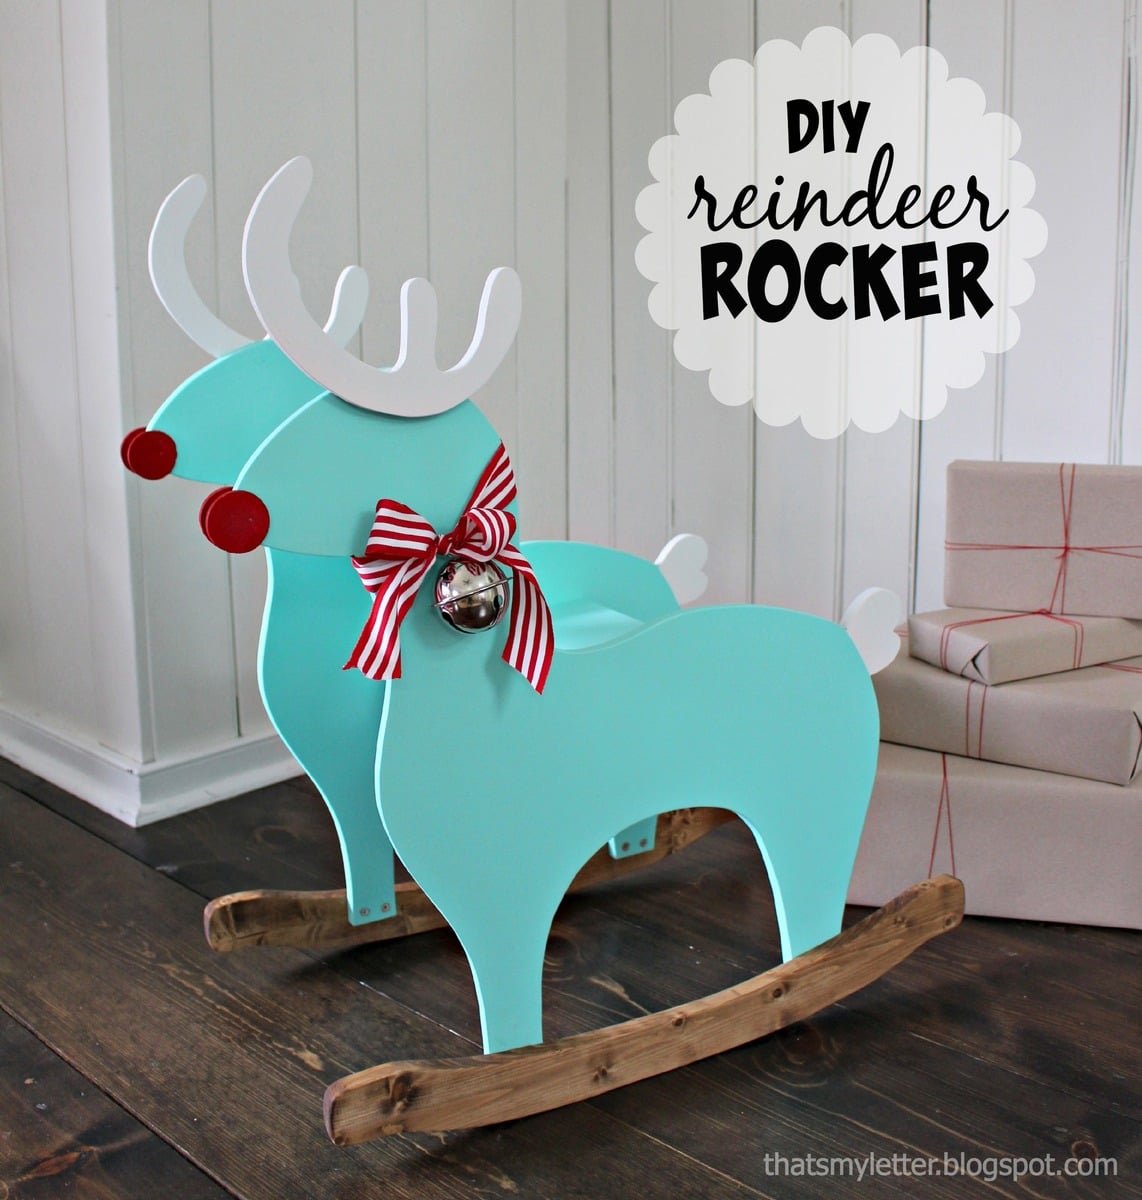
DIY Reindeer rocker chair with template and plans from
Specifications
| Project type | Toys |
|---|---|
| Room | Kids and Toys |
| Style | Children's and Kid's Room Furniture and Toy Plans |
| Difficulty | Advanced |
| Estimated cost | $20 - $50 |
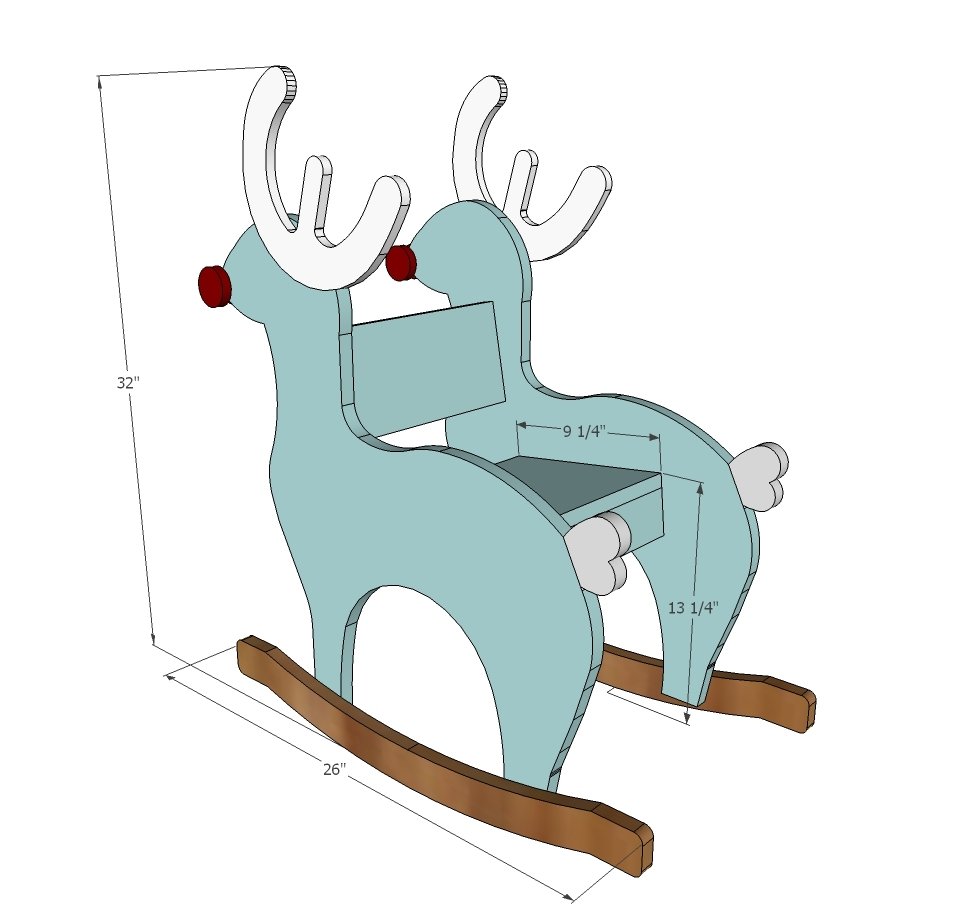
Dimensions
Use the size-specific shopping and cut lists below.
Shopping List
2 - 24" x 24" pieces of 1/2" thick MDF (or on 48" x 24" piece)
1x3 @ 12"
1x10 @ 12"
1x6 @ 12"
1x4 @ 53"
1-1/4" pocket hole screws or 2" wood screws
Cut List
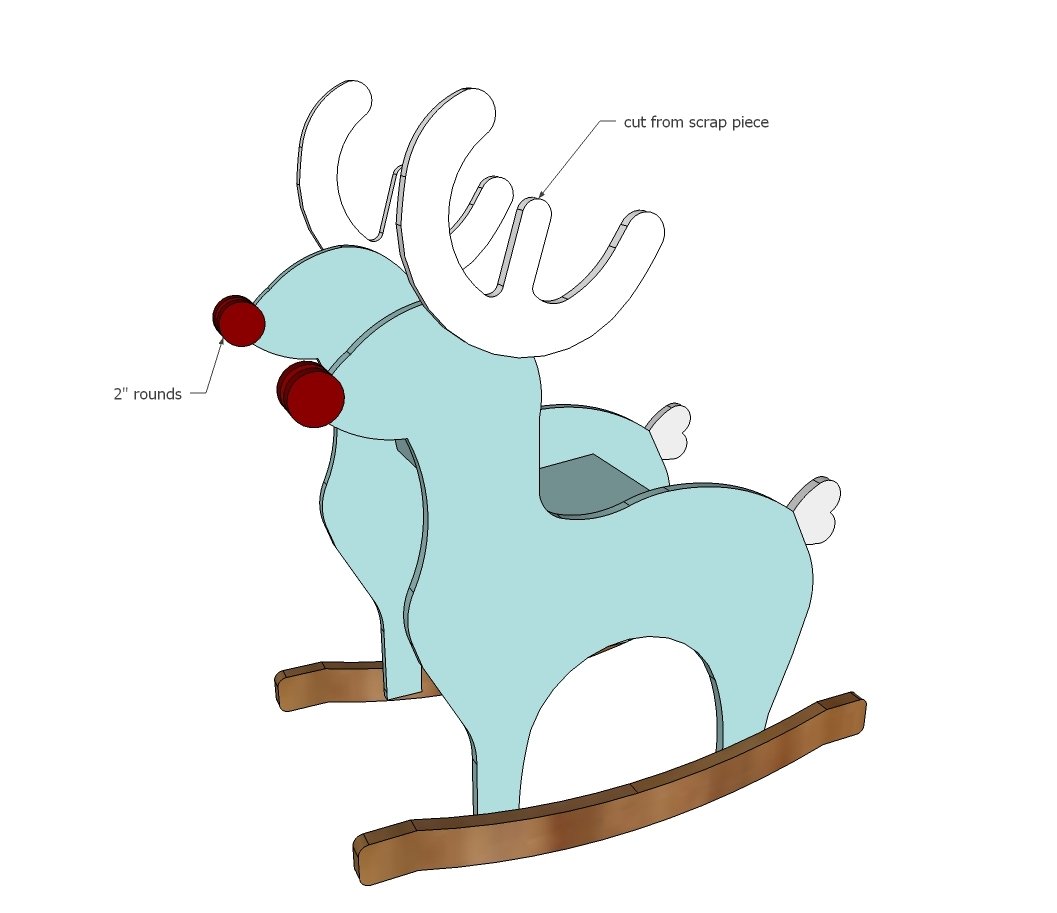
2 - 1/2" mdf @ 24" x 24" (reindeer cutouts & antlers)
1 - 1x3 @ 12" (seat apron)
1 - 1x10 @ 12" (seat)
1 - 1x6 @ 12" (seat back)
2 - 1x4 @ 26" (rockers)
Step-by-step Instructions
Step 1
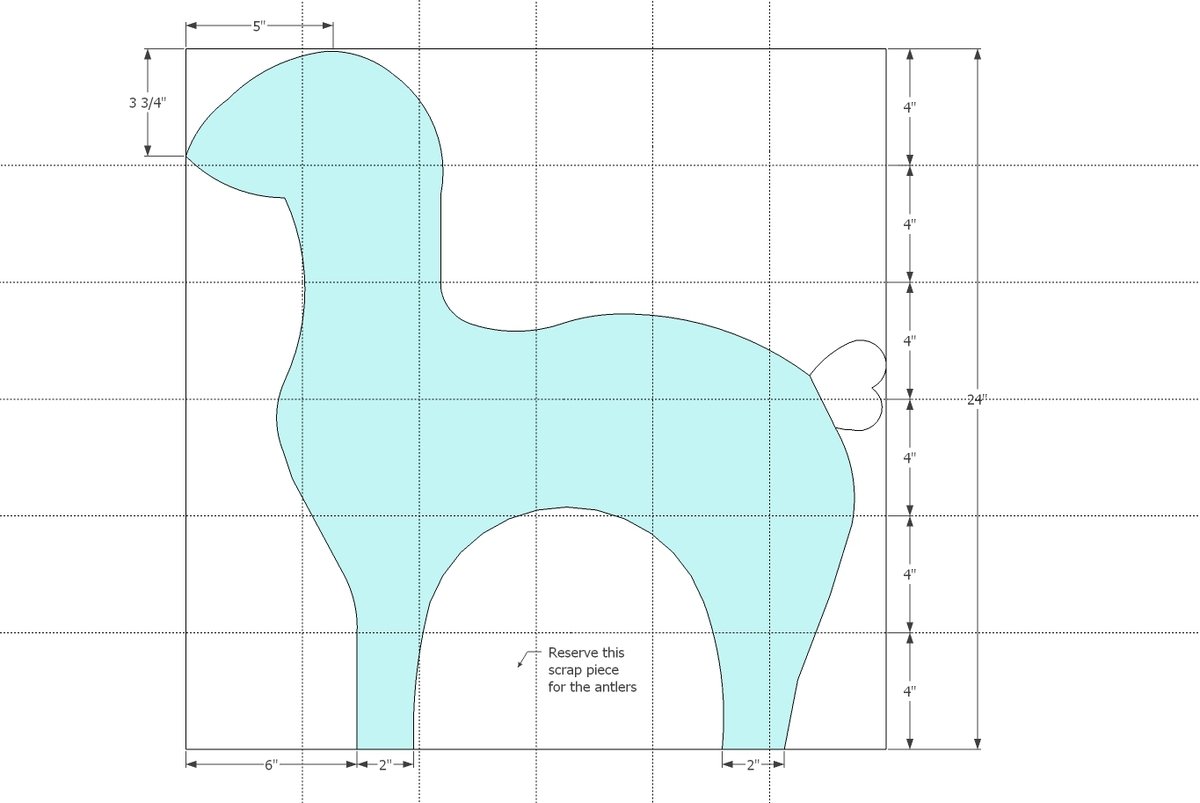
On one sheet of the 24" x 24" MDF, draw grid lines every 4". Transfer the template diagram above to the MDF using the grid lines as a reference. Carefuly cut out with a jigsaw. Reserve the piece between reindeers legs for the antlers. Trace pattern on to second piece of MDF and cut. A few tips when tracing and cutting the pattern - - Trace from the side that you marked the pattern on as a jigsaw blade can bevel when you cut, resulting in a difference from one side of the pattern to the other - Cut the traced line on the second side - Clamp both pieces together and sand cut edges
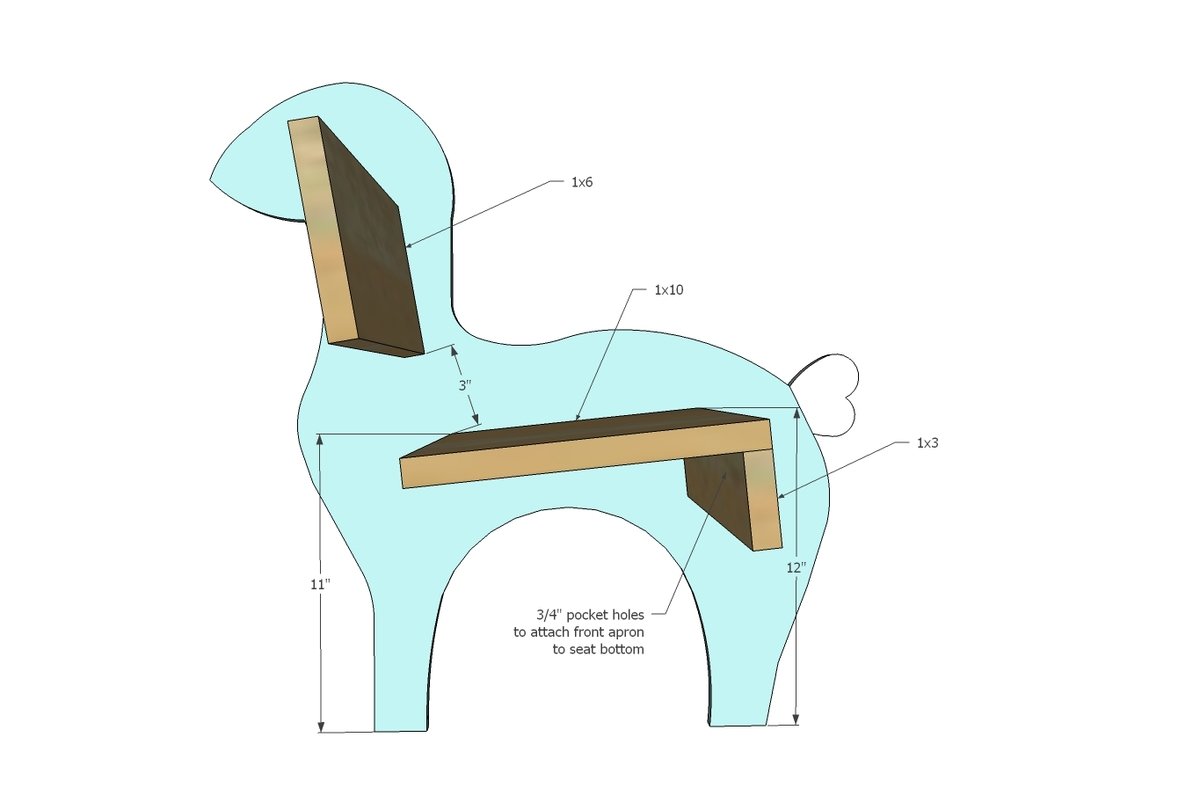
Jaime built with 3/4" pocket holes and 1-1/4" pocket hole screws.
If a Kreg Jig is on your Christmas list, you can also build with countersunk screws in the meantime, but you'll have to hide screw holes and it will be a little tricker to find the placement of the screws from the outside. What I would do is add 1x2 cleats under the seat and behind the backrest. You can also predrill holes through both patterns at the same time to make sure your screws line up. NOTE: Make sure you predrill all non-pocket hole screws through the MDF.
Step 3
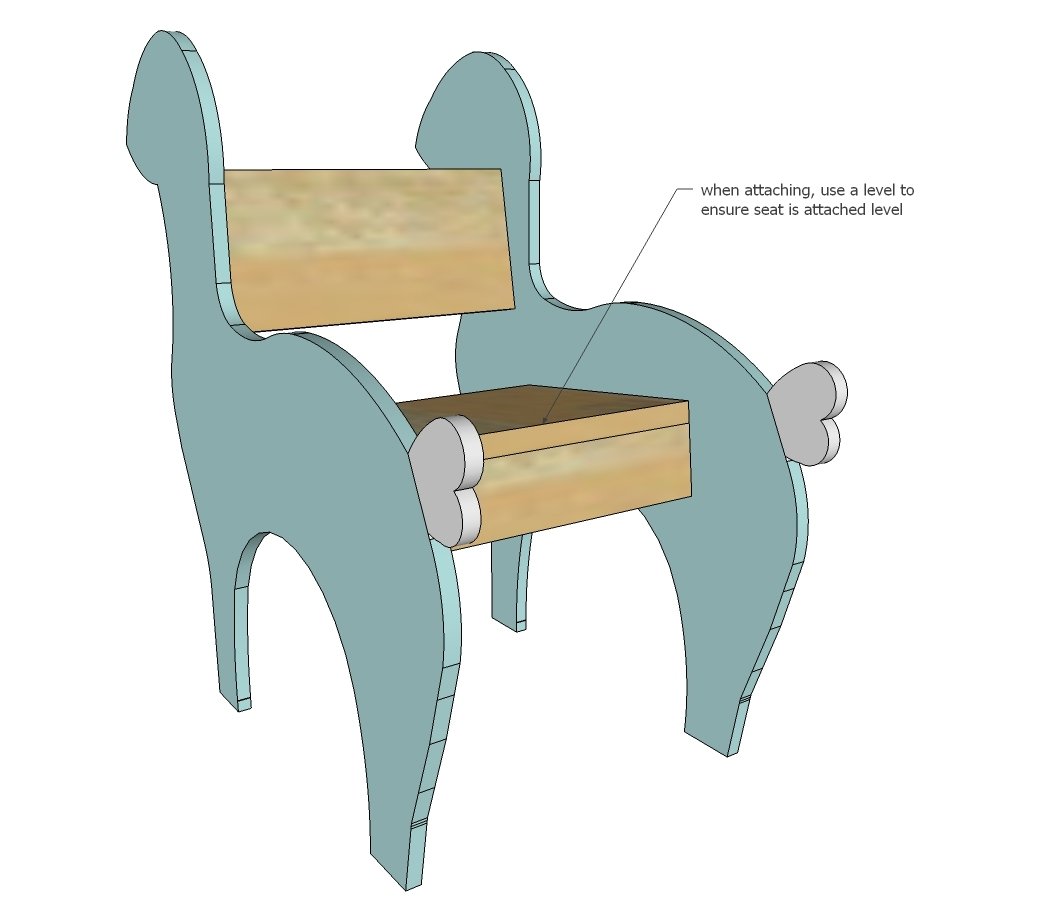
Make sure when you attach the second reindeer to the seat and back rest that they are attached exactly in line with the first and the seat is level.
Step 4
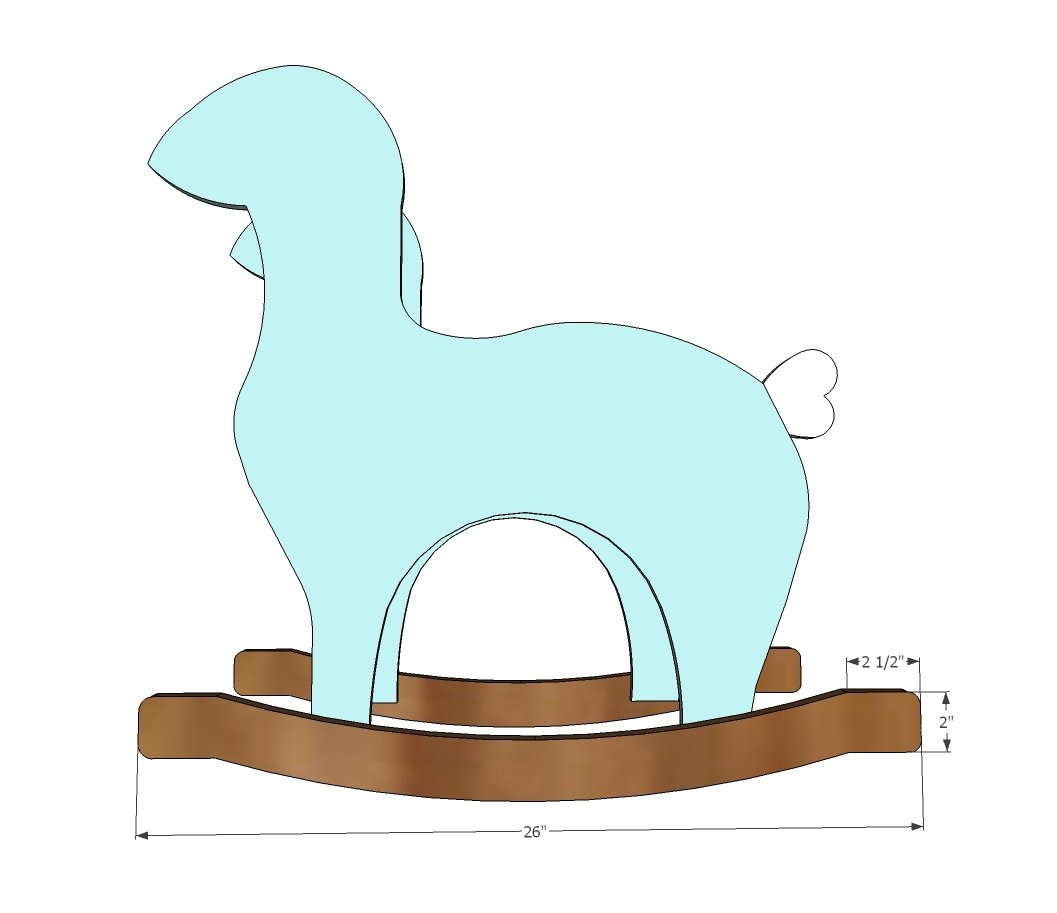
Cut the rockers from the 1x4s and sand until they match exactly. More details on cutting rockers can be found in this plan. Attach with 1" screws from inside of the reindeer's legs. NOTE: You may wish to clamp the rockers on first and test how the reindeer balances, and reposition until it balances just right.
Step 5
Finishing
Sand all surfaces, starting with a medium grit and finishing with fine. Wipe off the dust, fill any holes or gaps with wood filler, and sand smooth once dry. Apply primer if you're painting, then finish with your choice of paint or stain and seal with a durable clear topcoat. For outdoor projects, use exterior-rated primer, paint or stain, and sealer so the piece stands up to the weather.
Source (temporary): https://www.ana-white.com/woodworking-projects/reindeer-rocking-chair