Restaurant High Chair
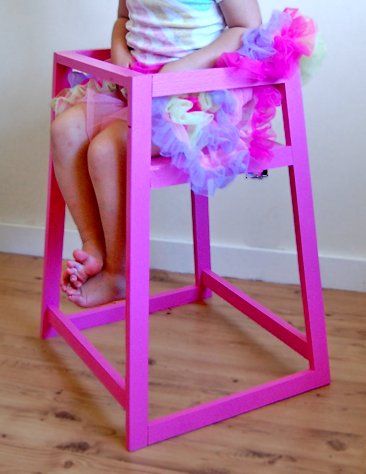
My four year old loves to sit in this chair, we had to remove the front and back supports so that she could fit into it. Cause she still want ot sit in it.
Specifications
| Project type | Chairs |
|---|---|
| Room | Kids and Toys |
| Style | Children's and Kid's Room Furniture and Toy Plans |
| Difficulty | Intermediate |
| Estimated cost | Under $20 |
Dimensions
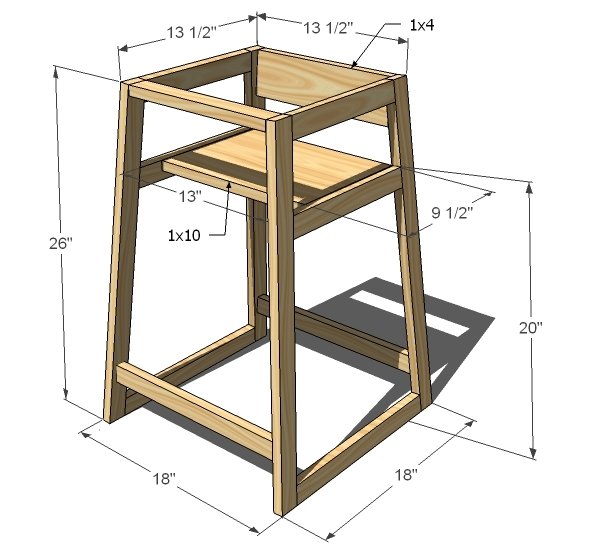
Use the size-specific shopping and cut lists below.
Shopping List
3 – 1×2 boards, 8′ long
1 – 1×4 board, 15″ long
1 – 1×10 board, 15″ long (you can substitute 3 – 1x4s joined instead if you don’t have a 1×10 laying around)
Cut List
4 – 1×2 @ 26 3/16″ (Legs, both ends cut at 5 degrees parallel to each other)
2 – 1×2 @ 15″ (long point to long point, ends cut at 5 degrees NOT parallel to each other, bottom sides)
2 – 1×2 @ 11 3/4″ (long point to long point, ends cut at 5 degrees NOT parallel to each other, middle sides)
2 – 1×2 @ 10 11/16″ (long point to long point, ends cut at 5 degrees NOT parallel to each other, top sides)
2 – 1×2 @ 16″ (long point to long point, ends cut at 5 degrees NOT parallel to each other, bottom supports)
1 – 1×4 @ 12 9/16″ (long point to long point, ends cut at 5 degrees NOT parallel to each other, seat back)
1 – 1×2 @ 12″ (short point to short point, ends beveled at 5 degrees NOT parallel to each other, front)
1 – 1×10 @ 13″ (short point to short point, ends beveled at 5 degrees NOT parallel to each other, seat)
Tools
- measuring tape
- square
- pencil
- hammer
- safety glasses
- hearing protection
- kreg-jig
- drill
- circular saw
- sander
Step-by-step Instructions
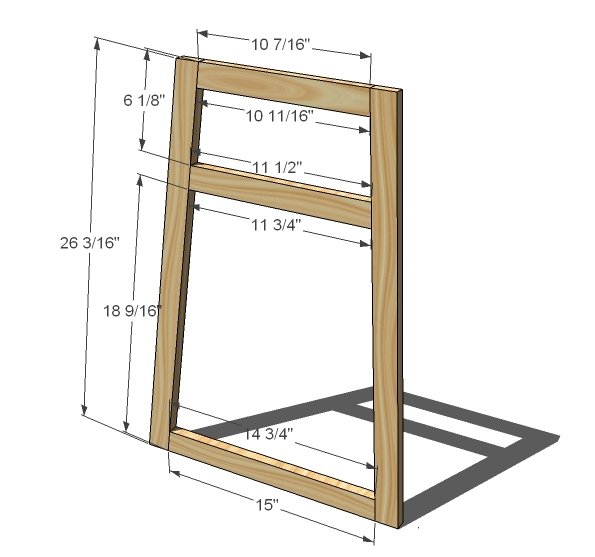
Sides
Build the sides as shown above. Drill pocket holes in all the horizontal boards ends, two per end. Mark the sides, clamp, and glue and screw together with 1 1/4″ pocket hole screws.
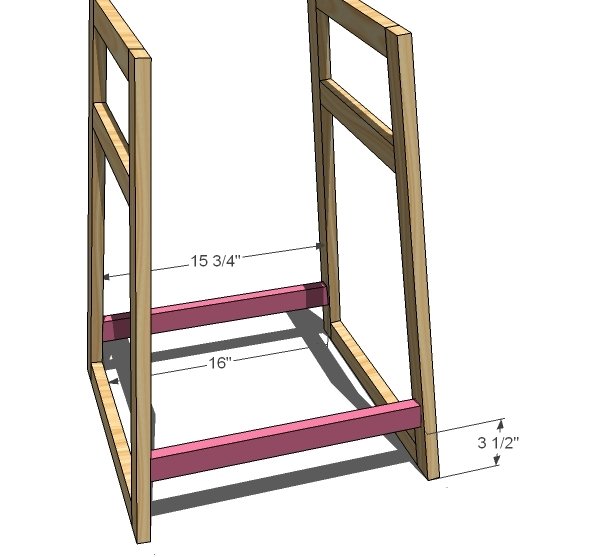
Bottom Supports
Now here is where things get a little tricky. Drill pocket holes on both ends of the bottom supports, two per end. Mark the sides 3 1/2″ up. Then glue, clamp and screw with 1 1/4″ pocket hole screws the bottom supports to the sides. Center the bottom supports on the width of the legs. A right angle clamp would be super handy here, but I don’t have one, and was just fine.
Seat Back
Drill pocket holes in the back of the seat. Attach with glue and 1 1/4″ pocket hole screws.
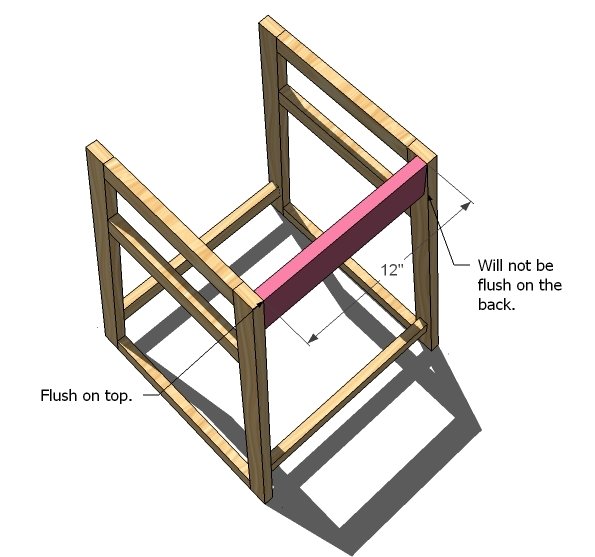
Front
Drill pocket holes on both ends of the front and attach to the tops of the legs with glue and 1 1/4″ pocket hole screws.
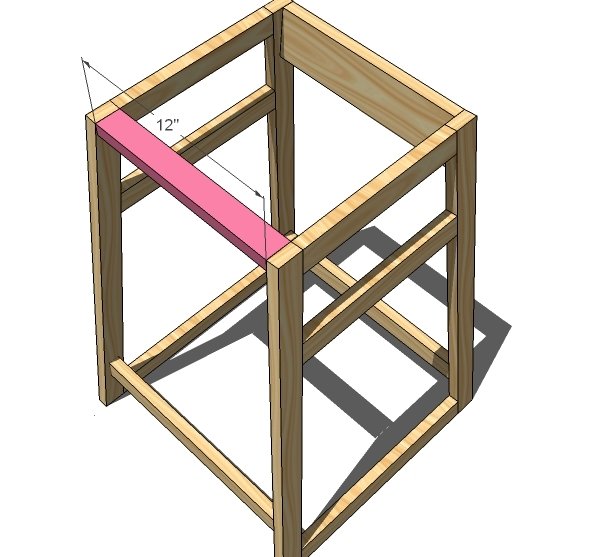
Step 5
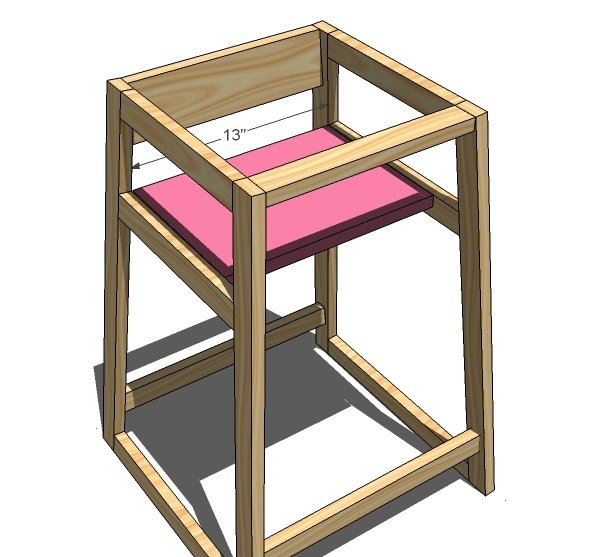
Finishing
I finished mine by filling pocket holes with wood filler. It took three applications of wood filler to completely fill the holes. Then a thorough sanding with 120 grit sandpaper. Then primer and paint, followed by a spray on top coat. Add a strudy strap to the center and a safety belt (tip – use a dog leash or a belt)
Finishing
Sand all surfaces, starting with a medium grit and finishing with fine. Wipe off the dust, fill any holes or gaps with wood filler, and sand smooth once dry. Apply primer if you're painting, then finish with your choice of paint or stain and seal with a durable clear topcoat. For outdoor projects, use exterior-rated primer, paint or stain, and sealer so the piece stands up to the weather.
Source (temporary): https://www.ana-white.com/woodworking-projects/restaurant-high-chair