Rhyan Console Table
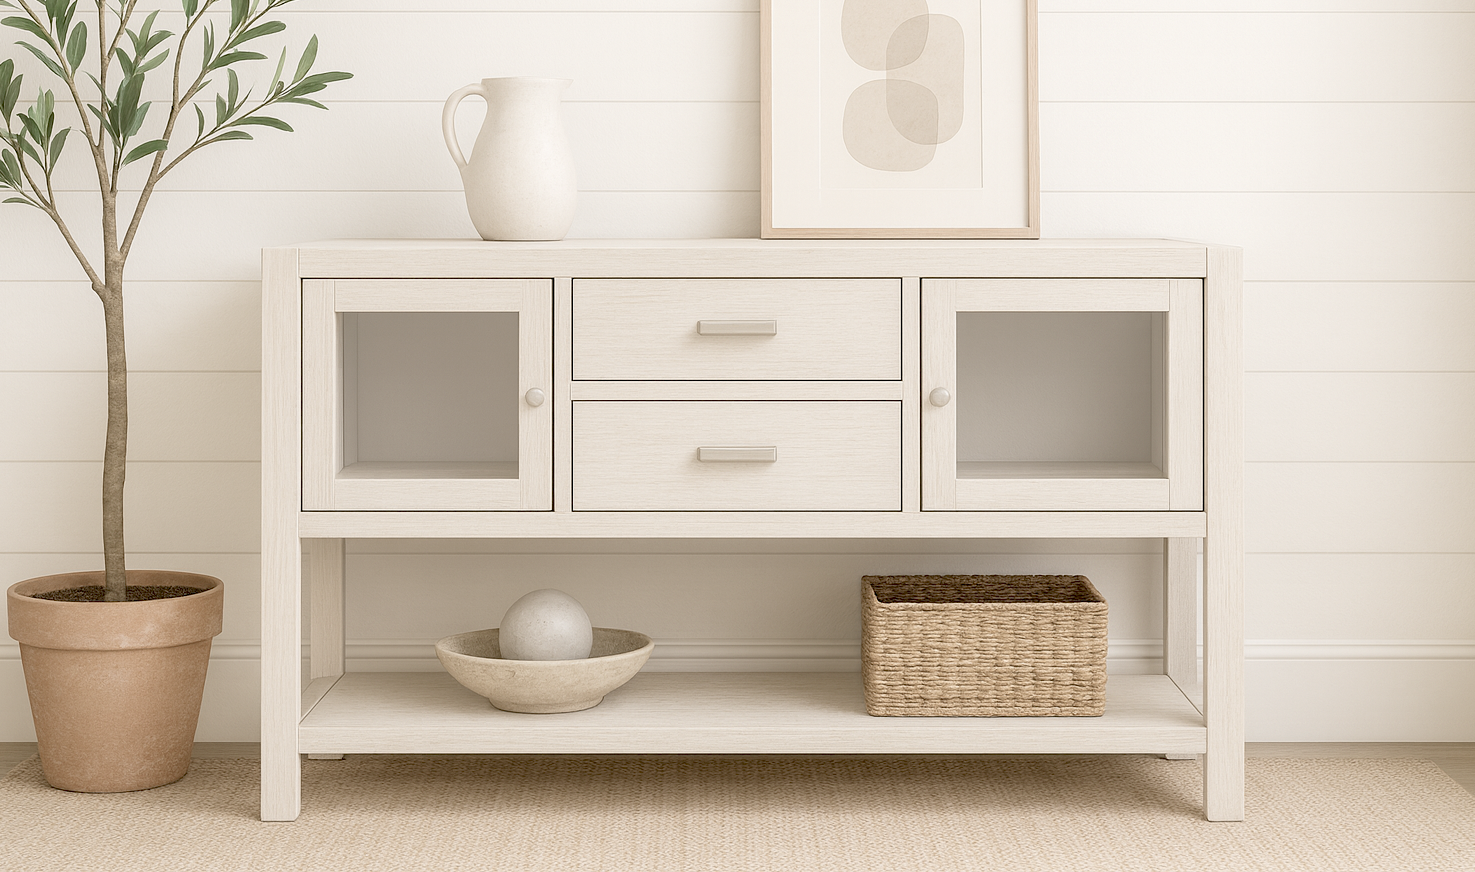
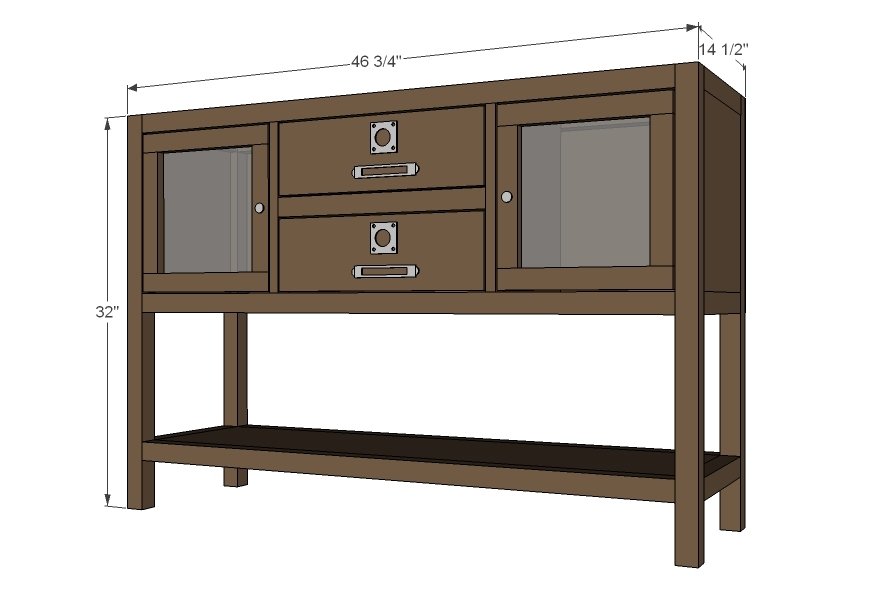
to build your own wood console table featuring drawers, doors, and a large open bottom shelf. This piece is solid wood, can be painted or stained any color, and includes for the matching coffee table and end table, so you can build the entire collection! design image is rendered from plans, features an added solid bottom shelf, actual results may vary
Specifications
| Project type | Console Table Plans |
|---|---|
| Room | Storage Solutions |
| Style | Modern Style Furniture Plans |
| Difficulty | Advanced |
| Estimated cost | $50 - $100 |
Dimensions
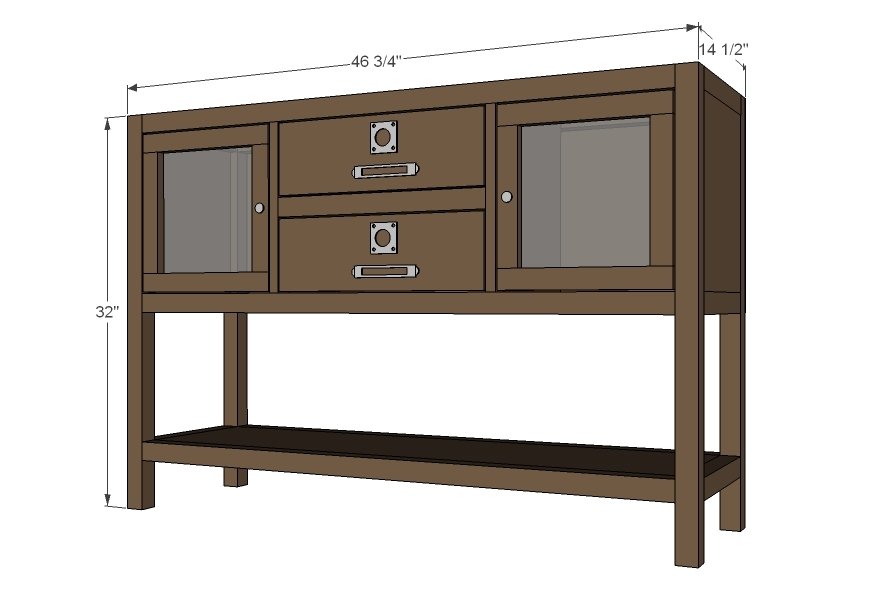
Use the size-specific shopping and cut lists below.
Shopping List
- 1 – 1x4 @ 10 feet long
- 1 – 1x6 @ 3 feet long
- 2 – 1x2 @ 8 feet long
- 1 – 1x12 @ 8 feet long
- 1 – 1x12 @ 10 feet long
- 5- 2x2 @ 8 feet long
- ¼ sheet of ¼” plywood or hardboard
- 2 sets 12” white drawer slides euro style bottom corner mount
- 2 sets narrow profile hinges and magnetic clasps OR Euro Style non mortise butt surface mount hinges
- Knobs and handles
- 2 – 12x12 sheets ¼” acrylic glass and mirror clips
Cut List
- 3 – 1x12 @ 43 ¾”
- 6 – 2x2 @ 11 ¼” (cut to width of 1x12s)
- 2 – 1x12 @ 13”
- 2 – 1x12 @ 13 ¾”
- 4 – 2x2 @ 32”
- 6 – 2x2 @ 43 ¾”
- 4 – 1x2 @ 13”
- 2 – 2x2 @ 17 ¼”
- 1 – ¼” plywood @ 16” x 46 ¾”
- Drawer and Door cut list in instructions
Tools
- measuring tape
- square
- pencil
- safety glasses
- hearing protection
- kreg-jig
- drill
- circular saw
- compound miter saw
Step-by-step Instructions
Step 1
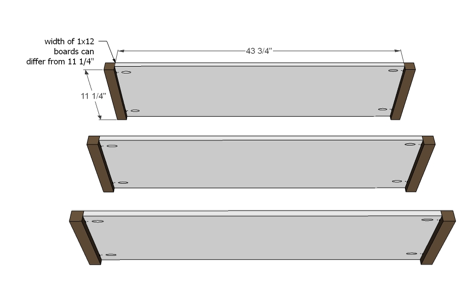
Drill ¾” pocket holes along all sides of the shelves (only ends are shown, but go ahead and drill front and back sides too). Attach with 1 ¼” pocket hole screws and glue the end trim, keeping top edges flush.
Step 2
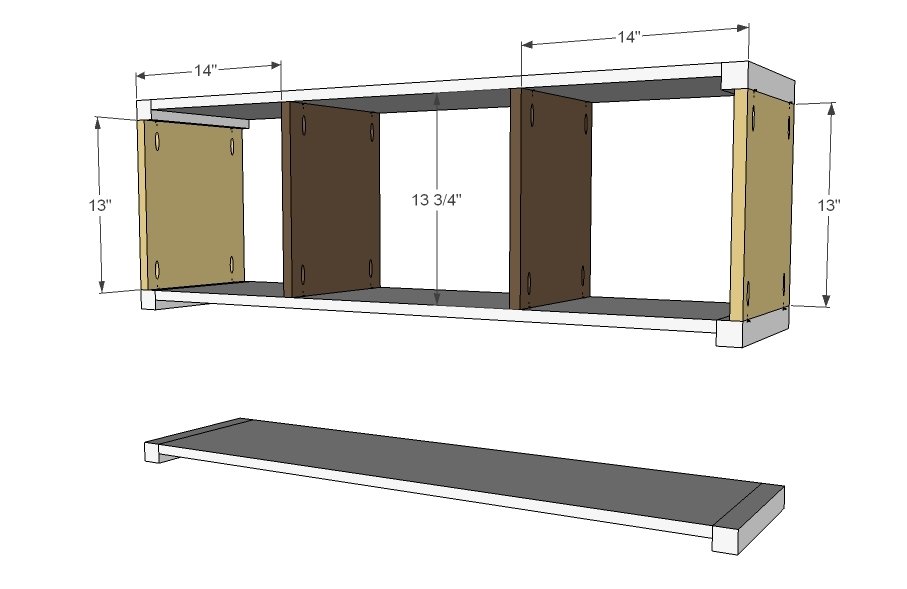
Put one shelf aside (shown at bottom of diagram). From remaining two shelves, attach dividers and sides as shown above, hiding pocket holes to insides. Use ¾” pocket holes and 1 ¼” pocket hole screws and glue. IMPORTANT: When pre-drilling the pocket holes in the dividers, go ahead and do some on the front and back, as well as the top and bottom. These will help when attaching the face frames.
Step 3
The face frames will use a mixture of 1 ½” and ¾” pocket holes. If you are using any ¾” stock, revert to the ¾” pocket hole and 1 ¼” pocket hole screws. For joints of 1 ½” stock to 1 ½” stock, use 1 ½” pocket holes and 2 ½” pocket hole screws. As you build the face frames, make sure the frame stays true to measurements and matches up with the storage boxes. Check to make sure door and drawer openings measure true to size. You will build two of these.
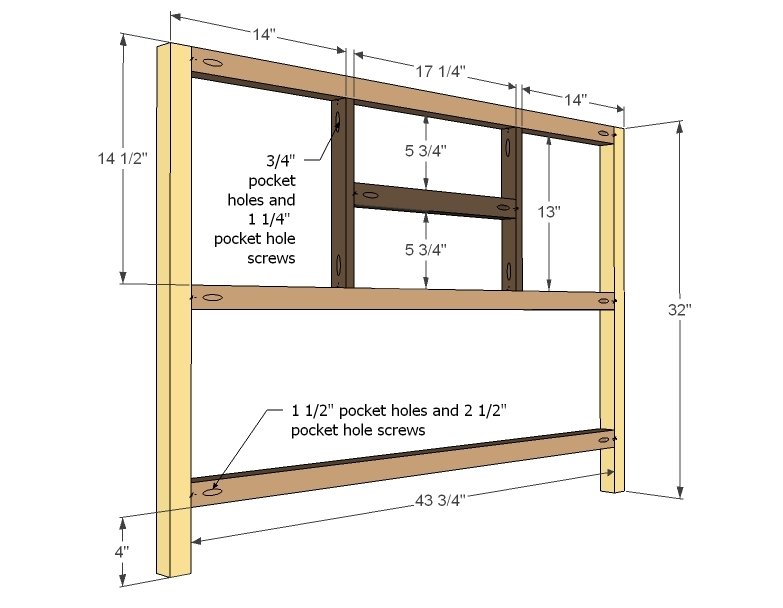
Step 4
Attach face frames to box and bottom shelf through predrilled holes using glue and ¾” pocket hole screws. Add additional fasteners where needed to secure face frame to shelves and storage box.
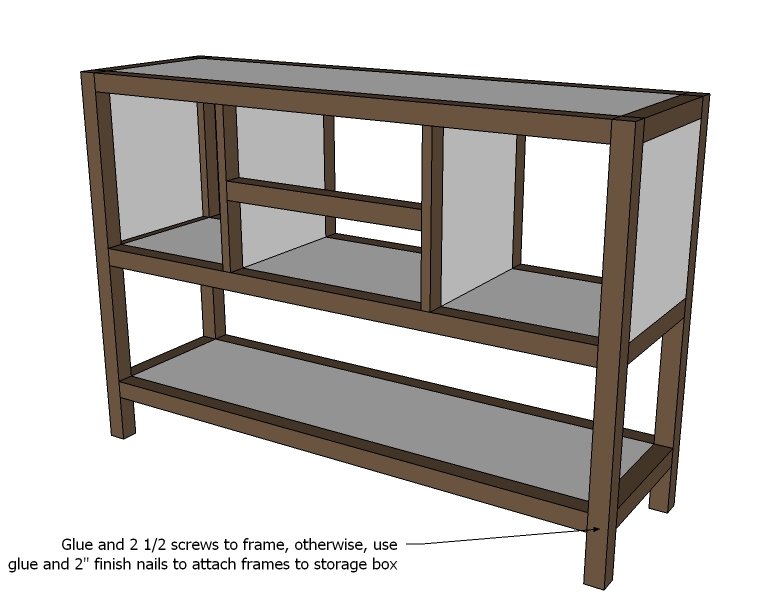
Step 5
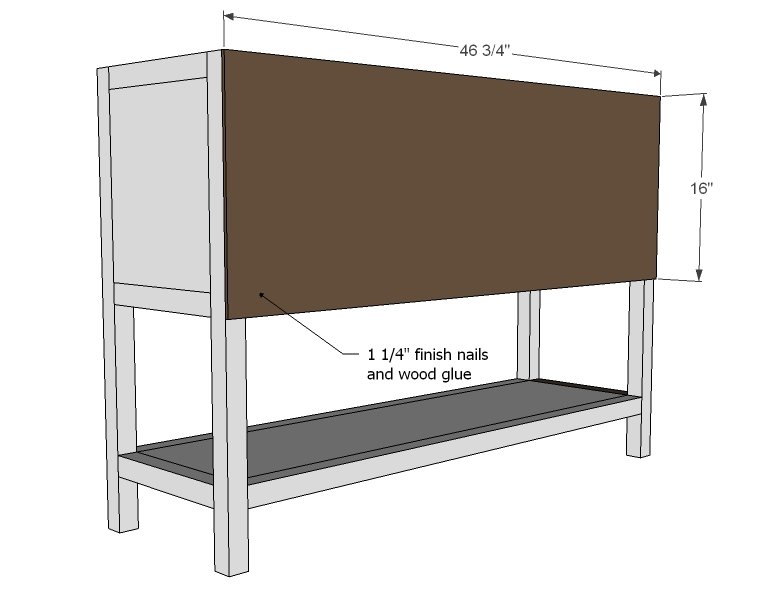
DRAWERS
4 – 1x4 @ 12 ¾” 4 – 1x4 @ 14 ¾” 2 – 1x6 @ 17” 1 - 1/4" ply @ 12 3/4" x 16 1/4" Build drawer boxes 1” less in width than the opening with 1x4s. Attach plywood to bottom. Attach drawer slides to sides of bottom and install drawer in cabinet. Drawer should sit inset when closed ¾” from outside of cabinet to give room for drawer face.
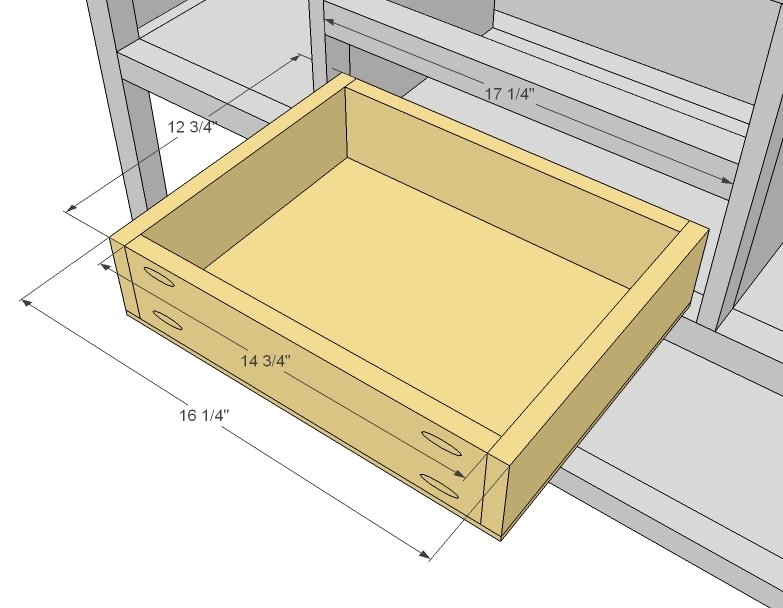
Step 7
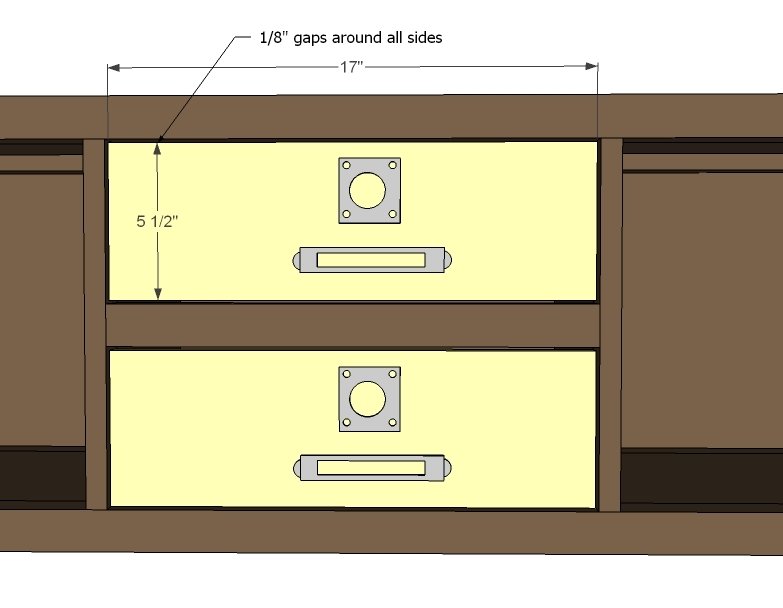
With drawer fully pushed in, align drawer faces up with drawers, with an even 1/8” gap on all sides. Nail on with 1 ¼” finish nails and glue. Remember to avoid areas you will add hardware to.
Step 8
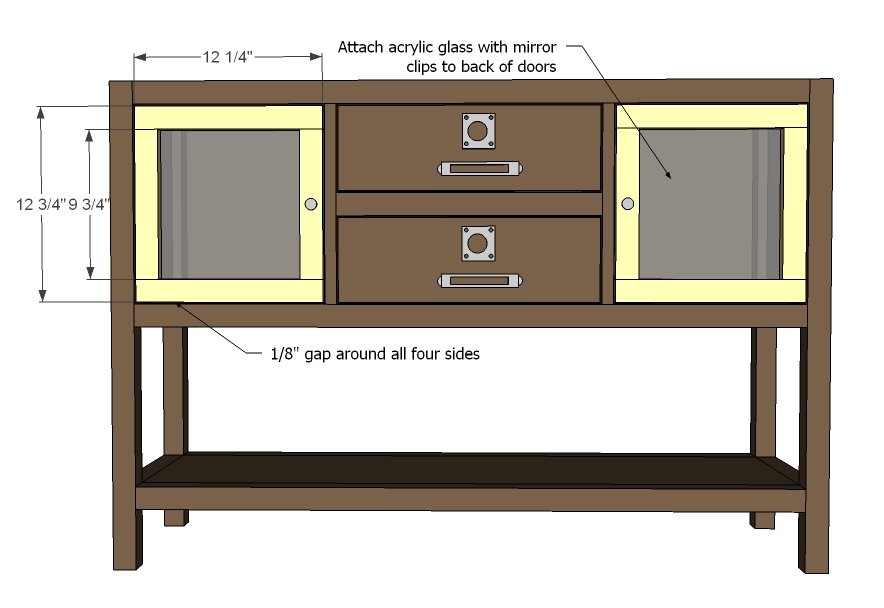
Next build doors from 1x2 stock. When satisfied with doors, test fit with hinges. Add acrylic glass to back using mirror clips. Install clasps to keep doors closed when shut.
Step 9
Finishing
Sand all surfaces, starting with a medium grit and finishing with fine. Wipe off the dust, fill any holes or gaps with wood filler, and sand smooth once dry. Apply primer if you're painting, then finish with your choice of paint or stain and seal with a durable clear topcoat. For outdoor projects, use exterior-rated primer, paint or stain, and sealer so the piece stands up to the weather.
Source (temporary): https://www.ana-white.com/woodworking-projects/rhyan-console-table-free-plans