Rhyan End Table
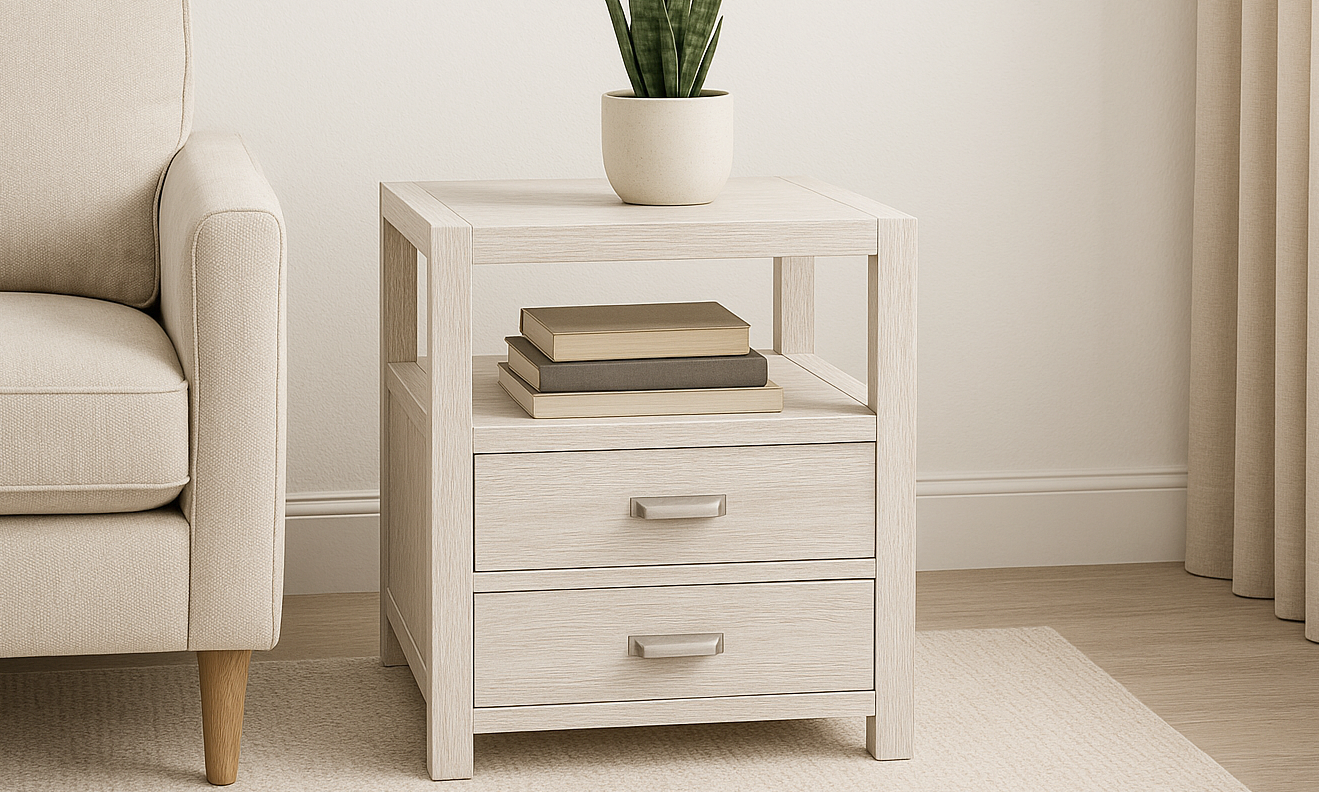
End tables featuring two drawers and a large open top shelf. Open base design. Square styling.
Specifications
| Project type | Side and End Table Plans |
|---|---|
| Room | living room |
| Style | Farmhouse Furniture |
| Difficulty | Advanced |
| Estimated cost | $50 - $100 |
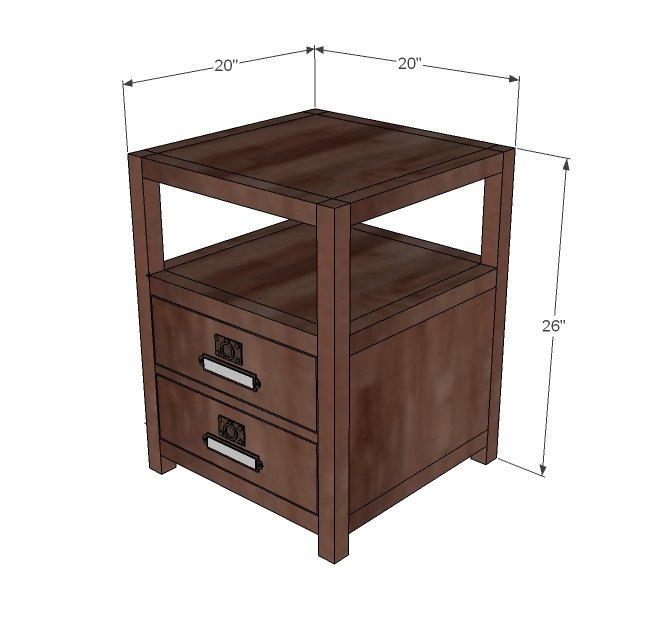
Dimensions
Use the size-specific shopping and cut lists below.
Shopping List
- 1/2 – sheet of 3/4″ hardwood plywood (or MDF for paint grade) measuring 48″ x 48″ or larger
- 4 – 2×2 @ 8 feet long
- 2 – 1×6 @ 8 feet long
- 1 – 1×2 @ 8 feet long
- Hardware
- 2 1/2″ screws,
- 1 1/4″ screws, or 2 5/8″ trim screws
- wood glue, wood filler and finishing supplies
- 2 sets of 16″ Euro Drawer Slides
Cut List
- 2 – 3/4″ plywood or MDF @ 17″ x 17″ (Shelf and Top)
- 3 – 3/4″ plywood or MDF @ 17″ x 12 1/4″ (Sides)
- 2 – 3/4″ plywood or MDF @ 17″ x 14 1/2″ (Drawer Bottoms – note different than dimensions shown in plan)
- 4 – 2×2 @ 26″ (Legs)
- 12 – 2×2 @ 17″
- 5 – 1×2 @ 17″ (Drawer Slide Spacers and Drawer Trim)
- 4 – 1×6 @ 17″ (Drawer Sides)
- 2 – 1×6 @ 16″ (Drawer Backs – note different than shown in plans)
- 2 – 1×6 @ 16 3/4″ (Drawer Fronts)
Tools
- measuring tape
- square
- pencil
- safety glasses
- hearing protection
- kreg-jig
- drill
- circular saw
- sander
- level
- countersink drill bit
Step-by-step Instructions
Step 1
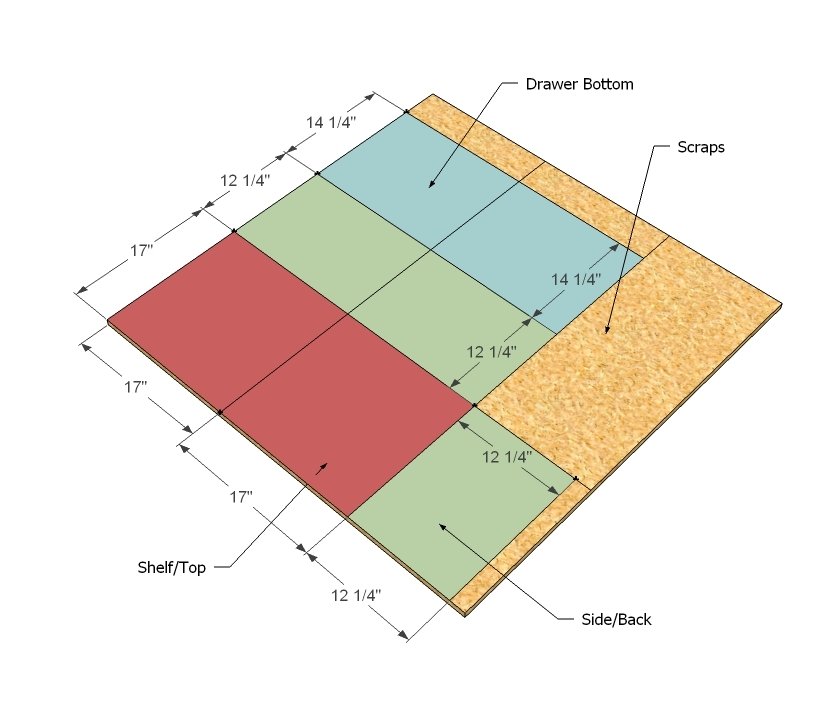
Cut Plywood I was just at The Home Depot the other day, and spotted these gorgeous 4×4 posts (been lusting after Crate and Barrel’s Big Sur Table for the longest time). An associate gladly cut the 4×4 to size for me, and the cuts were just perfect and only took a minute. So if your local store has a good staff, perhaps bring this cutting diagram in. Always remember that the saw blade takes up approximately 1/4″ and you cannot just mark out all the cuts and go – your pieces will not be accurately cut. My advice is to cut two strips that are 17″ wide, and then cut the strips into the 17″, 12 1/4″ and 14 1/4″ pieces. And then from the scrap cut your final back piece.
Step 2
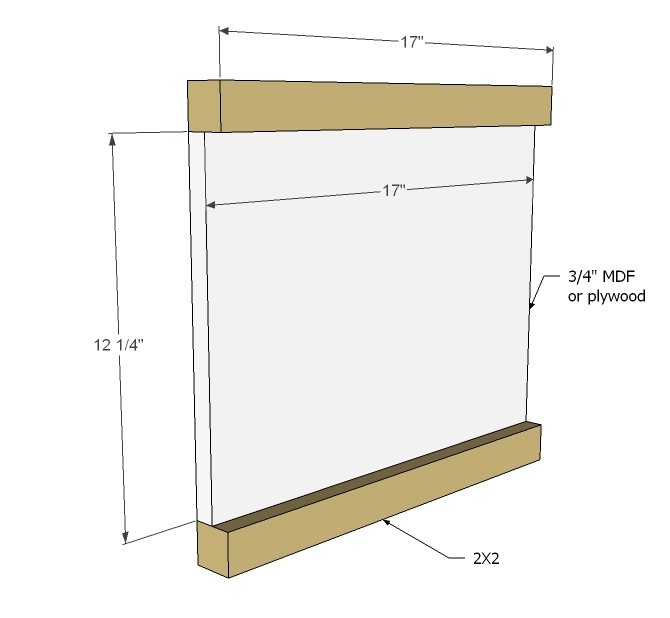
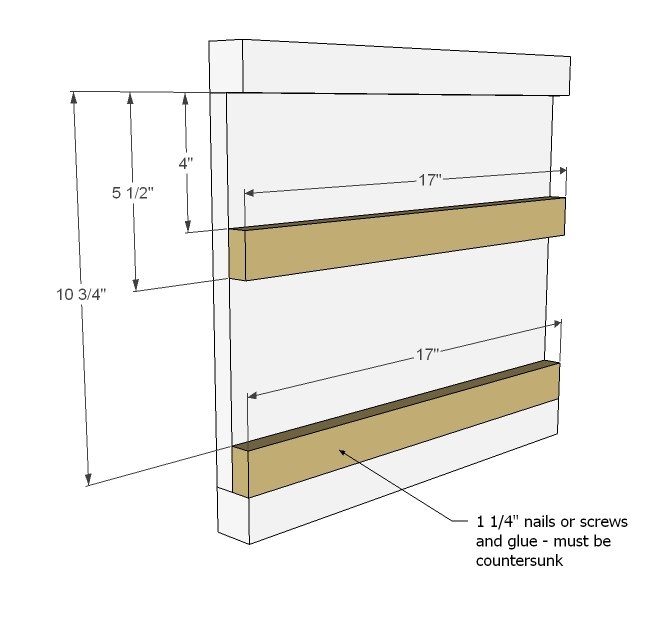
Sides Start building the sides by attaching 2x2s to the top and bottom. You will need to build 2 of these – well, actually, go ahead and build three of these.
Step 3
Side Drawer Slides Okay, now only build two of these from the three that you build in step 2. Make sure that there are no screws sticking out here these are the drawer slide spacers.
Step 4
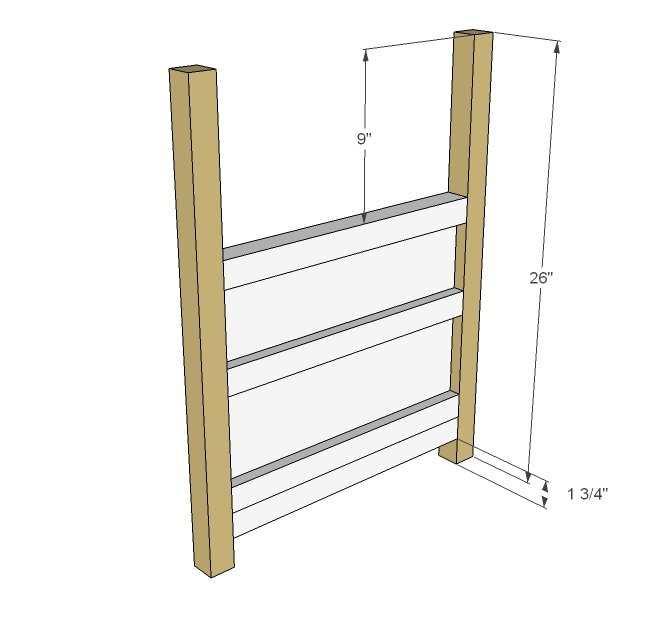
Legs From the two pieces with the drawer slides, add legs as shown above.
Step 5
Step 6
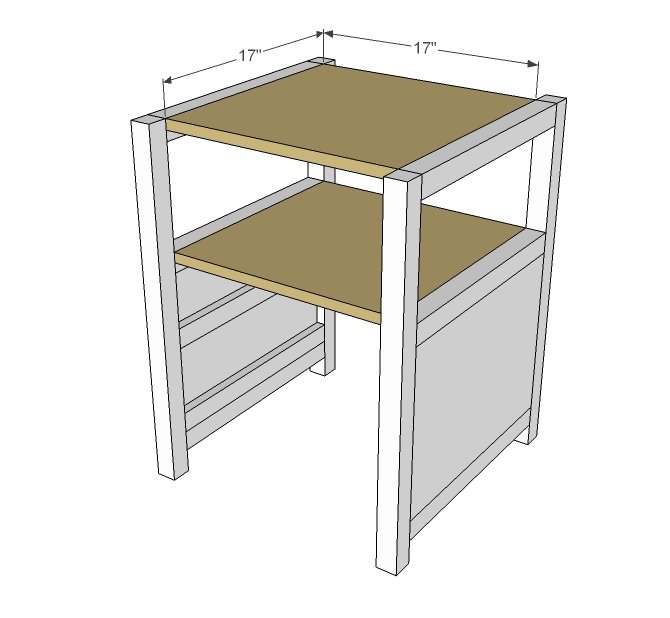
Shelf/Top Add the top and shelf as shown above.
Step 7
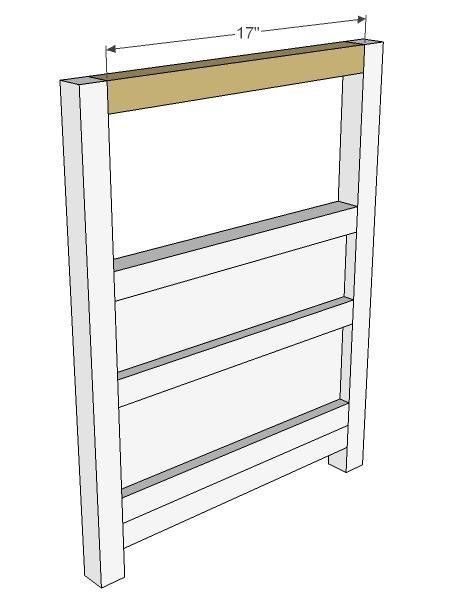
Back and Shelf Trim Okay, here’s where you add that third piece you built in step 2 – to the back. Also trim out the shelves and the bottom with 2x2s as shown above.
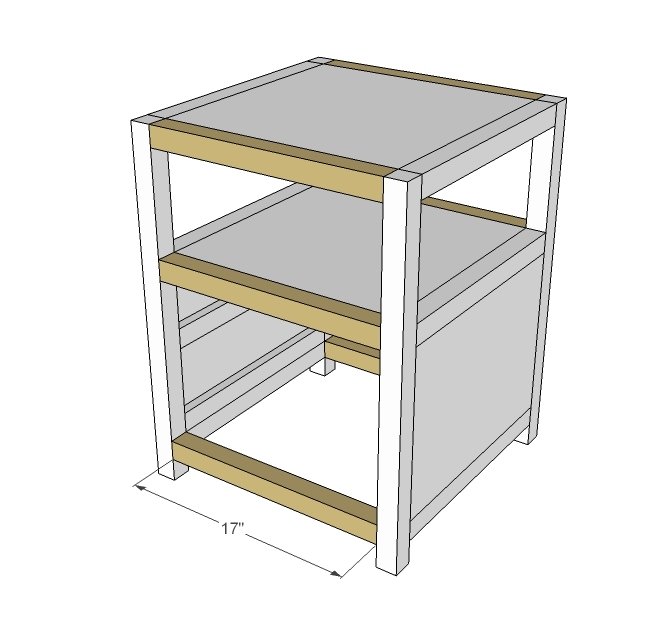
Step 8
Drawer Trim A little piece of trim for between the drawers...
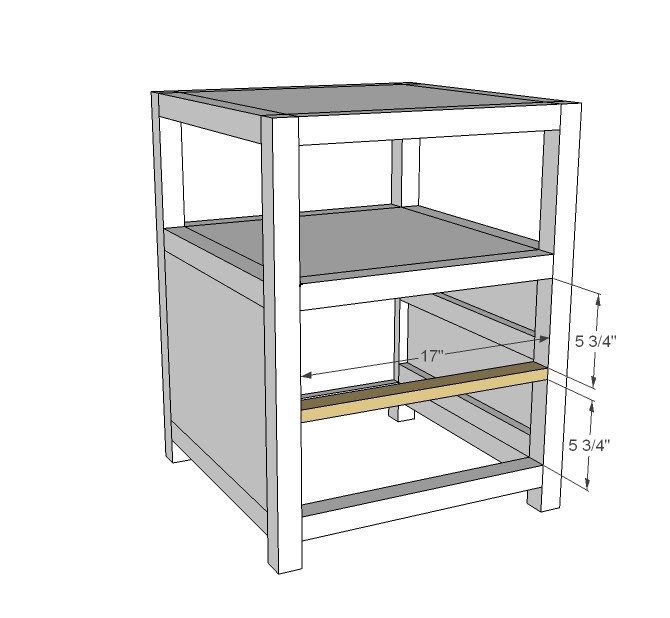
Step 9
Drawers You will need to build two drawers. It’s basically 1x6s surrounding the bottom plywood. You should always build your drawers to fit the opening in the end table, not to shown dimensions. Check the clearance on your drawer slides (normally 1/2") and adjust the door measurements to fit your endtable.
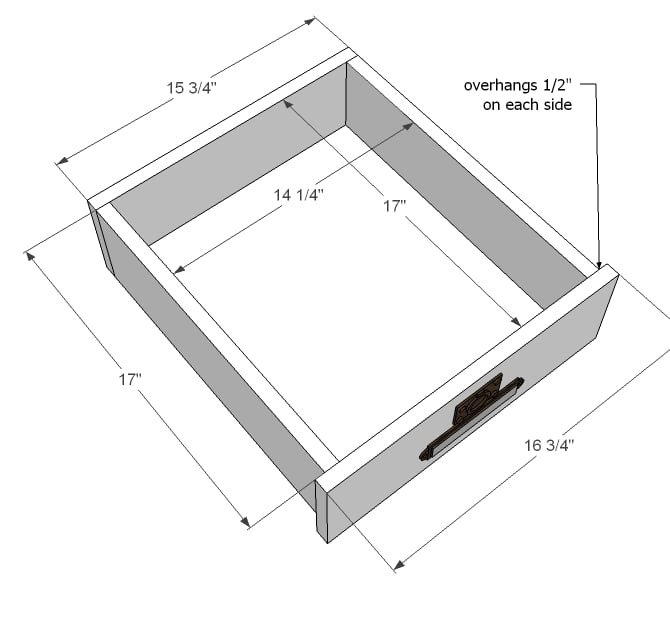
Step 10
Drawer Slides The blue boards in the diagram above are for attaching the drawer slides to the drawers. This drawer is designed for a standard slide requiring 1/2″ clearance on each side of the drawer. Adjust so that there is an even fit around the drawers and the drawers slide smoot
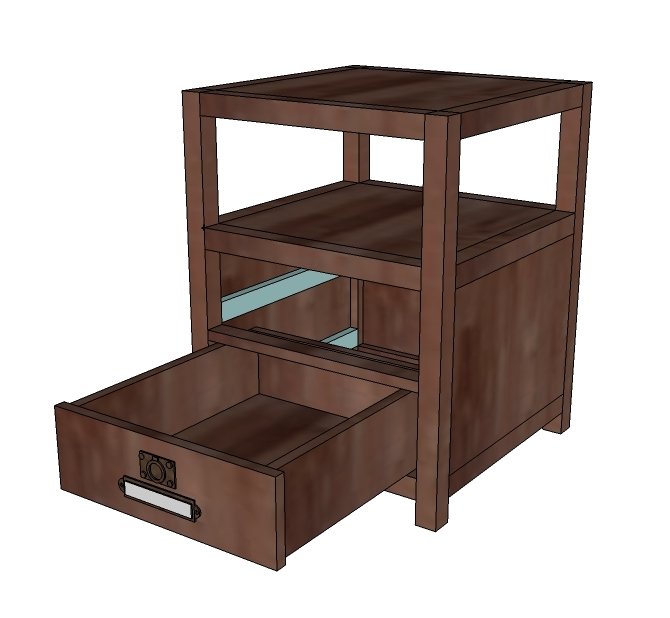
Finishing
Sand all surfaces, starting with a medium grit and finishing with fine. Wipe off the dust, fill any holes or gaps with wood filler, and sand smooth once dry. Apply primer if you're painting, then finish with your choice of paint or stain and seal with a durable clear topcoat. For outdoor projects, use exterior-rated primer, paint or stain, and sealer so the piece stands up to the weather.
Source (temporary): https://www.ana-white.com/woodworking-projects/rhyan-end-table