Rocket Bookcase
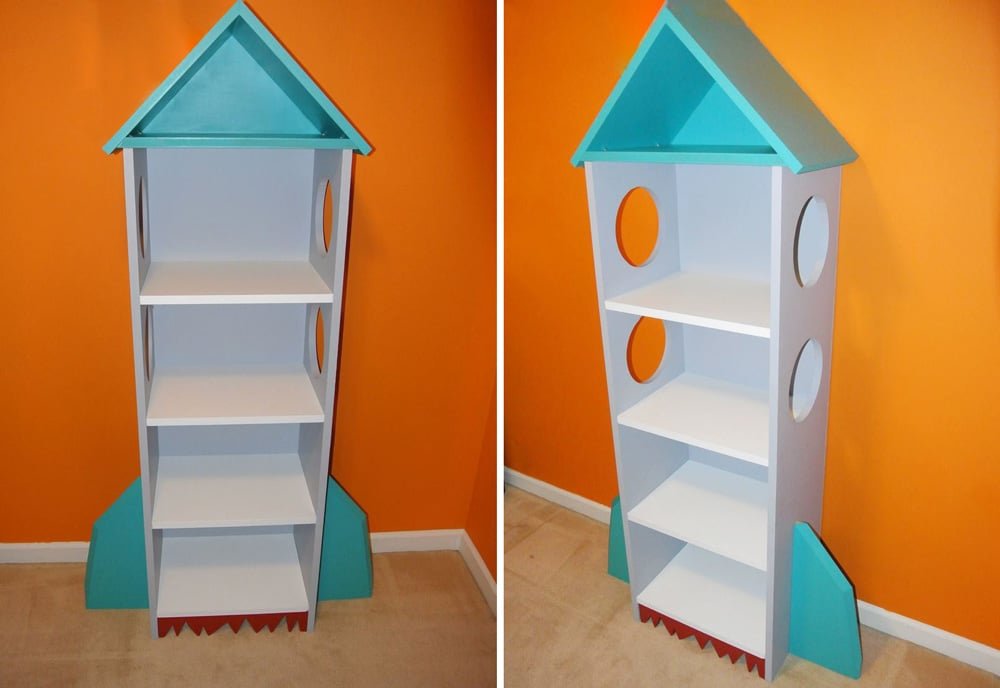
Blast off with this rocket bookcase! An easy project that any mom (or dad) can make to be an out of this world hit for their little ones. Features four roomy shelves and a top display shelf, optional rocket flares and mods for space port holes. from
Specifications
| Project type | Other Projects |
|---|---|
| Room | Kids and Toys |
| Style | Children's and Kid's Room Furniture and Toy Plans |
| Difficulty | Intermediate |
| Estimated cost | $20 - $50 |
Dimensions
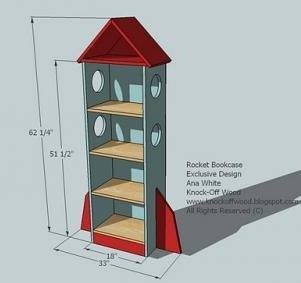
Use the size-specific shopping and cut lists below.
Shopping List
3 - 1x12 @ 8 feet long
1 - 1x8 @ 4 feet long
1 - 1x4 @ 17" Long
1/4" plywood, full sheet
Cut List
- 2 – 1×12 @ 51 1/2″ (Sides)
- 4 – 1×12 @ 16 1/2″ (Shelves)
- 2 – 1×8 @ 18″ (Rocket Fins)
- 1 – 1×4 @ 16 1/2″ (Footer)
- 1 – 1×12 @ 19 1/2″ long point to long point, both ends beveled at a 45 degree bevel, ends NOT parallel - SEE STEP 5
- 2 – 1×12 @ 15″ long point to point measurement, ONE end cut at 45 degree bevel - SEE STEP 5
- 1/4″ Plywood Cut 18″ wide x 61 1/4″ Tall
Tools
- measuring tape
- square
- pencil
- safety glasses
- hearing protection
- drill
- jigsaw
- nailer
- sander
Step-by-step Instructions
Step 1
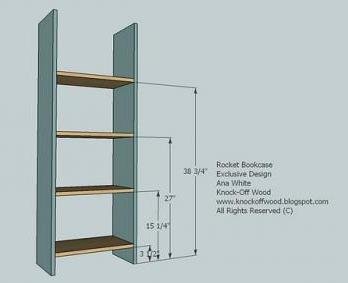
Attach the shelves the sides. You can use 1-1/4" brad nails and glue, or 2" self tapping screws or 3/4" pocket holes with 1-1/4" pocket hole screws.
Step 2
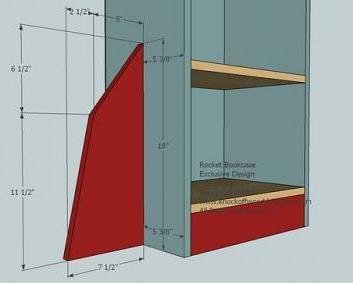
Cut the rocket fins out of the 1×8 as shown above. Fasten from the inside of the bookcase with 1-1/4" brand nails and glue. Alternatively pocket holes can be used from the back side of the "fin" into the outside side of the shelf. Make sure the bottoms are flush.
Step 3
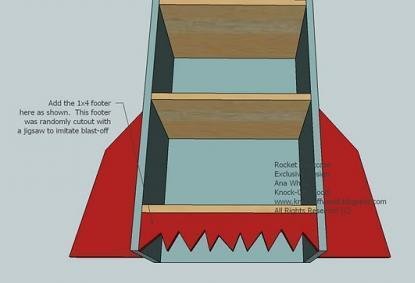
Fasten the footer with nails and glue. The footer above is shown cut out to represent flames from the blast-off. If you are going to cut out your footer, pay attention to the length of your nails and where you place the nails so the nails do not show when you cut out the footer.
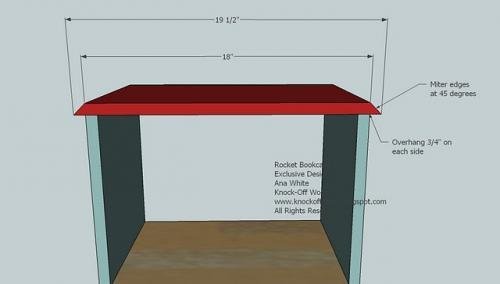
Set miter saw to 45 degree bevel.
Cut top shelf piece, long point to long point measurement is 19-1/2". Fasten the top piece as shown above, leaving a 3/4″ overhang on the ends. Keep front and back edges flush.
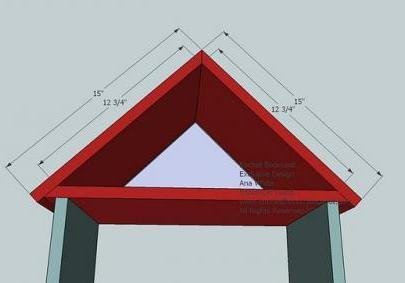
Step 5
Cut "roof" pieces, the long point to long point measurement is 15" - only the top cut is a 45 degree bevel. The tail cut is square. Make sure all the pieces fit. Then attach roof pieces with 1-1/4" brad nails and glue.
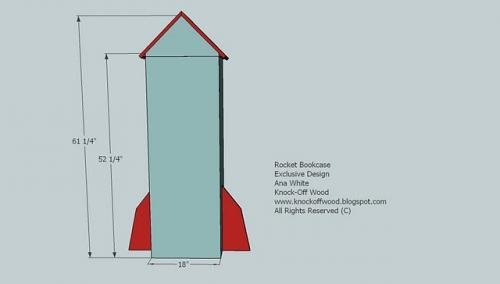
Place the rocket bookshelf on the 1/4" plywood.
Trace the outside with a pencil. Remove and cut out along pencil line. Attach to the back of the rocket bookshelf with 3/4" brad nails and glue into all available boards.
Finishing
Sand all surfaces, starting with a medium grit and finishing with fine. Wipe off the dust, fill any holes or gaps with wood filler, and sand smooth once dry. Apply primer if you're painting, then finish with your choice of paint or stain and seal with a durable clear topcoat. For outdoor projects, use exterior-rated primer, paint or stain, and sealer so the piece stands up to the weather.
Source (temporary): https://www.ana-white.com/woodworking-projects/rocket-bookcase