Rocking Moses Basket Stand
For me, it came down to this: I didn't want to turn my kids into work. I didn't want to be in these special moments - hearing the baby's heartbeat for the first time, finding out the gender, experiencing first kicks, and ultimately, holding our baby for the first time - and also be holding a camera, thinking how can I turn this very special moment into content for my blog.
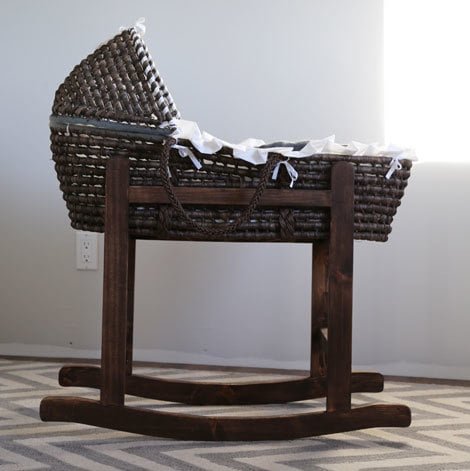
Specifications
| Project type | Other Projects |
|---|---|
| Room | Kids and Toys |
| Style | Children's and Kid's Room Furniture and Toy Plans |
| Difficulty | Advanced |
| Estimated cost | Under $20 |
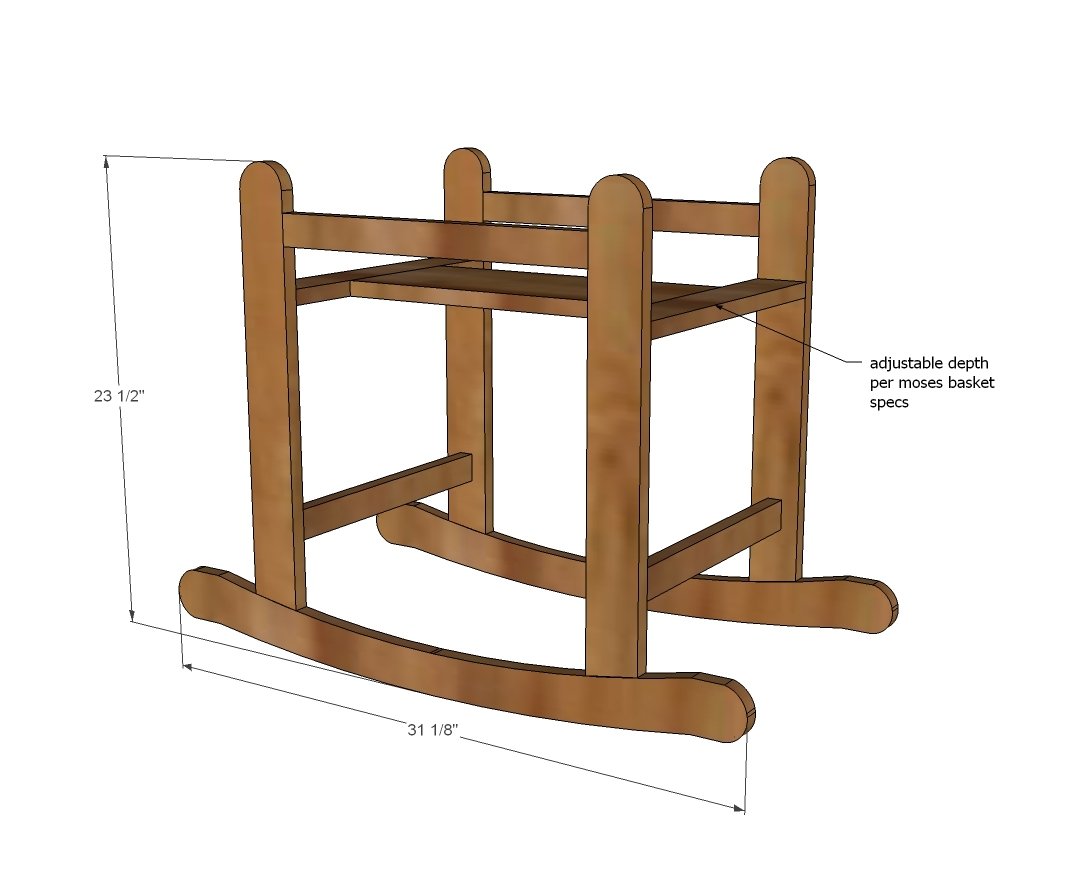
Dimensions
Use the size-specific shopping and cut lists below.
Shopping List
1 - 1x4 @ 8 feet long
1 - 1x2 @ 6 feet long
1 - 1x3 @ 10 feet long
1-1/4" pocket hole screws
Fresh wood cutting jigsaw blade
lots of sandpaper, grits from coarse to fine
wood glue
Cut List
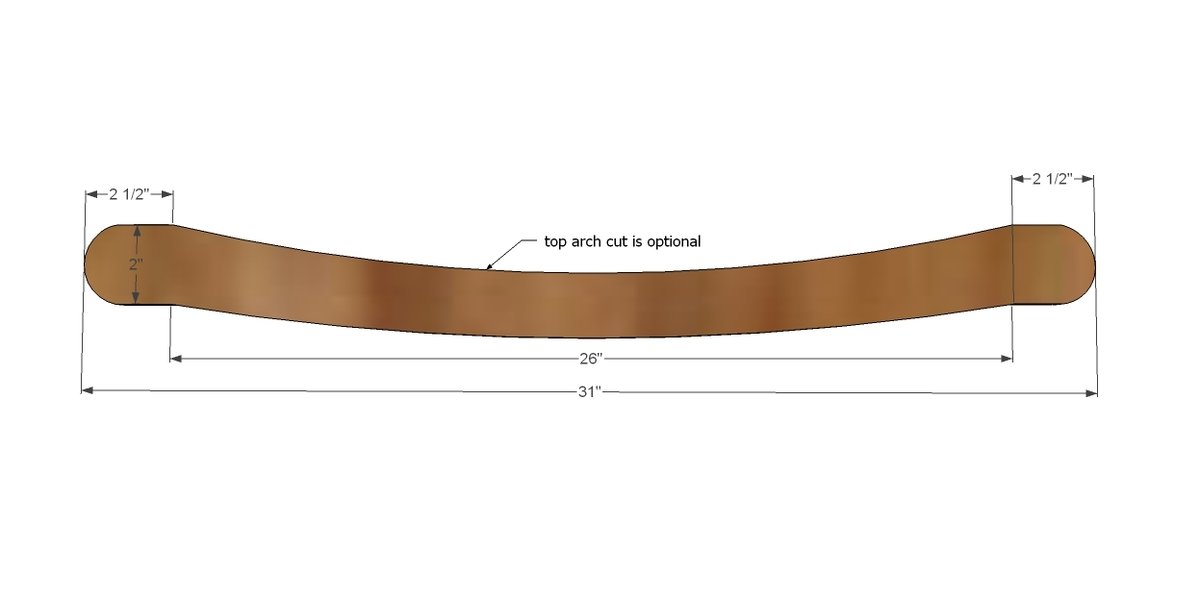
2 - 1x4 @ 31" (rockers)
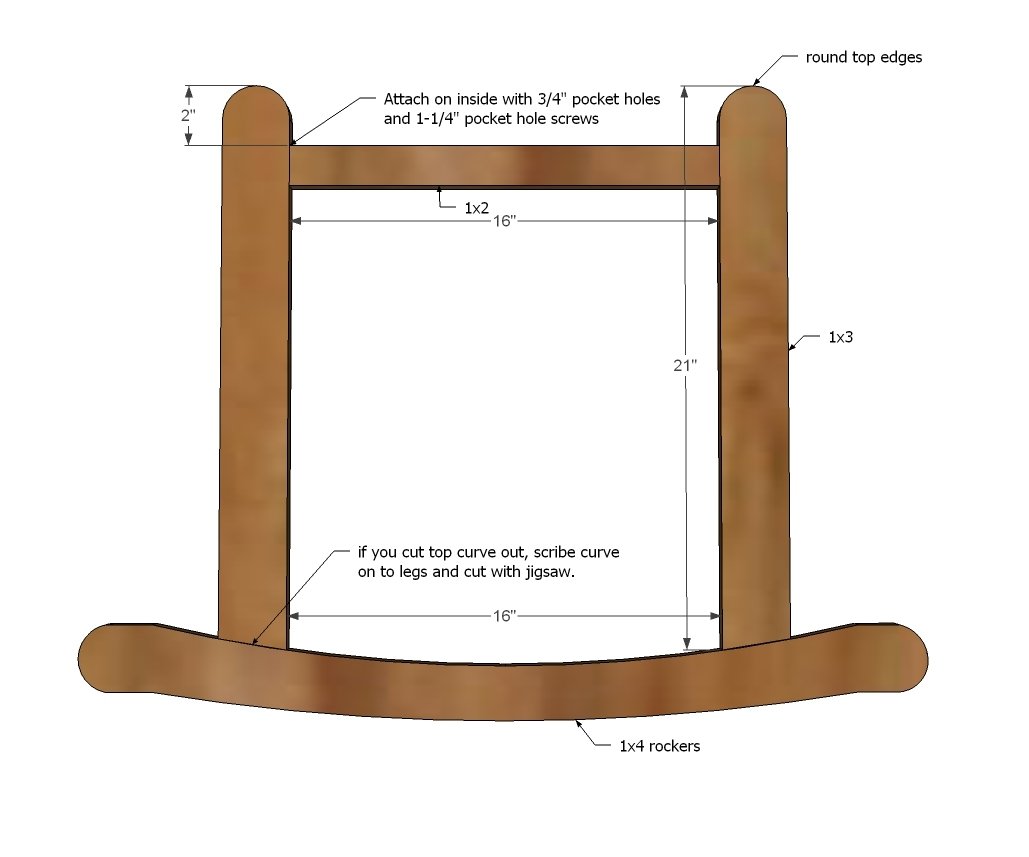
2 - 1x2 @ 16" (side top supports)
4 - 1x3 @ 21" (legs)
2 - 1x3 @ width of Moses Basket
2 - 1x2 @ width of Moses Basket
1 - 1x6 or 1x8 @ 16" (support) - you could also use 2 - 1x4s here to conserve wood
Tools
- measuring tape
- square
- pencil
- safety glasses
- hearing protection
- kreg-jig
- drill
- jigsaw
- compound miter saw
- sander
Step-by-step Instructions
Step 1
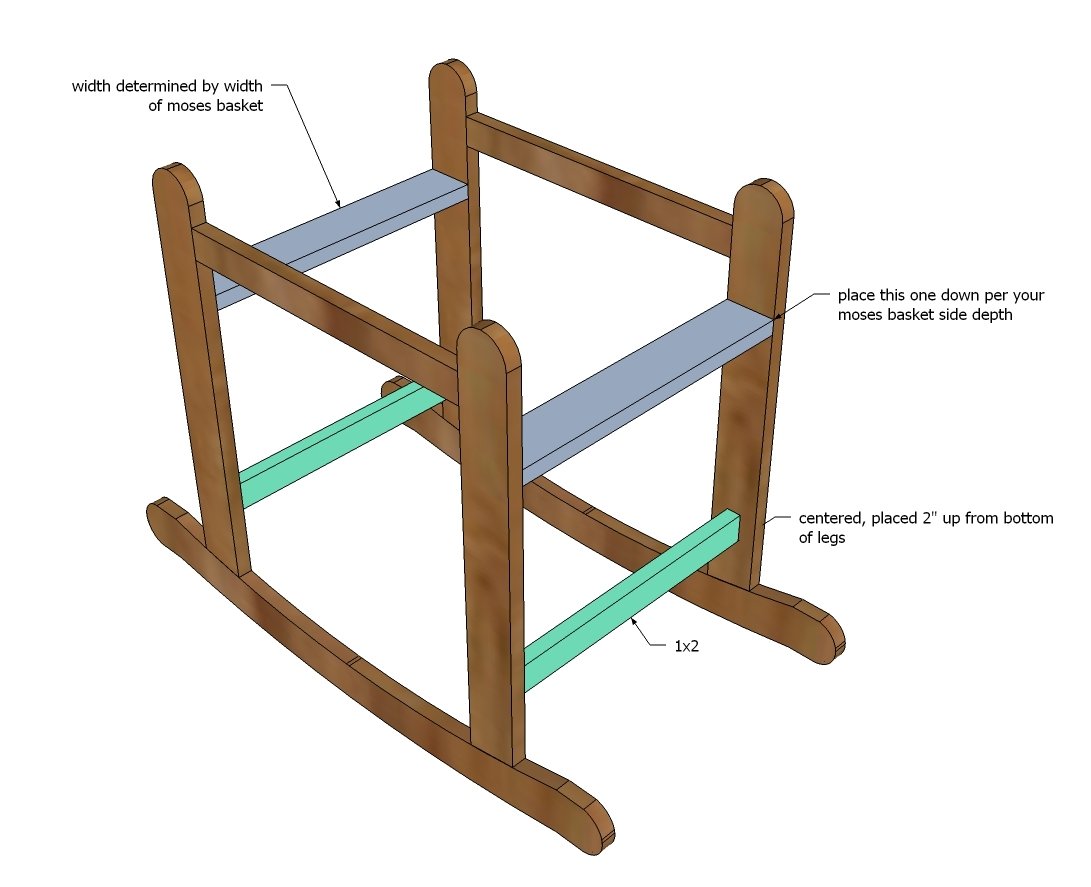
So this is the hardest step. Getting these rockers cut. Take your 1x4s and draw out the pattern. I used a piece of 1/8" plywood (because it has some flex) to draw out the curve of the bottom rocker. You can simplify by keeping the top of the rocker square - only the bottom needs to be cut. You'll need to cut two, and then clamp the two together and sand until the bottoms match perfectly.
Step 2
Once you have the rockers cut, attach two legs to the 1x2 @ 16" to get your spacing right. I used a Kreg Jig set on the 3/4" setting and 1-1/4" pocket hole screws. Then I scribed the bottom arched cut on the bottom of the legs, cut out with a jigsaw, and then attached.
Step 3
We measured the bottom of the Moses basket width, and adusted the width of these boards so it holds the Moses basket in firmly. NOTE: You must secure your Moses basket to the stand somehow. We screwed ours to the base. You could also attach with ties.
Step 4
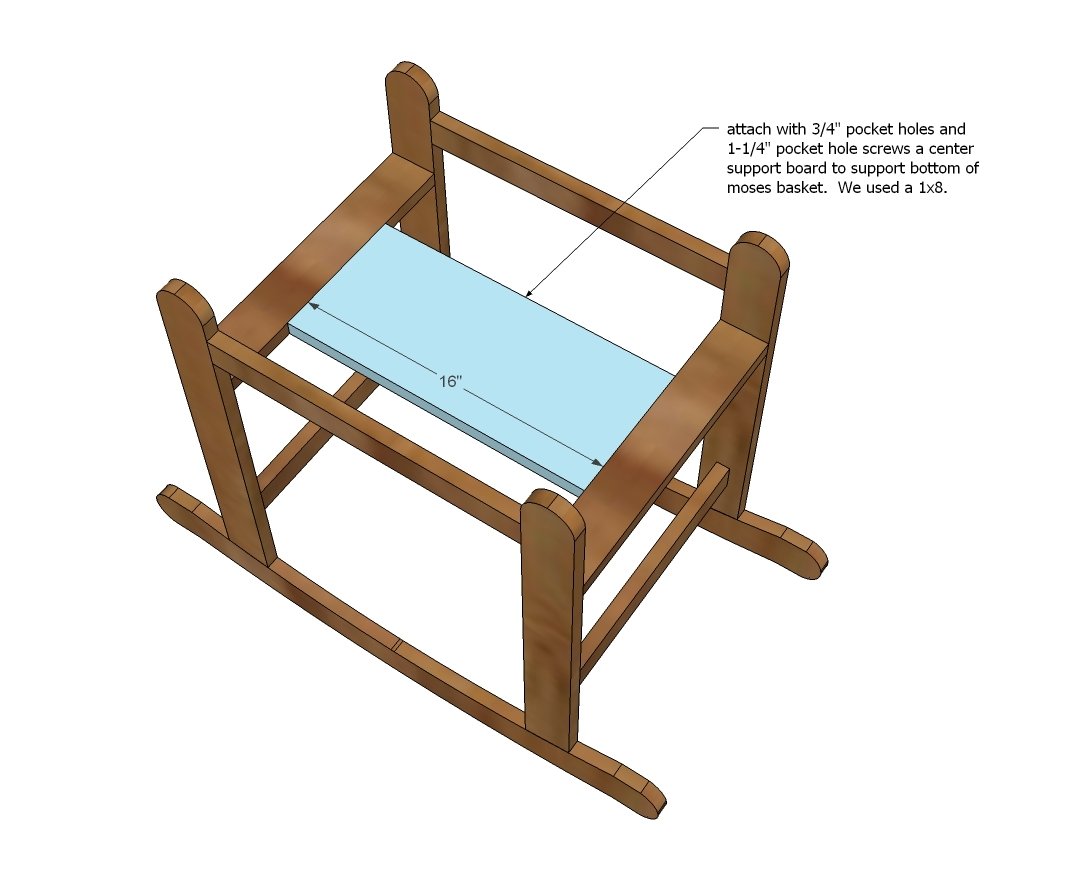
For the bottom, now that I look at ours again, I used a 1x6 down the center to support the weight of the baby. You could also use 2 - 1x4s (save yourself a trip to the lumber aisle). I attached on underside again with pocket holes.
Step 5
Finishing
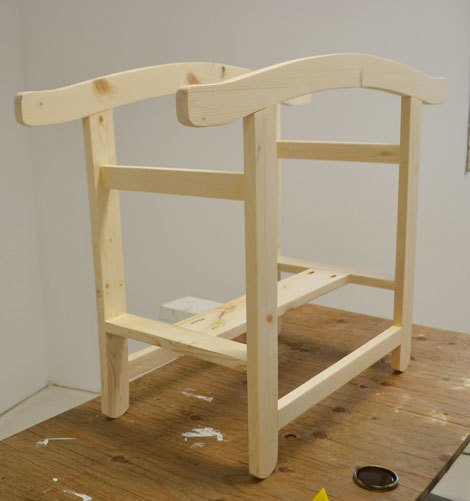
Sand all surfaces, starting with a medium grit and finishing with fine. Wipe off the dust, fill any holes or gaps with wood filler, and sand smooth once dry. Apply primer if you're painting, then finish with your choice of paint or stain and seal with a durable clear topcoat. For outdoor projects, use exterior-rated primer, paint or stain, and sealer so the piece stands up to the weather.
Source (temporary): https://www.ana-white.com/woodworking-projects/rocking-moses-basket-stand