Rolling Bar Cart with Removable Tray
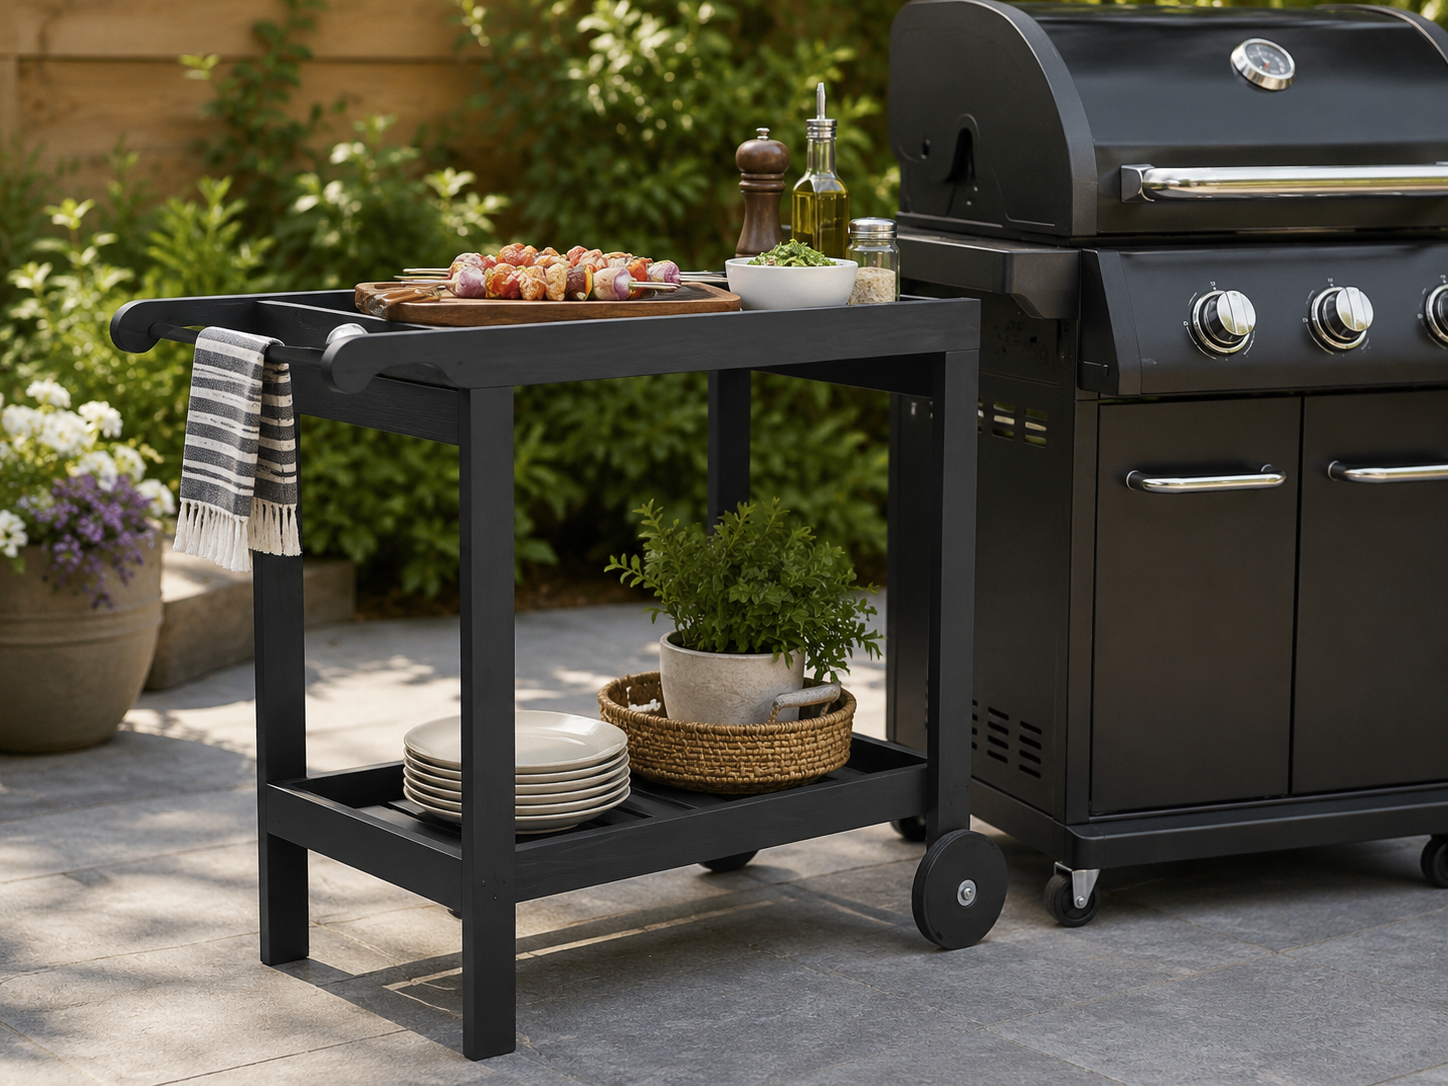
to build your own wood rolling bar cart - Featuring a top tray that is fully removable, and bottom shelf with slatted design for easy water drainage, curved handles for easy moving, and two large wooden front wheels, moving your party outdoors - or indoors come unplanned weather changes, is as easy as it is stylish. The plans are very detailed with step by step diagrams, shopping and cut list, and reader submitted photos from
Specifications
| Project type | Outdoor Seating, Lounging and Accents |
|---|---|
| Room | Outdoor |
| Style | Cottage Style Furniture Plans |
| Difficulty | Intermediate |
Dimensions
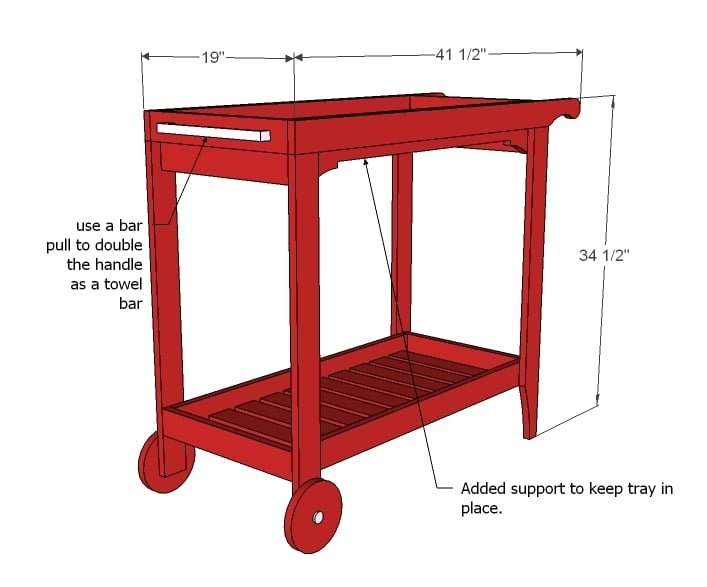
Use the size-specific shopping and cut lists below.
Shopping List
- 9 - 1x3 @ 8 feet long
- 4 - 1/2" diameter bolts,
- 2 1/2" long with bolts
- 6 - 1/2" washers to fit bolts
- 2 - handles
- 2 - 6" diameter wood rounds
Cut List
- 2 - 1x3 @ 41 1/2" (Side Aprons)
- 4 - 1x3 @ 32" (Legs)
- 2 - 1x3 @ 16" (End Aprons)
- 2 - 1x3 @ 32" (Optional Side Supports)
Trays
- 4 - 1x3 @ 33 1/4" (Sides)
- 10 - 1x3 @ 14 1/2" (Bottom Slats)
- 10 - 1x3 @ 14 1/4" (Top Slats)
- 2 - 1x3 @ 16" (Bottom Ends)
- 2 - 1x3 @ 15 3/4" (Top Ends)
Tools
- measuring tape
- square
- pencil
- safety glasses
- hearing protection
- kreg-jig
- drill
- jigsaw
- nailer
- sander
- level
- countersink drill bit
Step-by-step Instructions
Step 1
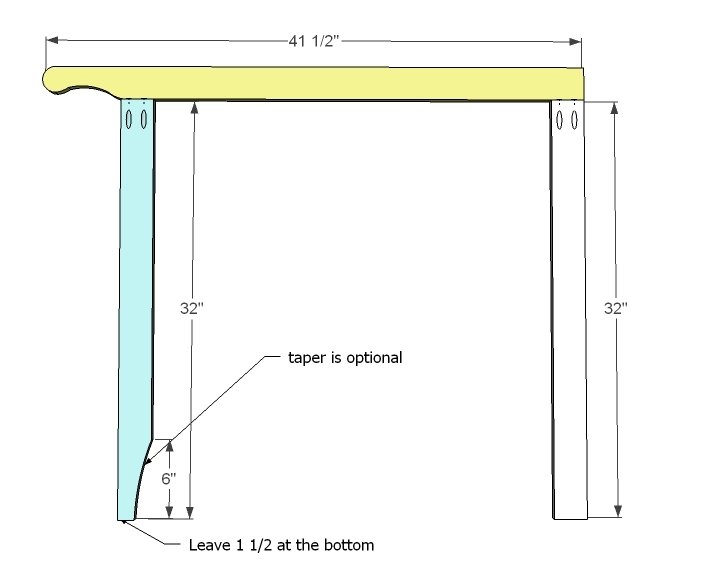
Build the sides. Start by drawing a handle pattern on the side aprons. The handle at most can be 6" long, as the handle overhangs the back leg 6". Clamp both side aprons together and sand until the two match perfectly. You can also taper the back leg with a jigsaw as shown above (I didn't, but would be cute). Then attach the legs to the side apron, using 1 1/4" pocket hole screws and drilling holes with the Kreg Jig, set for 3/4" stock. Again, the handle overhangs the back leg by 6". Use glue and adjust for the square. You will need to build two sides. Take care to keep the pocket holes to the inside to conceal.
Step 2
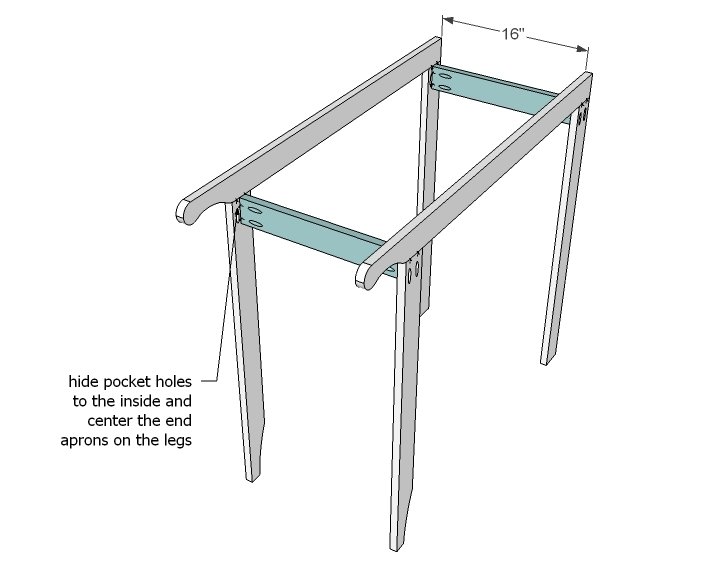
Once your two sides are complete, attach the end aprons as shown in the diagram. Use glue, adjust for square.
Step 3
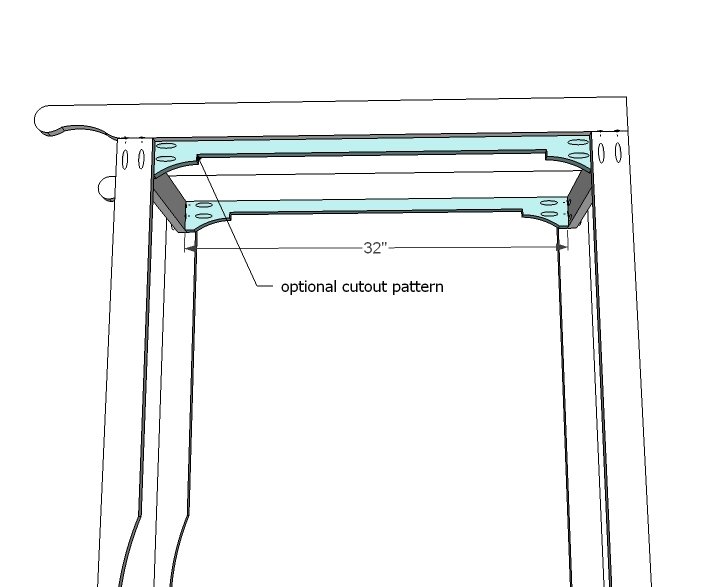
After I built my bar cart, I thought that a little extra support and also, a rail for possibly using smaller trays (or even a drop in ice bucket) would be good. So this step really is optional, but recommended. Add the side aprons supports as shown above.
Step 4
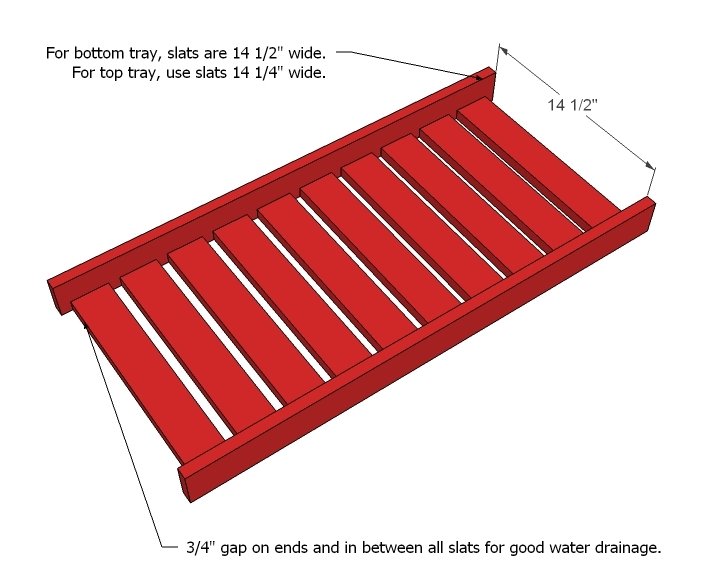
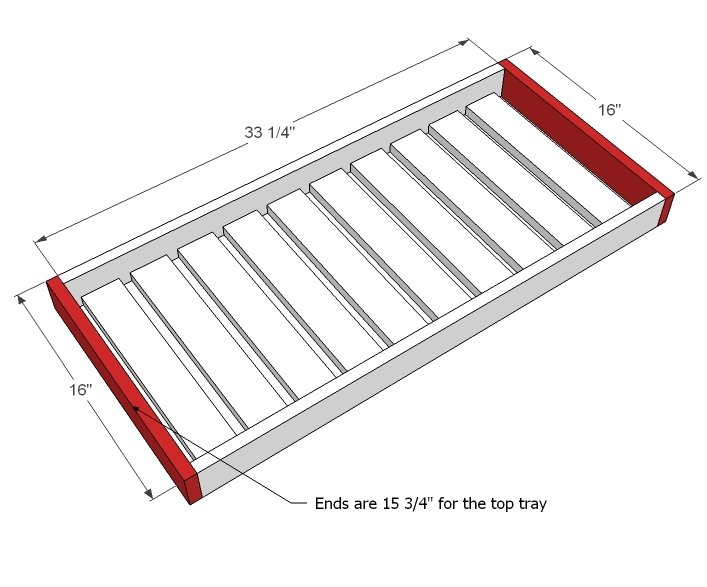
Now the trays. You can build the trays with pocket holes, but it's really overkill. I used 2" finish nails and wood glue, two nails per slat, with slats spaced 3/4" apart. The top tray needs to be 1/4" narrower than the bottom so you can easily remove it without scratching the finish. This is noted above and shown in the cut list.
Step 5
Step 6
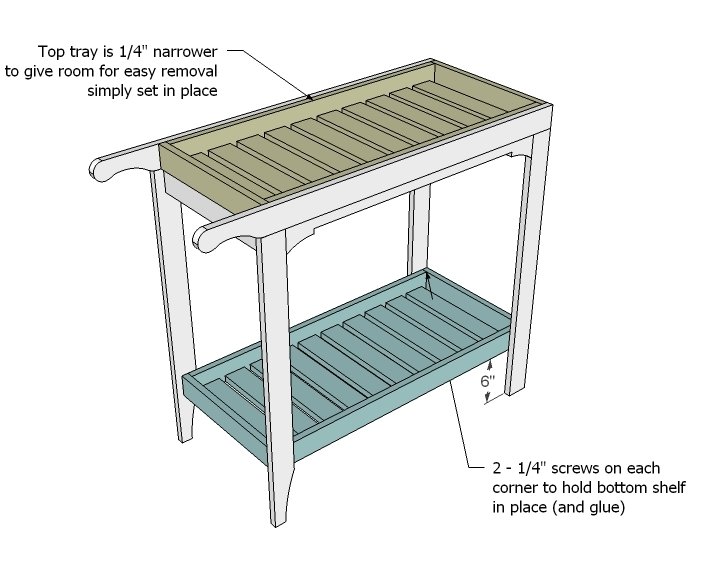
Now add the trays to the frame. The top is as easy as just resting in place. For the bottom, measure up 6" and screw in place. I used 1 1/4" screws and glue from the insides, two per leg, and it's plenty strong to hold my preschooler.
Step 7
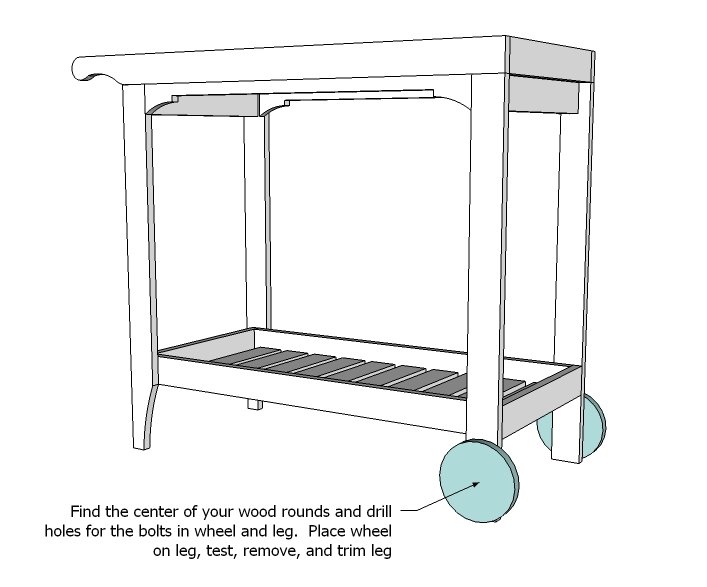
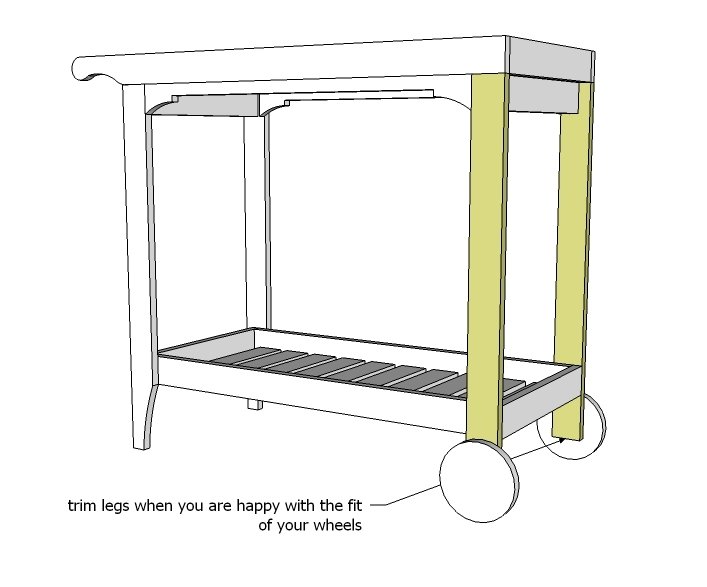
Drill holes in the center of your wood rounds with a 1/2" drill bit. Mark the hole placement on the leg, and drill holes in the legs. Test the wheels with bolts, and when satisified, remove the wheels and trim legs (see next step). When you put your wheels on permanently, you will want to use three washers - one on the bolts side, one on the nut side, and one between the wheel and the leg to protect your finish. Bolt side out, nuts on the inside.
Step 8
And a diagram for how the finished leg should look.
Finishing
Sand all surfaces, starting with a medium grit and finishing with fine. Wipe off the dust, fill any holes or gaps with wood filler, and sand smooth once dry. Apply primer if you're painting, then finish with your choice of paint or stain and seal with a durable clear topcoat. For outdoor projects, use exterior-rated primer, paint or stain, and sealer so the piece stands up to the weather.
Source (temporary): https://www.ana-white.com/woodworking-projects/rolling-bar-cart-removable-tray