Rolling C End Table or Sofa Table
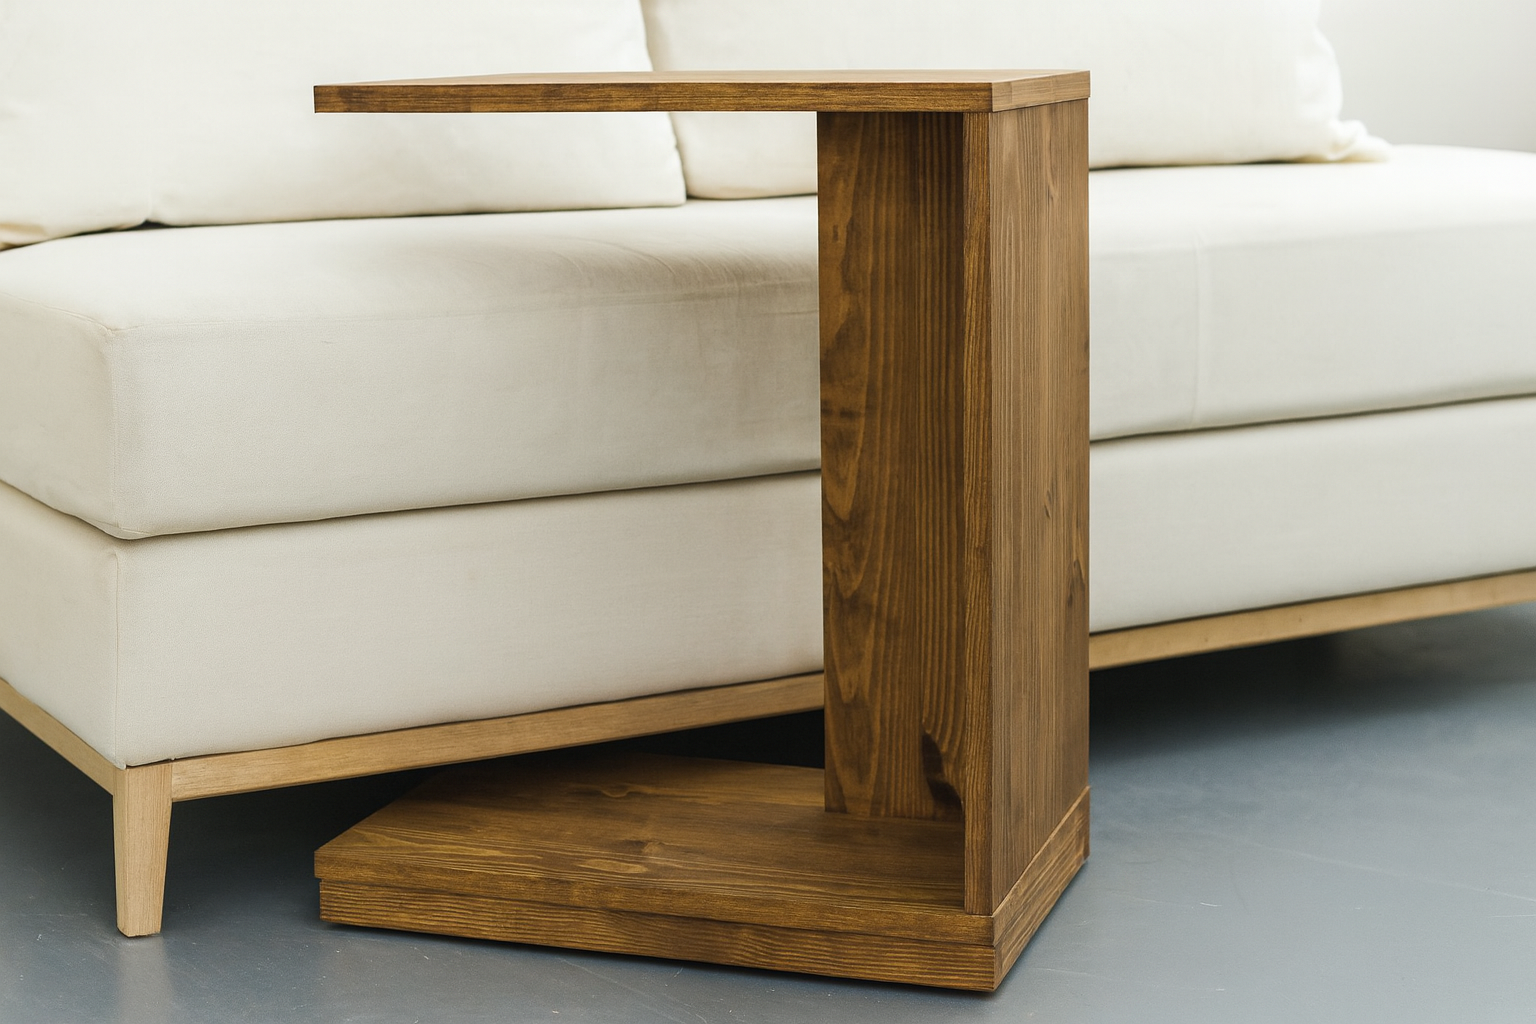
Free Rolling C Table Plans – Easy DIY Project Build your own rolling C table with! This modern and functional side table easily slides under sofas, chairs, or beds, and the rolling casters make it perfect as a laptop table, snack tray, or small desk. Our step-by-step include a complete shopping list, cut list, and diagrams so you can build with confidence, even if you’re a beginner. Designed with solid wood construction, this DIY C table is sturdy, stylish, and simple to customize with your favorite paint or stain. ✔ Beginner-friendly design ✔ Uses basic tools and affordable materials ✔ Perfect for small spaces, apartments, or multipurpose rooms ✔ Build in a weekend Make your own DIY rolling side table and enjoy a versatile piece of furniture you’ll use every day. Download the today at
Specifications
| Project type | Side and End Table Plans |
|---|---|
| Room | living room |
| Style | Modern Style Furniture Plans |
| Difficulty | Beginner Projects |
Dimensions
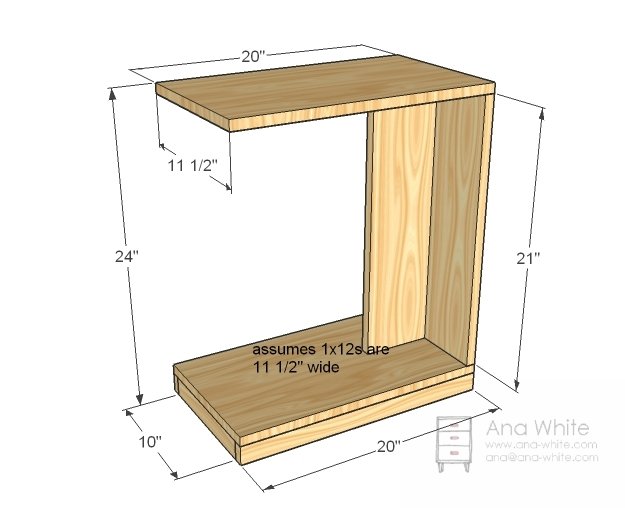
Use the size-specific shopping and cut lists below.
Shopping List
- 1 – 1×12, 6 feet long
- 1 – 1×6, 2 feet long
- 1 – 1×2, 6 feet long
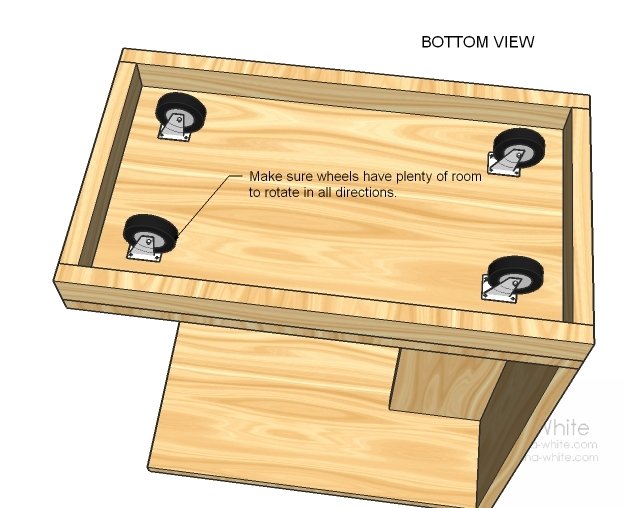
- 4 – 1 1/2″ caster wheels (wheel diameter is 1 1/2″)
- 2″ wood screws OR 1 1/4″ pocket hole screws for pocket holes
- wood glue
- paint and primer
- 120 grit sandpaper
- wood filler
Cut List
- 2 – 1×12 @ 20″ (Top and Bottom)
- 1 – 1×12 @ 21″ (Back)
- 1 – 1×6 @ 21″ (Center)
- 2 – 1×2 @ 20″ (Side Footer)
- 2 – 1×2 @ 10″ (End Footer)
Tools
- measuring tape
- square
- pencil
- safety glasses
- hearing protection
- drill
- circular saw
- sander
- level
- countersink drill bit
Step-by-step Instructions
Box
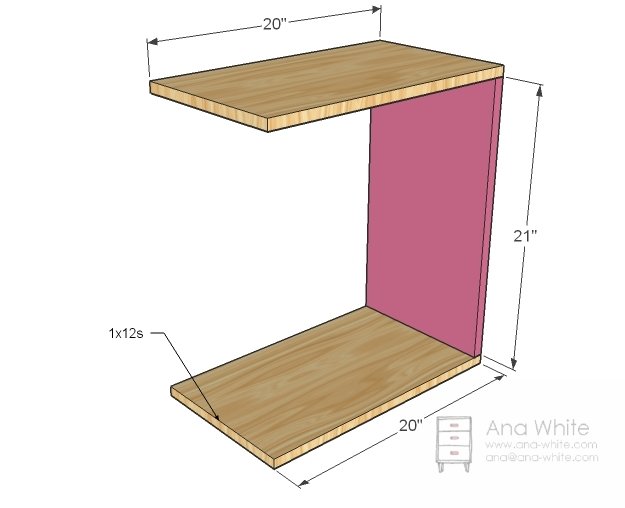
After you have cut all your boards, predrill either pocket holes or countersinking holes and build the box as shown above. Keep outside edges flush. Use glue.
Center
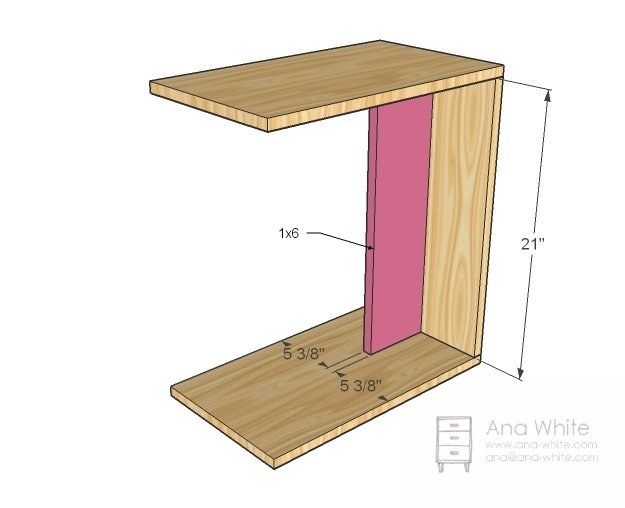
Now measure at the top, middle, and bottom as shown in the diagram and mark. Position 1×6 and screw through predrilled holes to secure in place. Use glue
Footer
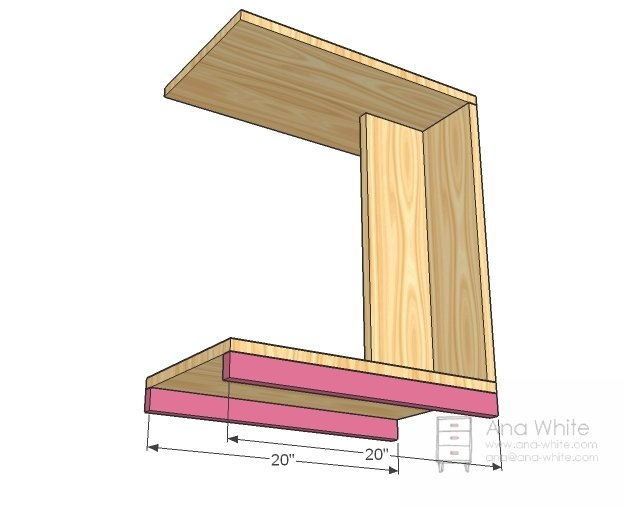
The footer on this one is purely decorative. You can use finish nails or screws, and glue. Attach to the bottom.
Footer Ends
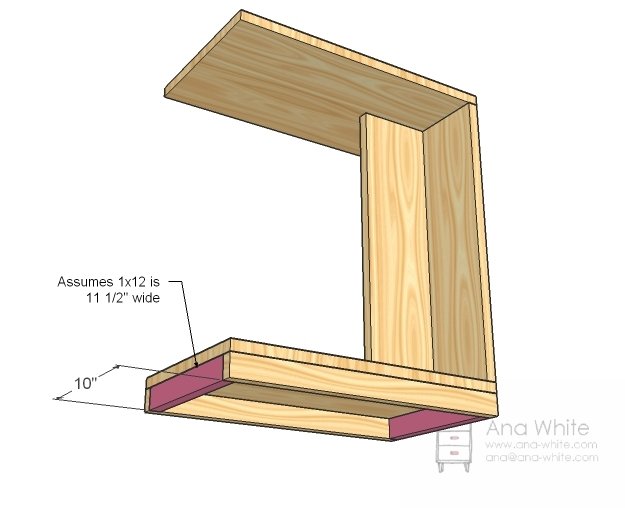
Attach the footer ends to the bottom and the side footer. You may not be able to reach a direct screw into the back footer – don’t worry. This piece is purely decorative, and glue and screws to the side footer will be plenty.
Step 5
Finishing
Sand all surfaces, starting with a medium grit and finishing with fine. Wipe off the dust, fill any holes or gaps with wood filler, and sand smooth once dry. Apply primer if you're painting, then finish with your choice of paint or stain and seal with a durable clear topcoat. For outdoor projects, use exterior-rated primer, paint or stain, and sealer so the piece stands up to the weather.
Source (temporary): https://www.ana-white.com/woodworking-projects/rolling-c-end-table-or-sofa-table