Rolling Cubby Bench
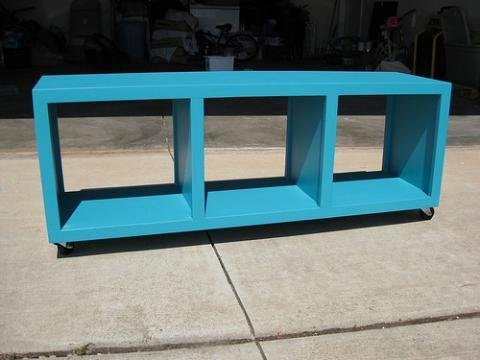
These rolling cubbies feature three large cubbies at bench height. Easy to build and fully framed, inexpensive and sturdy, there is a place for these rolling cubbies in every home.
Specifications
| Project type | Media and Entertainment Centers |
|---|---|
| Room | Storage Solutions |
| Style | Modern Style Furniture Plans |
| Difficulty | Beginner Projects |
| Estimated cost | $20 - $50 |
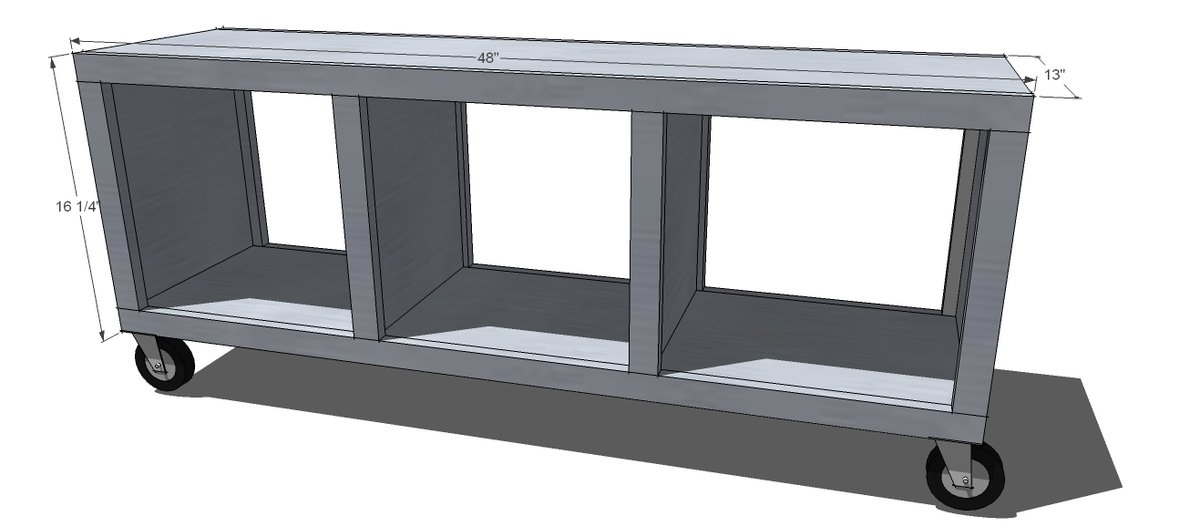
Dimensions
Use the size-specific shopping and cut lists below.
Shopping List
1 – 8′ 1×12 board
1 – 6′ 1×12 board
4 – 1×2 8′ boards
2″ nails for finish nailer
Wood filler
Wood glue
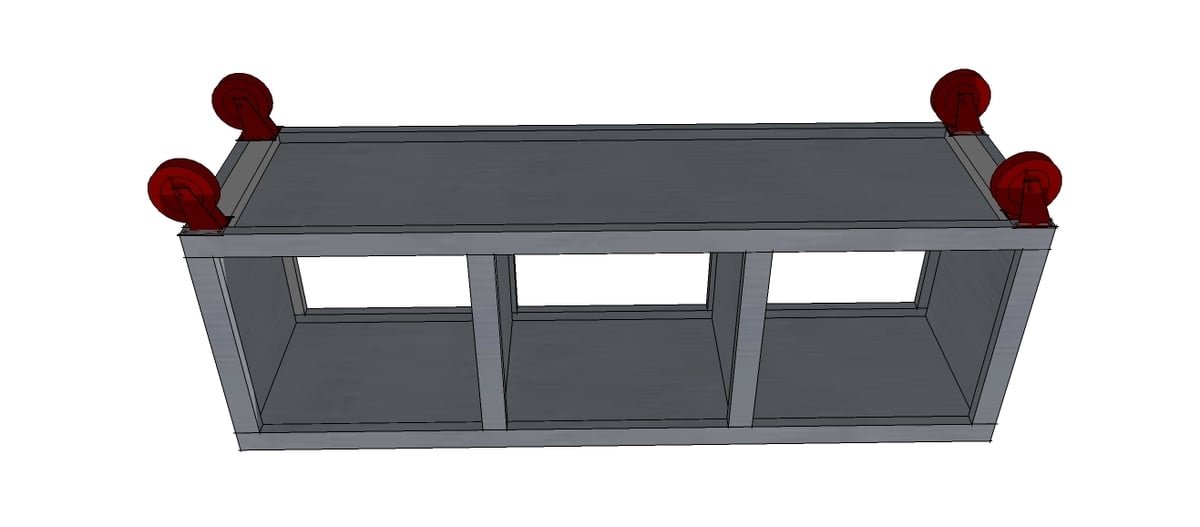
4 caster wheels with screws
Cut List
1 – 1×12 @ 48″ (Top)
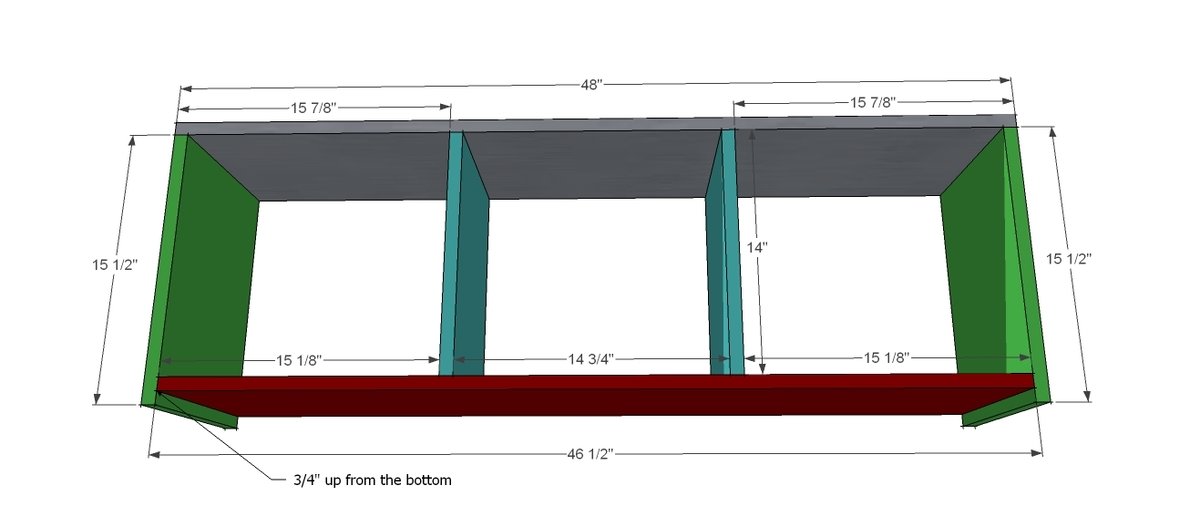
1 – 1×12 @ 46 1/2″ (Bottom)
2 – 1×12 @ 15 1/2″ (Sides)
2 – 1×12 @ 14″ (Dividers)
4 – 1×2 @ 48″ (Horizontal Trim)
8 – 1×2 @ 13 1/4″ (Vertical Trim, measure to fit perfectly)
2 – 1×2 @ 11 1/2″ (Wheel Supports, measure to fit)
Tools
- measuring tape
- square
- pencil
- hammer
- safety glasses
- drill
- circular saw
- nailer
- sander
Step-by-step Instructions
Step 1
Build the box. Build the box, as shown above. Use the 2″ nails and glue to fasten in place.
Step 2
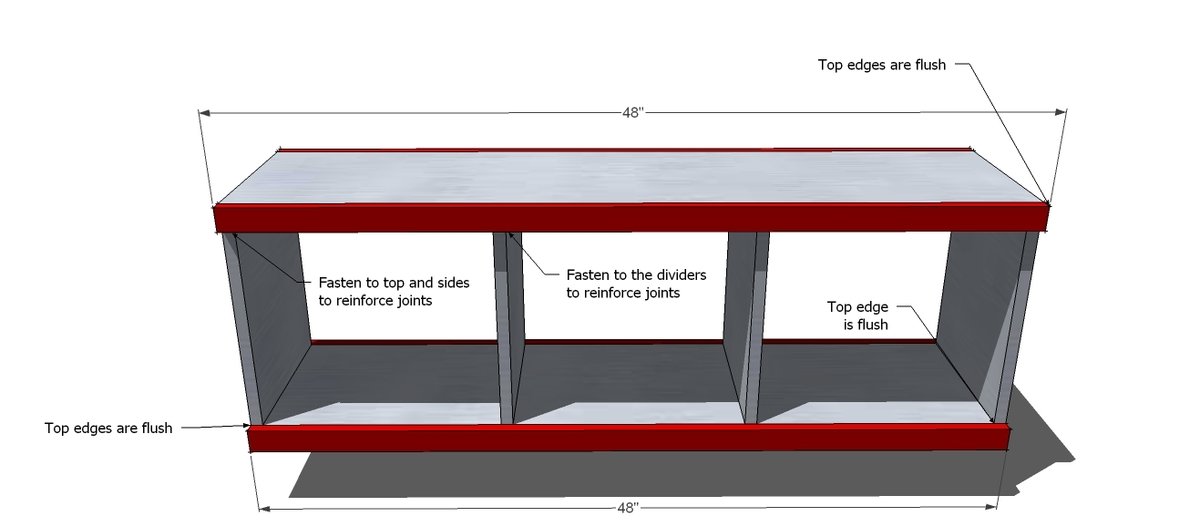
Top and Bottom Trim. Fasten the top and bottom trim pieces, as shown above. Keep top edges and outside edges flush. Make sure you fasten the top piece to the dividers, sides and top. This will help reinforce your joints. Use glue and 2″ nails.
Step 3
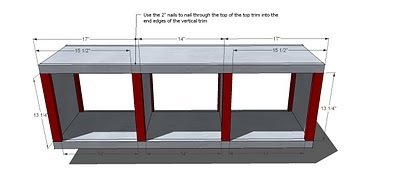
Vertical Trim. Fasten the vertical trim in place, using the measurements shown above. Keep the outside edges flush. The center vertical trim pieces will be centered on the vertical dividers. Use the 2″ nails and glue. Also fasten through the top and bottom of the horizontal trim pieces from step 2 into the end edges of the vertical trim.
Step 4
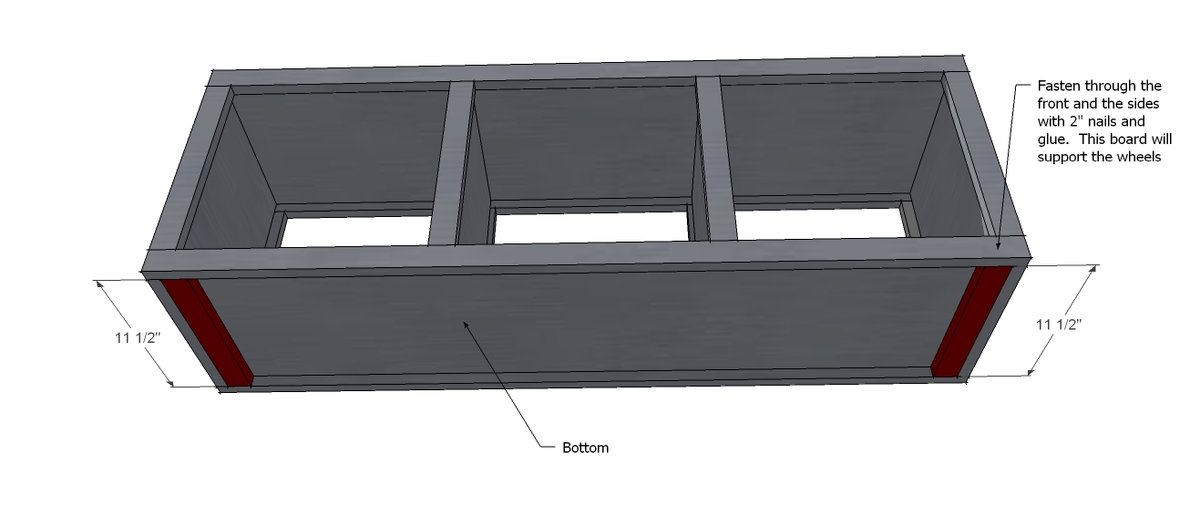
Supports. Fasten the supports as shown above.
Step 5
Finishing
Sand all surfaces, starting with a medium grit and finishing with fine. Wipe off the dust, fill any holes or gaps with wood filler, and sand smooth once dry. Apply primer if you're painting, then finish with your choice of paint or stain and seal with a durable clear topcoat. For outdoor projects, use exterior-rated primer, paint or stain, and sealer so the piece stands up to the weather.
Source (temporary): https://www.ana-white.com/woodworking-projects/rolling-cubby-bench