Rolling Room Divider Cubbies
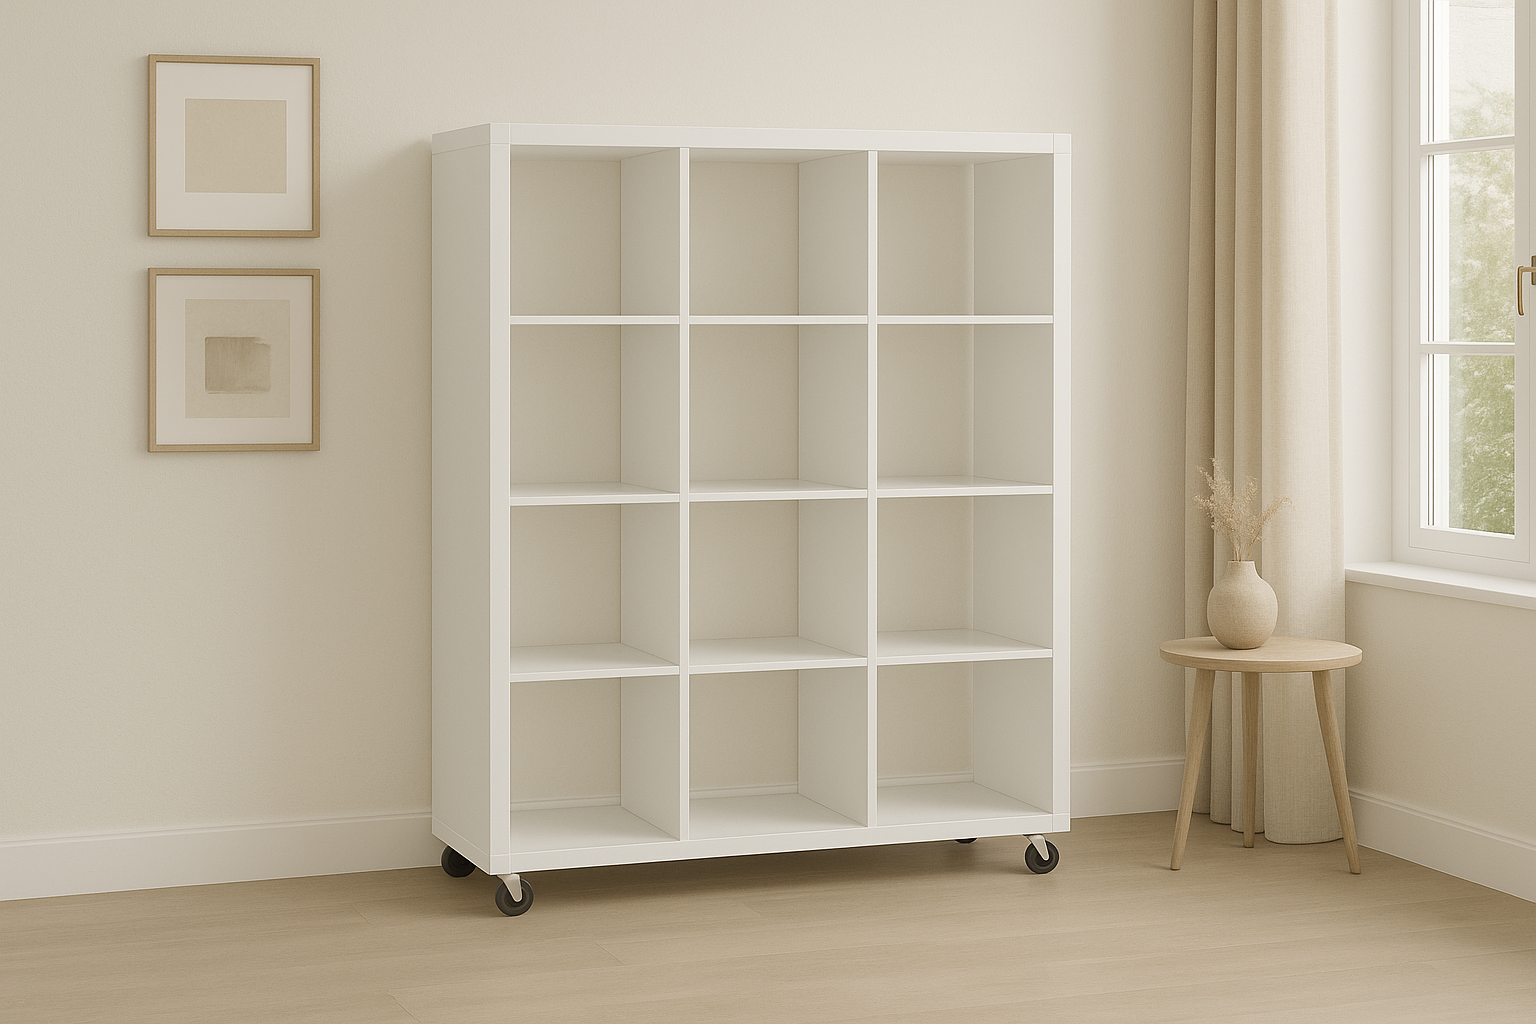
Cubby shelves are so loved because they enable you to further divide down your storage spaces. This simple cubby was transformed by one of our amazing readers into this outstanding storage playroom.
Specifications
| Project type | Bookshelf and Bookcase Plans |
|---|---|
| Room | Storage Solutions |
| Style | Modern Style Furniture Plans |
| Difficulty | Intermediate |
| Estimated cost | $20 - $50 |
Dimensions
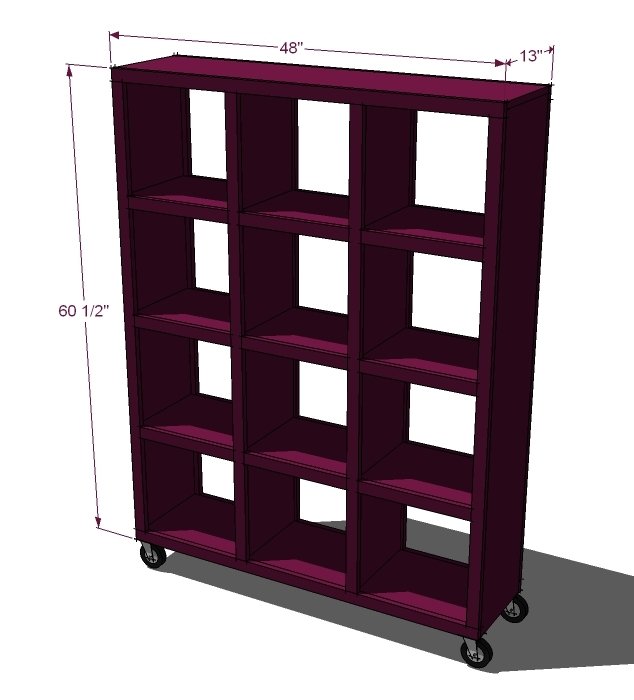
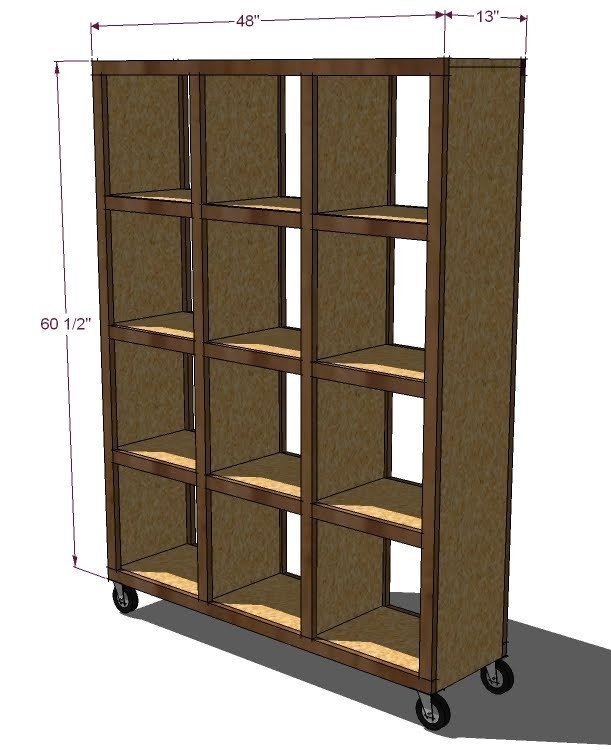
Use the size-specific shopping and cut lists below.
Shopping List
- 10 – 1×2 Boards (pine boards are about $1 each)
- 5 – 1×12 Boards (pine boards are about $9 each) OR 2 Sheets of 3/4″ A1 Plywood or 3/4″ MDF
- Wood Glue
- Wood Filler
- 2″ Nails for finish nailer
- 1 1/4″ Nails for finish nailer
- 5 Caster Wheels, shown in diagrams with a 2 1/2″ diameter, with screws
- Sand Paper
- Paint, Stain, Varnish or other finishing supplies
Cut List
Cut List for the Box
- 2 – 1×12 @ 59 3/4″ (Sides)
- 4 – 1×12 @ 46 1/2″ (Shelves)
- 1 – 1×12 @ 48″ (Top)
- 8 – 1×12 @ 14″ (Dividers)
Cut List of Trim (recommend to cut to measurements for exact fit)
- 4 – 1×2 @ 48″ (Top and Bottom Trim)
- 8 - 1×2 @ 57 1/2″ (Side Trim and Divider Trim)
- 18 – 1×2 @ 14″ (Shelf Trim)
- 3 – 1×2 @ 11 1/2″ (Wheel Supports)
Tools
- measuring tape
- square
- pencil
- hammer
- safety glasses
- hearing protection
- kreg-jig
- drill
- circular saw
Step-by-step Instructions
Step 1
Composition for Paint or Rustic Stained Look is pine boards in 1×12 width for the “box” and pine 1×2 boards for the trim Composition for “Framed in Solid Hardwood” Look is 3/4″ A1 plywood in choice of hardwood (ie Maple) cut into 1×12 strips (11 1/2″ wide) with hardwood 1x2s for the frame. Composition for Economical Painted Finish is 3/4″ Particle Board or MDF cut into 11 1/2″ wide strips, framed in 1×2 MDF or pine boards.
Step 2
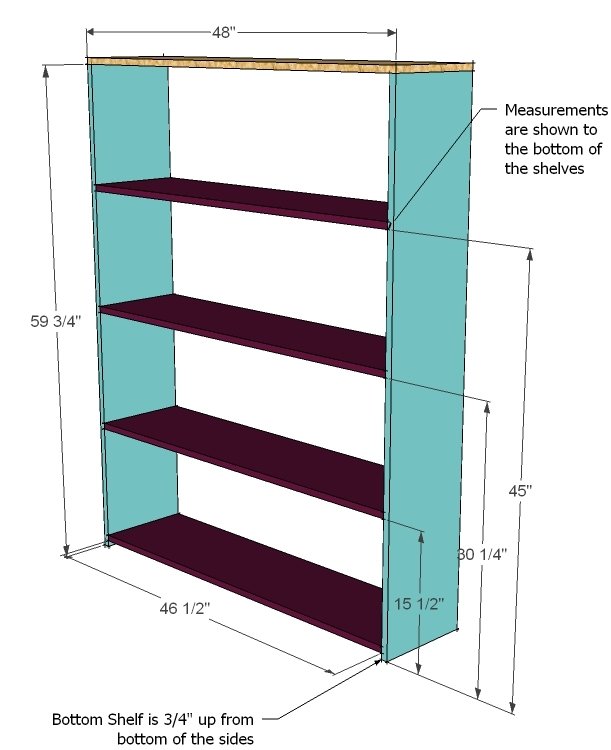
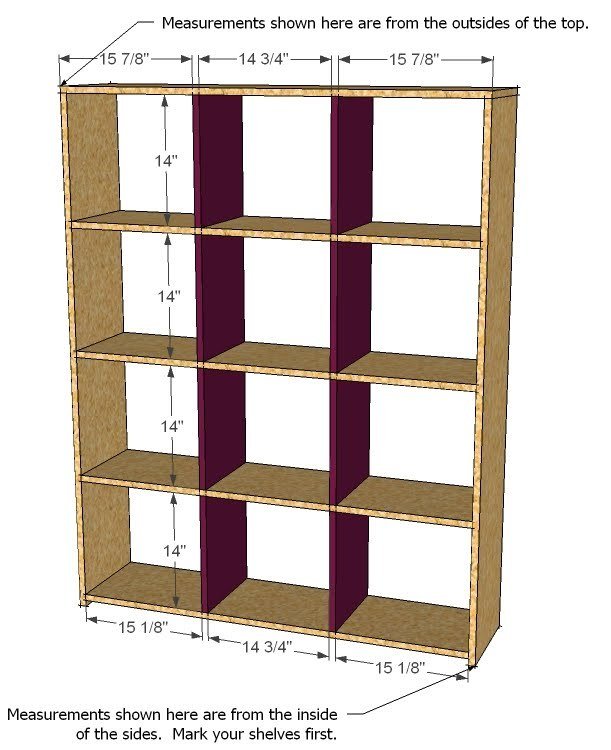
Build the box. Start by marking out the sides where the shelves will be fastened. It is a good practice to mark on both sides of the shelves to mark where to nail. Remember that the shelves are 3/4″ thick. Leave a 3/4″ gap under the bottom of the bottom shelf as shown above.
Step 3
Dividers. In this step we are just going to fasten the dividers in so they don’t move. The trim will actually hold the dividers in place. Start by marking your shelves and top where the dividers will go. Remember that the dividers are 3/4″ thick. Starting on the bottom shelf, fasten the bottom dividers to the bottom and first shelf. Working your way up, fasten the next level of dividers in place. This time you will only be able to fasten through the shelf on the upper shelf. On the lower shelf, you will need to nail at an angle through the front edge of the shelf into the ends of the dividers. Do this on the remaining dividers. Use 2″ nails and glue. Remember, we will add more support in the frame to the dividers.
Step 4
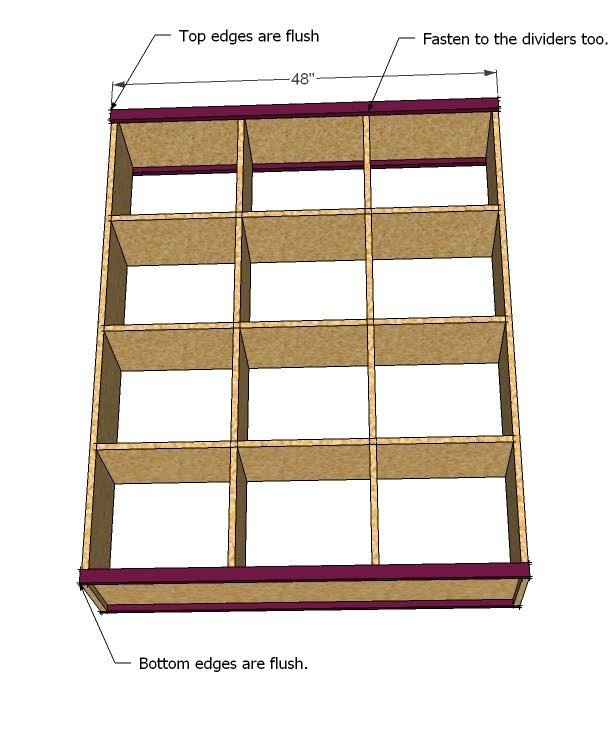
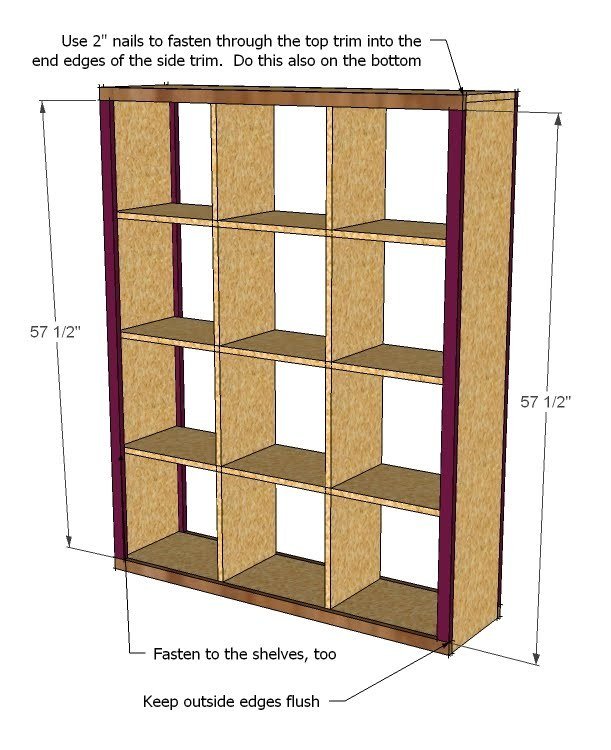
Bottom and Top Trim. Check for square. Then using 2″ nails an glue, fasten the bottom and top trim in place. Make sure you fasten to any vertical dividers, whenever possible. Keep outside edges flush. Do this on the front and back.
Step 5
Step 6
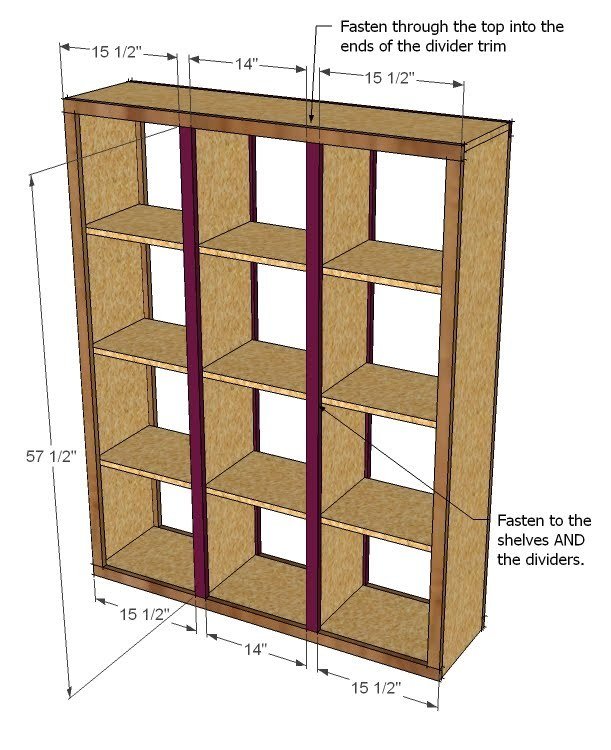
Divider Trim. Measure and cut your divider trim. Mark the bottom and top trim boards as shown above. Fasten the divider trim to the dividers, as shown above. The trim will be centered on the dividers. Make sure you fasten to the shelves too. Use 2″ nails and glue. Do this on both the front and back.
Step 7
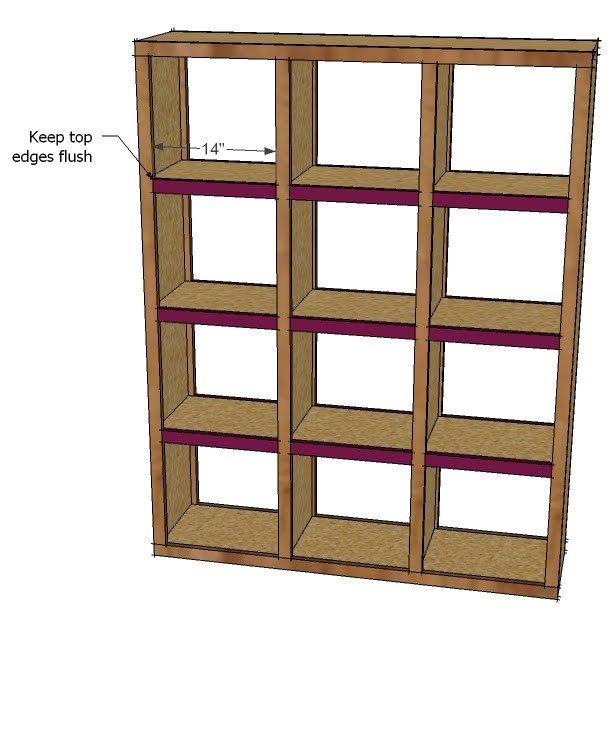
Shelf Trim. Measure and cut your shelf trim, keeping top edges flush with the tops of the shelves as you fasten the shelf trim in place. Use 2″ nails and glue. On the ends, fasten through the side trim into the ends of the shelf trim.
Step 8
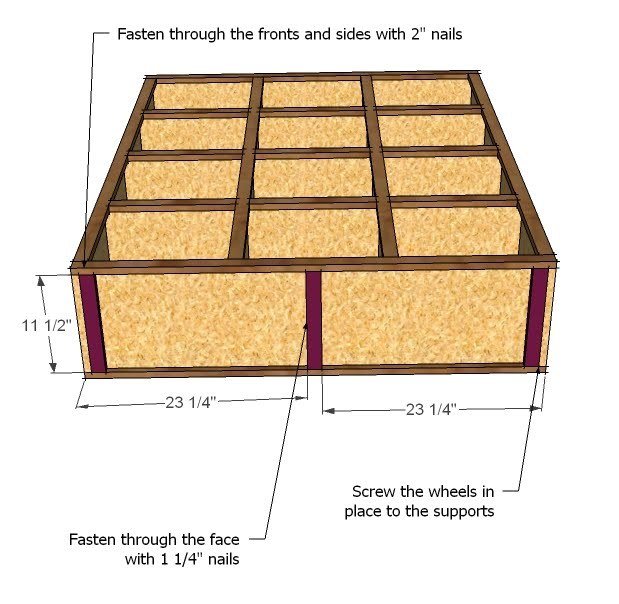
Wheel Supports. As shown above, fasten the wheel supports to the bottom of the piece. Then attach your wheels to these support pieces.
Step 9
Finishing. Fill nail holes with wood filler and sand and finish as desired.
Finishing
Sand all surfaces, starting with a medium grit and finishing with fine. Wipe off the dust, fill any holes or gaps with wood filler, and sand smooth once dry. Apply primer if you're painting, then finish with your choice of paint or stain and seal with a durable clear topcoat. For outdoor projects, use exterior-rated primer, paint or stain, and sealer so the piece stands up to the weather.
Source (temporary): https://www.ana-white.com/woodworking-projects/rolling-room-divider-cubbies