Rolling Rustic Wood Dresser
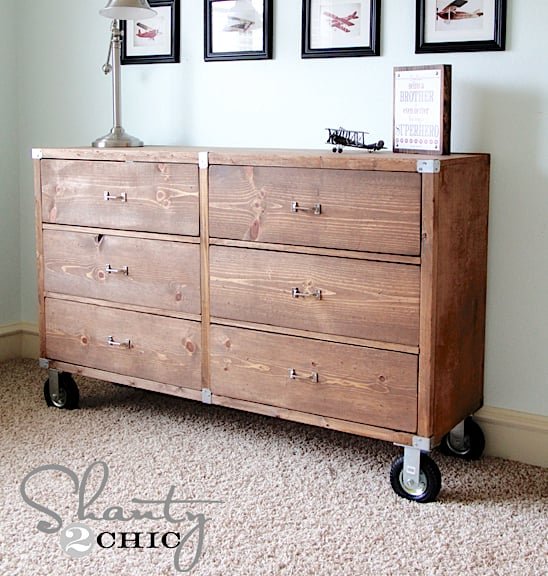
to build a solid wood, rolling dresser from This dresser is beautiful and blends with just about any style and decor. The plans include step by step diagrams, shopping list, cut list and more.
Specifications
| Project type | Dresser Plans |
|---|---|
| Room | Storage Solutions |
| Style | Farmhouse Furniture |
| Difficulty | Advanced |
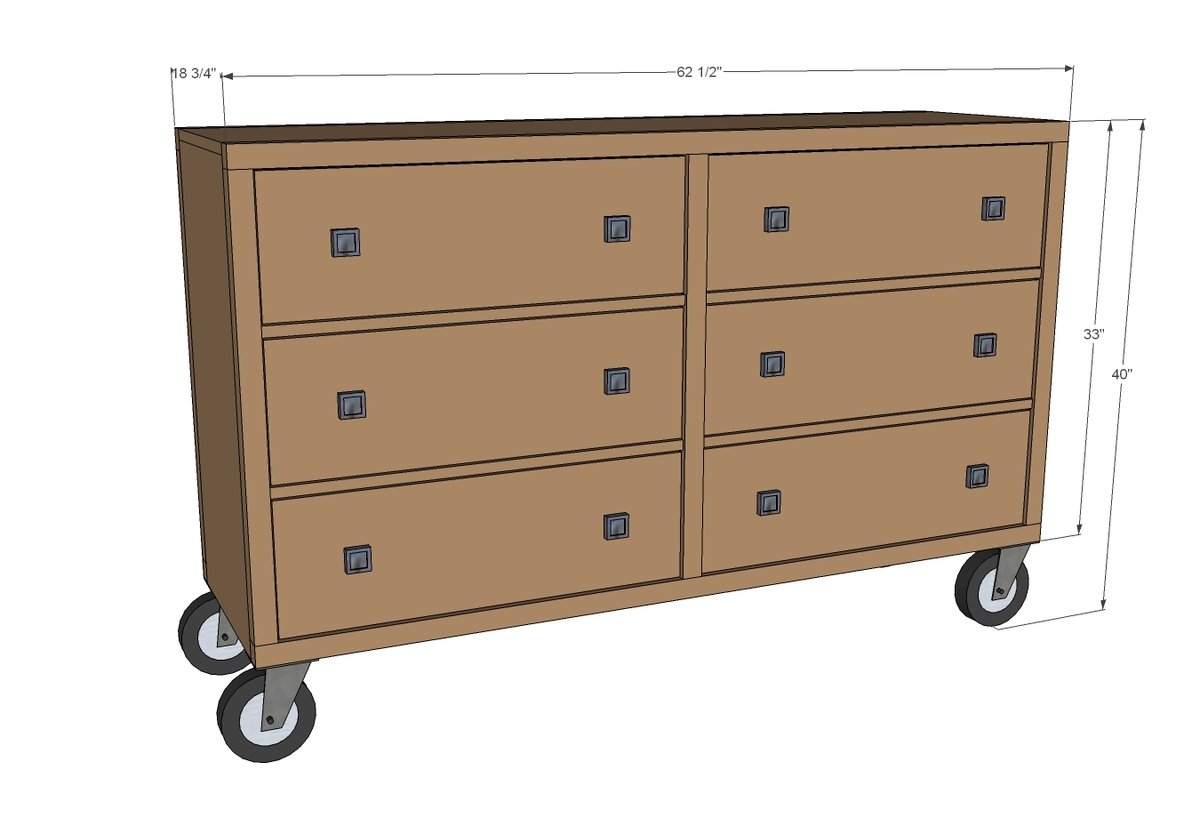
Dimensions
Use the size-specific shopping and cut lists below.
Shopping List
- 1 - sheet 3/4” plywood ripped into strips 15 3/4” wide referred to as 1x16 boards throughout this plan
- 3 - 1x2 @ 8 feet long
- 6 - 2x2 @ 8 feet long (MUST BE VERY STRAIGHT)
- 6 - 1x8 @ 8 feet long
- 2 - 1x10 @ 8 feet long
- 1 - 1/4” plywood for drawer bottoms/back
- 6 - 16” euro style white drawer slides (bottom corner mount)
- 1 1/4” and 2 1/2” Pocket Hole screws
- 1 1/4” brad nails
- Knobs or handles
- 6” caster wheels and screws to attach
NOTE: This plan assumes your 1x10 boards are 9 1/4" wide to fit a 9 1/2" wide drawer opening. Measure the width of your 1x10s and adjust if necessary, allowing for an 1/8" gap around all sides of drawer faces.
Cut List
- 2 - 1x16 @ 32 1/4”
- 6 - 1x2 @ 15 3/4”
- 1 - 1x16 @ 62 1/2”
- 4 - 2x2 @ 62 1/2”
- 6 - 2x2 @ 30”
- 4 - 2x2 15 3/4”
- 4 - 1x2 @ 29”
- 2 - 2x2 @ 41” (both ends cut at 45 degrees off square, ends NOT parallel, longest point measurement)
DRAWERS
- 12 - 1x8 @ 26 1/2”
- 12 - 1x8 @ 16”
- 6 - 1/4” plywood 28” x 16” (tip: have 1/4” plywood ripped into 16” widths at hardware store)
- 6 - 1x10 @ 28 3/4”
Back of dreser is optional
Tools
- measuring tape
- square
- pencil
- safety glasses
- hearing protection
- kreg-jig
- drill
- compound miter saw
- nailer
- sander
- countersink drill bit
Step-by-step Instructions
Step 1
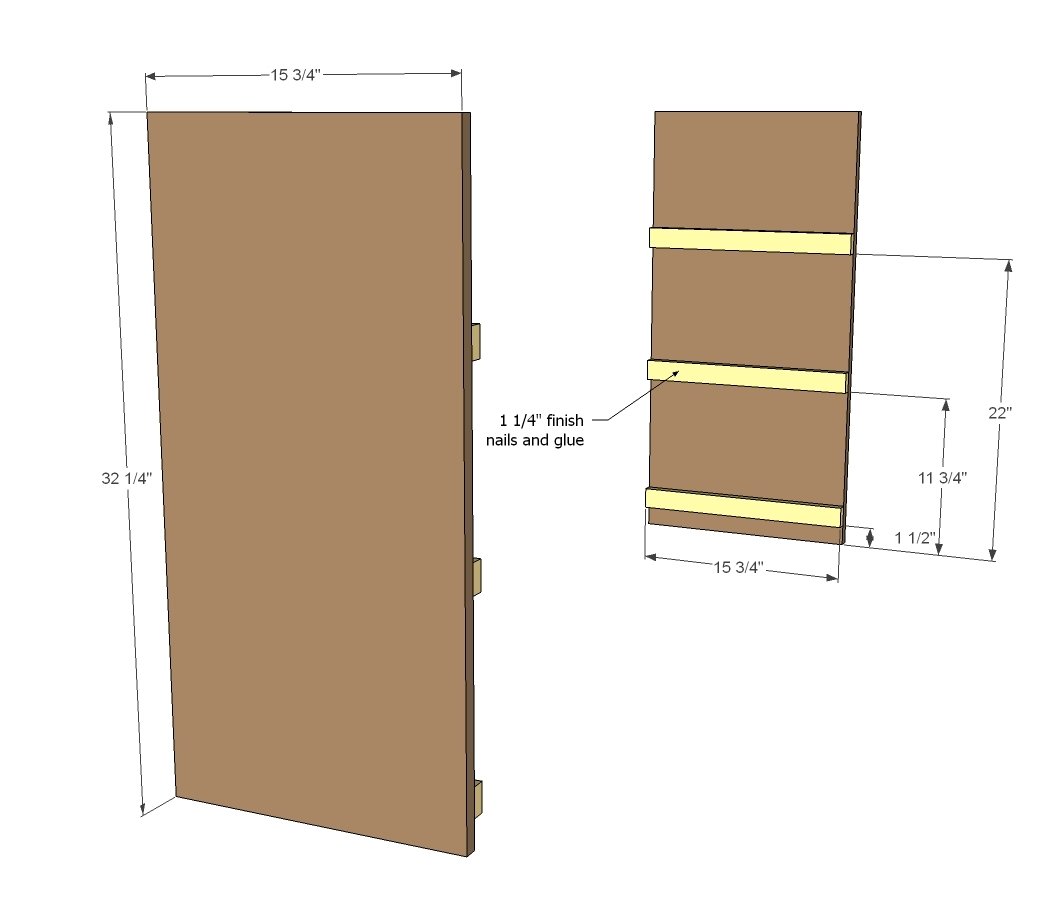
These spacers added will be where you attach the drawer slides. Attach level with 1-1/4" brad nails and glue. NOTE: You may wish to drill 3/4" pocket holes facing upward for attaching top and also 3/4" pocket holes facing forward for attaching front face frames in later steps.
Step 2
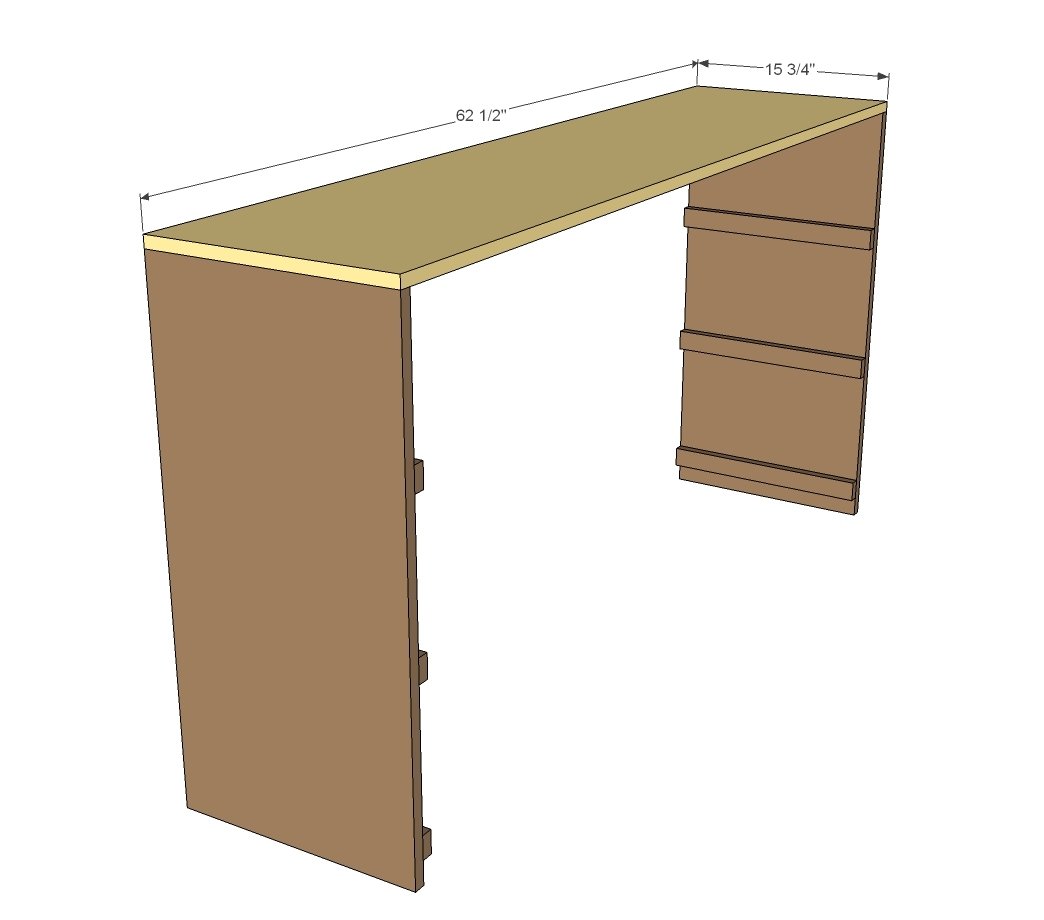
Then attach top. Either use the predrilled pocket holes from step 1 and 1-1/4" pocket hole screws or use finish nails and glue. NOTE: You may wish to drill 3/4" pocket holes facing forward and backward for attaching face frames in step 3.
Step 3
Build your face frames first, check for square, and then line up with the cabinet box and attach. You can attach with 2" brad nails AND GLUE or through pocket holes drilled in steps 1 and 2 with 1-1/4" pocket hole screws and glue.
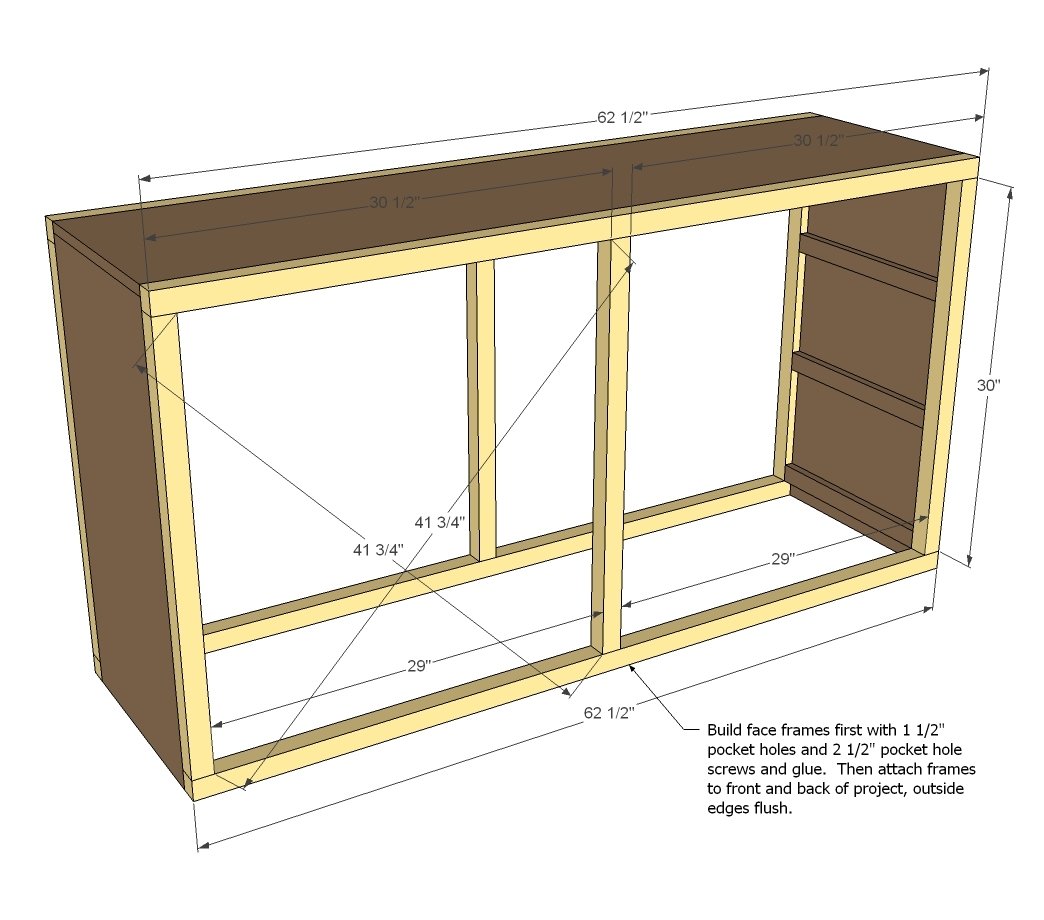
Step 4
These guys are for your drawer slides. Attach with 1-1/2" pocket holes and 2-1/2" pocket hole screws and glue.
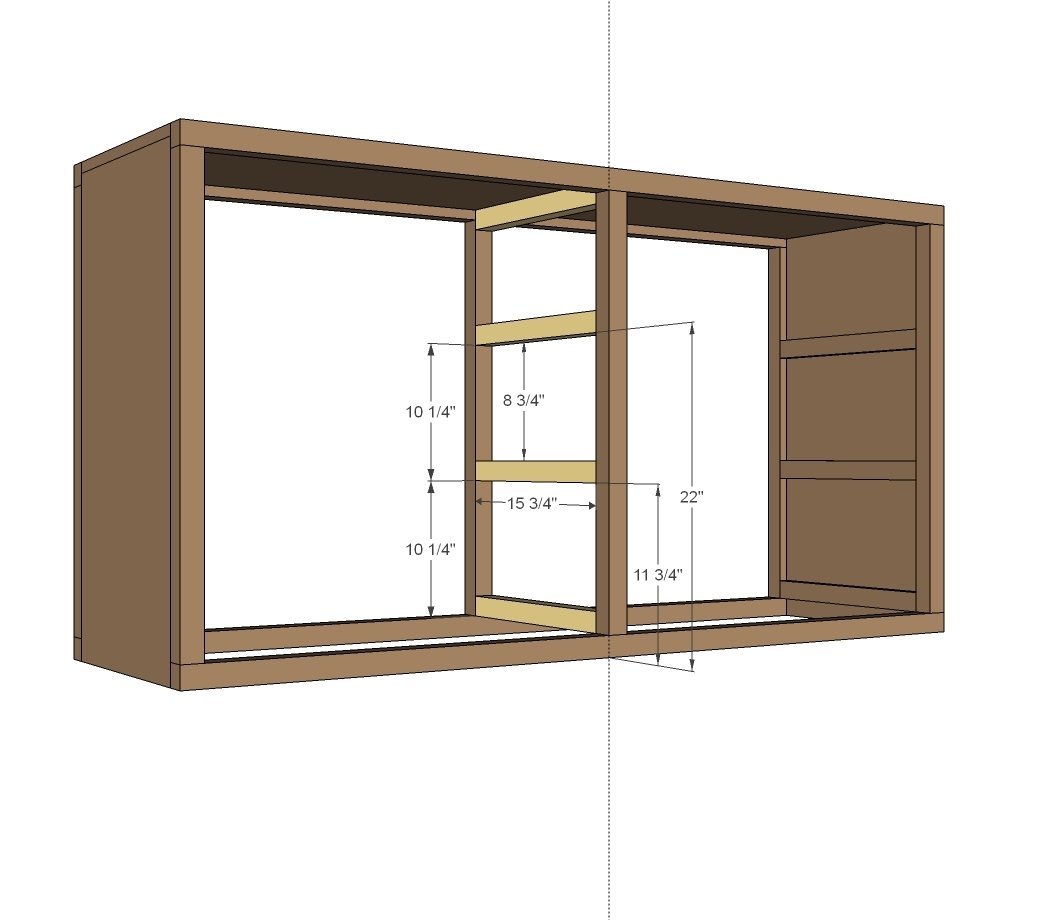
Step 5
Attach the 1x2 pieces carefully in place with 3/4" pocket holes and 1-1/4" pocket hole screws. Place pocket holes on underside.
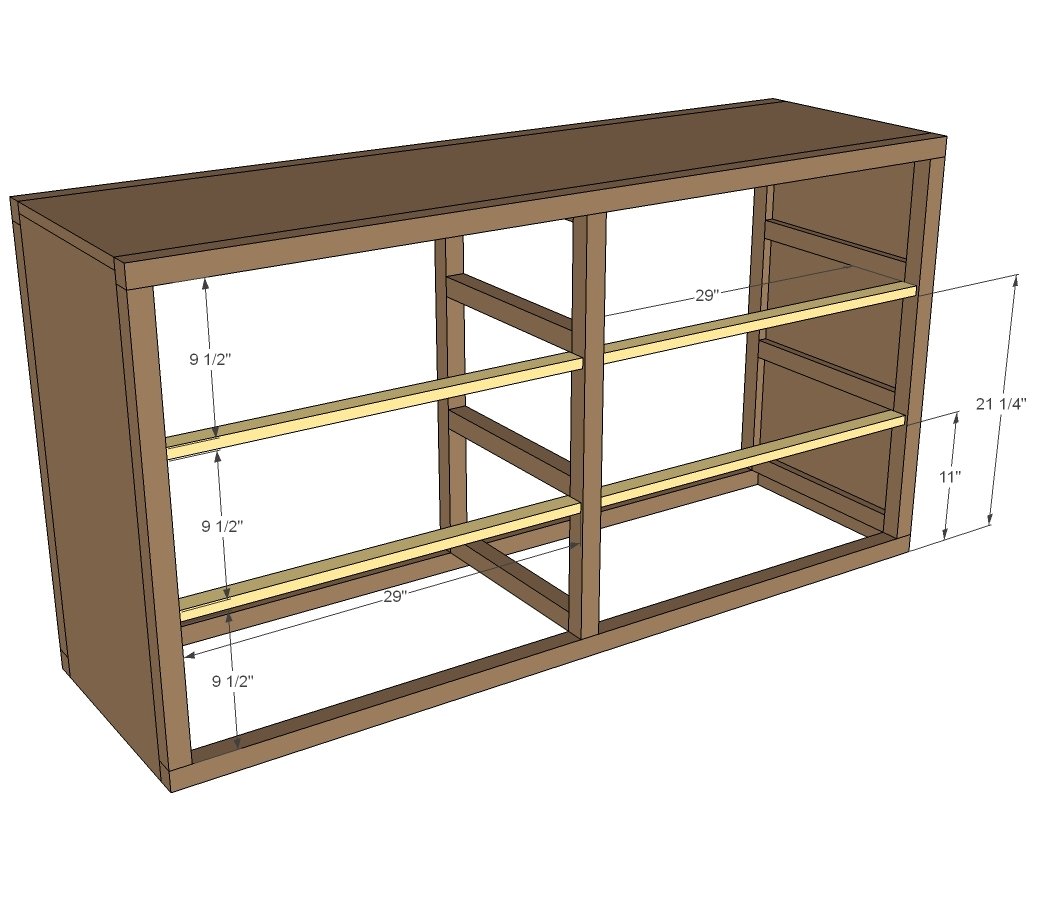
Step 6
These guys are to help take the weight off the center of the dresser and distribute it, and also to keep things square. You may feel you don't need them - I'm an overbuilding kinda gal:) Another option if you find your dresser needs additional center support (hey, you never know, you may be storing gold in there!) you can add and additional 5th wheel to the center.
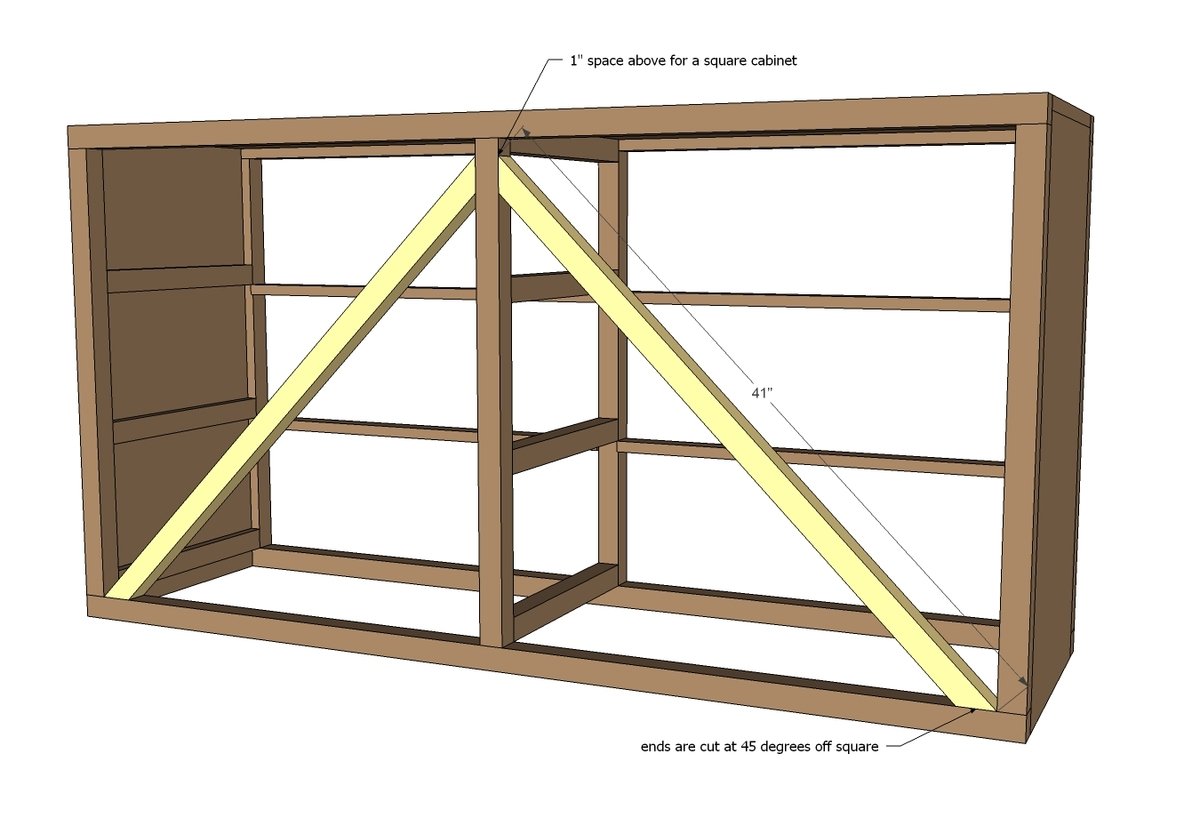
Step 7
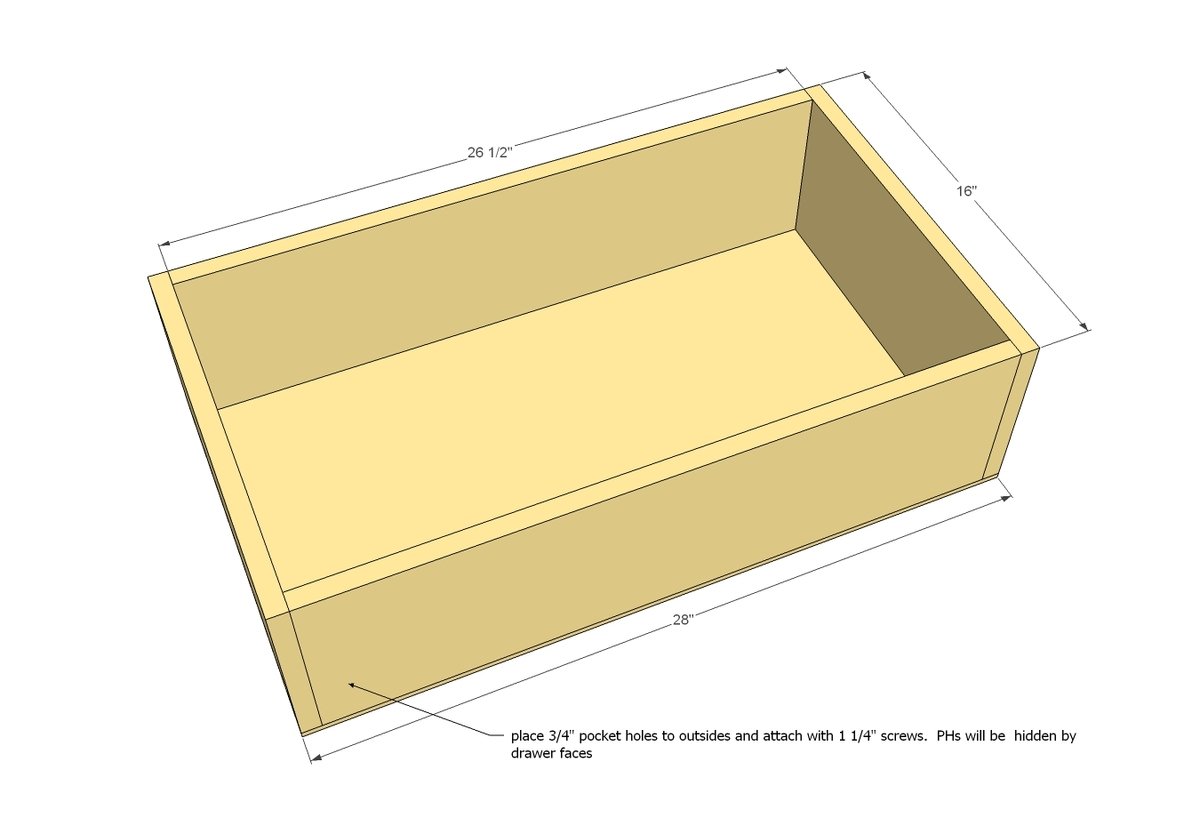
Drawer time! It's super important that your drawers are square and measure 1" less than the overall interior width of the drawer opening. NOTE that some drawer slides may vary in clearance requirements, so always read through the drawer slide instructions before building drawer boxes. Drawer video - please watch this video for drawer installation:
Step 8
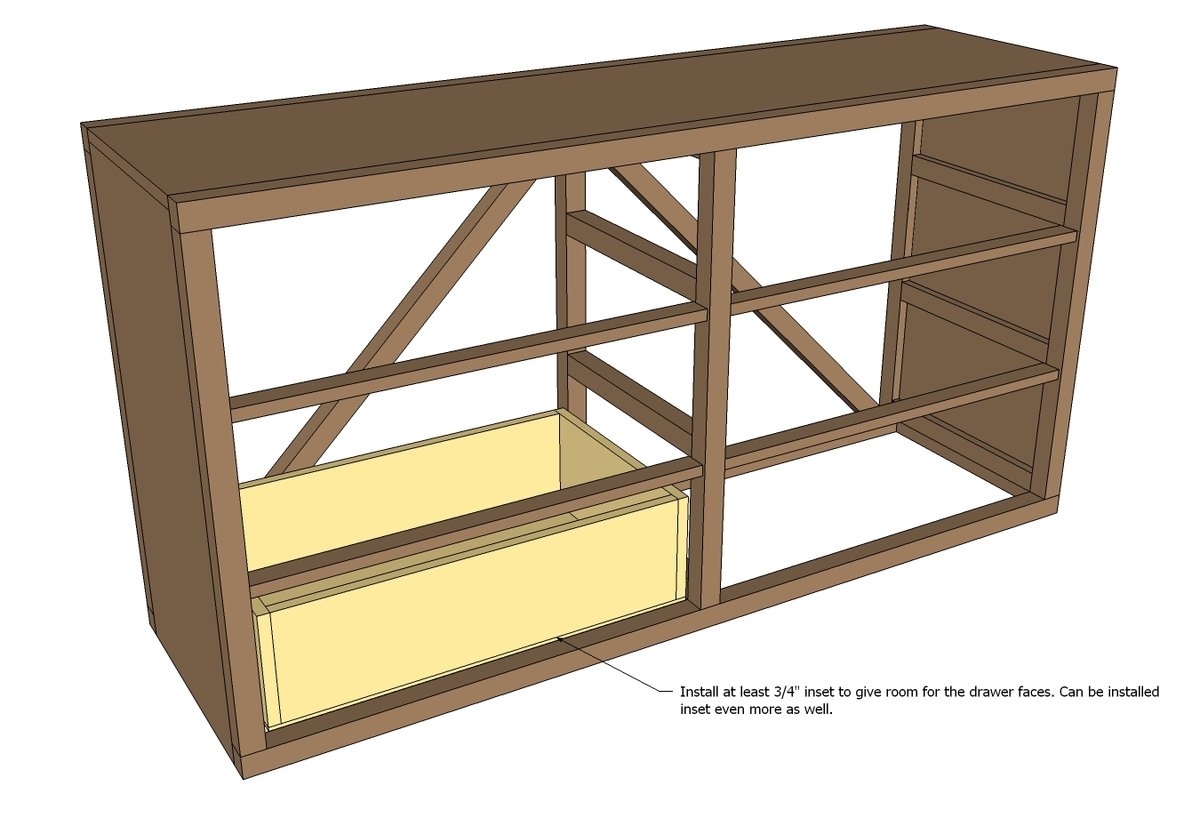
Install drawers with the metal drawer slides.
Step 9
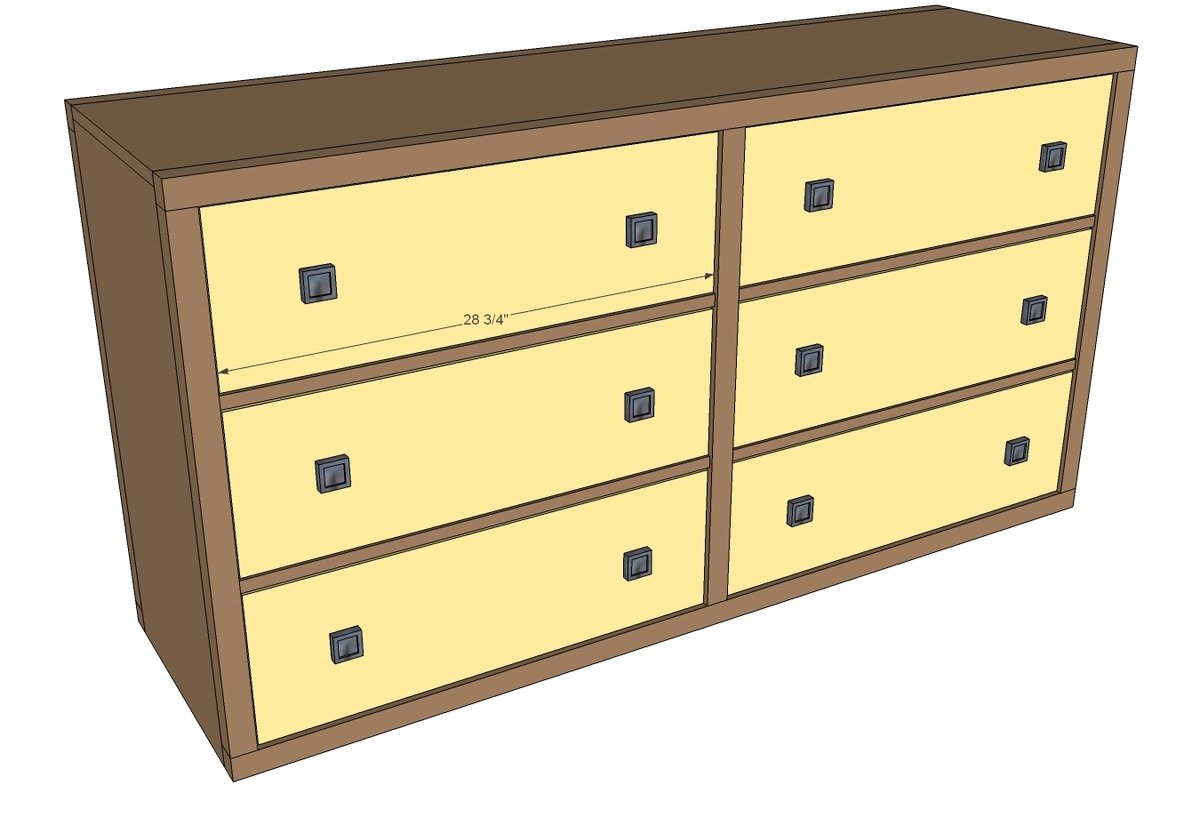
Now the fun part! Attach faces, with even 1/8" gap around all sides. I do this by setting in place with 1/8" shims on bottom and sides and attaching with glue and a couple of 1 1/4" finish nails. Then I open the door and attach from inside with a few 1 1/4" screws to secure. NOTE: Depending on your hardware, you may wish to attach hardware first to drawer face.
Step 10
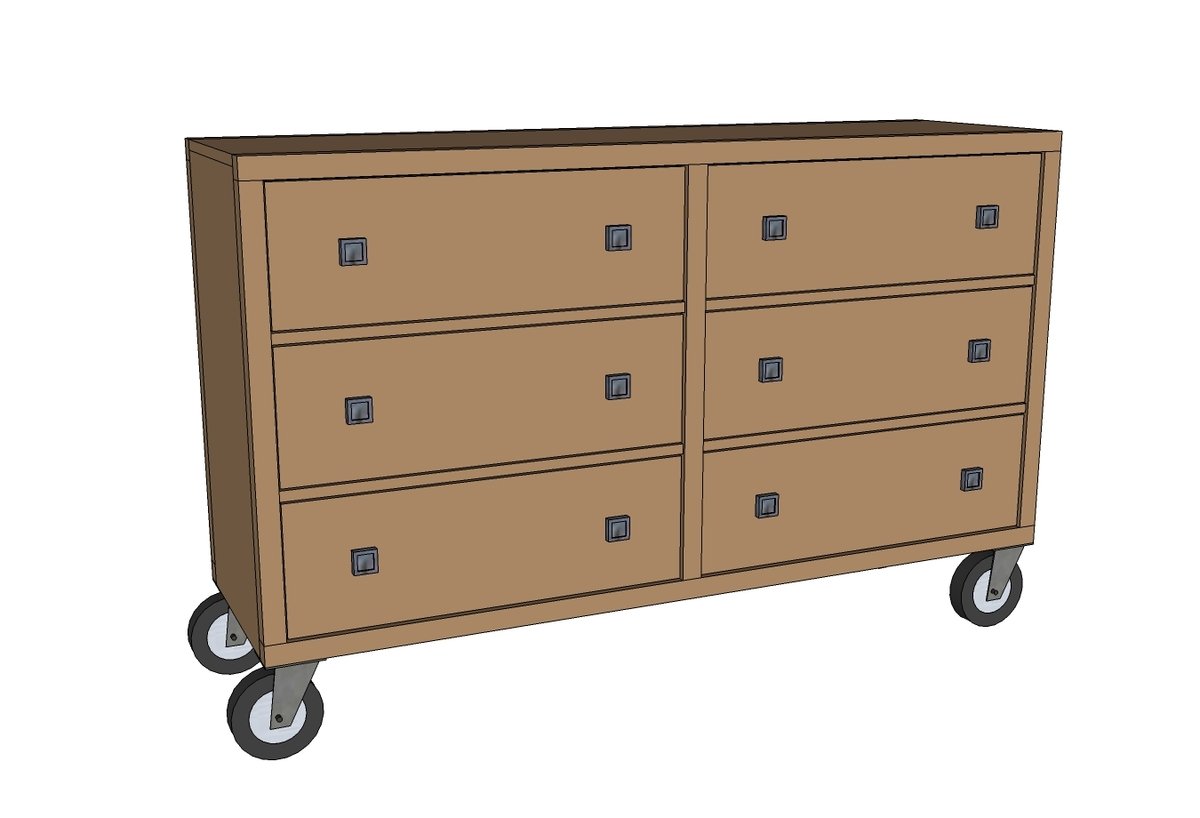
Final step is to add the wheels!
Finishing
Sand all surfaces, starting with a medium grit and finishing with fine. Wipe off the dust, fill any holes or gaps with wood filler, and sand smooth once dry. Apply primer if you're painting, then finish with your choice of paint or stain and seal with a durable clear topcoat. For outdoor projects, use exterior-rated primer, paint or stain, and sealer so the piece stands up to the weather.
Source (temporary): https://www.ana-white.com/woodworking-projects/rolling-rustic-wood-dresser