Round 2x4 Farmhouse Table Base
Build a beautifully simple round farmhouse table base from affordable 2×4 lumber — no fancy lumber required. This DIY project uses straightforward joinery and a timeless X-style pedestal design to create a sturdy support for your own round tabletop. Plans include clear cut lists, step-by-step photos, and easy-to-follow instructions, making it a great build for beginners and seasoned woodworkers alike. Finished in your choice of stain or paint, this base pairs perfectly with a wide variety of tops and decor styles.
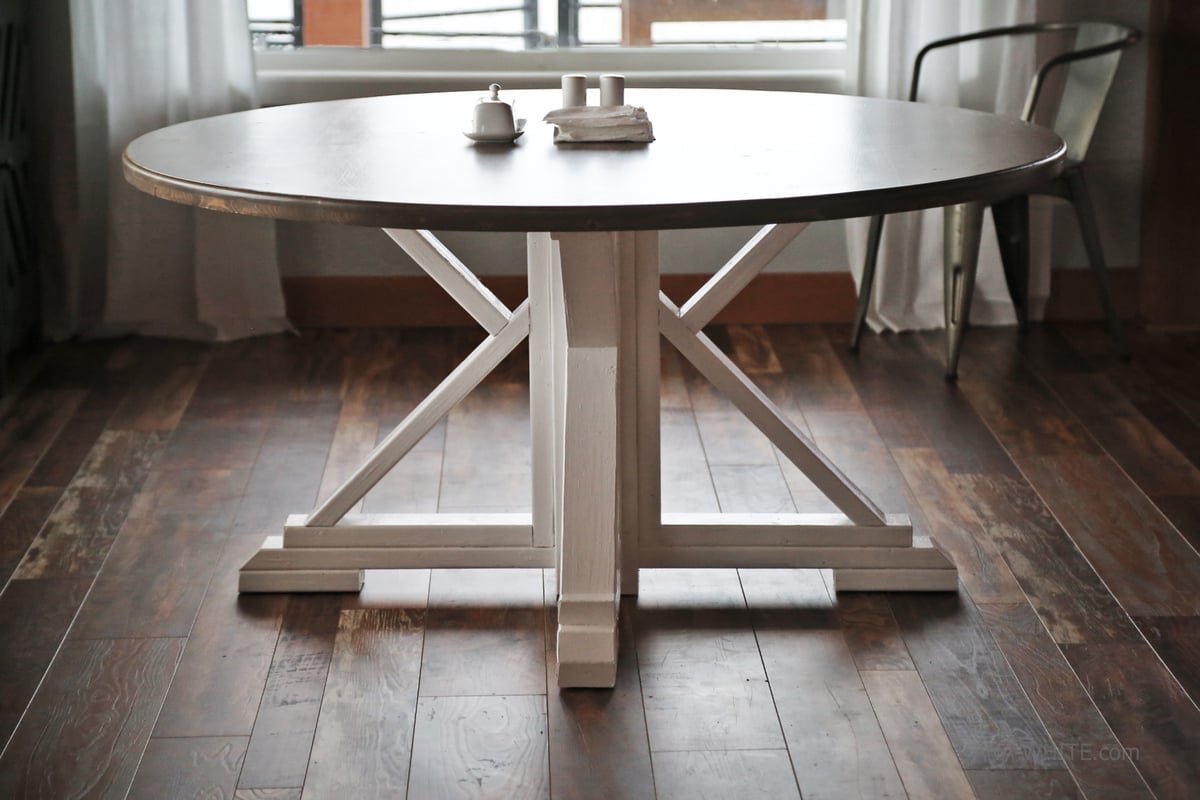
Specifications
| Project type | Dining Table Plans |
|---|---|
| Room | Craftroom |
| Style | Cottage Style Furniture Plans |
| Difficulty | Intermediate |
| Estimated cost | $150 - $200 |
Dimensions
Use the size-specific shopping and cut lists below.
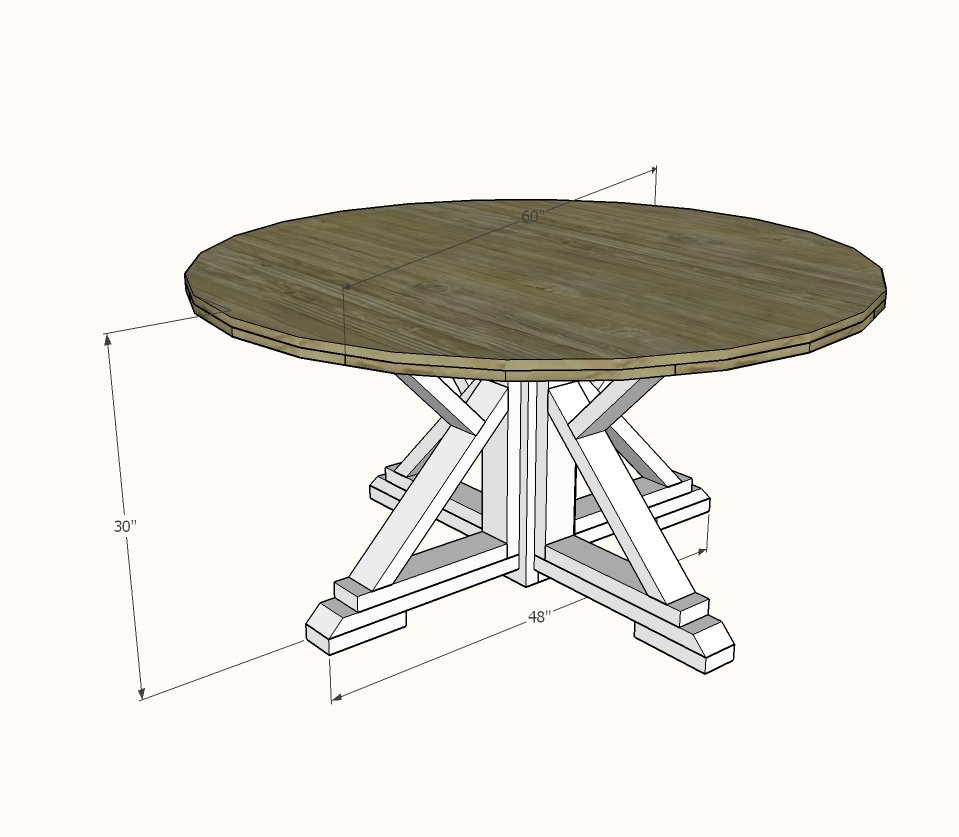
Shopping List
- 7 - 1x6 @ 10 feet long - cut longest boards first, work down to smallest boards with scraps
- 4 - 2x4 @ 12 feet long (can be in smaller pieces or 6 - 2x4 @ 8 feet long)
- 1 - 2x6 @ 8 feet or stud length
- 2 - 3/4" self tapping wood screws
- 1-1/4" self tapping wood screws
- 3/4" plywood scraps (recommended)
Cut List
Center
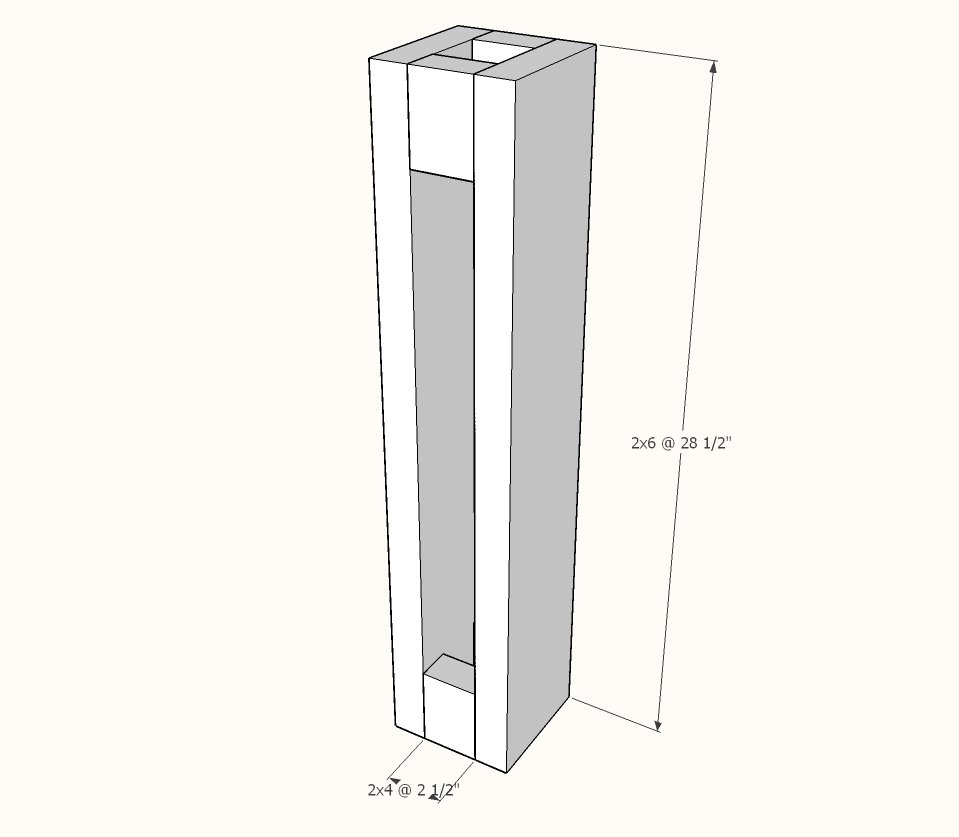
- 2 - 2x6 @ 28-1/2"
- 2 - 2x4 or 2x6 @ 2-1/2"
Legs
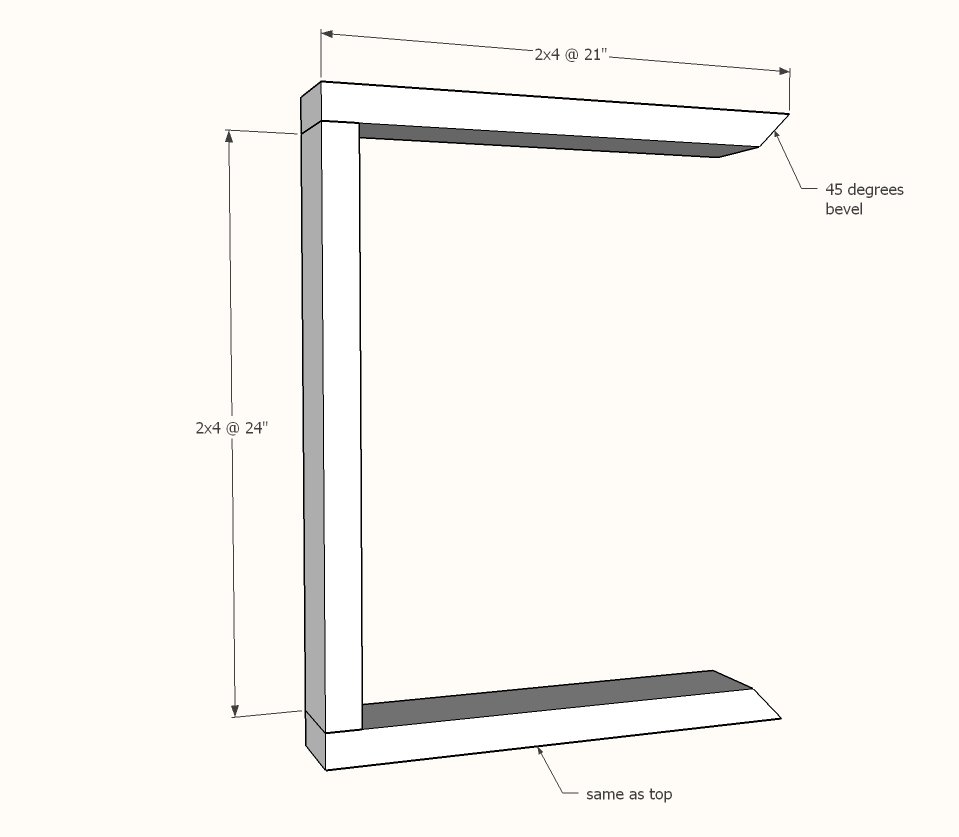
- 4 - 2x4 @ 24"
- 8 - 2x4 @ 21" - long point measurement, one end cut at 45 degree bevel
- 4 - 2x4 @ 16-1/2"
- 4 - 2x4 @ 8"
- 4 - 2x4 @ 21-1/4" - long point to long point measurement, both ends cut at a 45 degree bevel, ends NOT parallel
- 4 - 2x4 @ 15-7/8" - long point measurement, one end cut at 45 degree bevel
Top
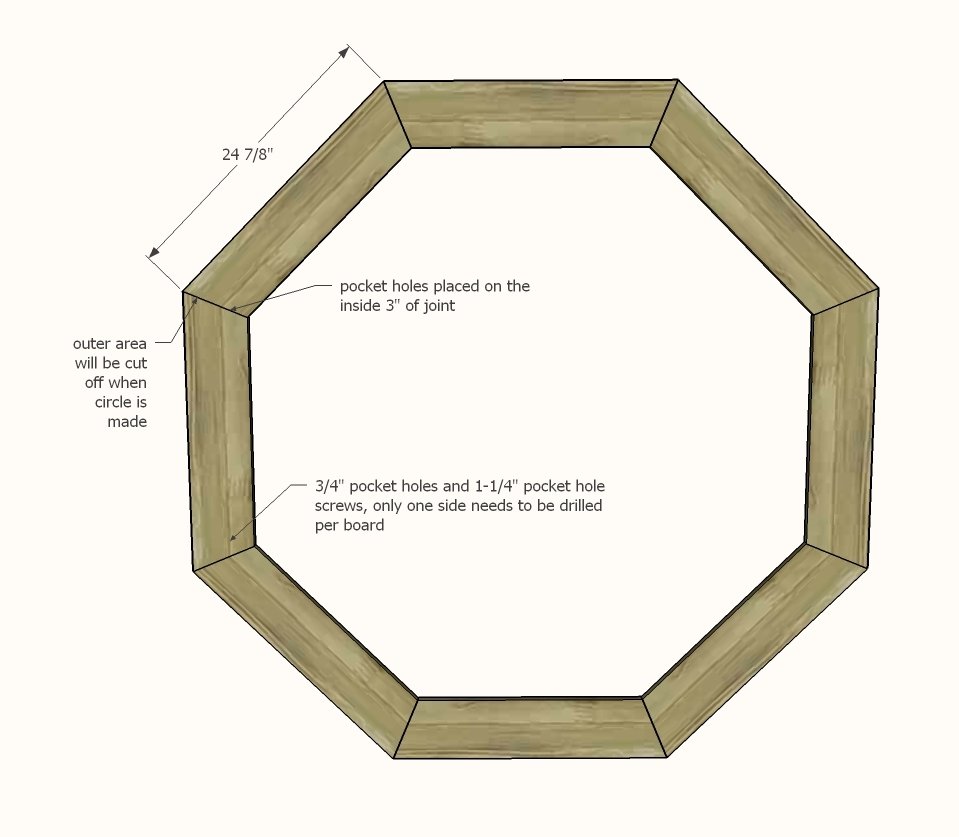
- 8 1x6 @ 24-7/8" - Longest point measurement, both ends cut at 22.5 degrees, ends NOT parallel
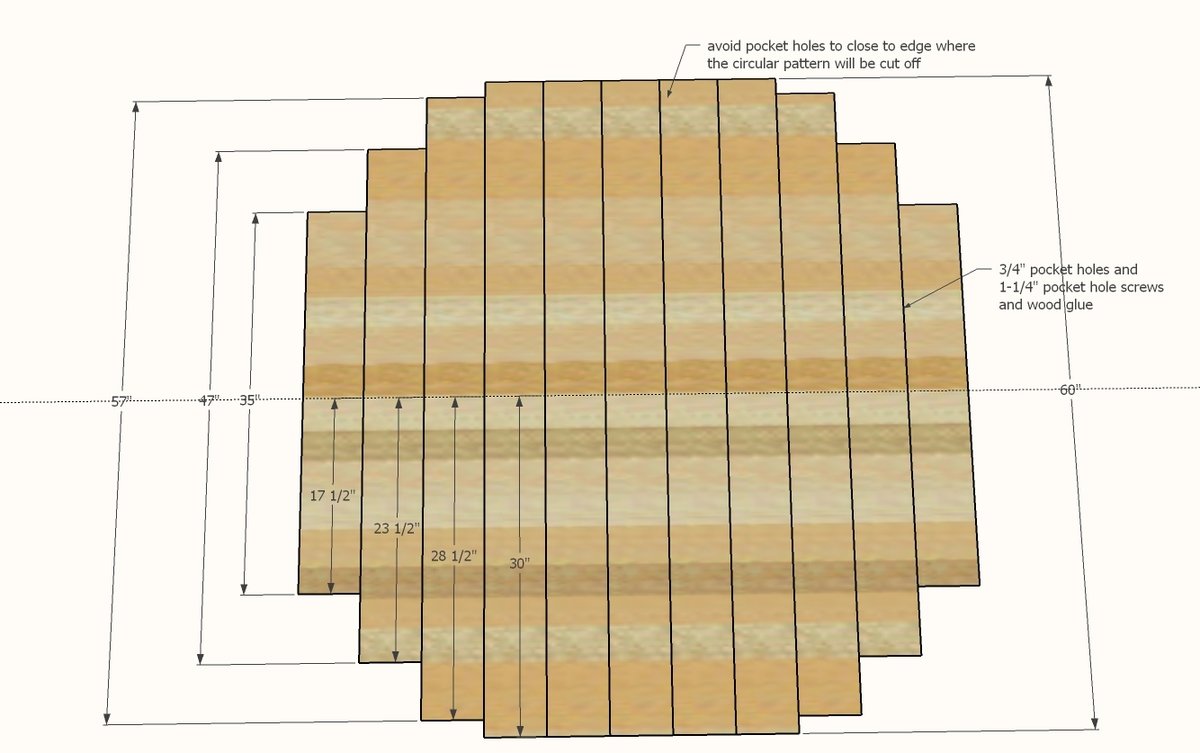
- 5 - 1x6 @ 60"
- 2 - 1x6 @ 57"
- 2 - 1x6 @ 47"
- 2 - 1x6 @ 35"
Tools
- measuring tape
- square
- pencil
- safety glasses
- hearing protection
- kreg-jig
- drill
- circular saw
- compound miter saw
- sander
Step-by-step Instructions
Step 1
Build the center pedestal. You can use 2-3/4" screws (paint grade), or for stain grade - 2" brad nails and glue, or pocket holes. Set aside.
Step 2
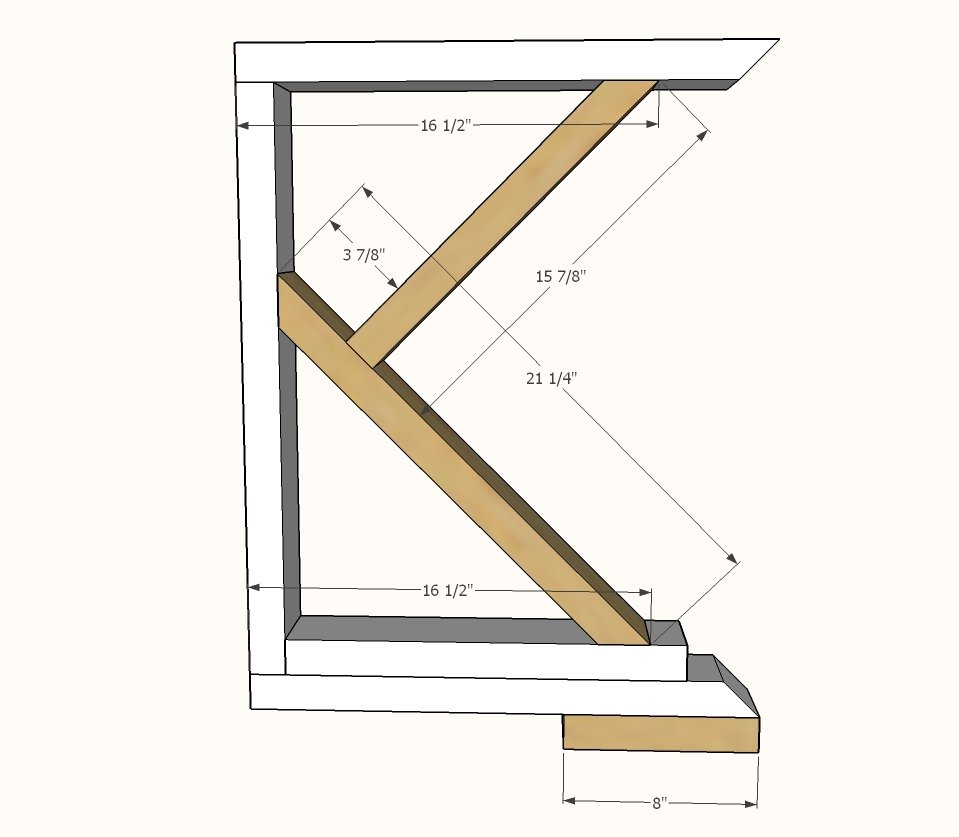
Start the legs by building four of the outside frames. You can use 2-3/4" self tapping screws or pocket holes set for 1-1/2" material and 2-1/2" pocket hole screws.
Step 3
Attach the angled pieces together first with 2-3/4" self tapping wood screws, then attach to the 2x4 @ 16-1/2". Attach inside the leg frame. Add the bottom foot.
Step 4
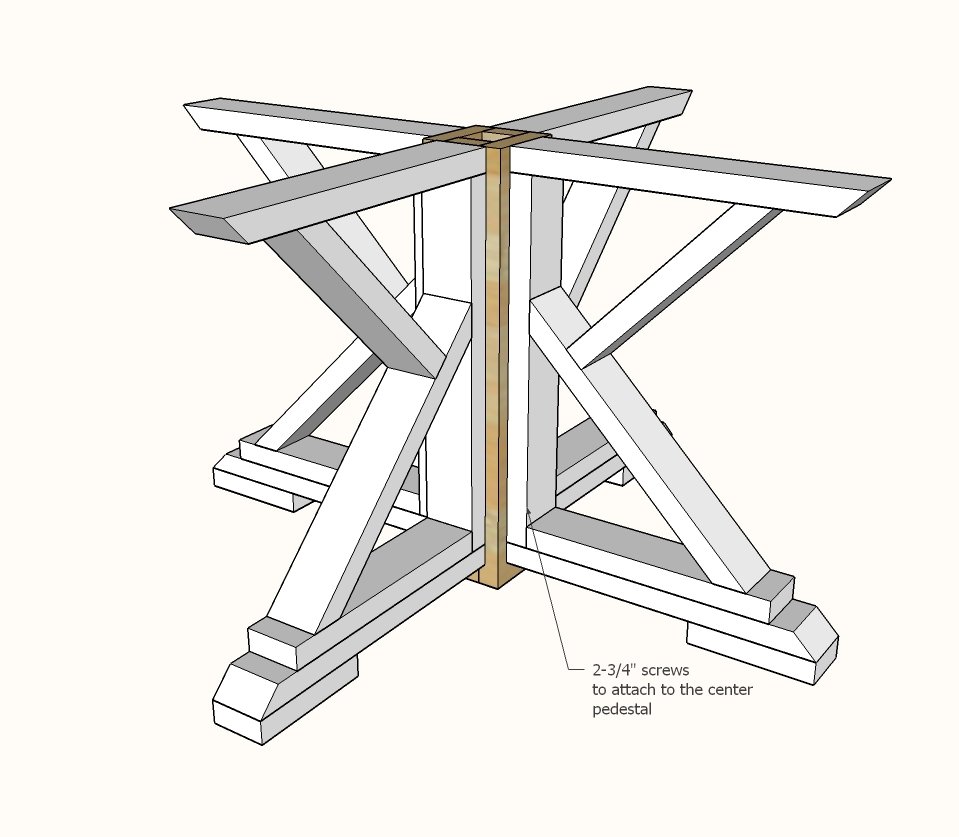
Once all four leg pieces are built, attach to the center pedestal with 2-3/4" screws. Everything is flush to the top.
Step 5
Step 6
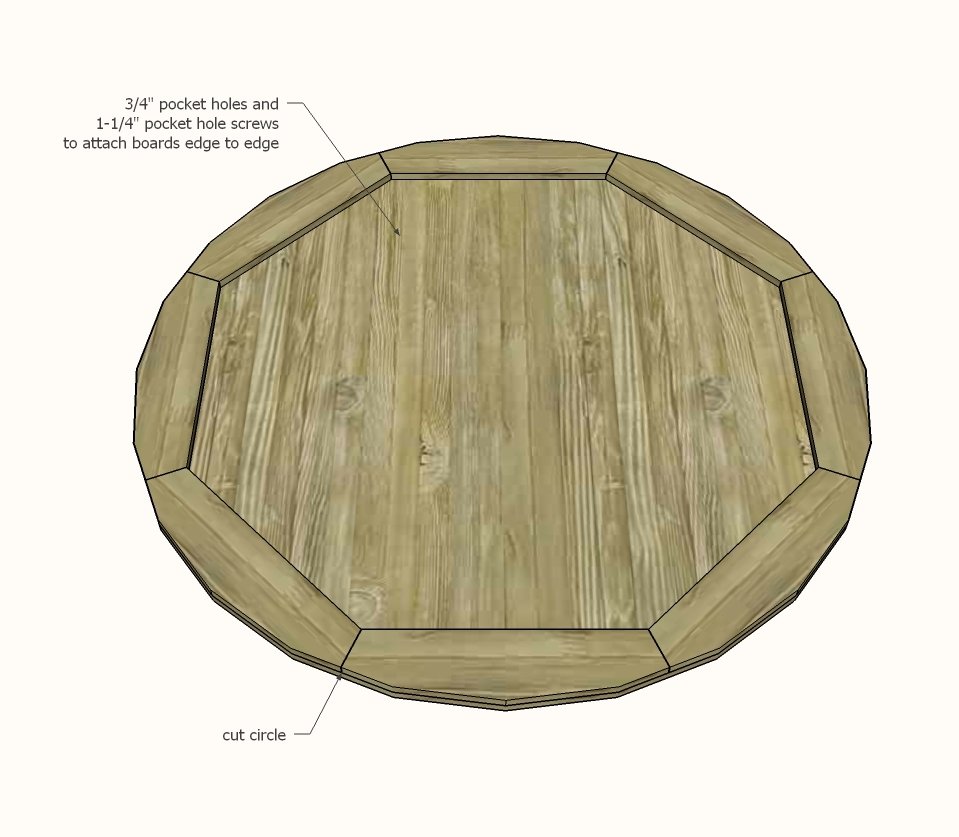
Cut the tabletop boards and mark centers. Line up and attach together with 3/4" pocket holes and 1-1/4" pocket hole screws. Remember that the tabletop will be cut down and avoid placing screws that could be cut with the saw in next step.
Attach the octogon ring to the tabletop with glue and 1-1/4" screws.
Cut the circle out ( see video for detail).
Step 8
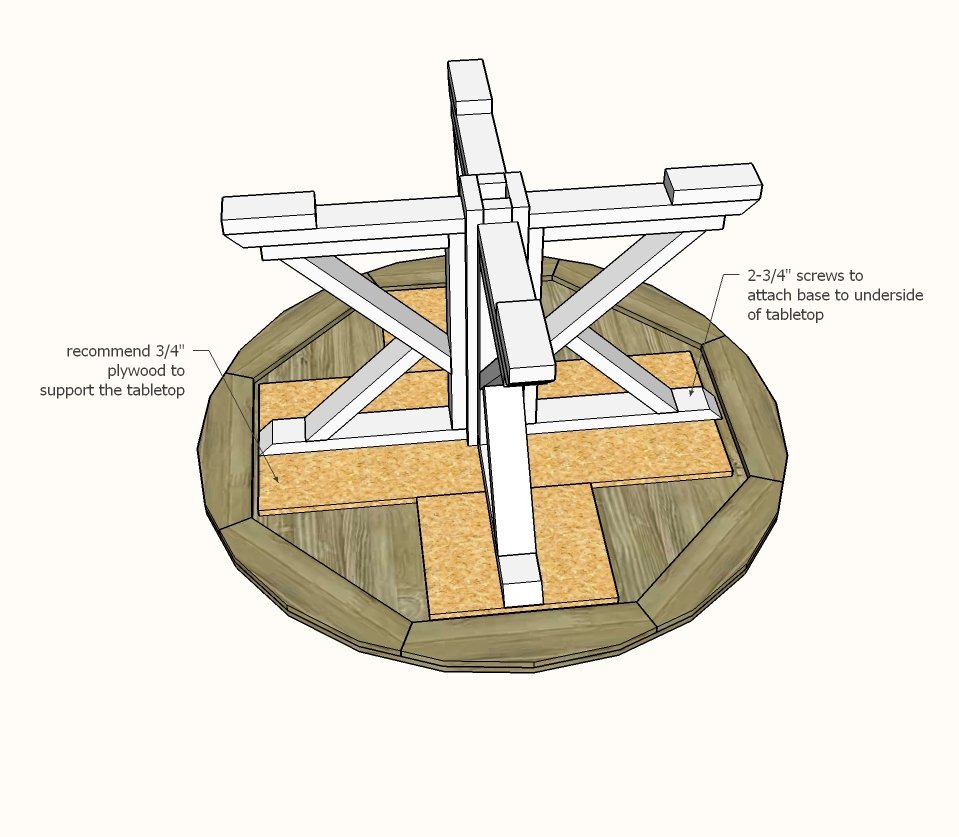
Attach base to tabletop.
Finishing
Sand all surfaces, starting with a medium grit and finishing with fine. Wipe off the dust, fill any holes or gaps with wood filler, and sand smooth once dry. Apply primer if you're painting, then finish with your choice of paint or stain and seal with a durable clear topcoat. For outdoor projects, use exterior-rated primer, paint or stain, and sealer so the piece stands up to the weather.
Source (temporary): https://www.ana-white.com/woodworking-projects/round-2x4-farmhouse-table-base