Round Children's Play Table with Storage Base
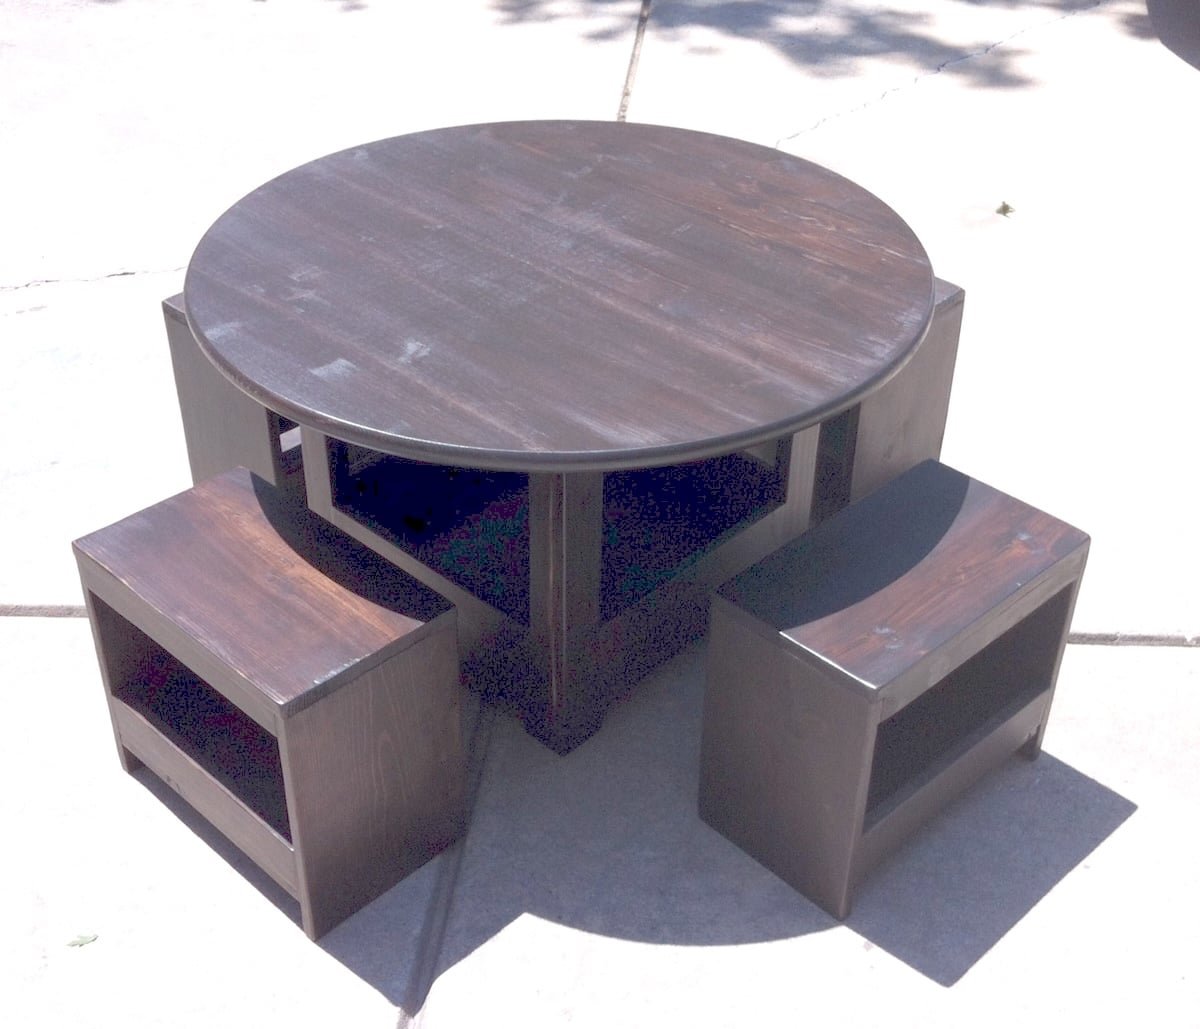
Build a round kids play table with storage from This play table features a smooth, off the shelf top, and an easy to build 1x framed base, with a large storage center in the middle. We love this play table paired with benches or small ottomans! This play table can be used for arts and crafts, legos, dining, homeschool, and much more! feature step by step diagrams and lots of reader submitted photos!
Specifications
| Project type | Kids Tables and Chairs |
|---|---|
| Room | Storage Solutions |
| Style | Children's and Kid's Room Furniture and Toy Plans |
| Difficulty | Intermediate |
| Estimated cost | $20 - $50 |
Shopping List
- 18″ x 36″ Project Panel (Available at Lowes or Home Depot)
- 32″ Wood Tabletop (Available at Lowes or Home Depot)
- 1 – 1×6 Board
- 1 – 1×2 Board
- 2 – 1×3 Boards
Cut List
- 2 – 18″ x 18″ Shelves cut from the project panel
- 4 – 1×2 @ 22 3/4″ (Sides of Legs)
- 4 – 1×3 @ 22 3/4″ (Fronts and Backs of Legs)
- 2 – 1×6 @ 15″(Sides of Compatment between the 1×2 side of legs)
- 2 – 1×6 @ 14 1/2″ (Sides of Compatment between the 1×3 side of legs)
- 2 – 1×3 @ 15″ (Top trim between the 1×2 sides of legs)
- 2 – 1×3 @ 14 1/2″ (Top trim between the 1×3 sides of legs)
Tools
- measuring tape
- square
- pencil
- hammer
- safety glasses
- hearing protection
- kreg-jig
- drill
- circular saw
- sander
Step-by-step Instructions
Step 1
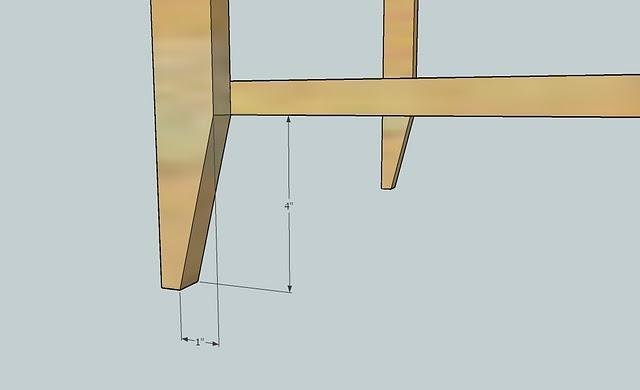
Start by cutting the ends of your legs as shown above. Do this on all the 1×2 leg pieces on the ends.
Step 2
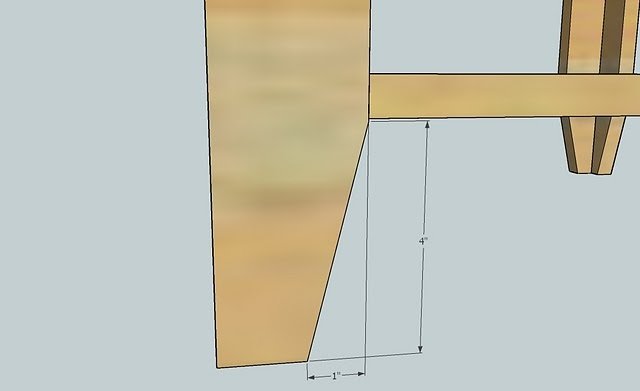
Now cut the 1×3 legs as shown above, just like step 1.
Step 3
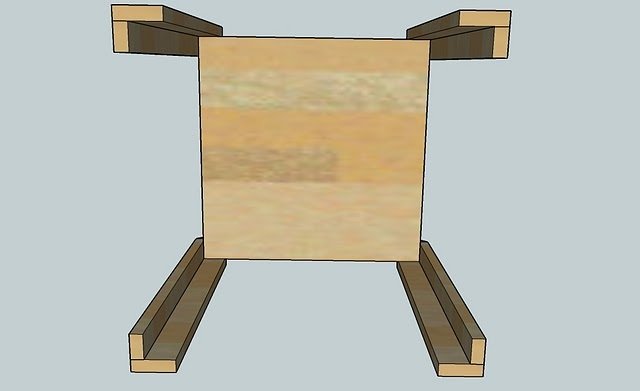
Put the legs together as shown above. Mark each of the legs 4″ from the bottom. Please visit the small storage table post located here for more details on this step. Use 2″ nails and glue here. You could screw the legs together for added strength.
Step 4
Now add the shelves, the bottom of the bottom shelf sitting 4″ from the bottom of the table. Use glue and 2″ nails. It would not be a bad idea to screw the table together here (think little kids climbing on the table).
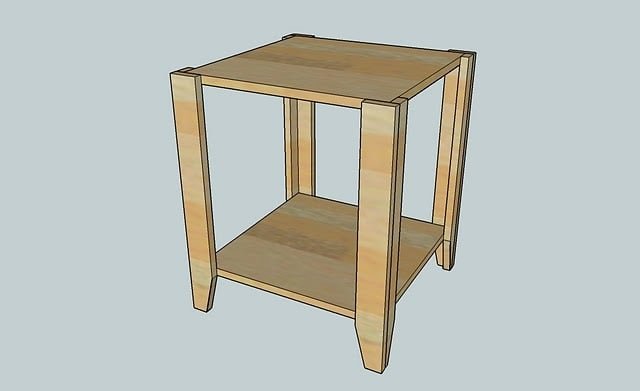
Step 5
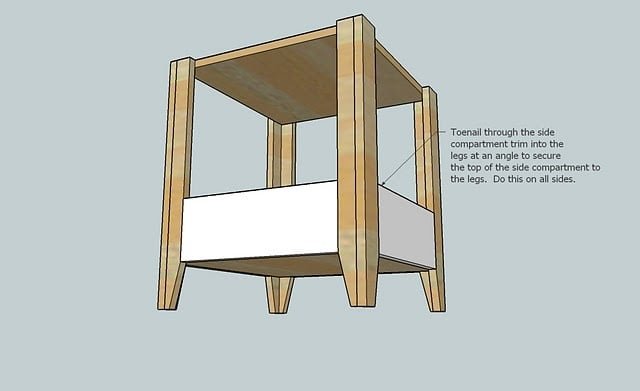
Step 6
Now add the top trim pieces, as shown above. Toenail the bottom edges of the trim to the legs.
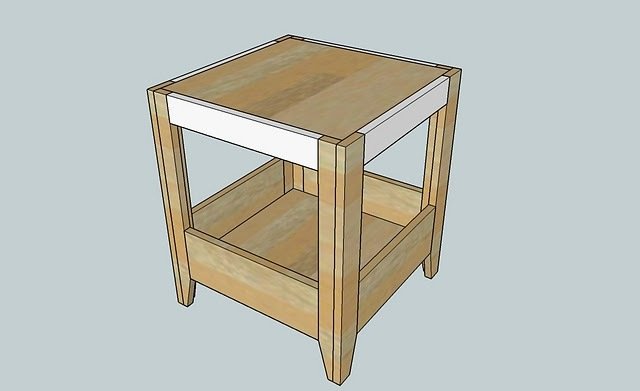
Step 7
Flip the table over and screw through the top shelf into the underside of the tabletop.
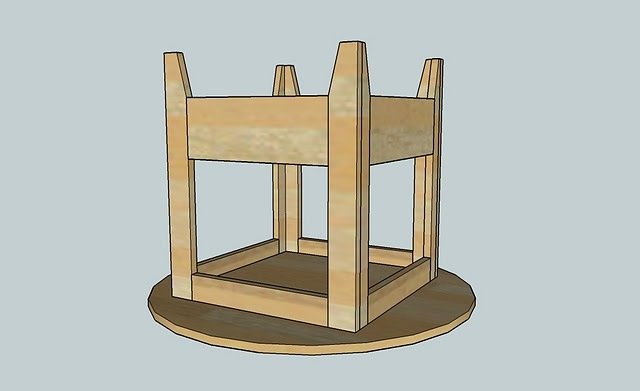
Step 8
Fill holes with wood putty and sand and finish as desired.
Finishing
Sand all surfaces, starting with a medium grit and finishing with fine. Wipe off the dust, fill any holes or gaps with wood filler, and sand smooth once dry. Apply primer if you're painting, then finish with your choice of paint or stain and seal with a durable clear topcoat. For outdoor projects, use exterior-rated primer, paint or stain, and sealer so the piece stands up to the weather.
Source (temporary): https://www.ana-white.com/woodworking-projects/round-childrens-play-table-storage-base-free-plans