Round Modern Dining Table Base
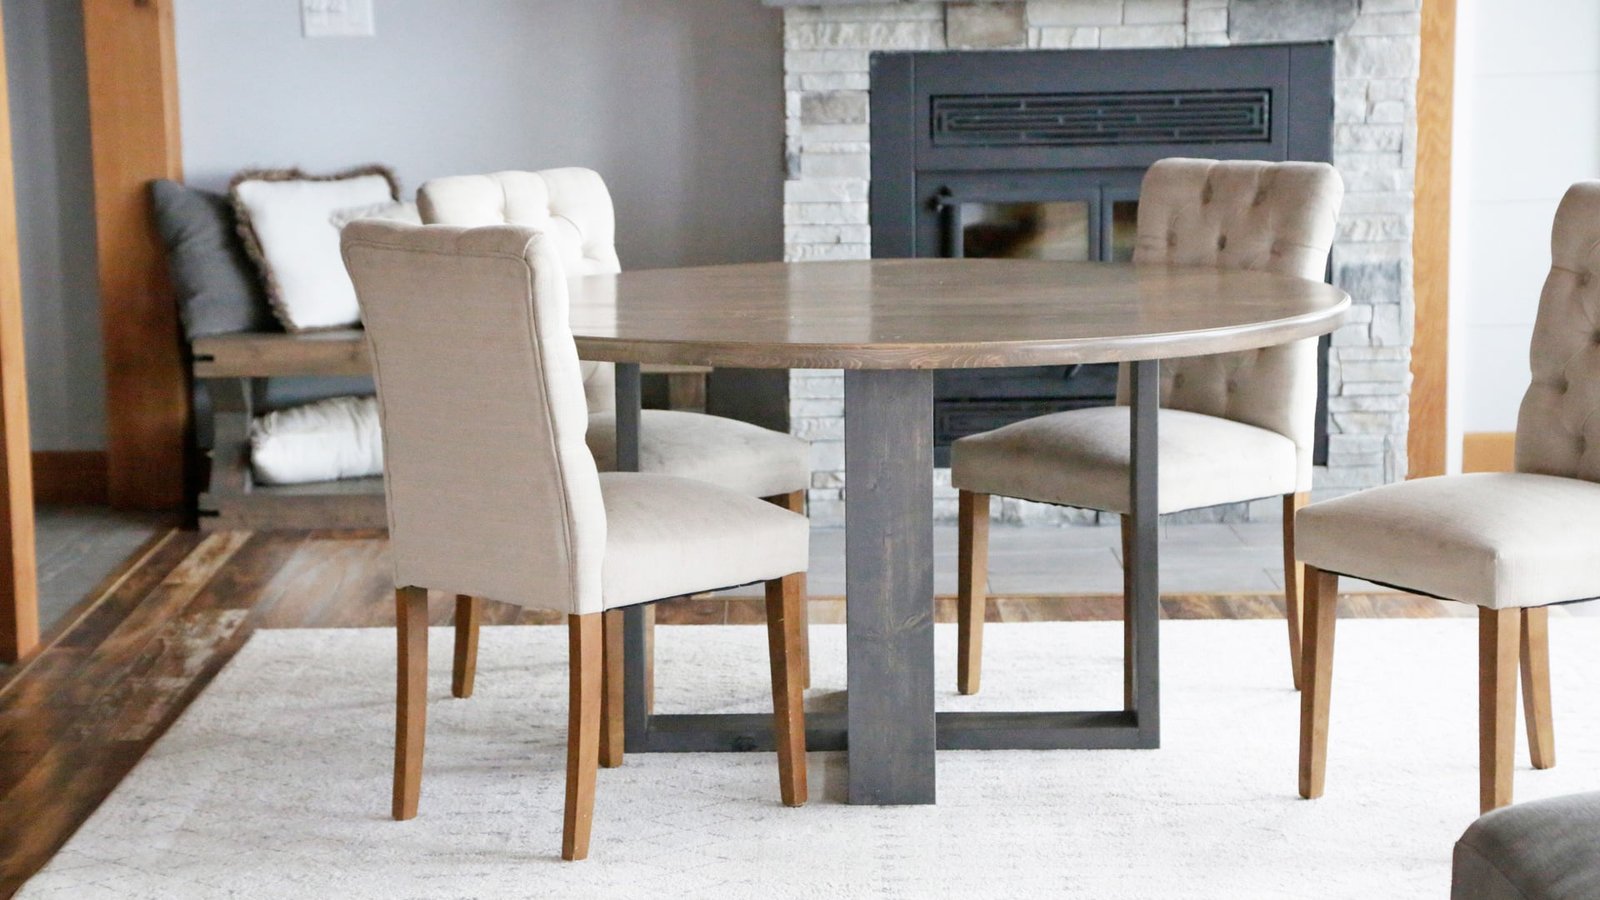
Build your own round modern dining table from
Specifications
| Project type | Dining Table Plans |
|---|---|
| Room | dining room |
| Style | Modern Style Furniture Plans |
| Difficulty | Beginner Projects |
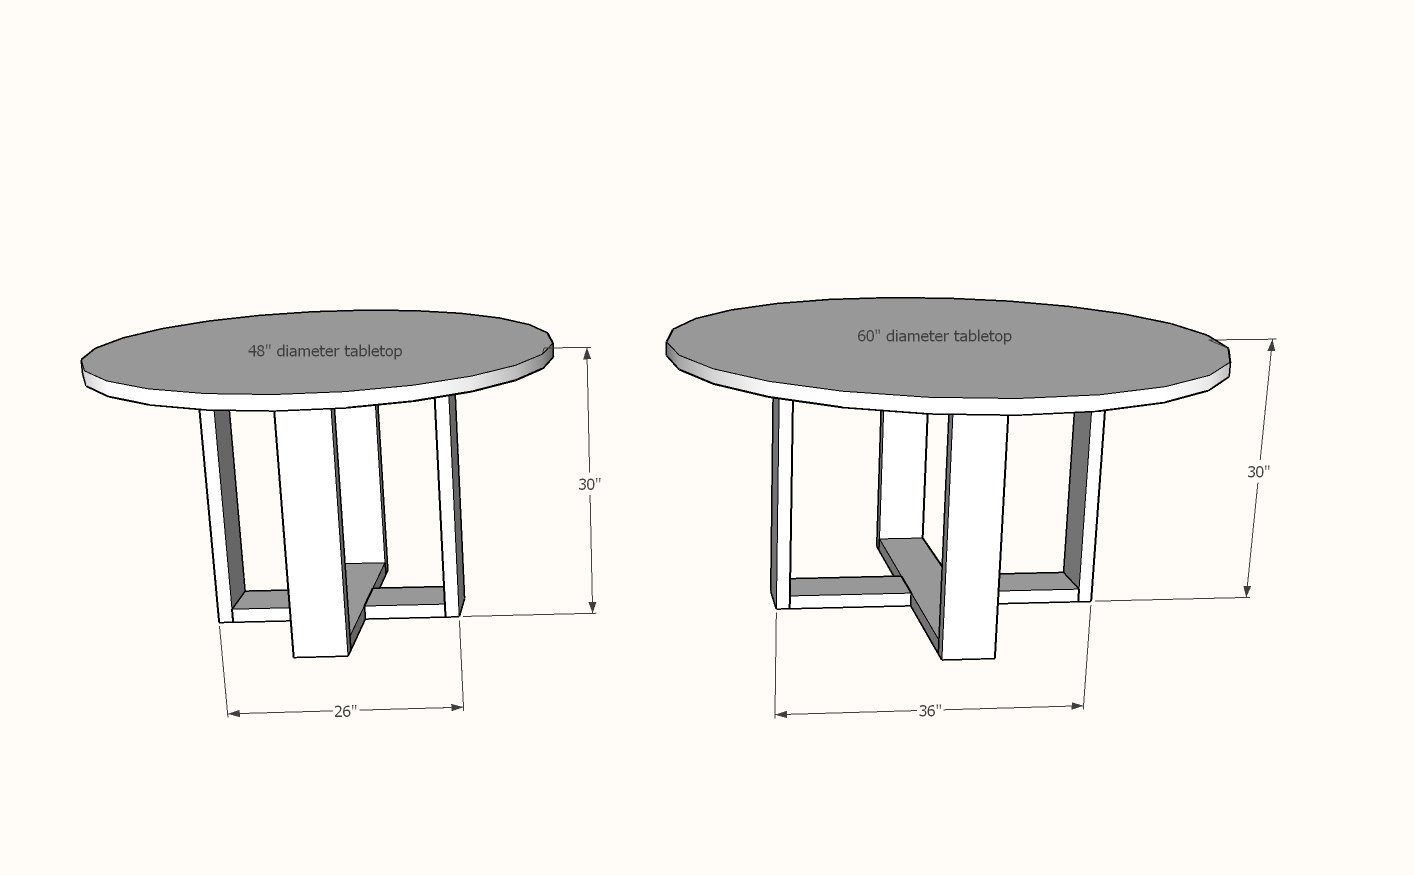
Dimensions
Use the size-specific shopping and cut lists below.
Shopping List
For 48" Base
- 2 - 2x6 @ 8 feet or stud length
- 24 - 2-1/2" pocket hole screws
For 60" Base
- 2 - 2x6 @ 10 feet or stud length
- 24 - 2-1/2" pocket hole screws
Divide the cuts evenly between the two boards.
You will also need screws for attaching the tabletop. If your tabletop is 1-1/2" thick you can use the 2-1/2" pocket hole screws.
Cut List
Cut List for 48" Table Base
- 4 - 2x6 @ 28-1/2"
- 2 - 2x6 @ 23"
- 4 - 2x6 @ 8-3/4"
Cut List for 60" Table Base
- 4 - 2x6 @ 28-1/2"
- 2 - 2x6 @ 34" *
- 4 - 2x6 @ 14-1/4" *
*I added one inches to the 60" table base from the diagrams, because I felt like it needed to be slightly larger to reduce potential tipping.
Tools
- measuring tape
- square
- pencil
- safety glasses
- hearing protection
- kreg-jig
- drill
- compound miter saw
- sander
Step-by-step Instructions
Step 1
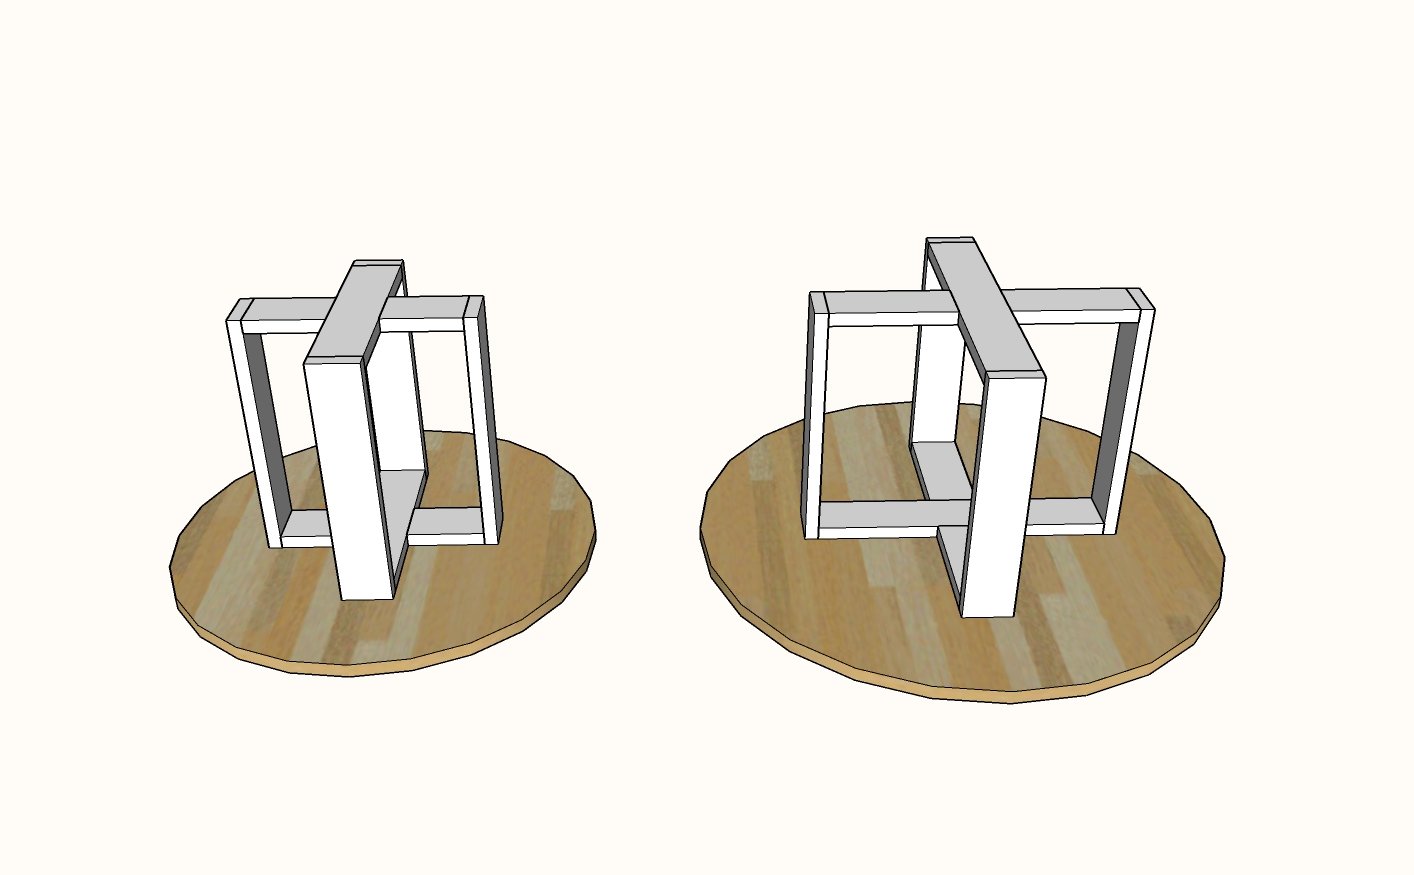
Attach the longer 2x6 boards to the legs to create a rectangle. Use 2-1/2" pocket hole screws and glue.
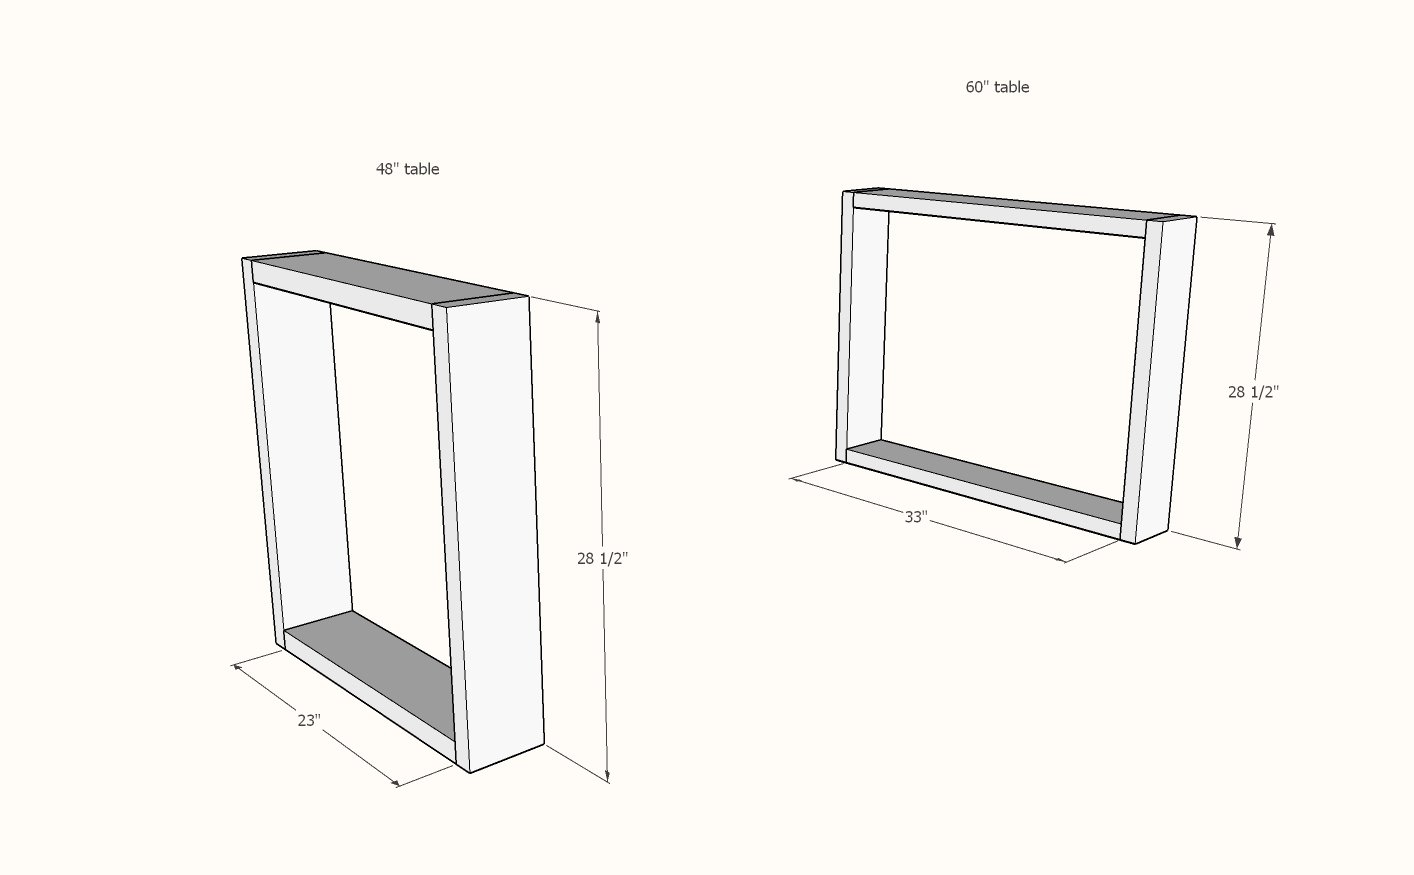
Attach the shorter remaining pieces to the remaining legs with 2-1/2" pocket hole screws.
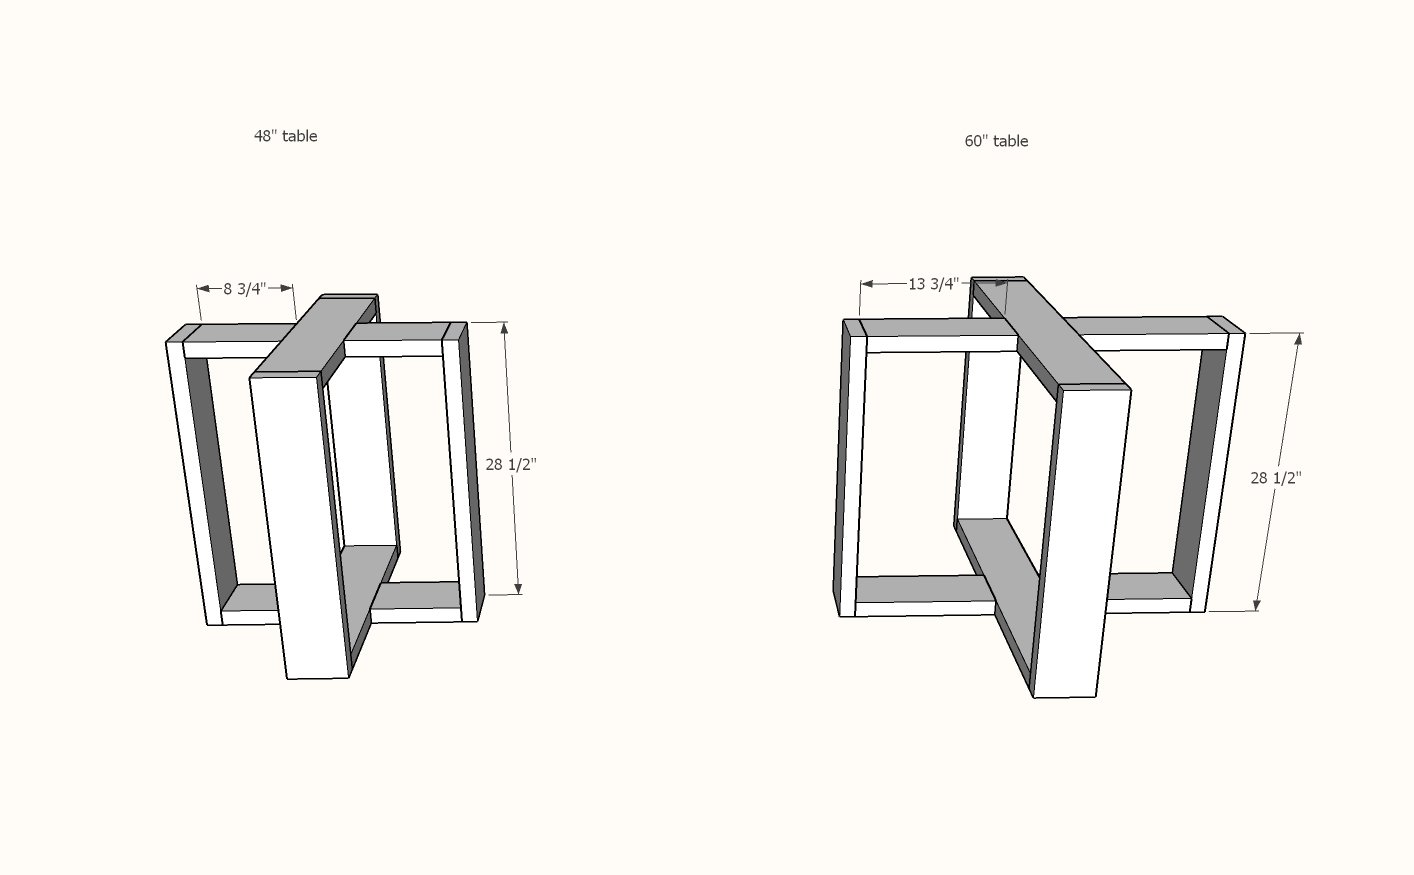
Find the center of the rectangles from step 1 and attach the C pieces to it with 2-1/2" pocket holes and glue.
Step 3
Attach base to the tabetop underside.
Finishing
Sand all surfaces, starting with a medium grit and finishing with fine. Wipe off the dust, fill any holes or gaps with wood filler, and sand smooth once dry. Apply primer if you're painting, then finish with your choice of paint or stain and seal with a durable clear topcoat. For outdoor projects, use exterior-rated primer, paint or stain, and sealer so the piece stands up to the weather.
Source (temporary): https://www.ana-white.com/woodworking-projects/round-modern-dining-table-base