Round Modern Wood Side Tables
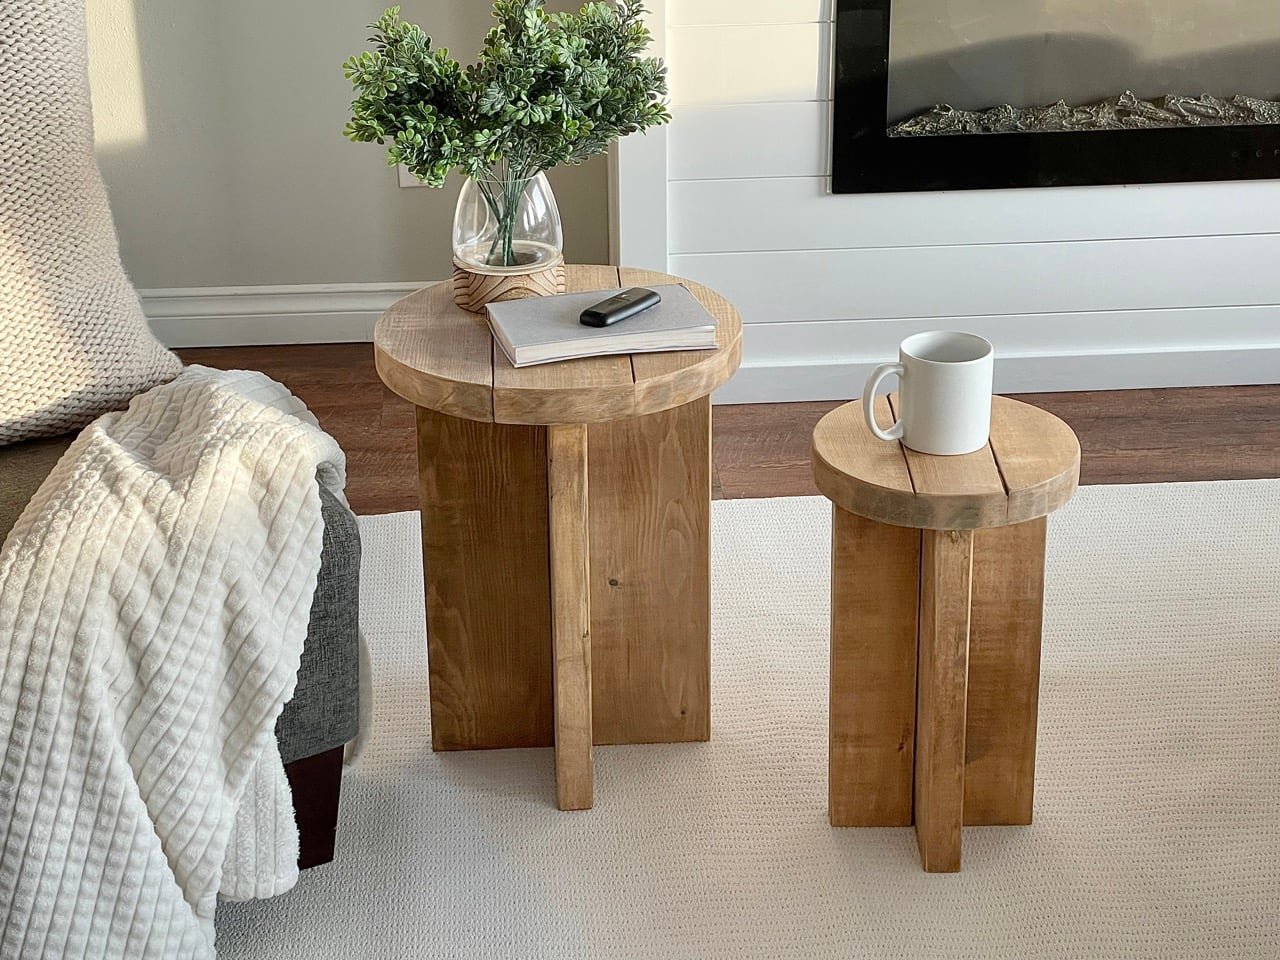
These beautiful side tables are DIY! For about $20, you can build your own with our free, step by step plans with video, detailed diagrams and lots of photos. From
Specifications
| Project type | Nightstands |
|---|---|
| Room | Bedroom |
| Difficulty | Intermediate |
Dimensions
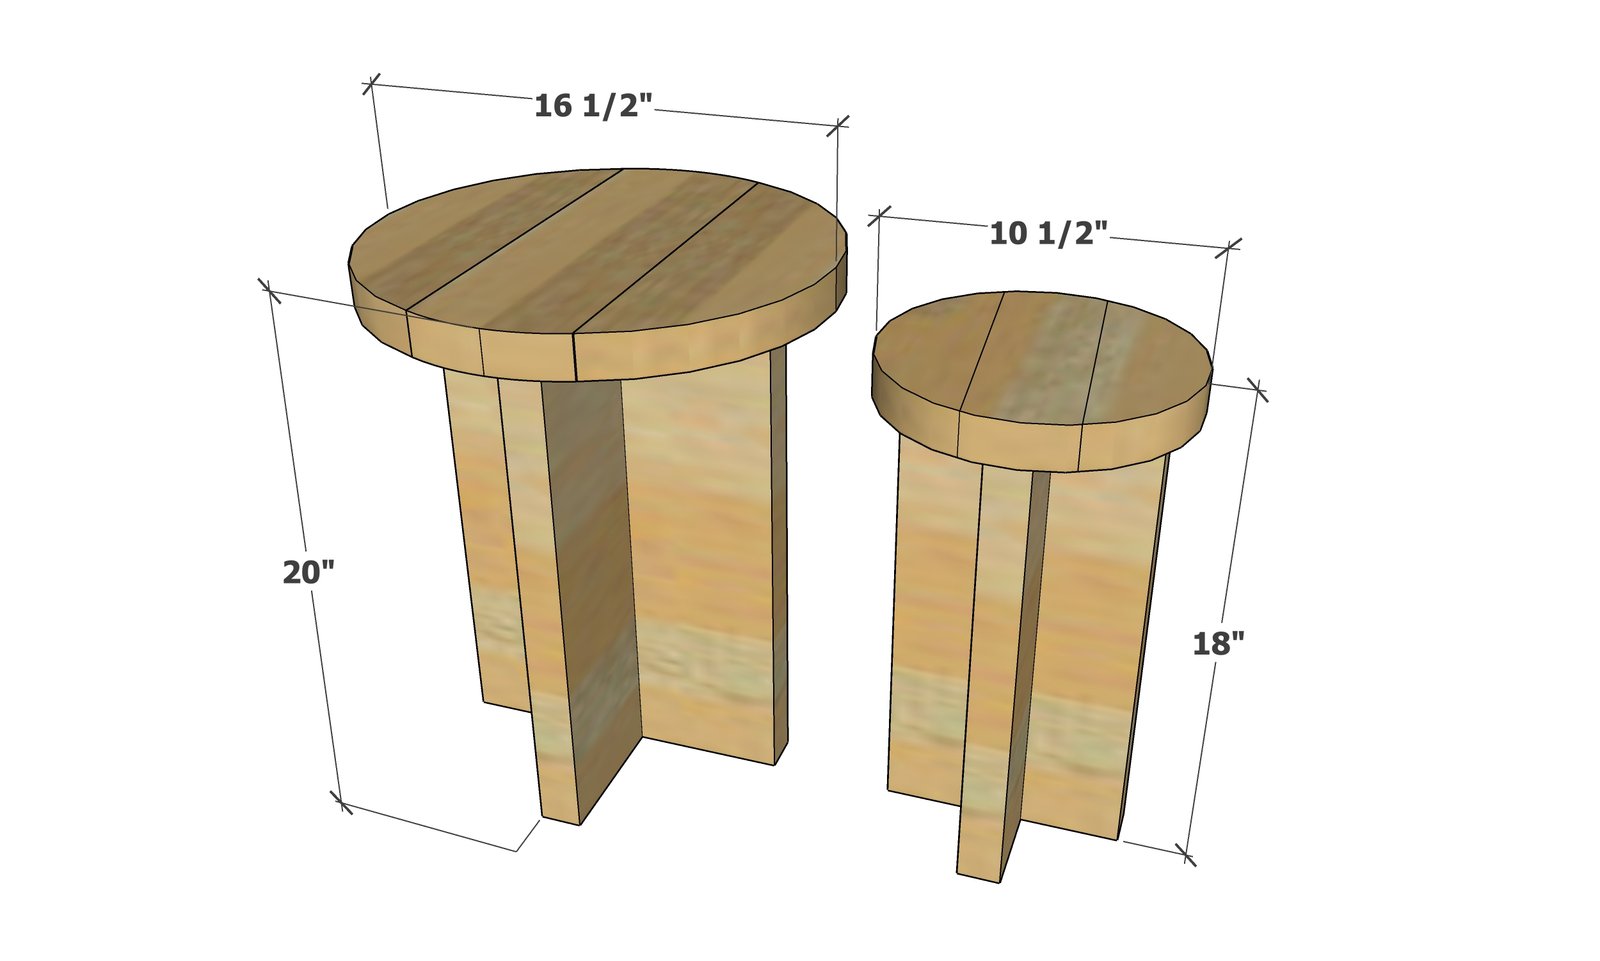
Use the size-specific shopping and cut lists below.
Shopping List
For 2x4 Side Table
- 1 - 2x4 @ 8 feet long (soft pine, yellow toned boards with minimal knots, cracks and warps)
- 1 - 2x2 @ 20" long (must be 1-1/2" x 1-1/2")
- 2" self tapping trim screws (16)
- 1 - 1/2" pocket hole screws (4)
For 2x6 Side Table
- 1 - 2x6 @ 12 feet long (soft pine, yellow toned boards with minimal knots, cracks and warps)
- 1 - 2x2 @ 24" long
- 2" self tapping trim screws (16)
- 1 - 1/2" pocket hole screws (6)
Cut List
For 2x4 Side Table
- 4 - 2x4 @ 16-1/2"
- 2 - 2x2 @ 9" - long point measurement, one end cut at 45 degrees
- 3 - 2x4 @ 10-1/2"
For 2x6 Side Table
- 4 - 2x6 @ 18-1/2"
- 2 - 2x2 @ 10" - long point measurement, one end cut at 45 degrees
- 3 - 2x6 @ 16-1/2"
Tools
- measuring tape
- pencil
- safety glasses
- kreg-jig
- drill
- circular saw
- compound miter saw
- sander
Step-by-step Instructions
Step 1
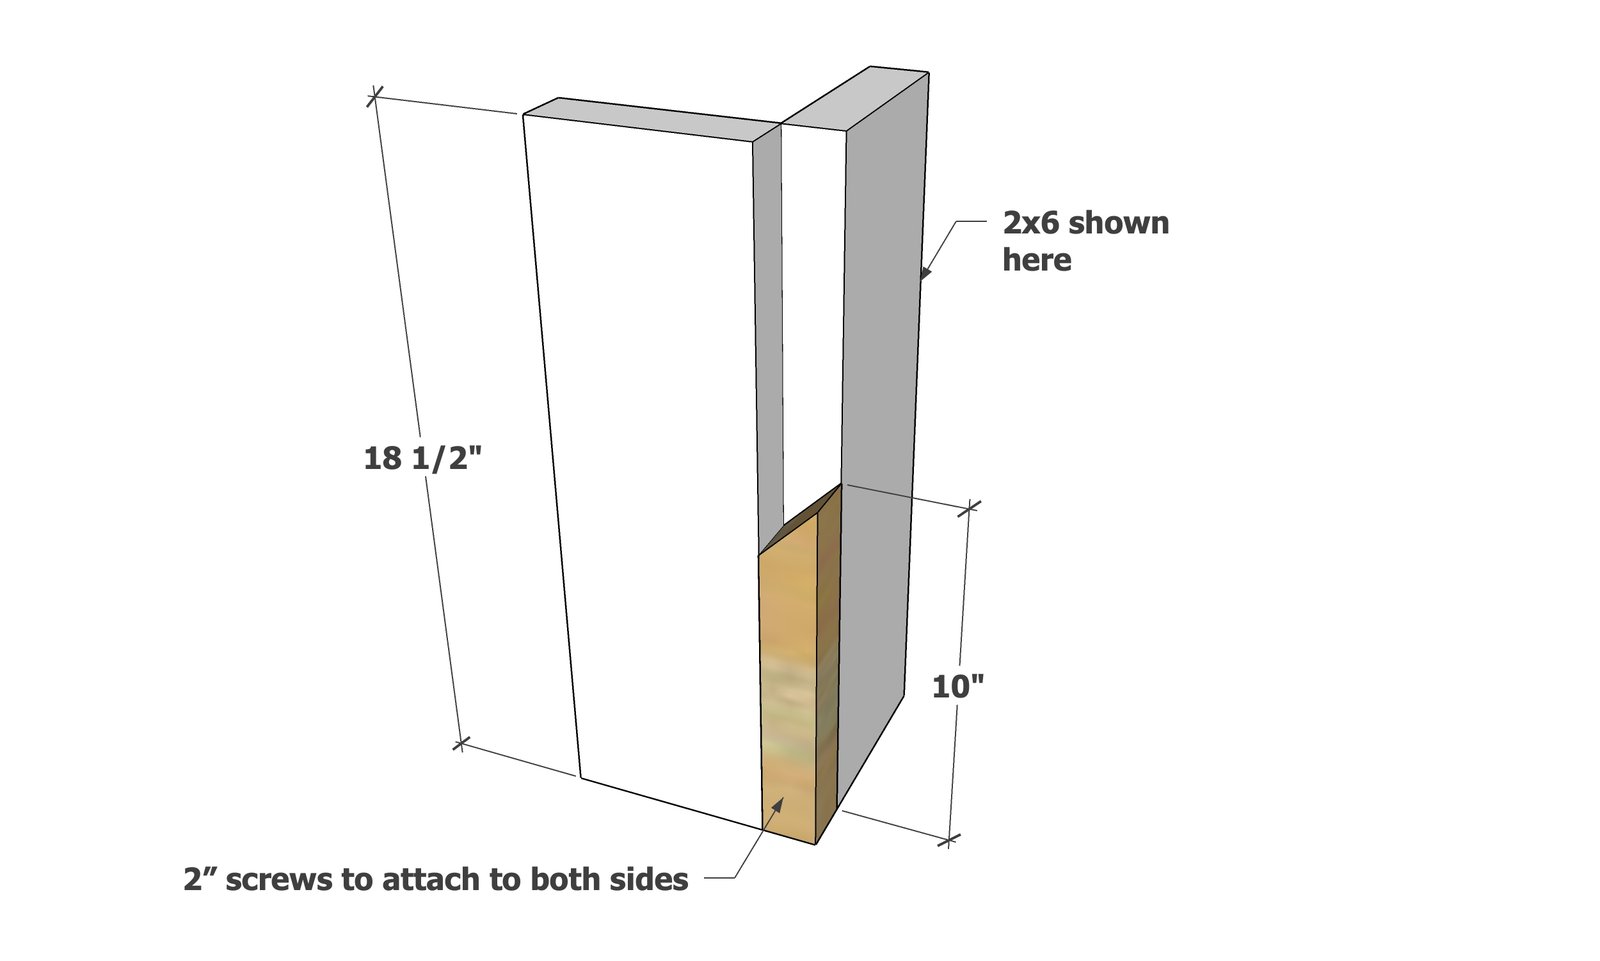
Attach one of the 2x2s to two of the legs as shown using the 2" trim screws, a total of four screws (2 per leg) to attach. Be careful not to split the 2x2. Make sure the 2x2 long point is facing outward and is flush to the bottom.
Step 2
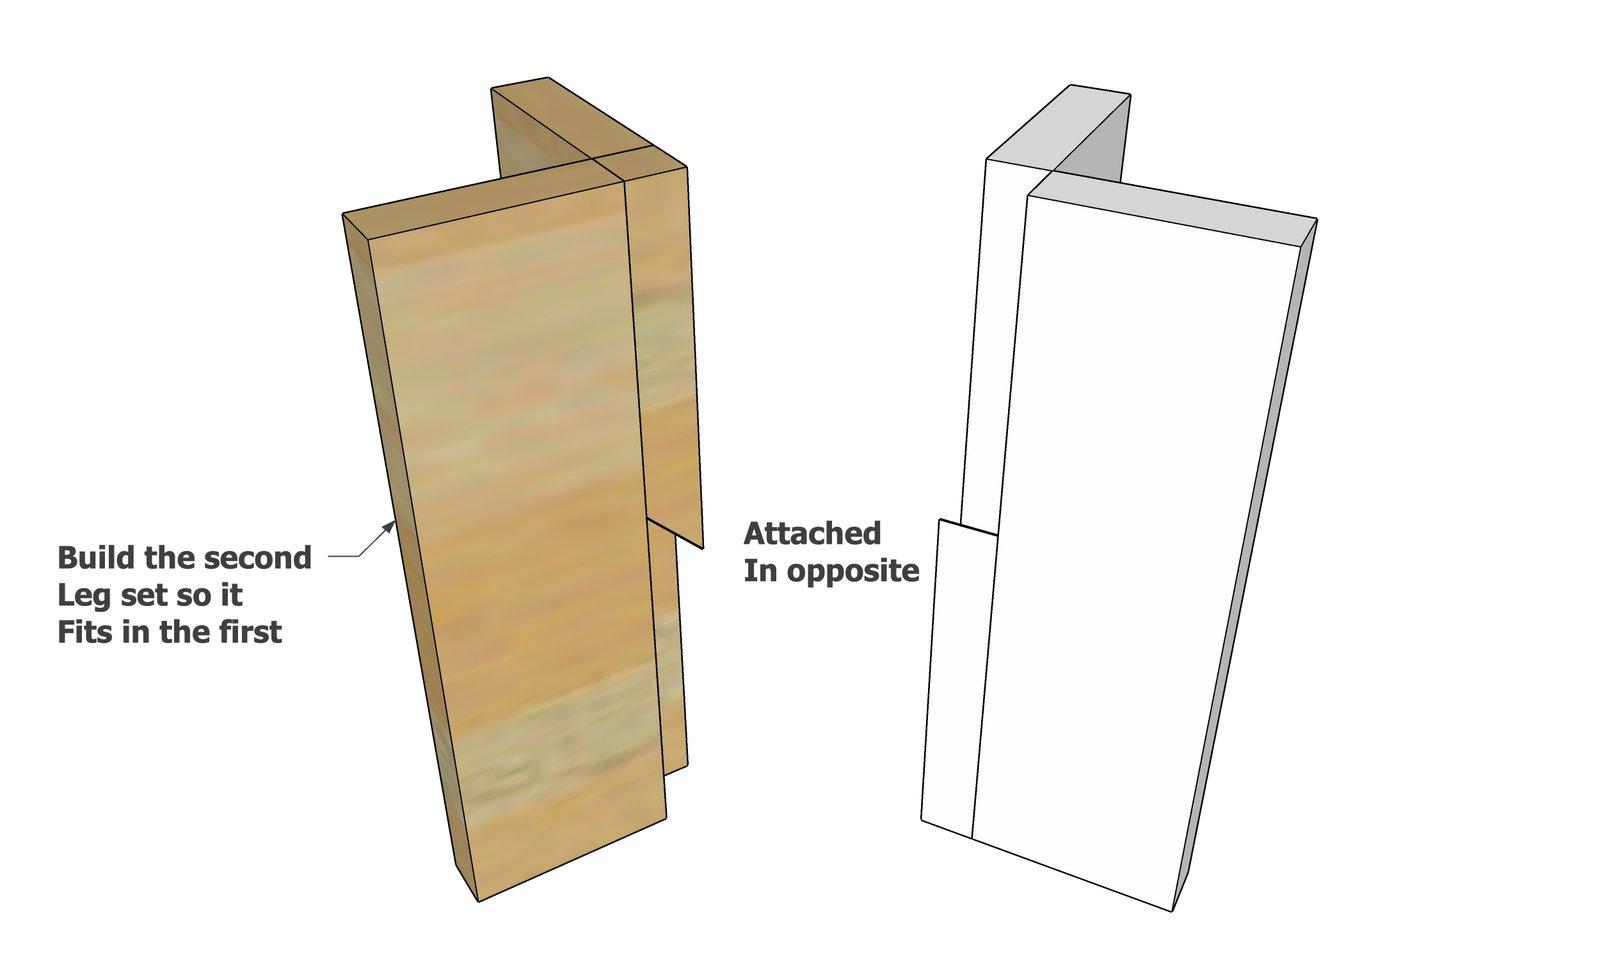
Repeat the steps for the second leg set, but make sure the 2x2 is orientated so it fits with the first 2x2 piece.
Step 3
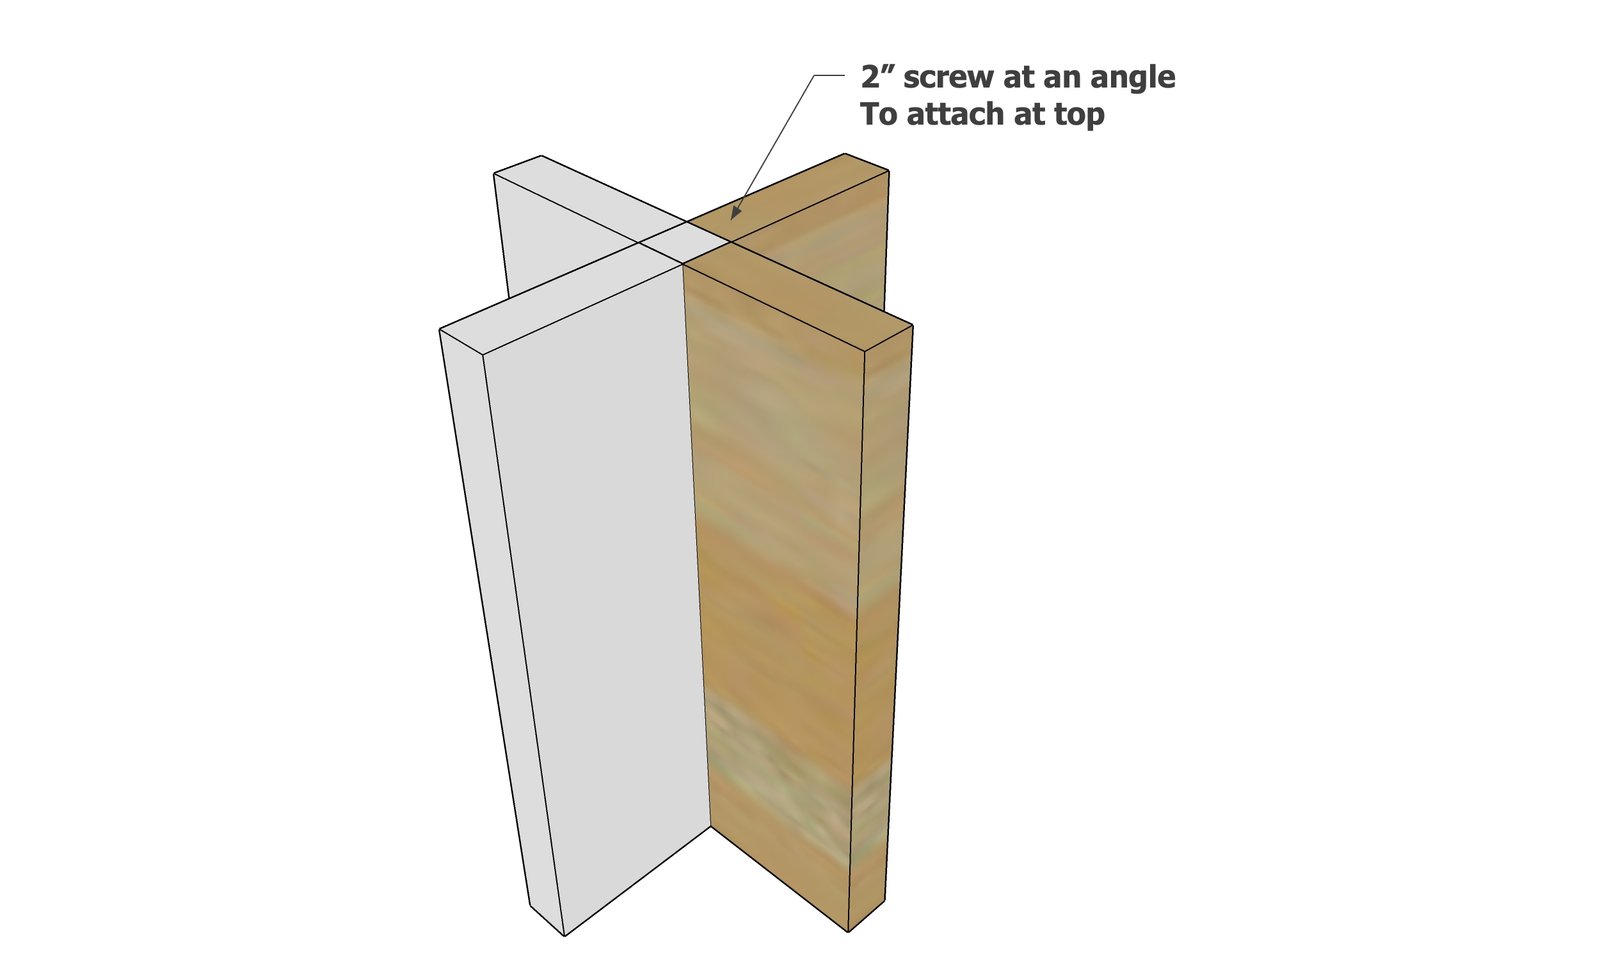
Set the two pieces together and lock in. Then attach at the top and bottom with 2" trim screws at an angle. To attach the screws at an angle, first start the screw as normal, but once the screw is about 1/2" in, begin to rotate it as you drive the screw so it finishes screwing in at a 45 degree angle. Practice this technique first on a scrap wood piece. Repeat the screws for the bottom of the legs set.
Step 4
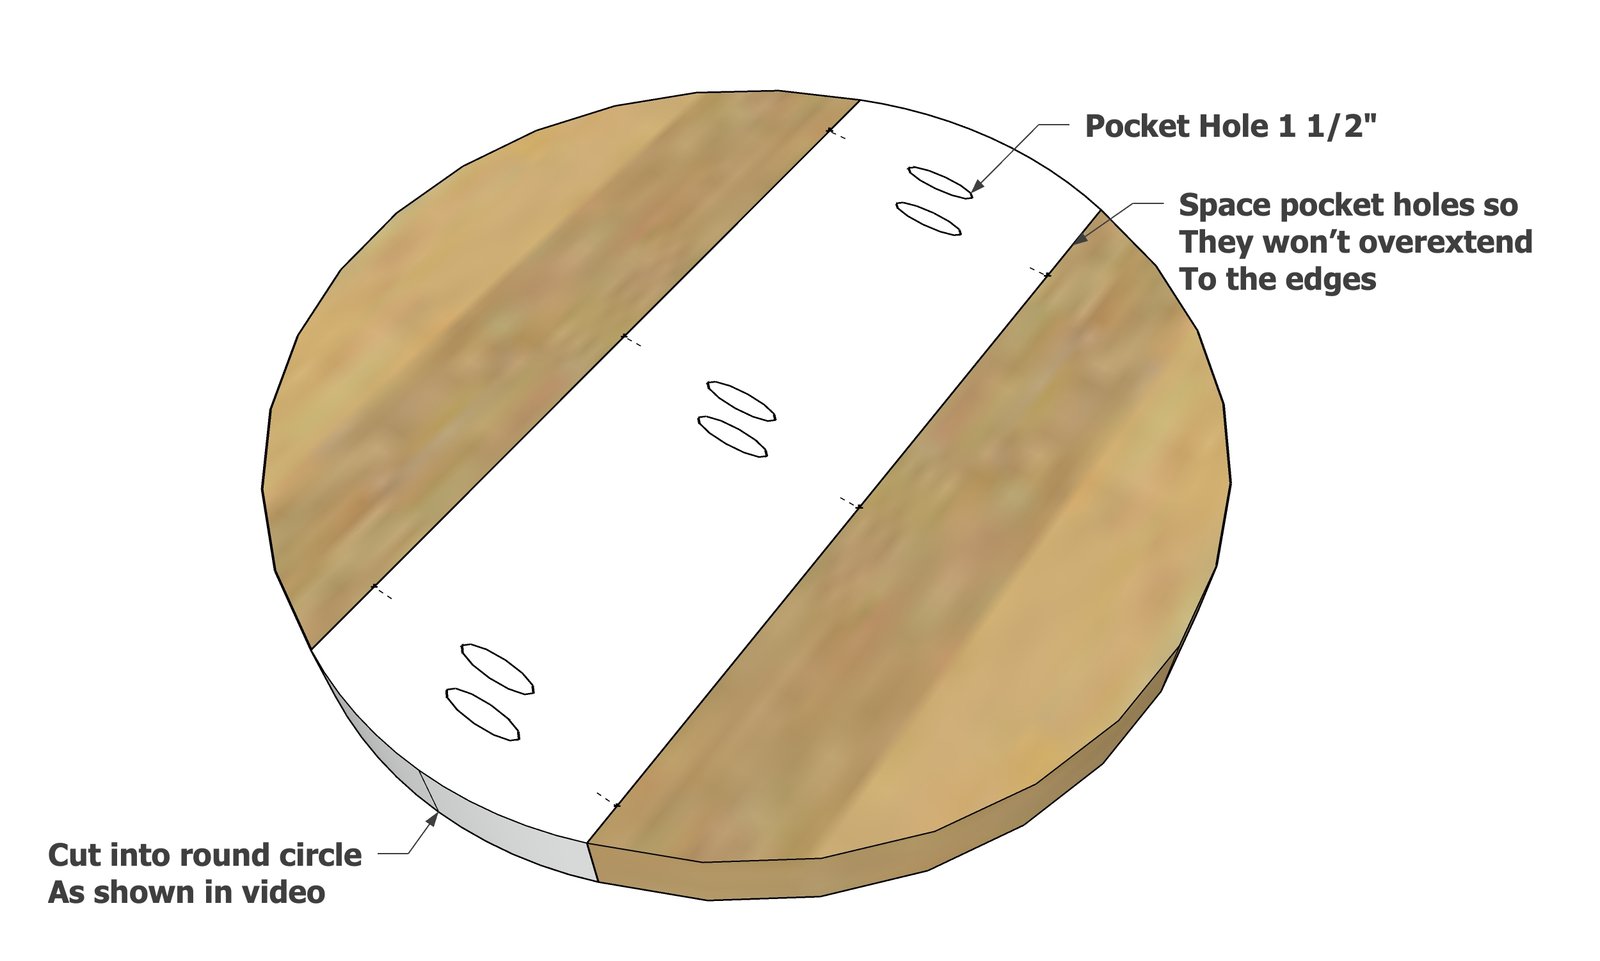
Cut the tabletop boards. Then layout and mark out the circle cuts. Carefully place pocket holes so the pocket holes won't show when the circle is cut. Drill 1-1/2" pocket holes and attach together with 2-1/2" pocket hole screws. Cut the tabletop - in the video I used a circular saw, but a jigsaw, bandsaw, router or tablesaw could also be used.
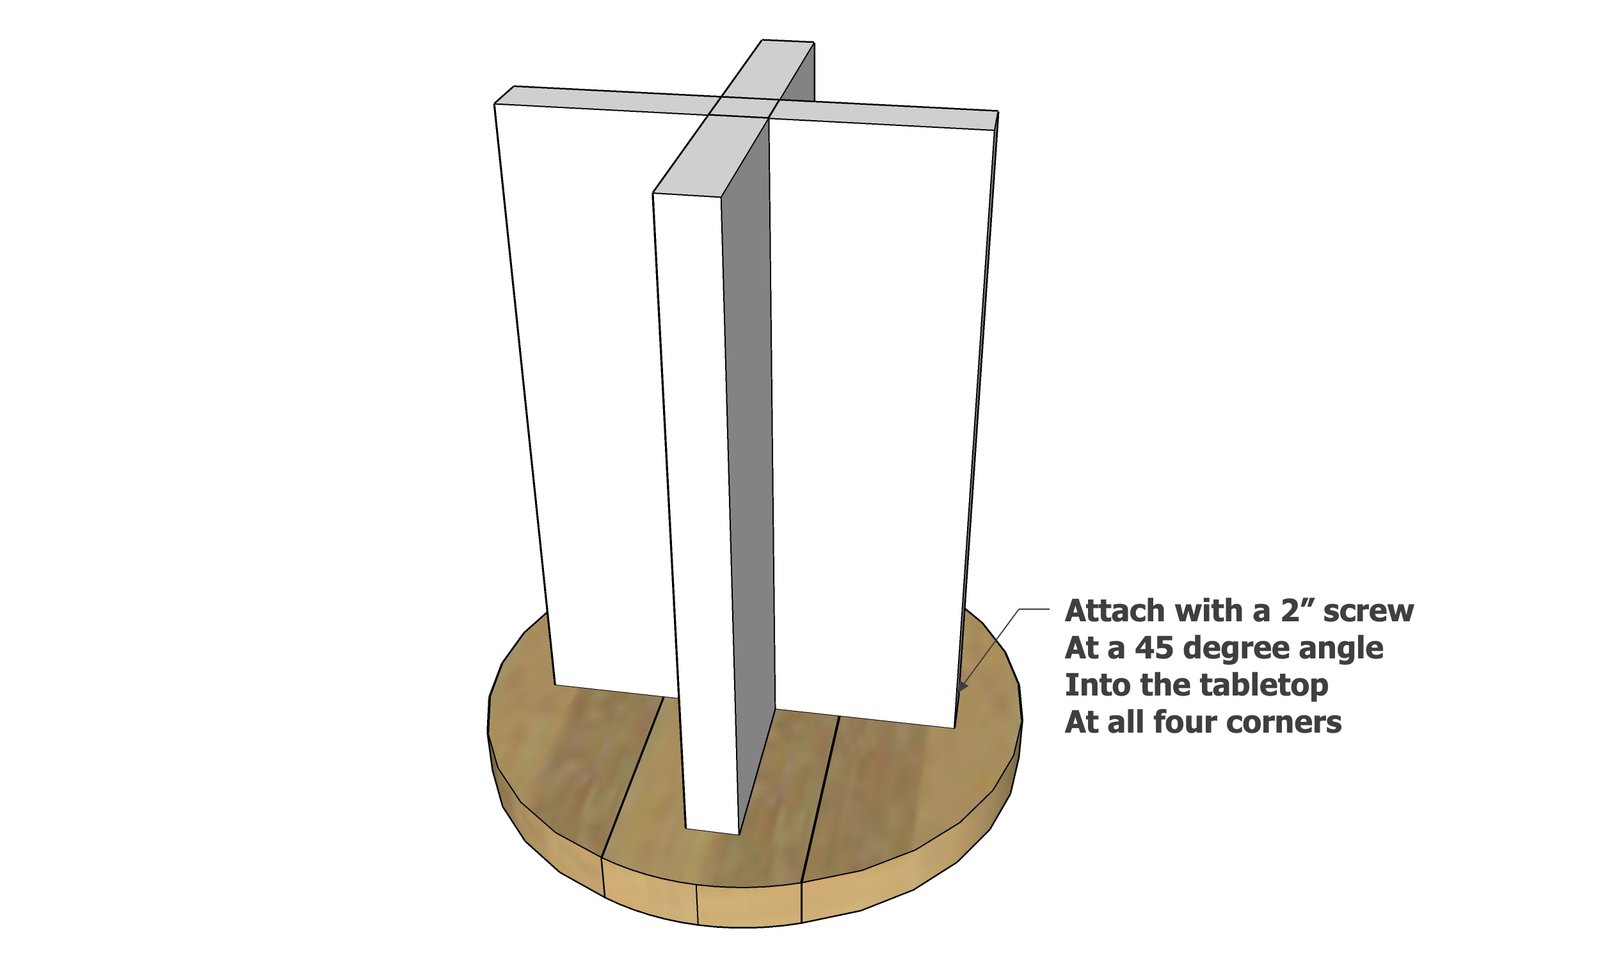
Attach the base to the top with the screws at an angle at the outsides.
Add the protective leveling feet to the bottom of the base to level if needed.
Finishing
Sand all surfaces, starting with a medium grit and finishing with fine. Wipe off the dust, fill any holes or gaps with wood filler, and sand smooth once dry. Apply primer if you're painting, then finish with your choice of paint or stain and seal with a durable clear topcoat. For outdoor projects, use exterior-rated primer, paint or stain, and sealer so the piece stands up to the weather.
Source (temporary): https://www.ana-white.com/woodworking-projects/round-modern-wood-side-tables