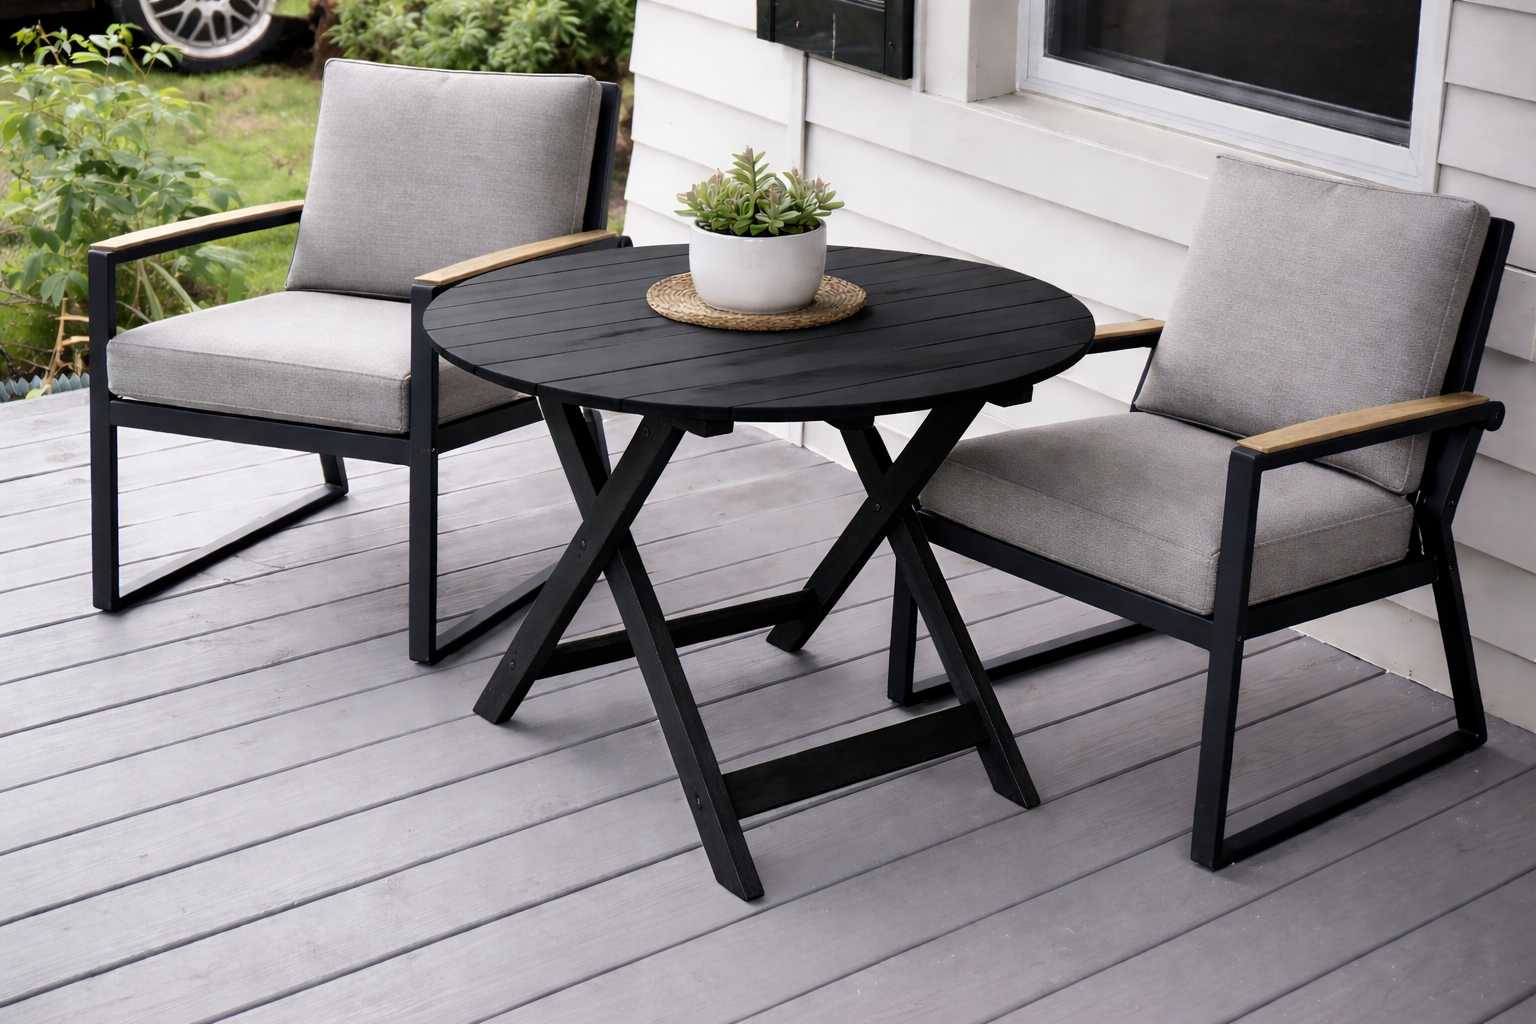
Round Outdoor Adirondack Side Table
to build a lightweight, simple round Adirondack side table. Good tutorial with lots of diagrams, images, and reader photos from
Specifications
| Project type | Side and End Table Plans |
|---|---|
| Room | Outdoor |
| Style | Cottage Style Furniture Plans |
| Difficulty | Beginner Projects |
| Estimated cost | Under $20 |
Dimensions
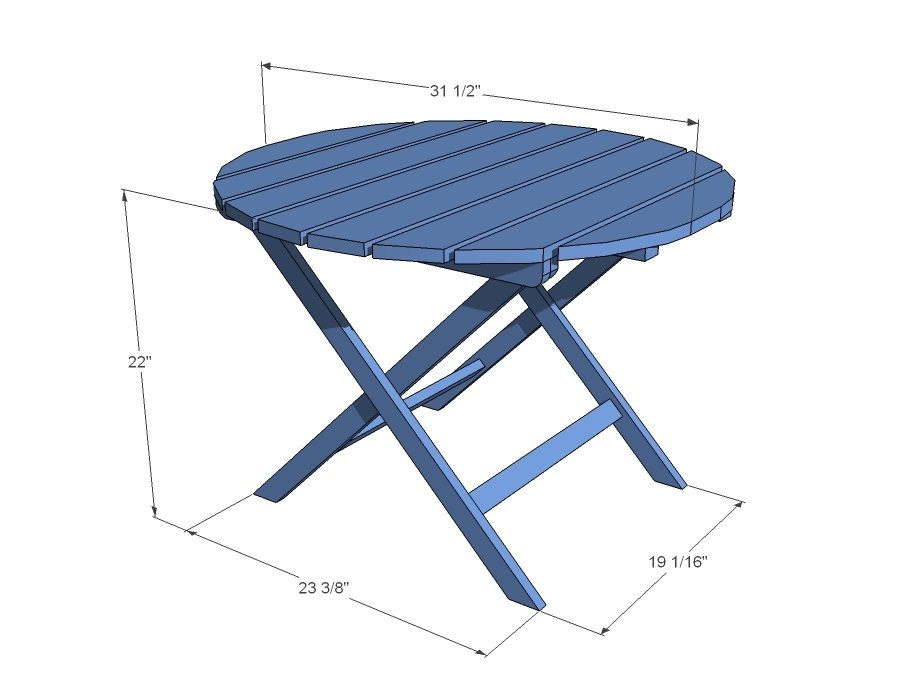
Use the size-specific shopping and cut lists below.
Shopping List
- 2 - 1x4 Boards, 10 feet long (cedar or other weather resistant species recommended) - can also use pallets
- 3 - 1x2 Boards, 8 feet long (cedar or other weather resistant species recommended)
- Use 1-1/2" to 2" long self tapping exterior wood screws (star bit don't strip...)
Cut List
- 2 - 1x4 @ 31 1/2"
- 2 - 1x4 @ 30 7/16"
- 2 - 1x4 @ 27 1/16"
- 2 - 1x4 @ 20"
- 2 - 1x2 @ 29 3/4"
- 2 - 1x2 @ 23 1/2"
- 2 - 1x2 @ 3 1/2"
- 4 - 1x2 @ 30" (Both ends cut at 45 degrees off square, parallel ends)
- 2 - 1x2 @ 17 1/2"
Tools
- measuring tape
- pencil
- safety glasses
- hearing protection
- drill
- jigsaw
- compound miter saw
- sander
Step-by-step Instructions
Step 1
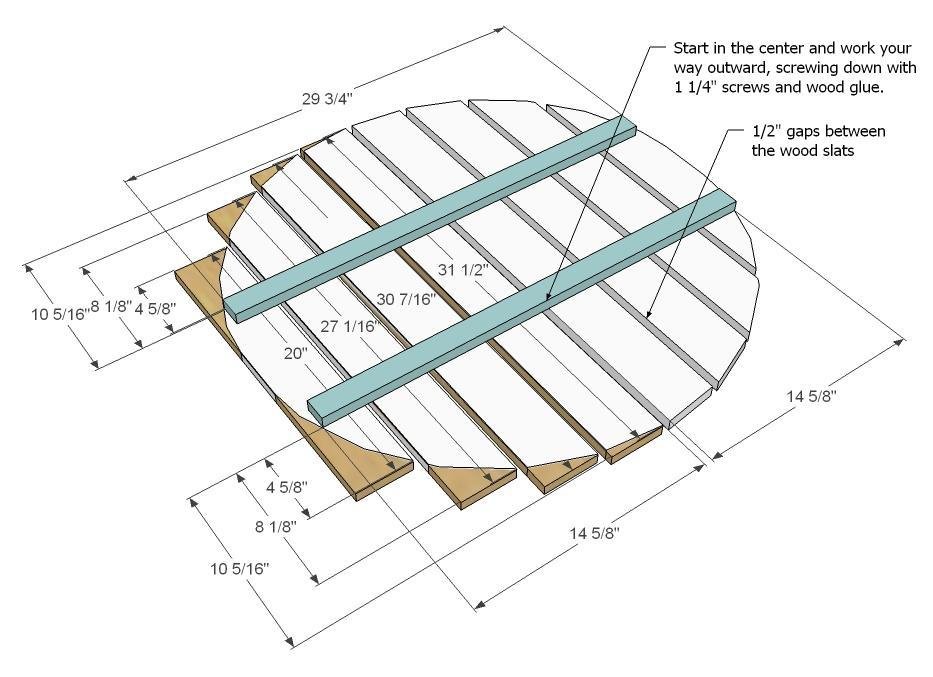
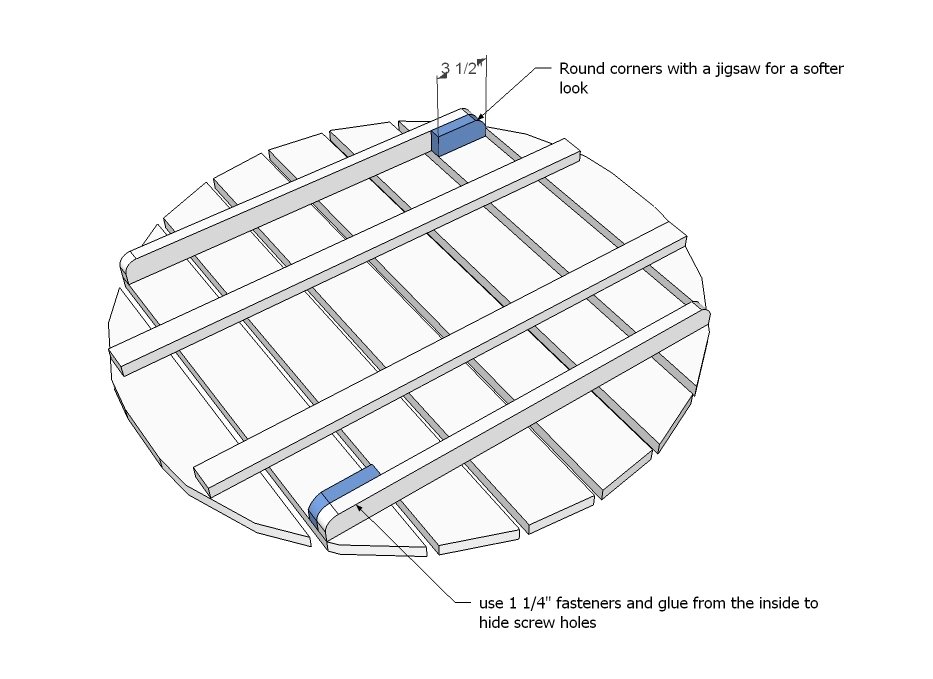
Start in the center and attach the tabletop supports to the underside of tabletop with 1 1/4" screws and glue. Use the diagram above to help you find the centers of the supports and tabletop boards. Then work you way outwards, leaving a 1/2" gap between tabletop boards. When all boards are screw to supports, use a string held in the center of the table and to a pencil to draw circle shape as shown above. Cut out circle shape with jigsaw. Sand edges until smooth and even.
Step 2
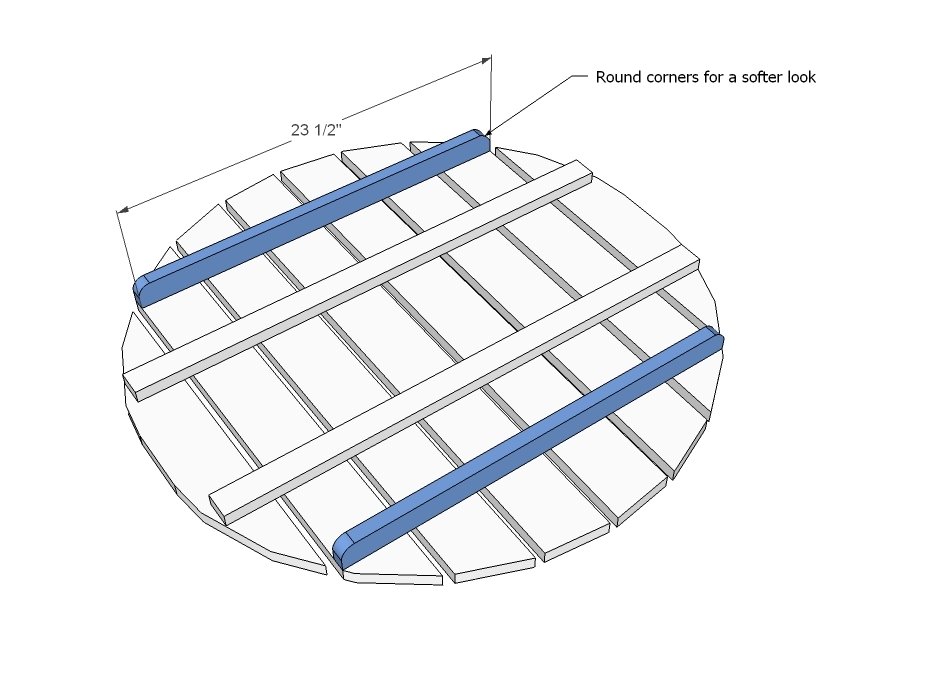
Lay the legs supports on the underside of the table as shown above. Use 2" screws and glue to attach supports to underside of table. Round corners to give the table a softer look as shown in diagram.
Step 3
Round corners of spacers and attach to legs supports as shown above. Use 1 1/4" fasteners and glue.
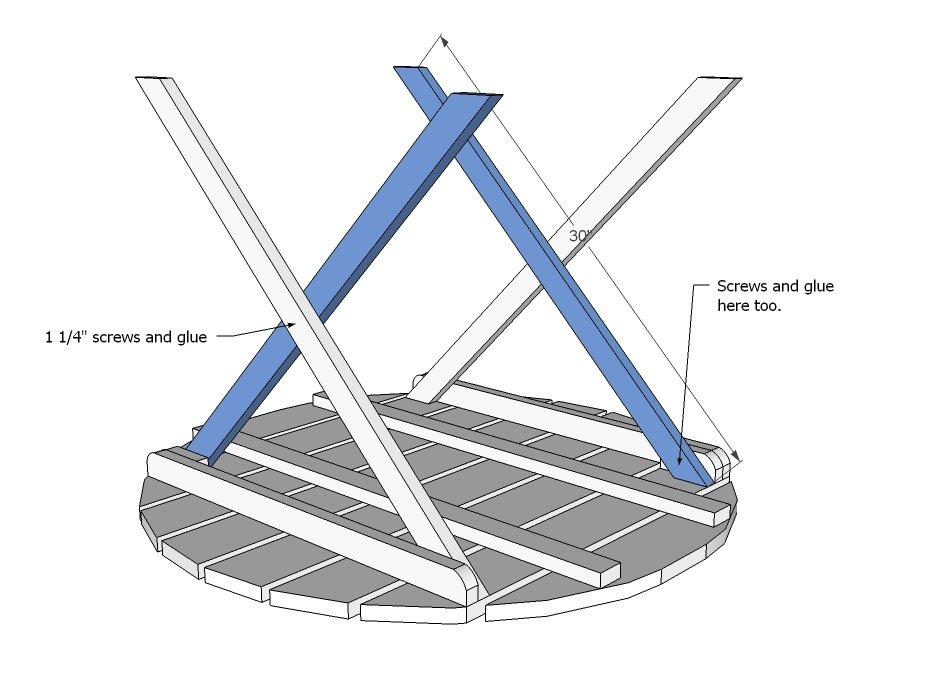
Attach legs to the tabletop as shown above.
If wanting to make table collapsible, use a bolt instead of screws here.
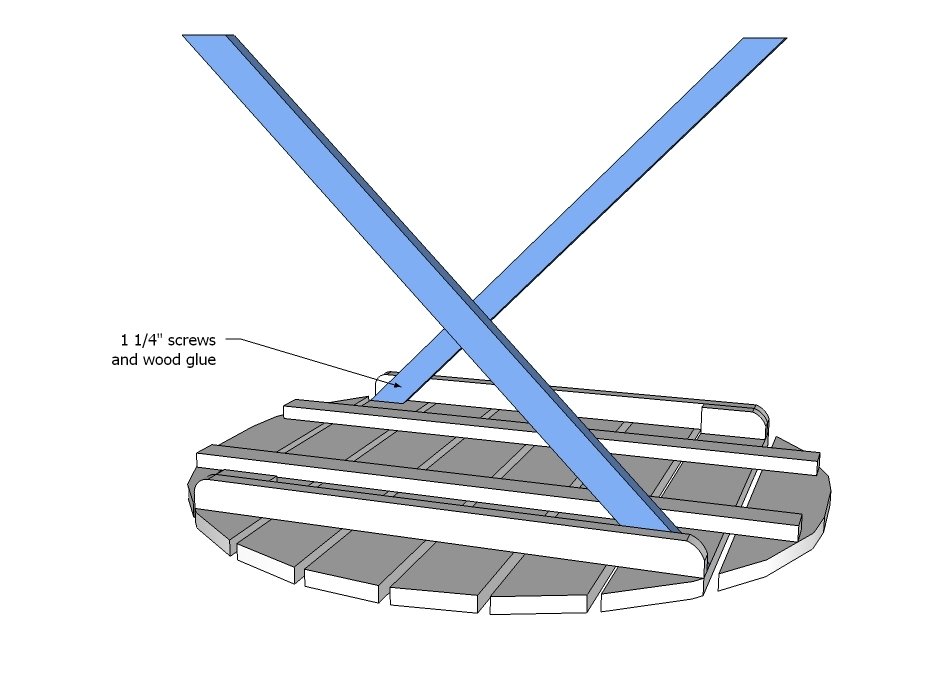
Attach at the center with a screw.
If wanting to make this table collapsible, use a bolt that is removeable instead of screws.
Step 6
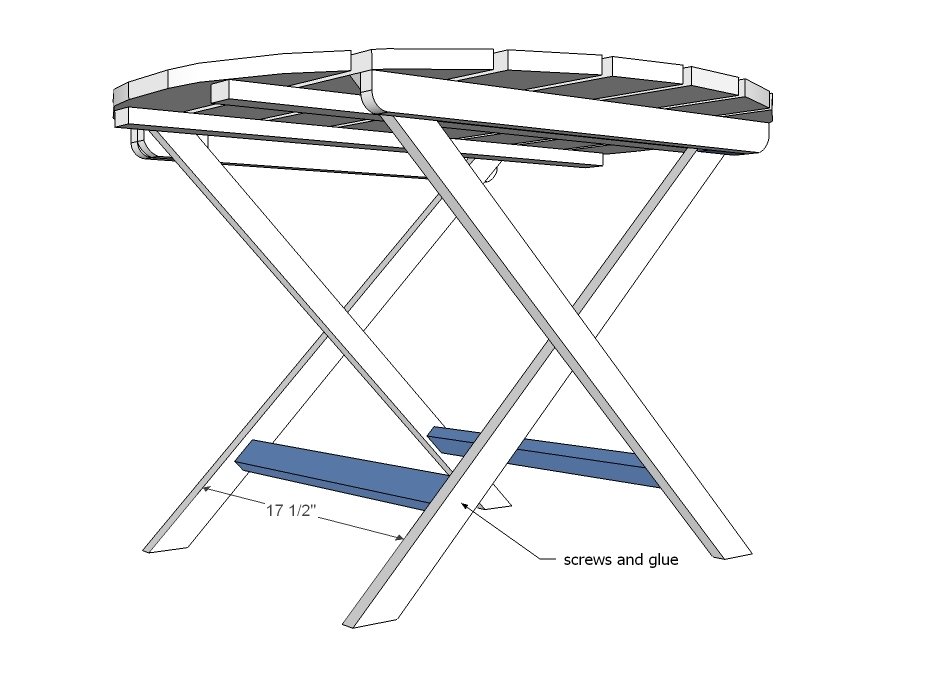
Supports - attach base supports as shown above.
Finishing
Sand all surfaces, starting with a medium grit and finishing with fine. Wipe off the dust, fill any holes or gaps with wood filler, and sand smooth once dry. Apply primer if you're painting, then finish with your choice of paint or stain and seal with a durable clear topcoat. For outdoor projects, use exterior-rated primer, paint or stain, and sealer so the piece stands up to the weather.
Source (temporary): https://www.ana-white.com/woodworking-projects/round-outdoor-adirondack-side-table