Round X Base Table
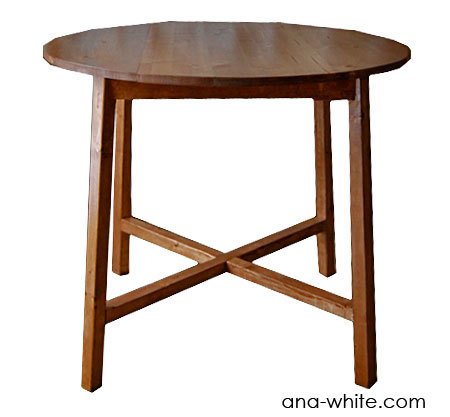
A sturdy small round table with an X base.
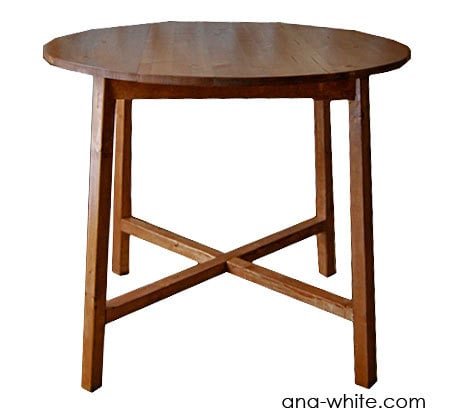
Specifications
| Project type | Side and End Table Plans |
|---|---|
| Room | dining room |
| Style | Cottage Style Furniture Plans |
| Difficulty | Intermediate |
| Estimated cost | $20 - $50 |
Dimensions
Use the size-specific shopping and cut lists below.
Shopping List
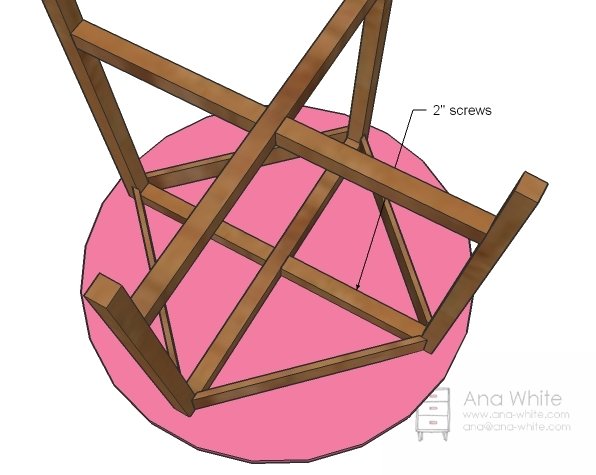
36″ Tabletop or 3/4″ MDF or 3/4″ Plywood cut into a 36″ circle
3 – 2x2s
1 – 1×4
3″ Screws or 2″ pocket hole screws
Cut List
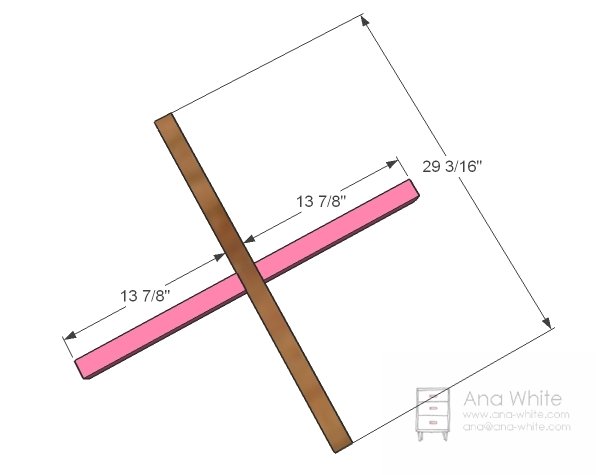
2 – 2×2 @ 13 7/8″ (Top X, one end cut at 5 degrees off square, measurement to long point)
1 – 2×2 @ 29 3/16″ (Top X, both ends cut at 5 degrees off square, measurement long point to long point)
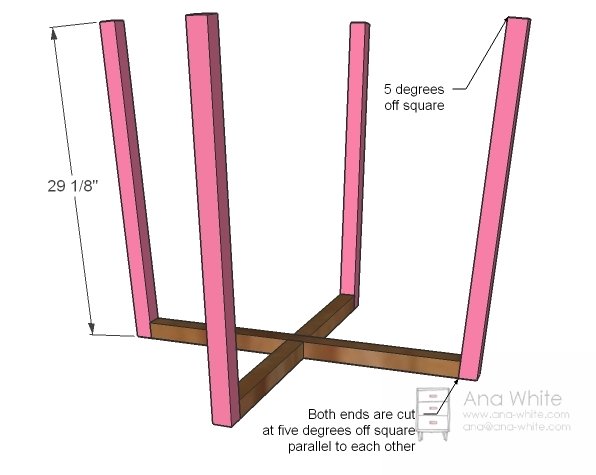
4 – 2×2 @ 29 1/8″ (Legs)
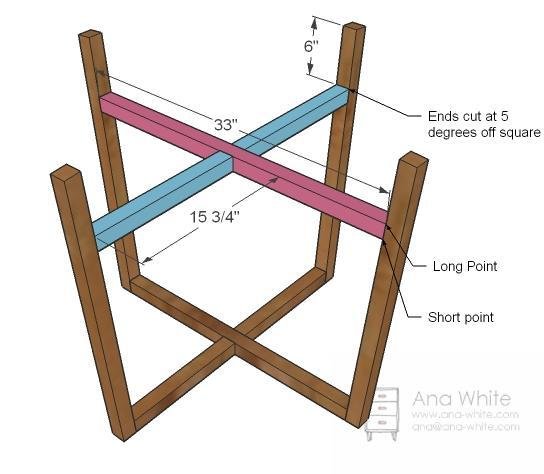
2 – 2×2 @ 15 3/4″ (Bottom X, one end cut at 5 degrees off square, measurement to long point) 1 – 2×2 @33″ (Top X, both ends cut at 5 degrees off square, measurement long point to long point)
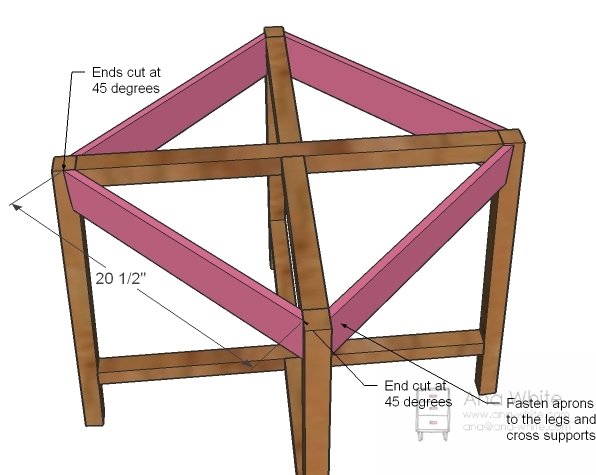
4 – 1×4 @ 20 1/2″ (Both ends cut at 45 degrees perpendicular to each other)
Tools
- measuring tape
- square
- pencil
- safety glasses
- hearing protection
- kreg-jig
- drill
- jigsaw
- sander
- level
- countersink drill bit
Step-by-step Instructions
Build the Top X
Cut all of the boards as directed in the cut list. Lay out so the bevel cuts all taper downward. Mark center (13 7/8″ from outsides of longer board) and screw the shorter boards to the longer boards. I used pocket hole screws, but if you do not have a Kreg Jig™, simply screw at an angle to join the second board to the longest board.
Attach the legs
Now attach the legs so that the legs lean outward.
Bottom X
Now build the bottom X as you did the top X. Mark all legs 6″ from ends. Attach bottom base to legs.
Aprons
Now this was the toughest part for me, but doesn’t have to be for you. Start by lining up the inside corners and either gluing and nailing (nailer would be super handy here) the aprons to the legs and top X or predrilling holes and screwing the aprons to the top X base. Now notice how the apron does not follow the line of the leg? Rather, it remains perpendicular to the ground. Note that and you’ll be good.
Step 5
Finishing
Sand all surfaces, starting with a medium grit and finishing with fine. Wipe off the dust, fill any holes or gaps with wood filler, and sand smooth once dry. Apply primer if you're painting, then finish with your choice of paint or stain and seal with a durable clear topcoat. For outdoor projects, use exterior-rated primer, paint or stain, and sealer so the piece stands up to the weather.
Source (temporary): https://www.ana-white.com/woodworking-projects/round-x-base-table