Rustic Bathroom Vanities
Add a rustic wood update to your bathroom by building your own bathroom vanities. Made from all common wood boards, these vanities features three drawers built around plumbing, and a farmhouse sink. We've been using these vanities for a couple years now, and love how they function and look. The include step by step diagrams. You can check out our entire rustic modern bathroom tour here, and find more vanity plans here.
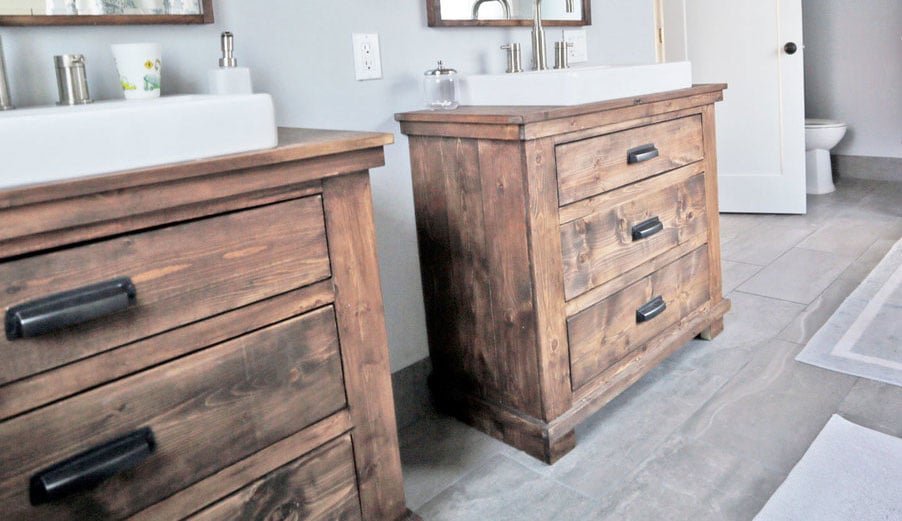
Specifications
| Project type | Console Table Plans |
|---|---|
| Room | Bathroom |
| Style | Farmhouse Furniture |
| Difficulty | Advanced |
Dimensions
Use the size-specific shopping and cut lists below.
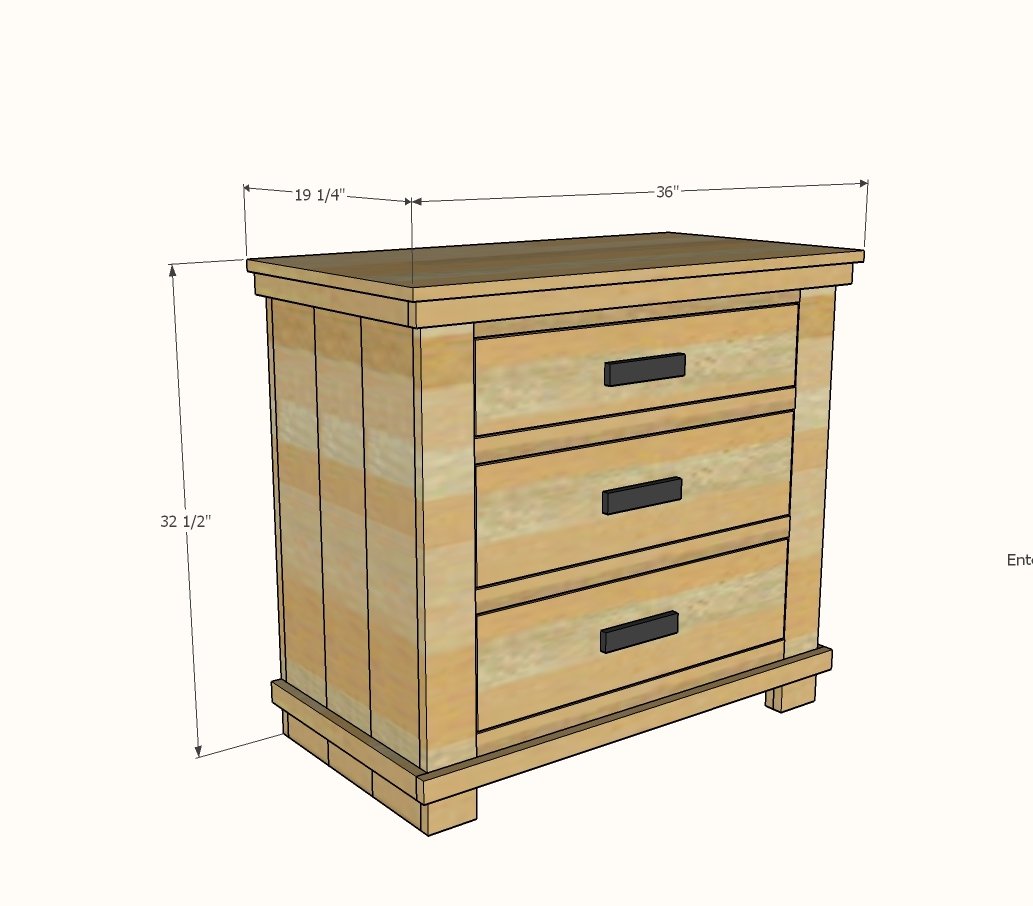
Shopping List
5 - 1x6 @ 8 feet long
3 - 1x2 @ 8 feet long
2 - 1x3 @ 8 feet long
2 - 1x4 @ 8 feet long
48" x 48" 1/4" plywood panel (for drawer bottoms)
3 - 16" Euro Style Drawer Slides - I used these Drawer Slides from Liberty Hardware
3 - Back sockets that match the drawer slides
3 Bin Pulls - I used these from Liberty Hardware
Cut List
Cut list is per ONE bath vanity
6 - 1x6 @ 31-3/4" - side panels - cut three from 8' long boards
4 - 1x2 @ 18" - side trim
2 - 1x3 @ 32" - back supports
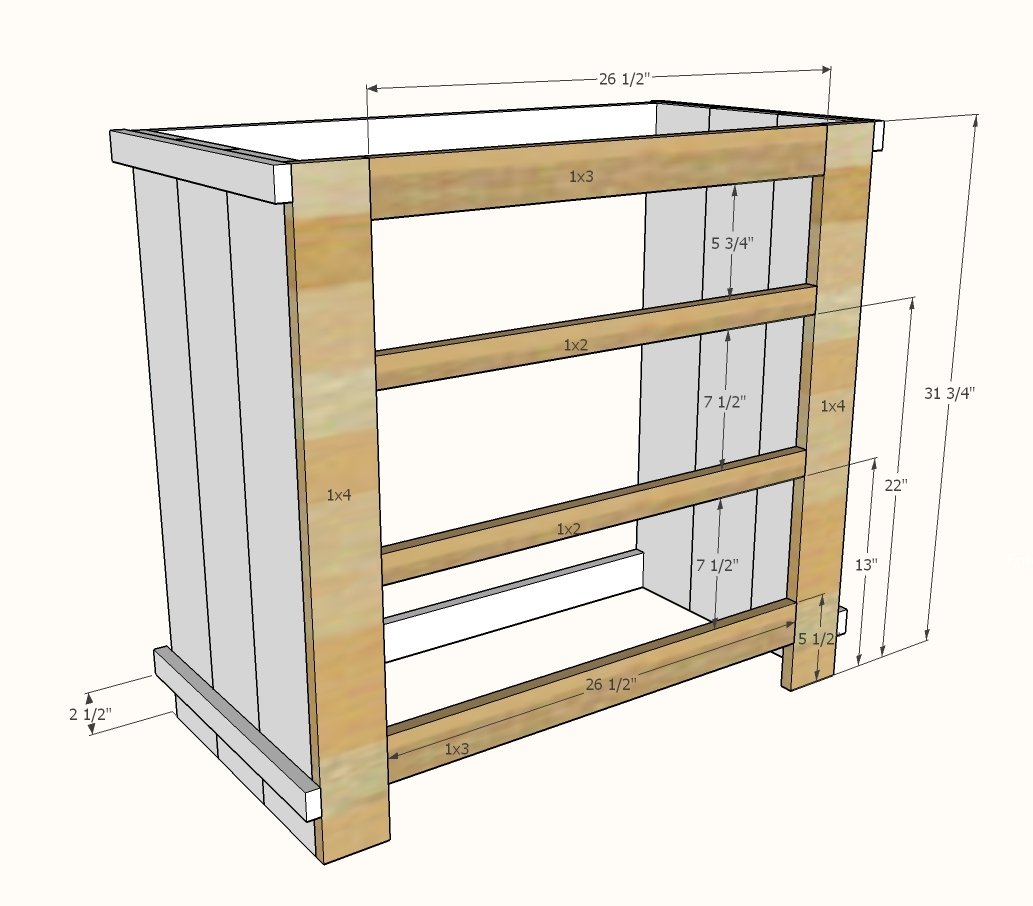
2 - 1x4 @ 31-3/4" - front legs
2 - 1x3 @ 26-1/2" - front face frame, top and bottom
2 - 1x2 @ 26-1/2" - front face frame, middle
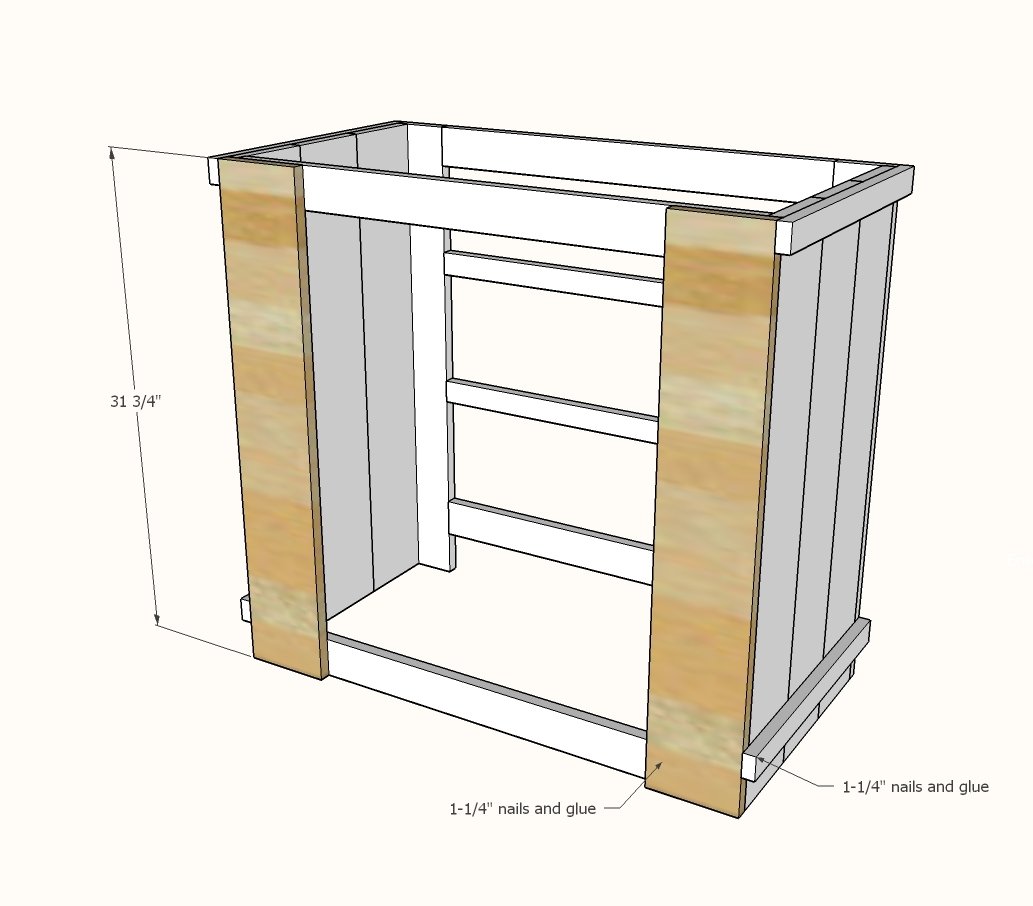
2 - 1x6 @ 31-3/4" - back
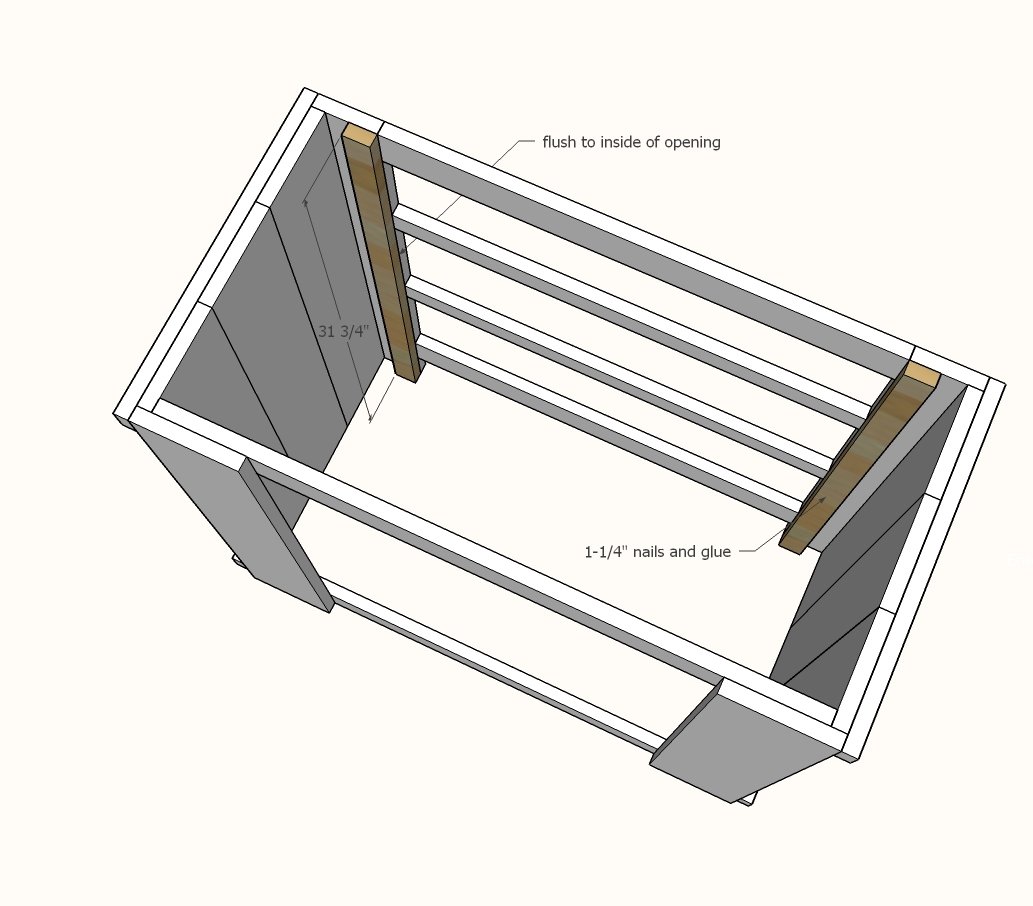
2 - 1x2 @ 31-3/4" - drawer slide supports
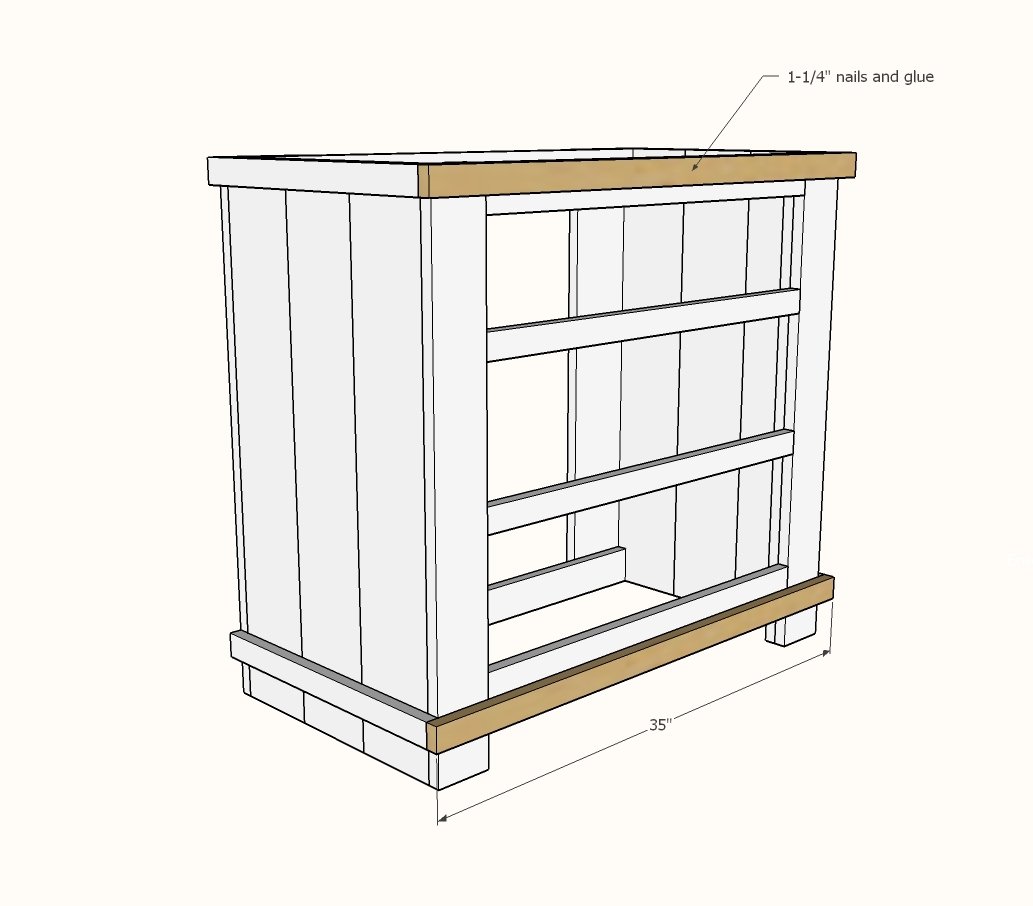
2 - 1x2 @ 35" - front trim - cut to fit
DRAWERS
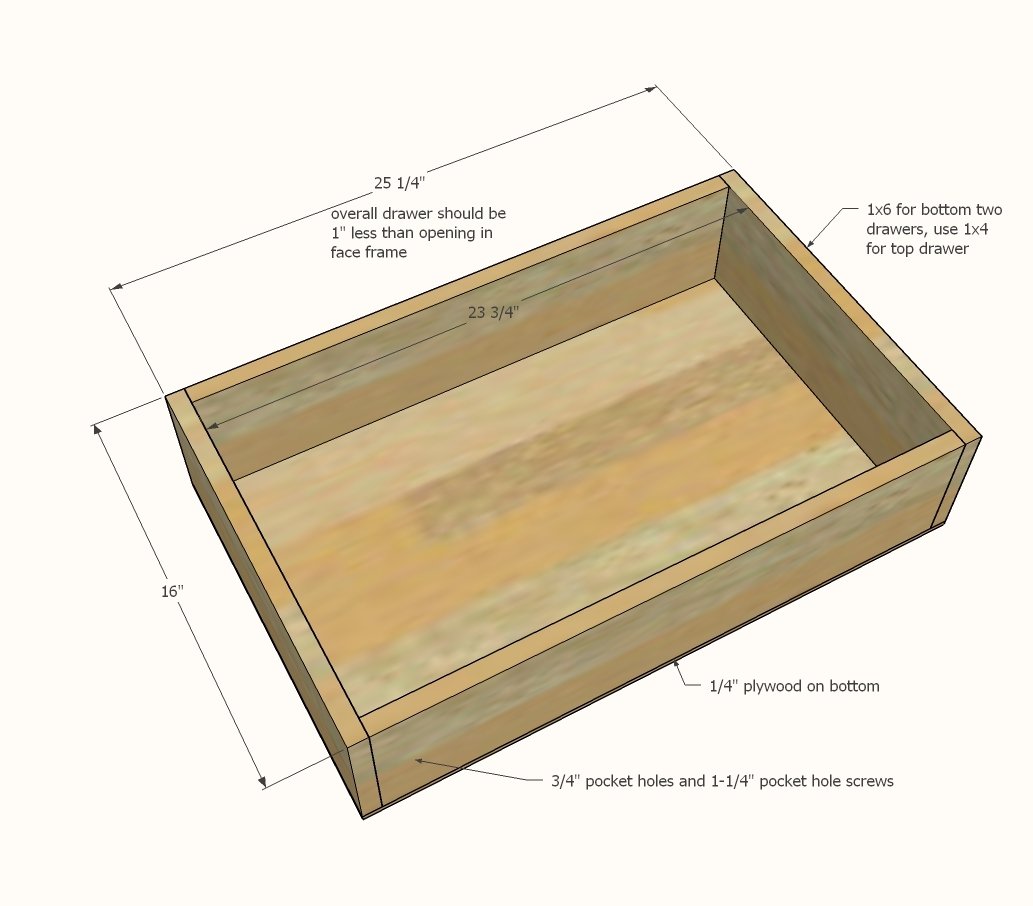
4 - 1x6 @ 16" - larger drawer sides
4 - 1x6 @ 23-3/4" - larger drawer front/back
2 - 1x4 @ 16" - top drawer sides
2 - 1x4 @ 23-3/4" - top drawer front/back
3 - 1/4" plywood @ 25-1/4" x 16" - drawer bottoms
TOP
Build to suit your sink
Tools
- measuring tape
- square
- pencil
- safety glasses
- hearing protection
- kreg-jig
- drill
- circular saw
- jigsaw
- compound miter saw
- nailer
- sander
Step-by-step Instructions
Step 1
Build the two side panels by laying three 1x6s down on a flat level surface, ensuring tops and bottoms are even. TIP: I glue each 1x6 together, edge to edge and let dry to hold in place. Attach the 1x2 trim on top of panels, overhanging ends by 3/4". There is a 2-1/2" space under the bottom trim (see diagram in step 3).
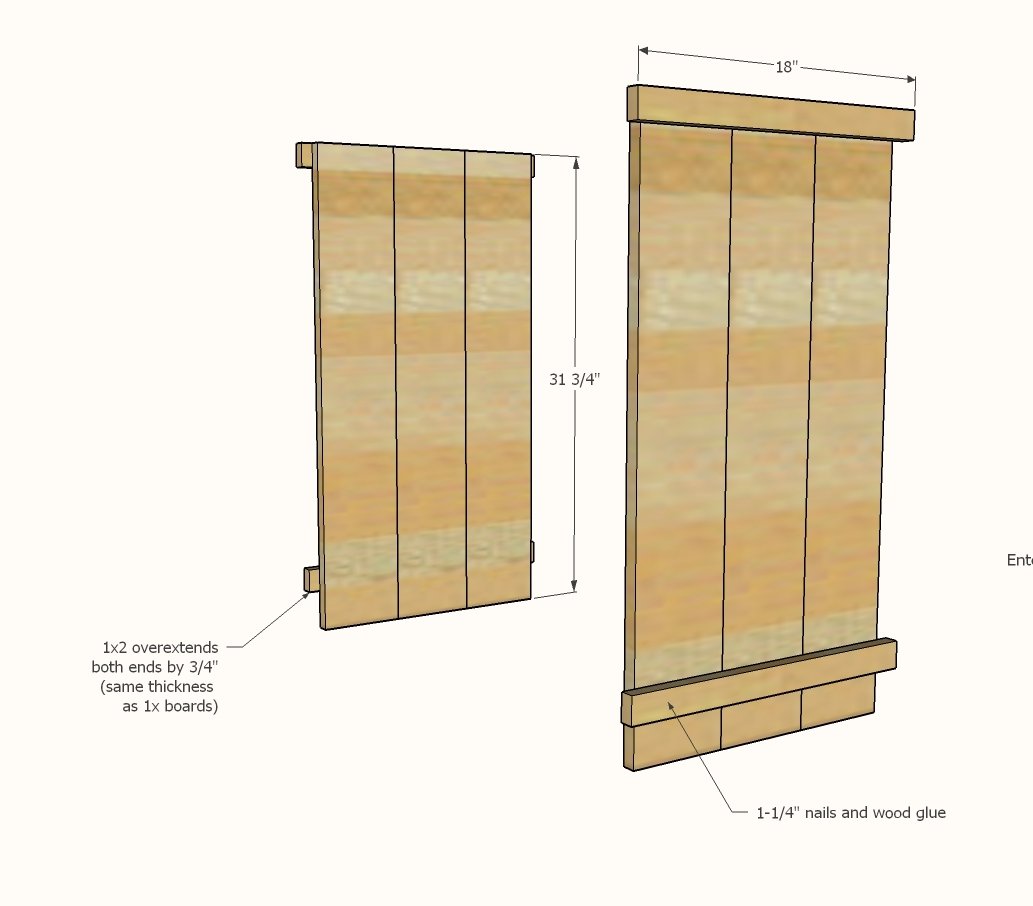
Step 2
Drill two pocket holes on each end of the back 1x3 support boards. Attach with pocket hole screws, pocket holes exposed on back of cabinet.
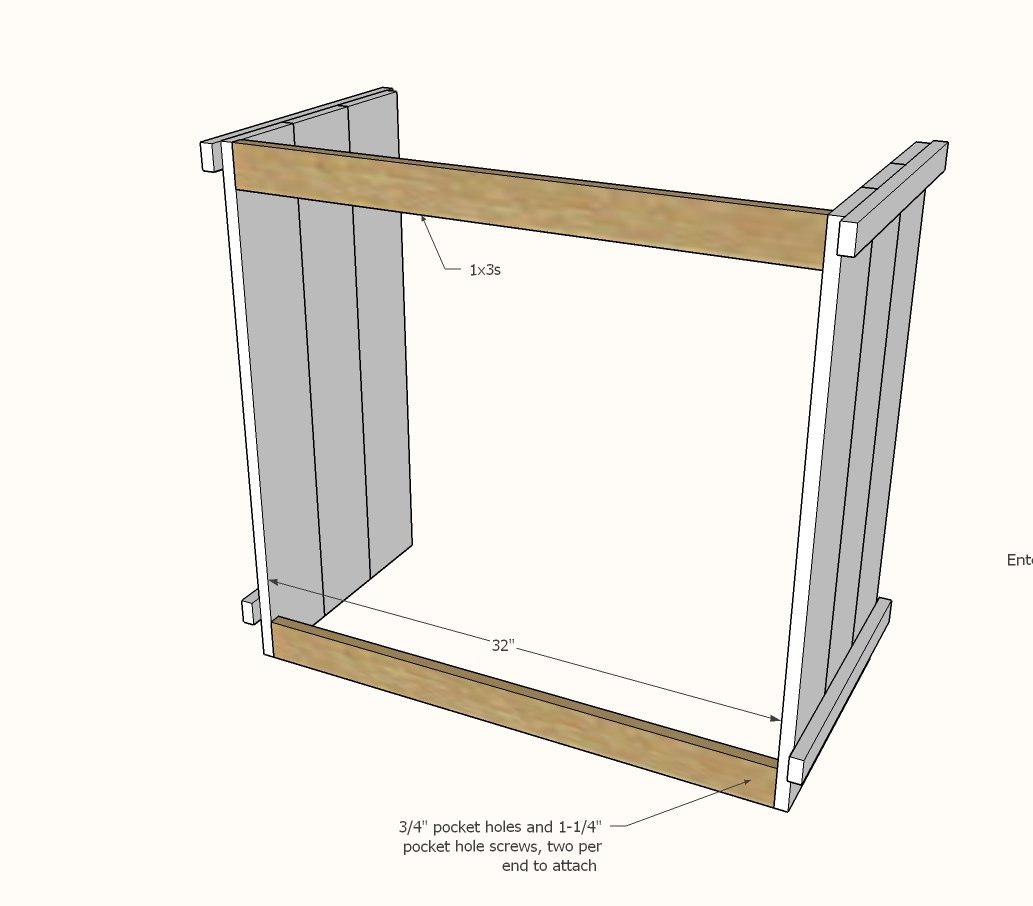
Step 3
Build the front face frame on a flat level surface with 3/4" pocket holes and 1-1/4" pocket hole screws. Once complete, nail and glue to front of cabinet. Take a second to ensure your cabinet is square - you can do this by taking diagonal measurements from opposite outside corners of the top of the cabinet, and adjusting until the diagonals match.
Step 4
Nail and glue back pieces to the sides and top/bottom supports. The purpose of these guys is to give you something to attach the drawer slides too, while still providing a finished edge (no plywood edges exposed on the back.
Step 5
Step 6
Finish the front trim - measure and cut to fit and nail and glue in place.
Step 7
For full size drawers that don't need to be cut around plumbing, construct as shown here with pocket holes. Nail and glue bottom plywood on.
Step 8
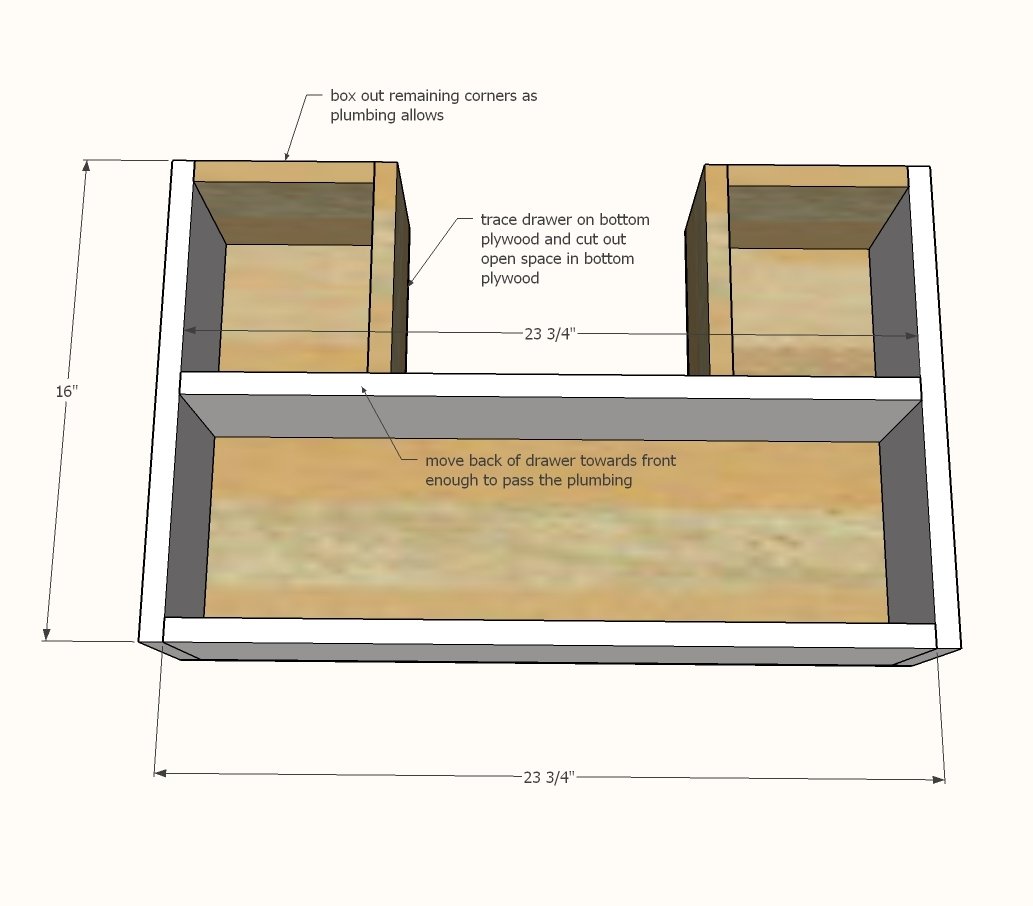
If you have to build drawers around plumbing, keep the same basic cuts, just install the back where it passes the plumbing and box out corners as needed.
Step 9
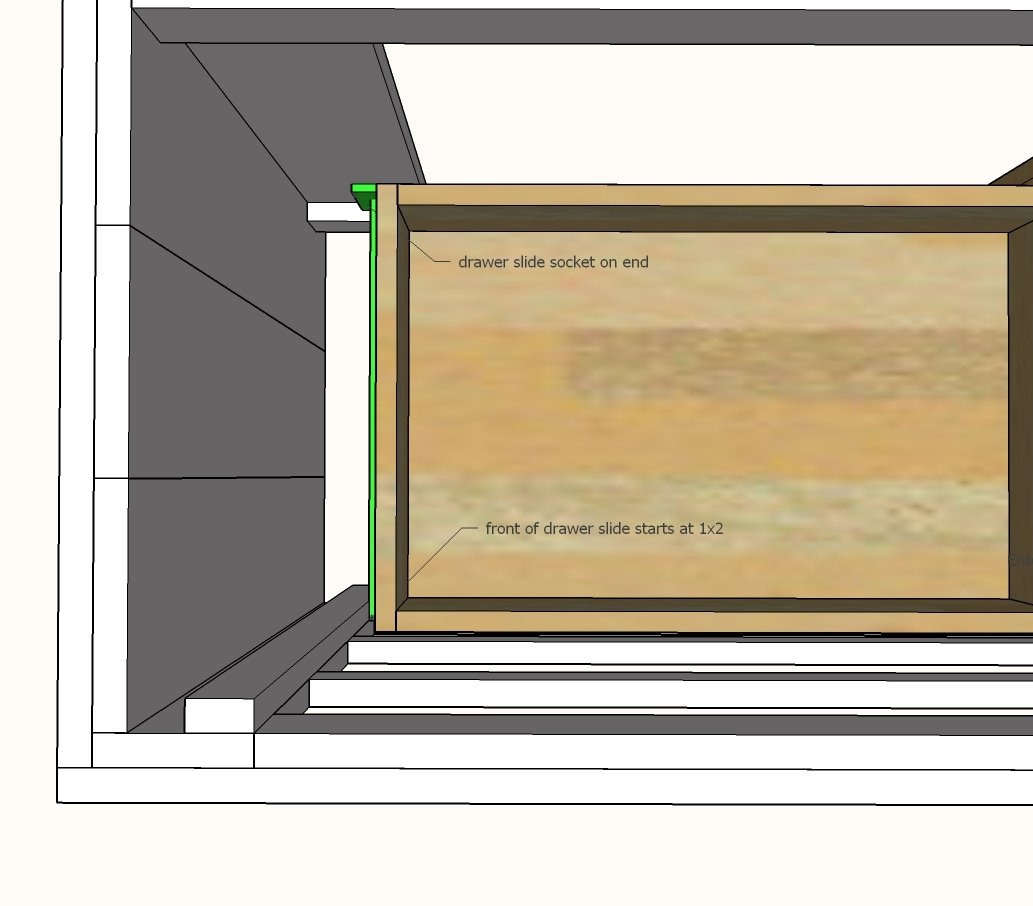
The drawer slides are installed attached to the 1x2 cleat at front, and with a end socket on the back. Here is a really good video from Liberty Hardware on installing - And I also did a video explaining how I do this too -
Step 10
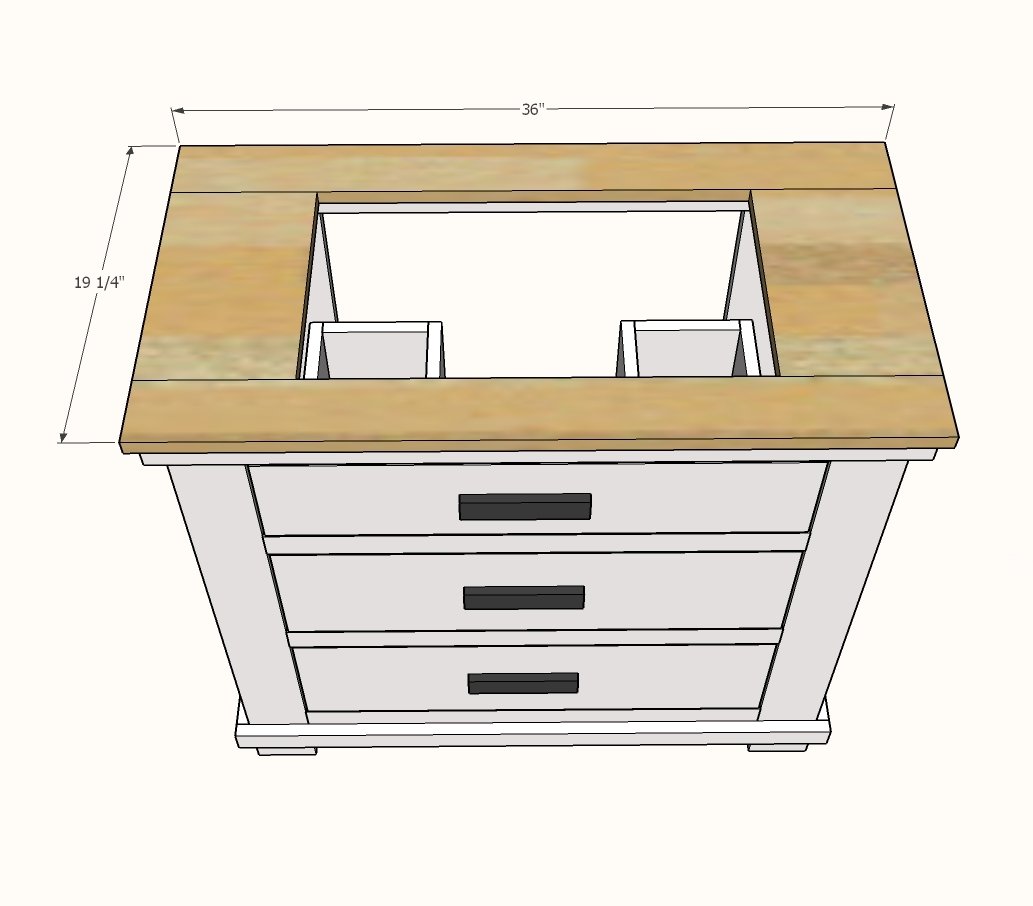
For the top, I used 1x boards and pocket holed them together, leaving an opening for my sink. For my sink, I used 1x4s on front and back, and 1x12 pieces on the sides.
Finishing
Sand all surfaces, starting with a medium grit and finishing with fine. Wipe off the dust, fill any holes or gaps with wood filler, and sand smooth once dry. Apply primer if you're painting, then finish with your choice of paint or stain and seal with a durable clear topcoat. For outdoor projects, use exterior-rated primer, paint or stain, and sealer so the piece stands up to the weather.
Source (temporary): https://www.ana-white.com/woodworking-projects/rustic-bathroom-vanities