Rustic Farmhouse Headboard (Twin)
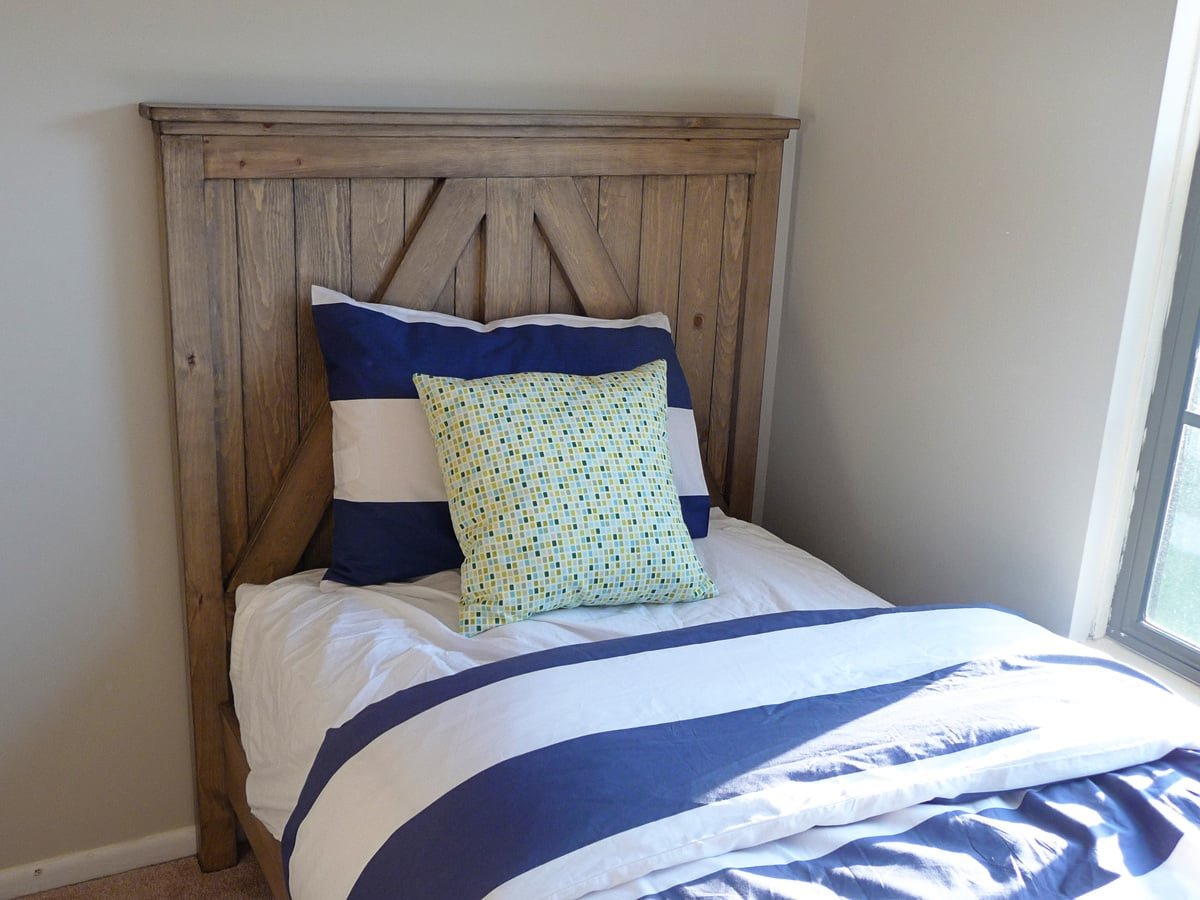
A beautiful simple headboard reminiscent of an old barn door. are perfect for the beginning woodworker. You can also build the matching storage bed frame with.
Specifications
| Project type | Headboard |
|---|---|
| Room | Bedroom |
| Style | Farmhouse Furniture |
| Difficulty | Intermediate |
| Estimated cost | $20 - $50 |
Dimensions
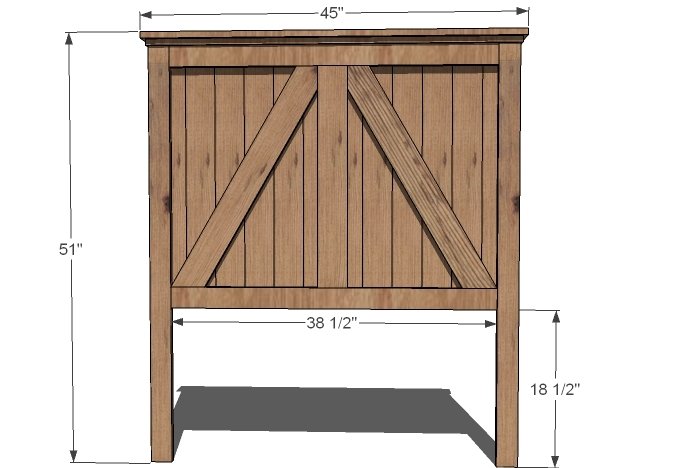
Use the size-specific shopping and cut lists below.
Shopping List
6 - 1x4 Boards @ 8 feet long
2 - 1x2 Boards @ 8 feet long
3 - 1x3 Boards @ 8 feet long
Cut List
- 12 - 1x4 @ 31" (Panel Boards)
- 2 - 1x2 @ 49 1/2" (Side Legs)
- 2 - 1x3 @ 49 1/2" (Front Legs)
- 2 - 1x3 @ 38 1/2" (Back Supports)
- 2 - 1x4 @ 38 1/2" (Front Trim)
- 1 - 1x4 @ 26" (Center Trim)
- 1 - 1x3 @ 44" (Top Trim)
- 1 - 1x4 @ 45" (Top Trim)
- 2 - 1x4 @ 30" (Cross Bracing, ends cut 30 Degrees off square, parallel)
Tools
- measuring tape
- square
- pencil
- safety glasses
- hearing protection
- drill
- compound miter saw
- nailer
- sander
- countersink drill bit
Step-by-step Instructions
Step 1
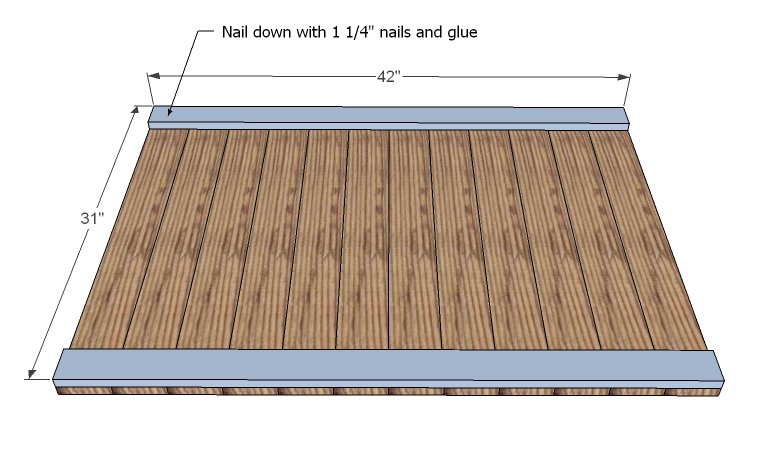
Shown above is a back view. Use a finish or brad nailer and glue to secure the back support boards to the panel boards. Please note that sometimes boards are not exactly the correct width – you could purchase “bad” boards. Measure your panel boards to make sure they are 3 ½” wide. If they are not, you should cut your back support boards to fit the panel, and not to the measurement I have given above. Adjust for square.
Step 2
Attach the 1x2 leg sides to the panel as shown in the diagram.
Step 3
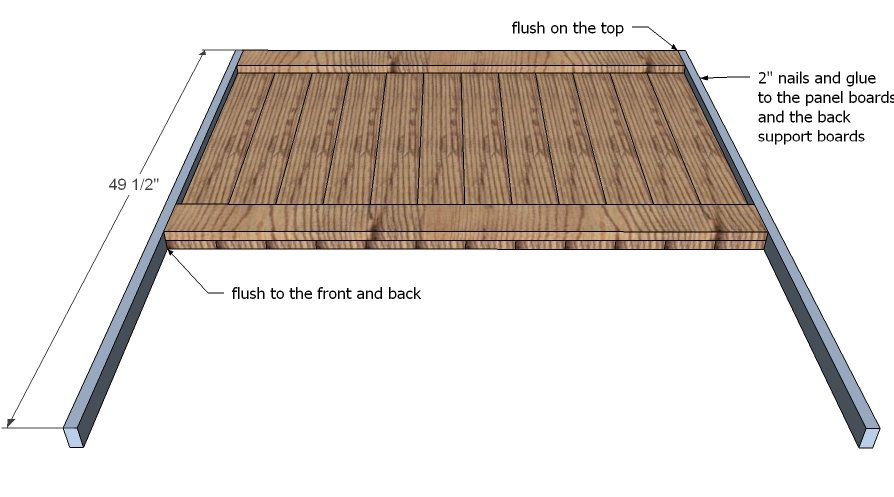
Attach the 1x3 legs to the front, as shown in the diagram. As you nail to the 1x2 leg, keep the seam as tight and flush as possible making the legs appear as a solid piece.
Step 4
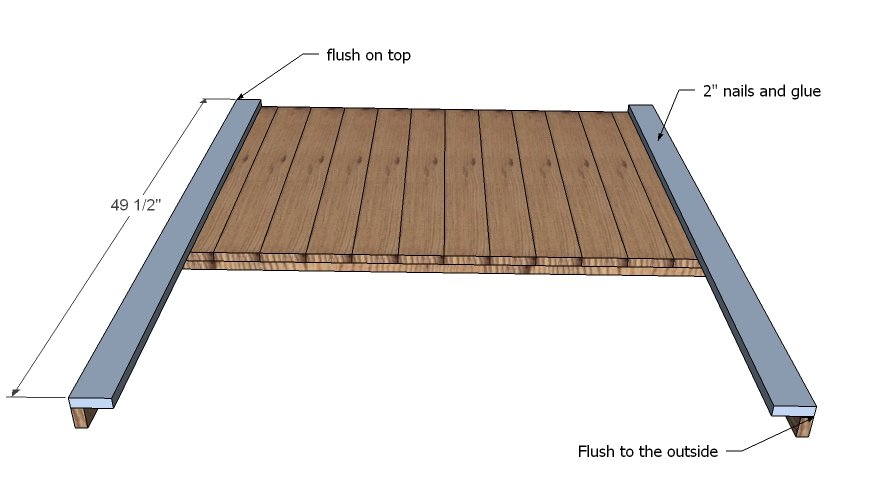
Use 2” nails an glue to attach the front trim to the panel boards, keeping outside edges flush.
Step 5
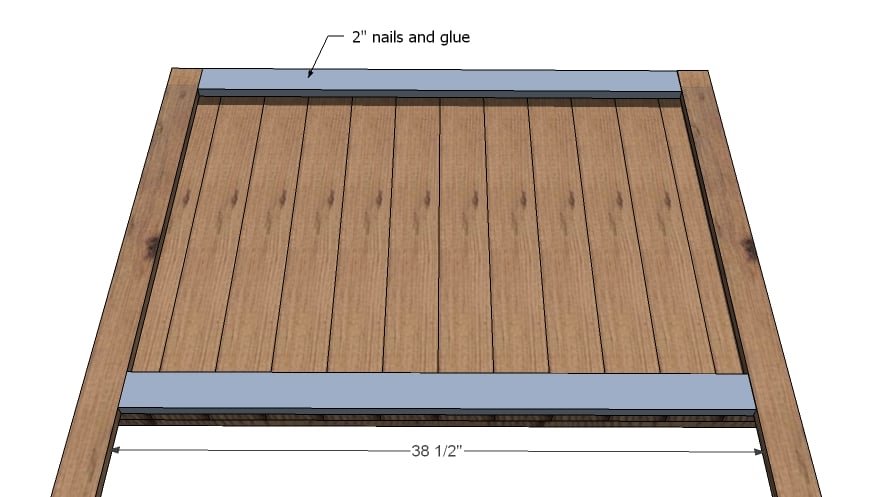
Mark the headboard as shown in the diagram. Use glue and 1 ¼” finish nails to attach the center trim to the panel.
Step 6
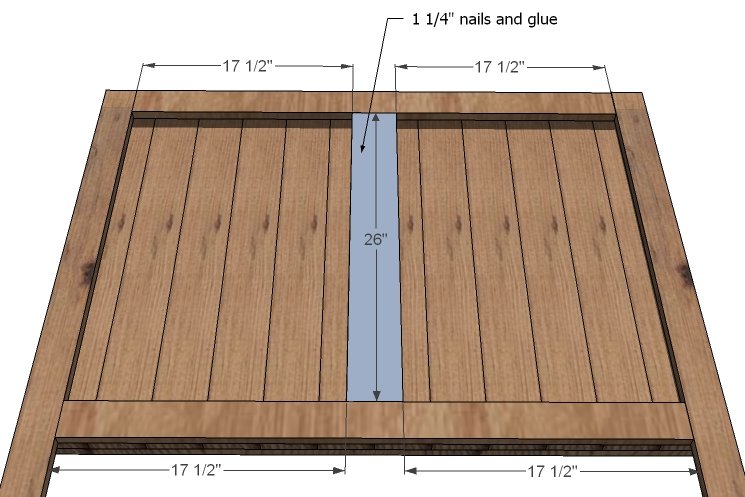
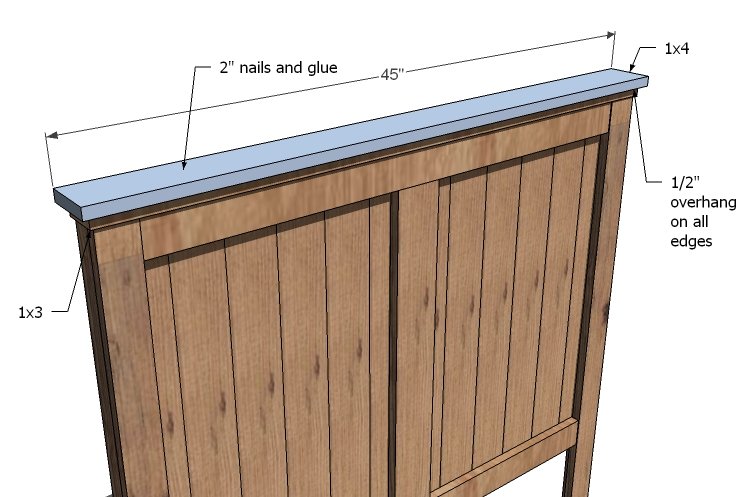
As shown in the diagram, attach the 1x3 top trim to the top of the headboard.
Step 7
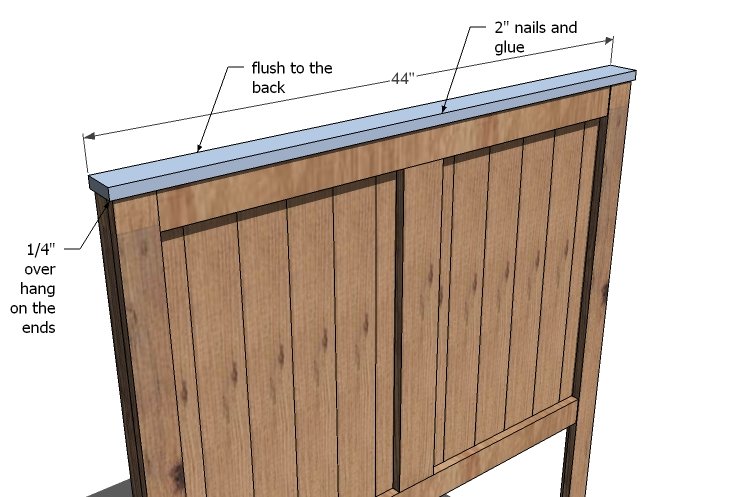
Attach the 1x4 top trim to the 1x3 top trim, with a ½” overhang on all edges.
Step 8
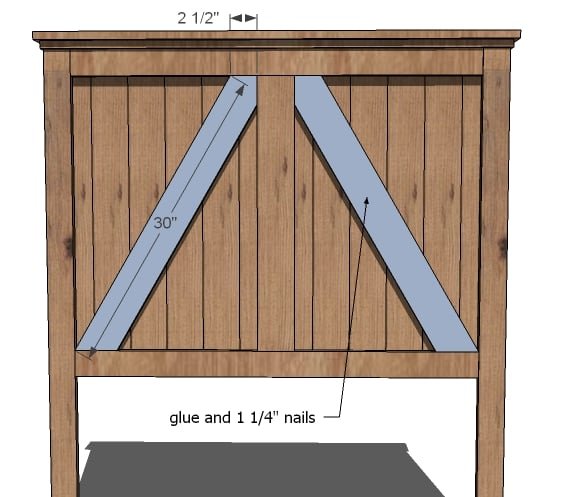
This step looks more difficult that it is. Cut from a 1x4 two boards with both ends at 30 degree angles (off square), ends are parallel to each other. The board will measure 30” long, from the short point to the long point. Then on the top side, measure 2 ½” in from the short point and cut off at a 90 degree angle. Fasten in place with 1 ¼” nails and glue.
Step 9
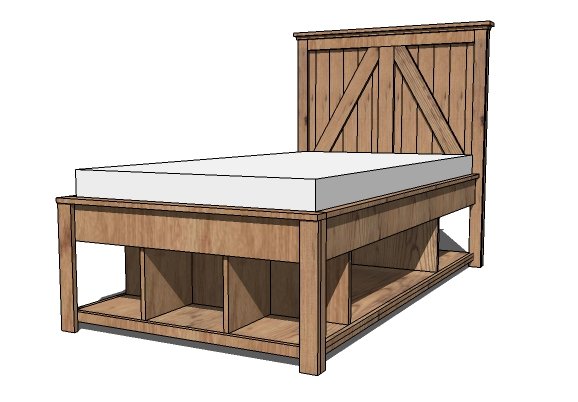
The optional storage bed frame plans are available here.
Finishing
Sand all surfaces, starting with a medium grit and finishing with fine. Wipe off the dust, fill any holes or gaps with wood filler, and sand smooth once dry. Apply primer if you're painting, then finish with your choice of paint or stain and seal with a durable clear topcoat. For outdoor projects, use exterior-rated primer, paint or stain, and sealer so the piece stands up to the weather.
Source (temporary): https://www.ana-white.com/woodworking-projects/rustic-farmhouse-headboard-twin