Rustic Hall Tree
Build a rustic hall tree inspired by Pottery Barn Grant Hall Tree! Free simple step by step plans feature detailed diagrams, cut list and shopping list. Everything you need to diy your own beautiful furniture!
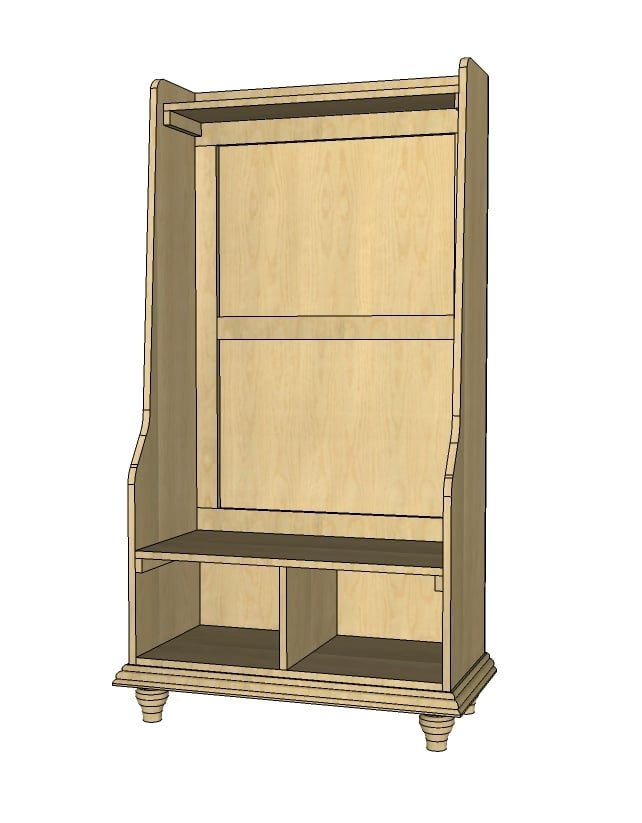
Specifications
| Project type | Hutch Plans |
|---|---|
| Room | Entryway and Mudroom |
| Style | Farmhouse Furniture |
| Difficulty | Intermediate |
| Estimated cost | $50 - $100 |
Dimensions
Use the size-specific shopping and cut lists below.
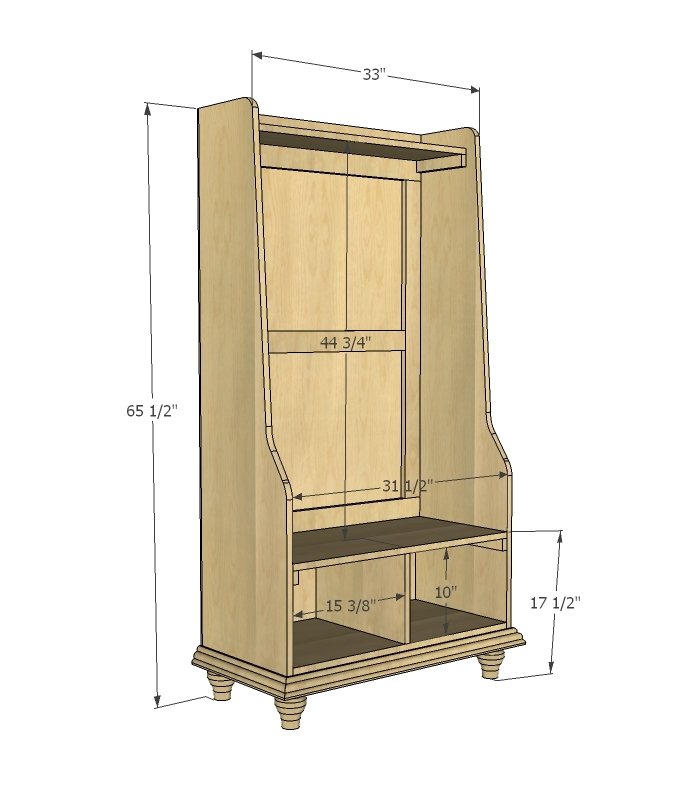
Shopping List
1 - Sheet of 3/4" Plywood (as shown PureBond Formaldehyde Free Plywood in Pine) or other sheet goods cut into three strips each 8 feet long, 15 3/4" wide (referred to as 1x16 boards throughout this plan)
4 - Tulip feet 4 1/4" tall
1 - small crown moulding piece, 7 feet long
2 - 1x2 @ 8 feet long
3 - 1x3 @ 8 feet long
1/4" plywood (full sheet in matching plywood grain)
You can use either pocket hole screws or countersunk screws
Cut List
3 - 1x16 @ 31 1/2" (one will get trimmed down for top shelf)
1 - 1x16 @ 10"
2 - 1x16 @ 61" (Sides - will cut out sides in decorative shape)
2 - 1x2 @ 15 3/4" (Under Shelf Support Trim)
2 - 1x2 @ 31 1/2" (Bottom Trim)
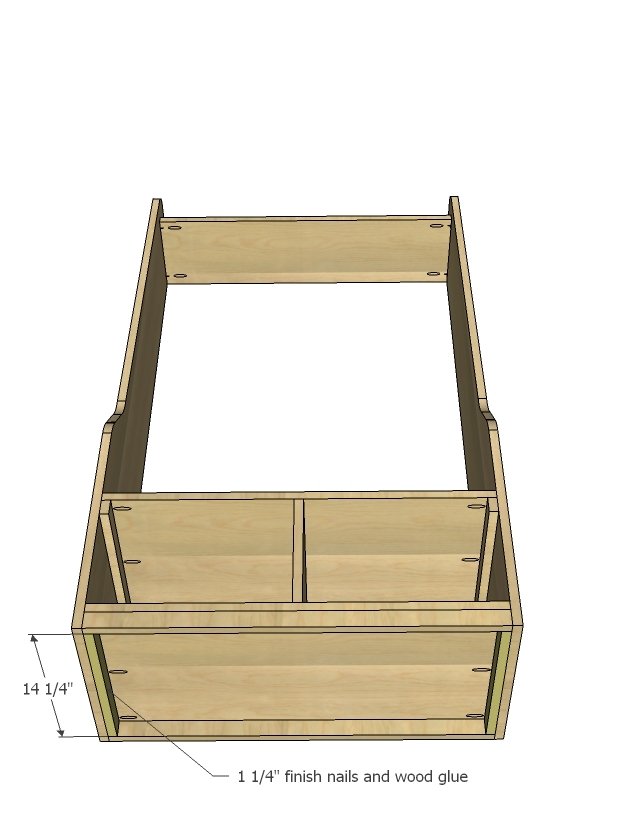
2 - 1x2 @ 14 1/4" (Bottom Under Support)
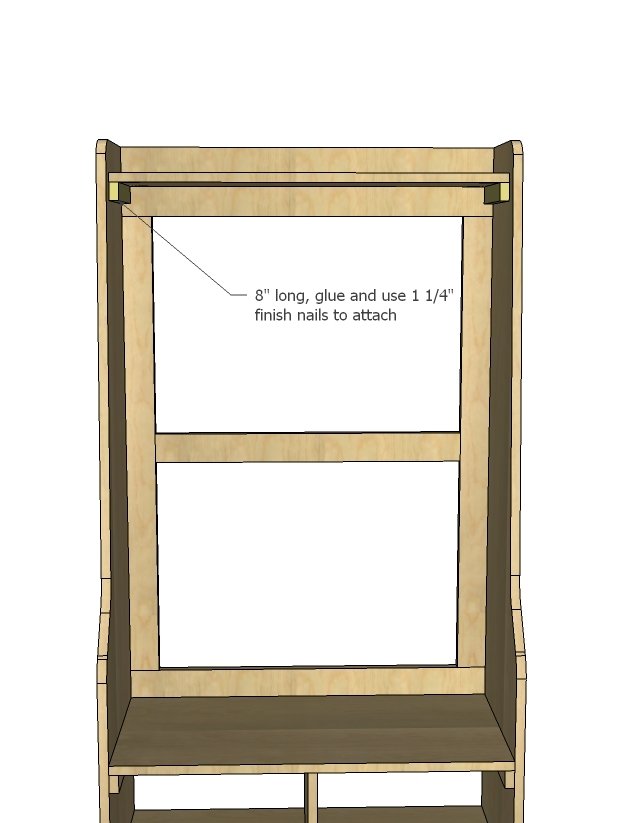
2 - 1x2 @ 8" (Top Shelf Supports)
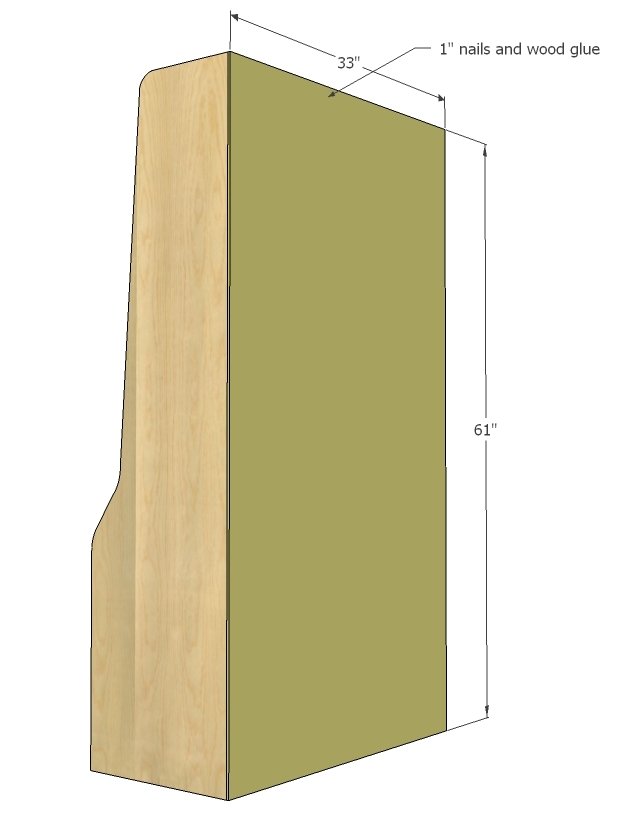
1 - 1/4" Plywood @ 61" x 33" (Back)
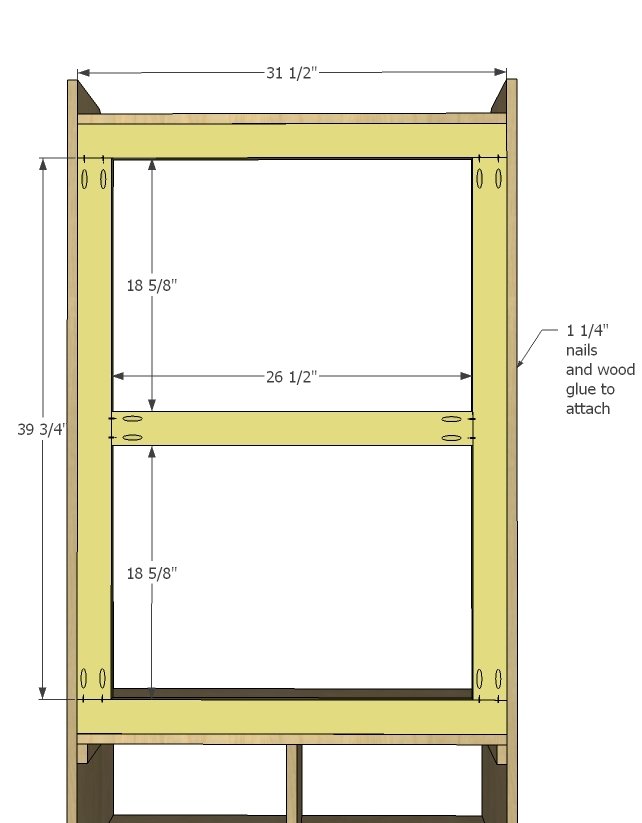
Back Inset Frame
2 - 1x3 @ 39 3/4"
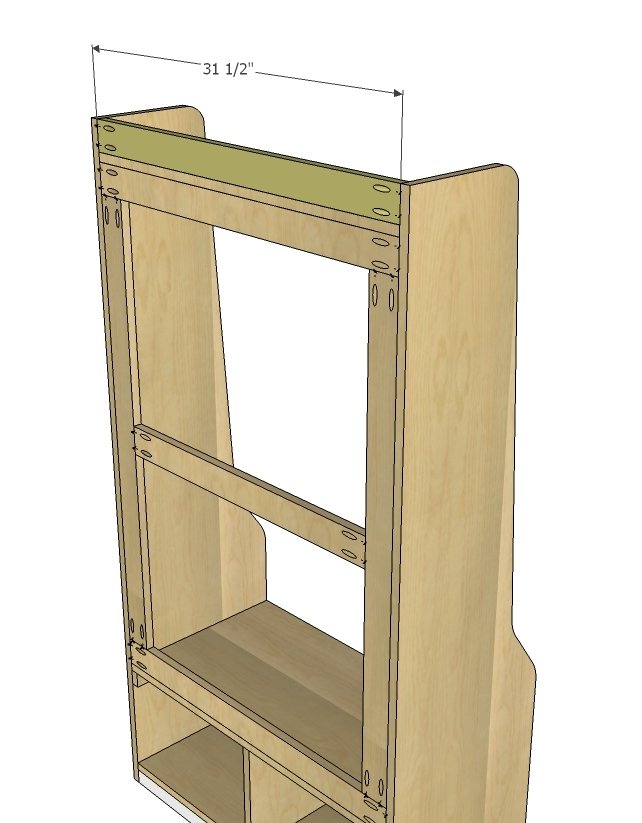
3 - 1x3 @ 31 1/2"
1 - 1x3 @ 26 1/2"
Tools
- measuring tape
- square
- pencil
- safety glasses
- hearing protection
- kreg-jig
- drill
- jigsaw
- compound miter saw
- nailer
- sander
- countersink drill bit
Step-by-step Instructions
Step 1
Build the shelf system with 2" finish nails and wood glue.
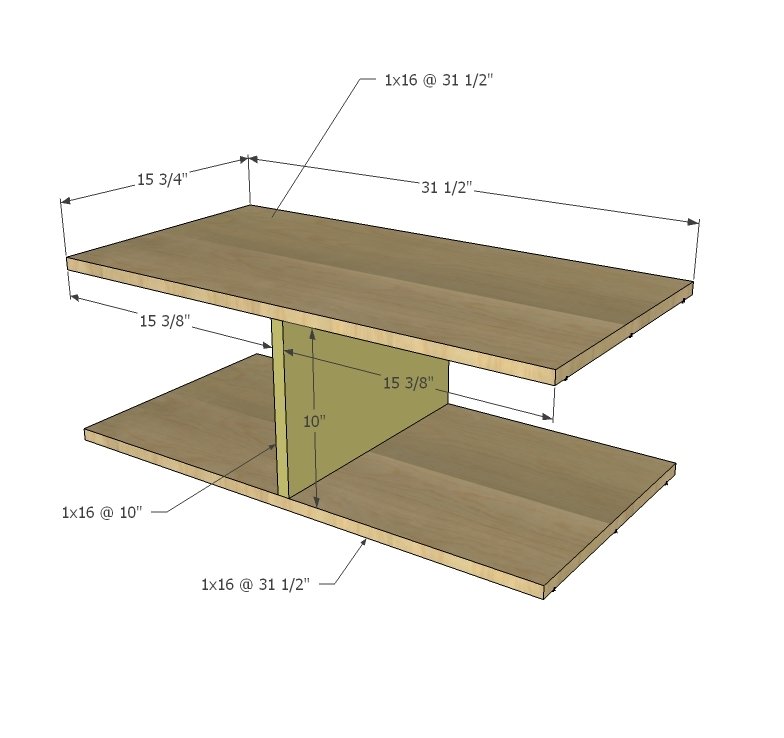
Step 2
Cut out sides as shown above with a jigsaw from 61" long 1x16 boards.
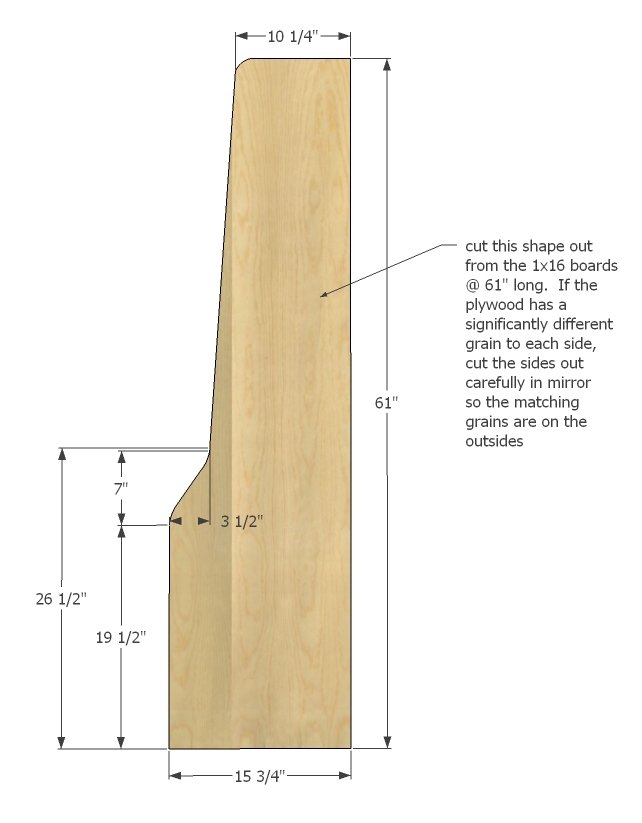
Step 3
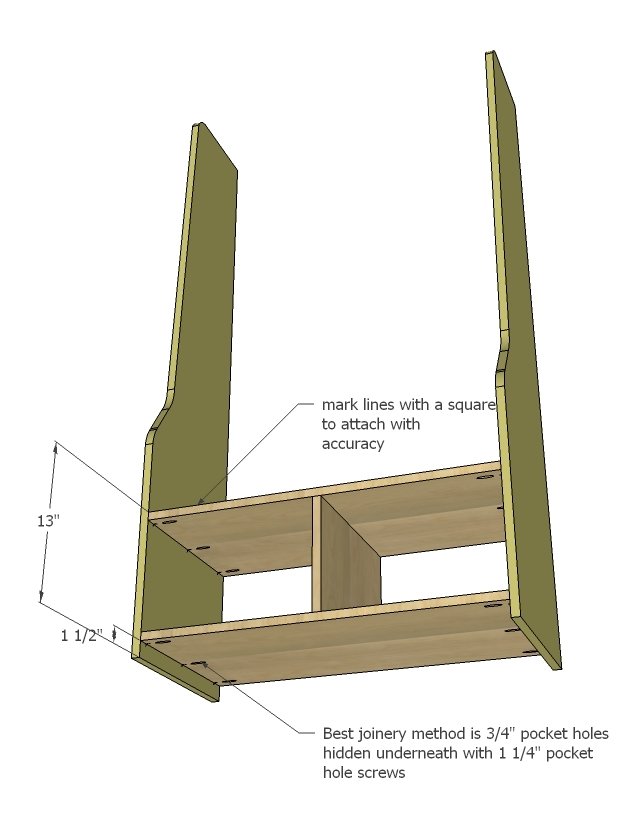
Mark sides for location of shelf system and attach. You can use either pocket hole screws or 2" screws countersunk from outsides, or even 2" finish nails, as all shelves get supported with 1x2s later.
Step 4
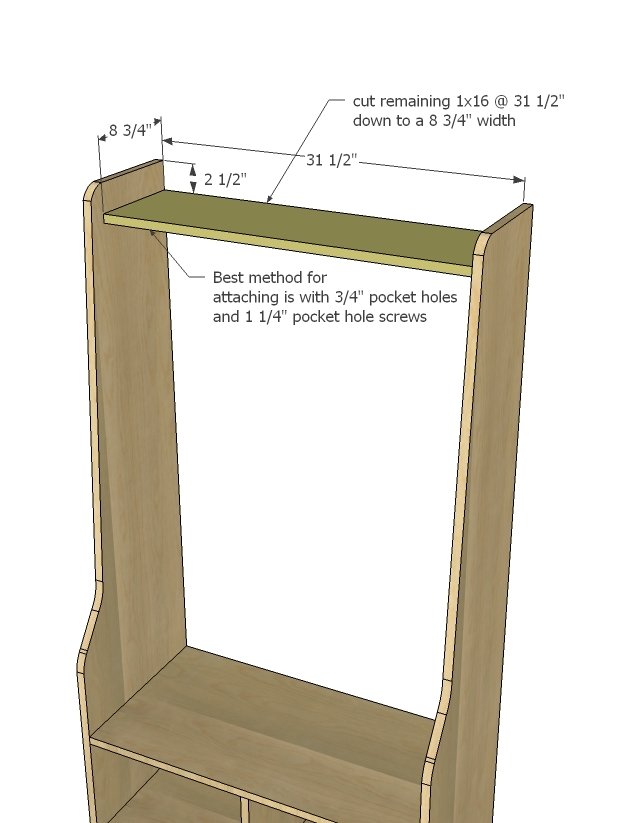
Top Shelf - use a circular saw or jigsaw to trim the remaining 1x16 @ 31 1/2" down to 8 3/4" wide - put the prettiest side to the front.
Step 5
Step 6
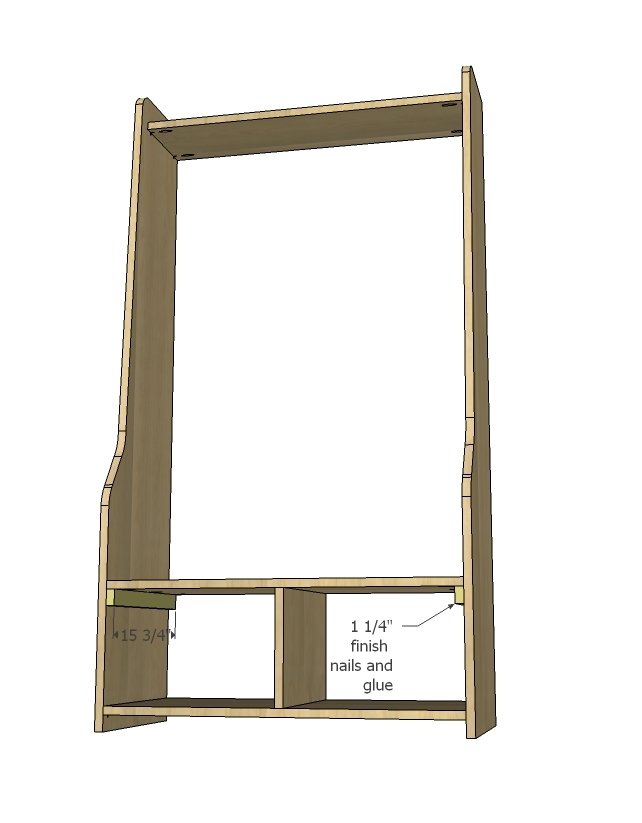
Bottoms get nailed in - or you could use your Kreg Jig here.
Step 7
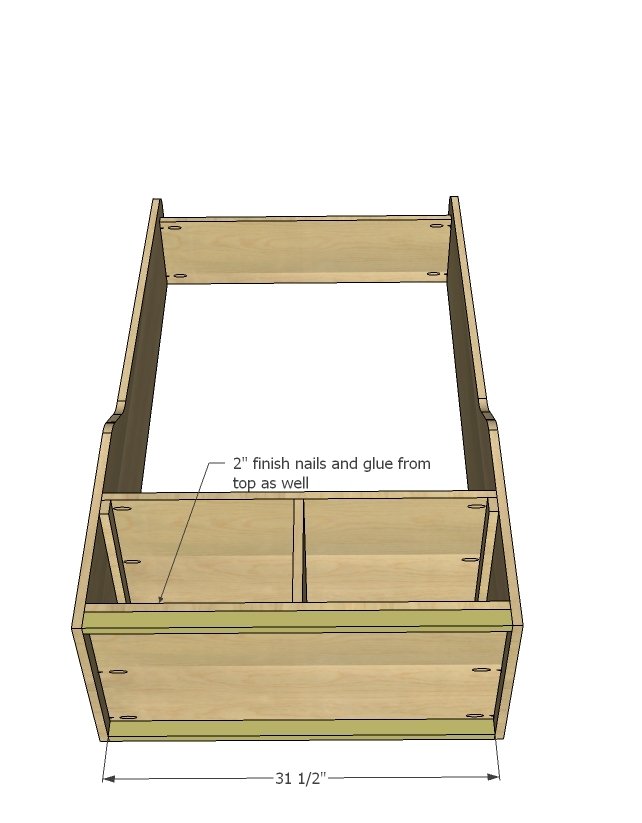
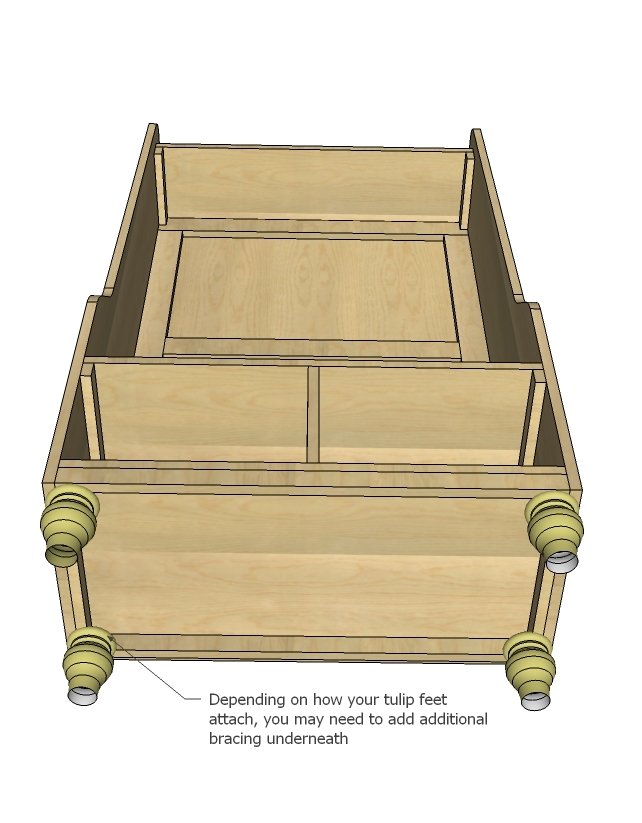
Fill in the blanks - you don't necessarily need these, but when it comes time to add the tulip feet, you will need something to attach to. You may even need to add additional boards, depending on how your tulip feet attach.
Build the back frame as shown above and attach in place with finish nails.
The back frame sides are not essential - but the top and bottom are because you will not have anything to hang hooks on. If you don't have a pocket hole jig, the easiest work around is simply nailing the top and bottom 1x3s in place and omitting everything else.
Step 9
Now the top.
Step 10
Shelf supports just get nailed in from sides and top.
Step 11
Adjust for square and nail back on. Be very aware of what you are nailing to and using the right depth nails here.
Step 12
Attach tulip feet per manufacturer recommendations. NOTE - Depending on the type of crown moulding you purchased, you may wish to move the tulip feet to fit the crown moulding. Do a dry fit, or perhaps put the moulding on first, feet second.
Step 13
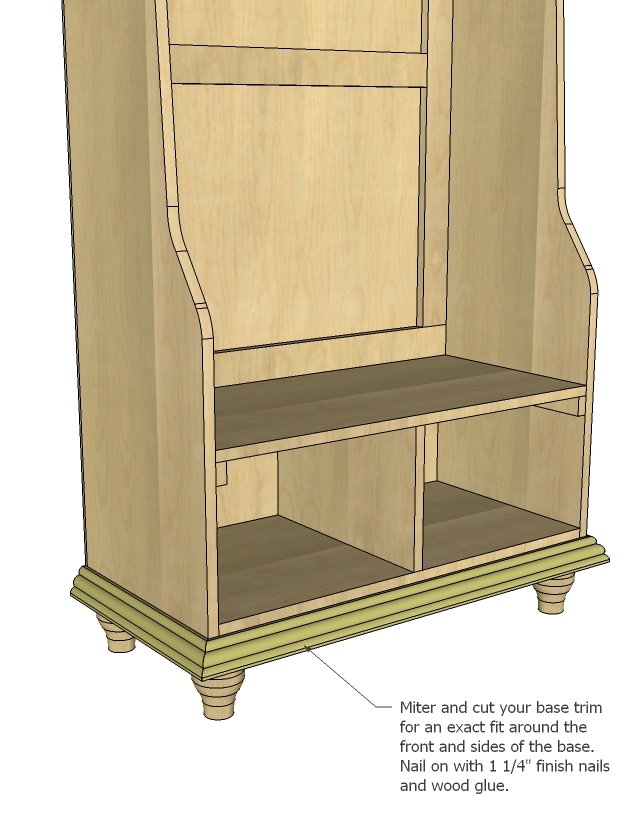
I'd love to be able to give you exact dimensions, but for moulding, you should always cut to fit. Miter corners with a miter saw. Attach with glue and finish nails.
Step 14
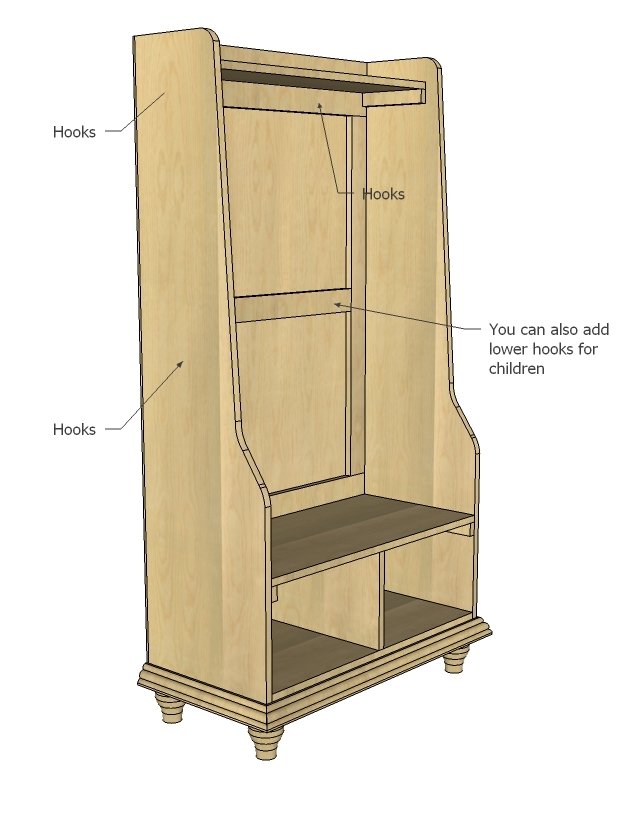
Install hooks!
Finishing
Sand all surfaces, starting with a medium grit and finishing with fine. Wipe off the dust, fill any holes or gaps with wood filler, and sand smooth once dry. Apply primer if you're painting, then finish with your choice of paint or stain and seal with a durable clear topcoat. For outdoor projects, use exterior-rated primer, paint or stain, and sealer so the piece stands up to the weather.
Source (temporary): https://www.ana-white.com/woodworking-projects/rustic-hall-tree