Rustic Kitchen Island
Build your own outdoor kitchen island with! This sturdy DIY table features a spacious top for prep or serving, plus two roomy shelves for extra storage. It’s a great project for patios, decks, or backyard entertaining, and the simple design makes it both practical and beautiful. Rustic Kitchen Island from 2x4s built by House Food Baby
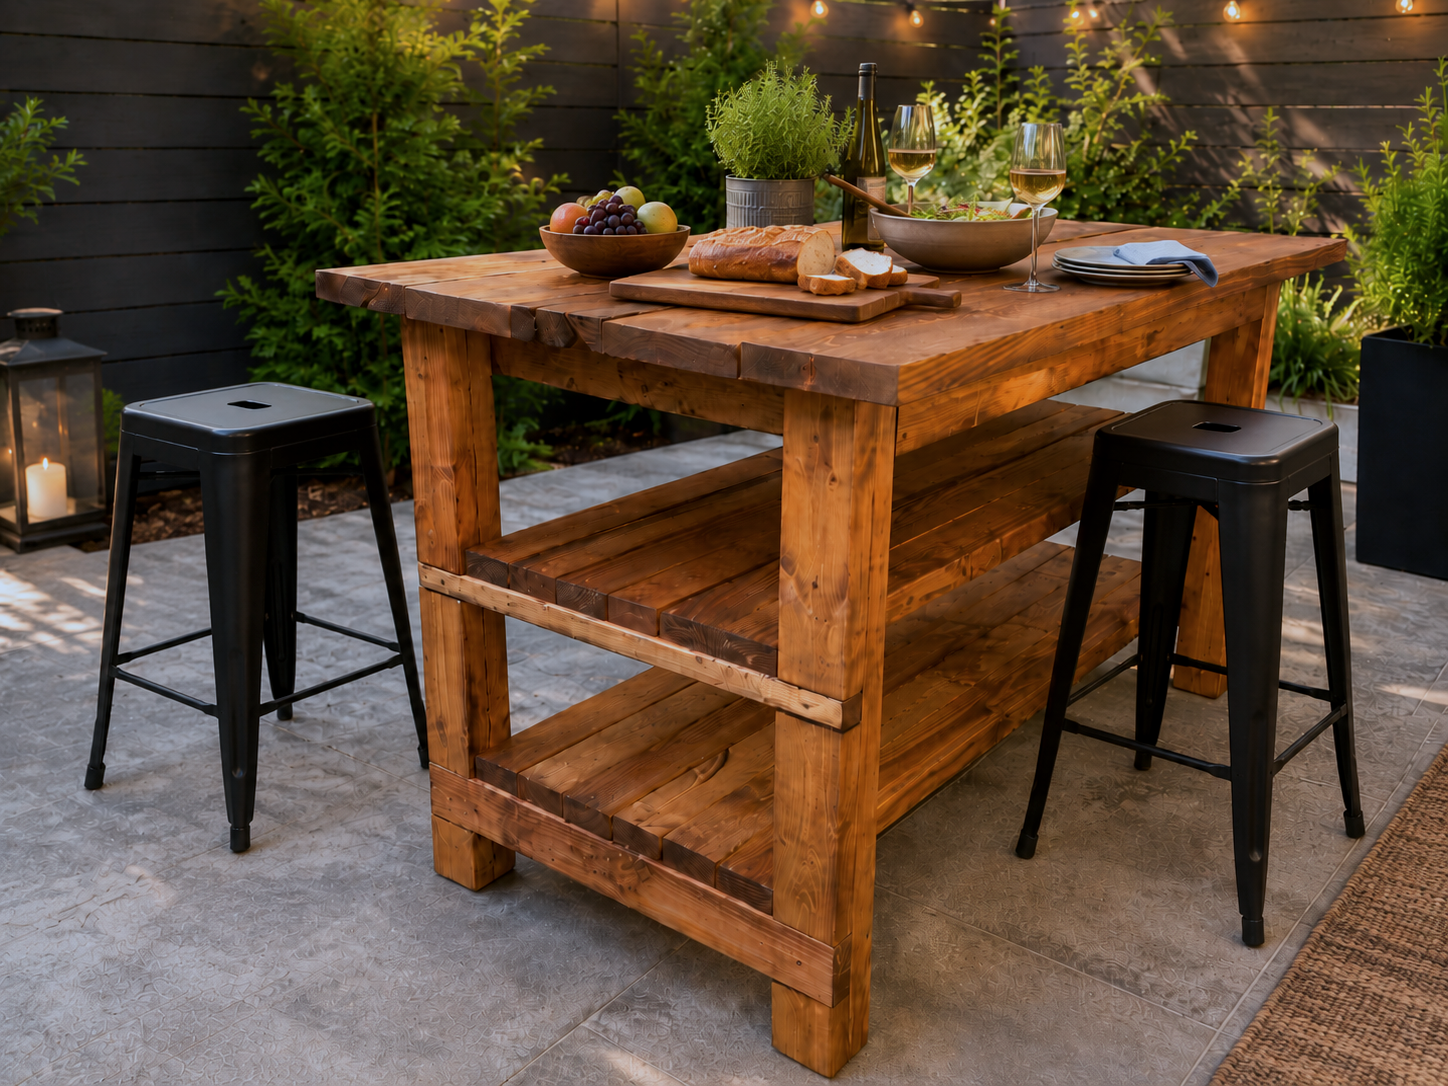
Specifications
| Project type | Kitchen Island Plans |
|---|---|
| Room | kitchen |
| Style | Rustic Furniture Plans |
| Difficulty | Beginner Projects |
| Estimated cost | $50 - $100 |
Dimensions
Use the size-specific shopping and cut lists below.
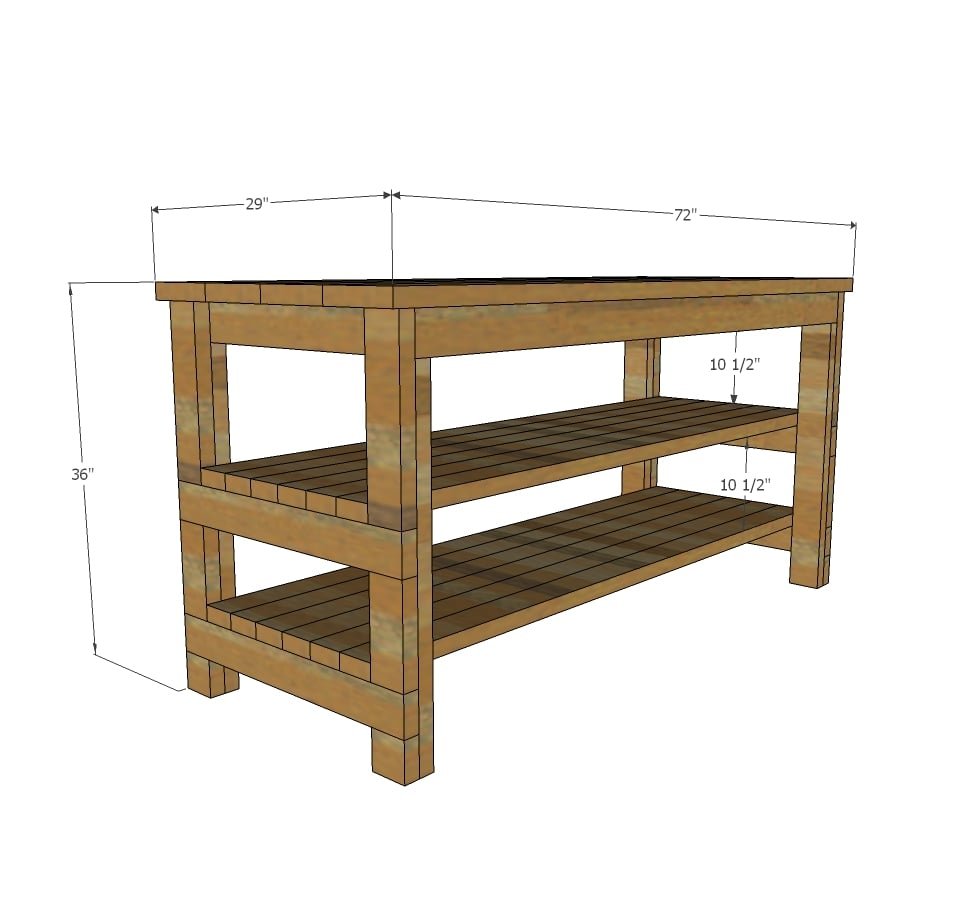
Shopping List
- 5 - 2x4 @ 8 feet long
- 6 - 2x4 @ 12 feet long (cut these in half for shelf boards)
- 2 - 2x8 @ 12 feet long (cut these in half for tabletop boards)
- 2-3/4" self tapping wood screws (try spax or similar)
Cut List
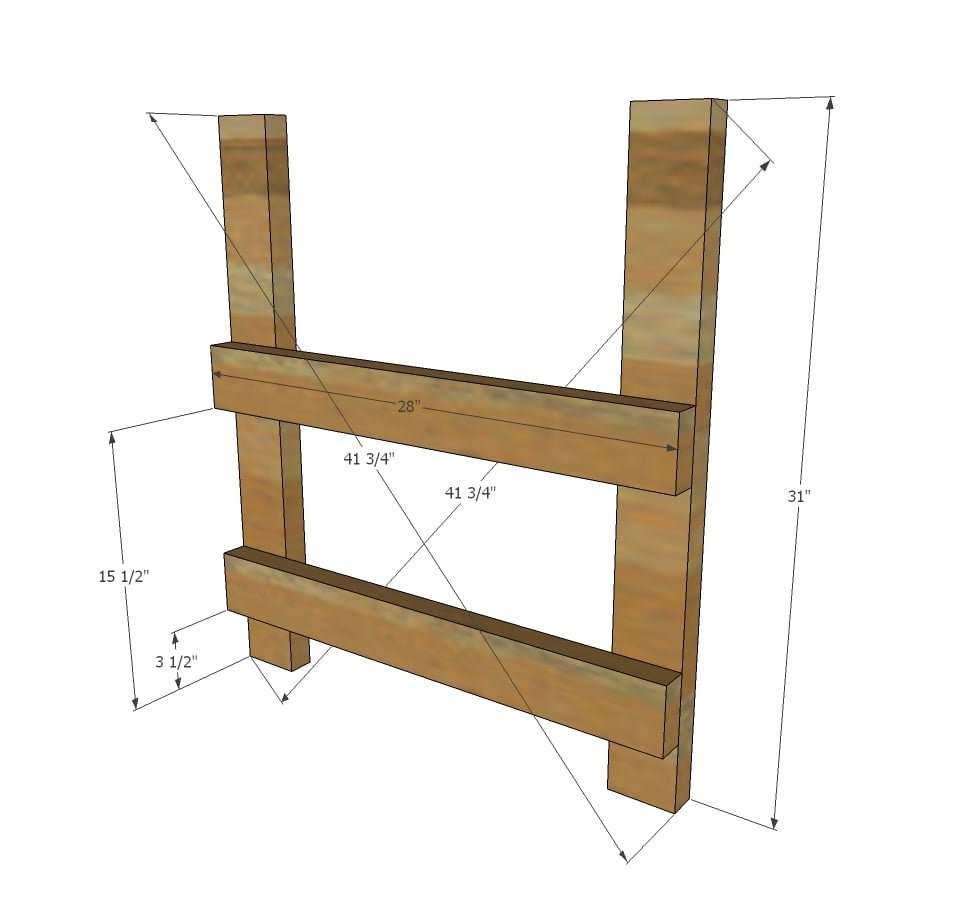
- 4 - 2x4 @ 31" - Inner Leg
- 4 - 2x4 @ 28" - Shelf supports
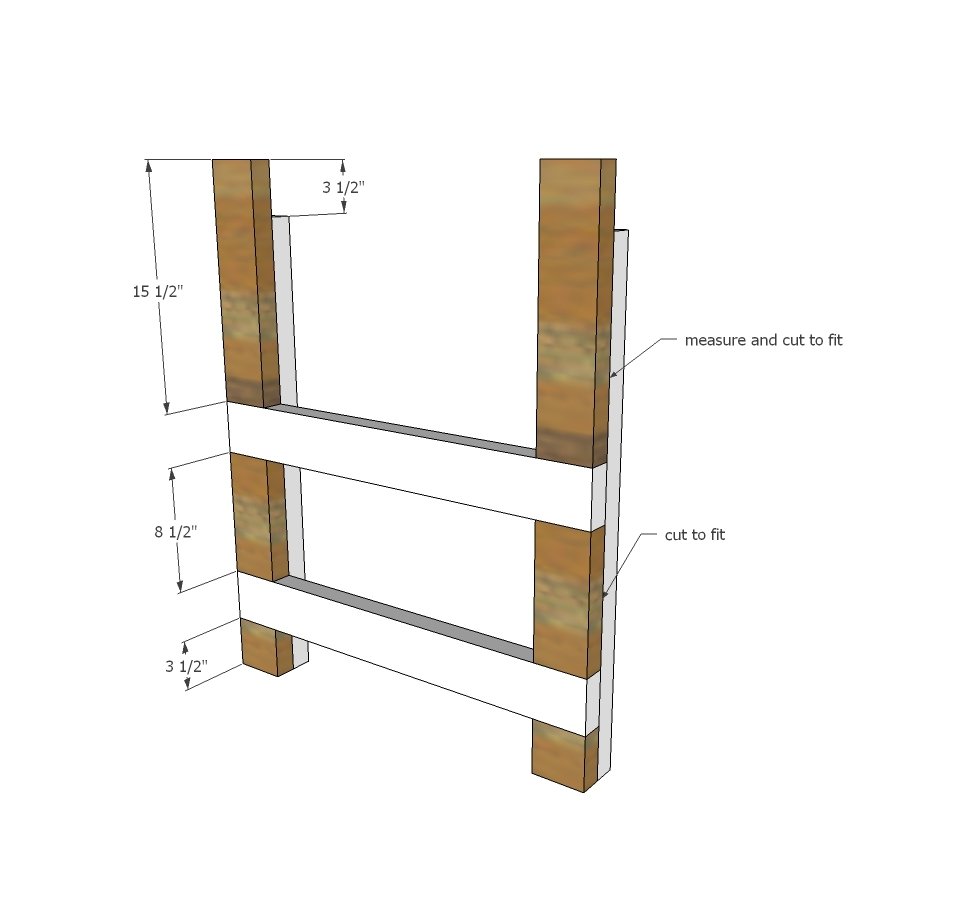
- 4 - 2x4 @ 3-1/2" - Bottom outer leg (cut to fit)
- 4 - 2x4 @ 8-1/2" - Middle outer leg (cut to fit)
- 4 - 2x4 @ 15-1/2" - Top outer leg (cut to fit)
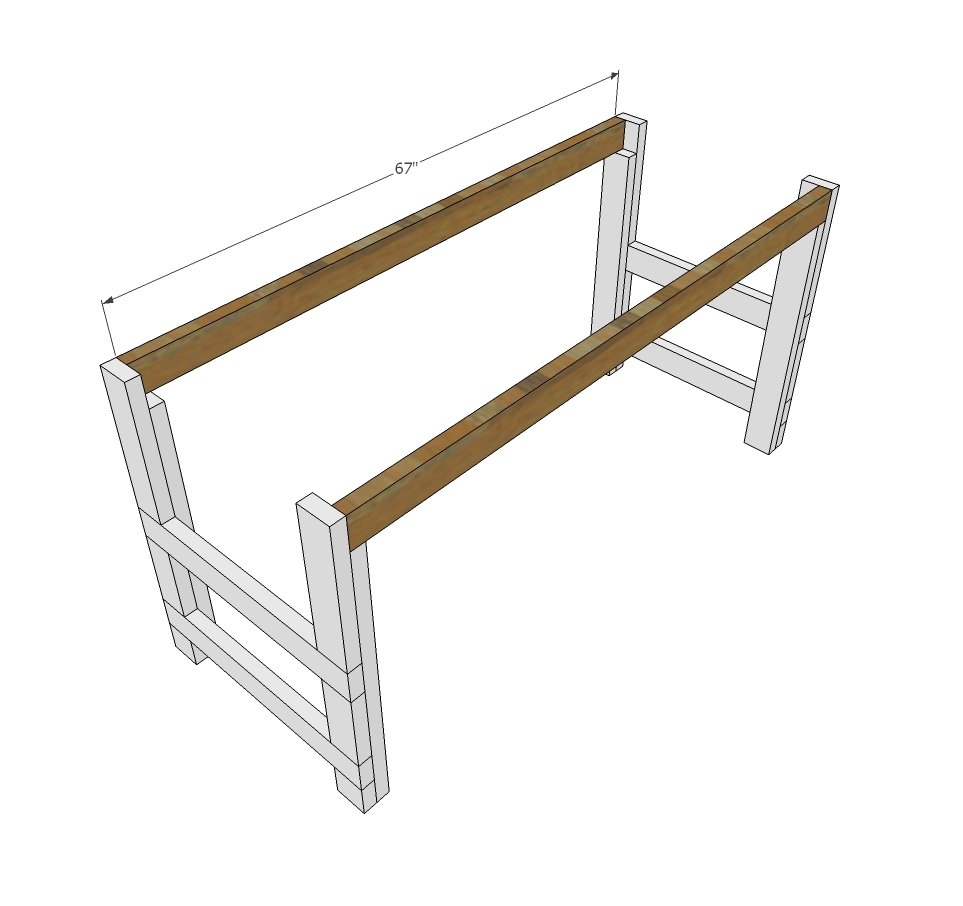
- 2 - 2x4 @ 67" - side aprons
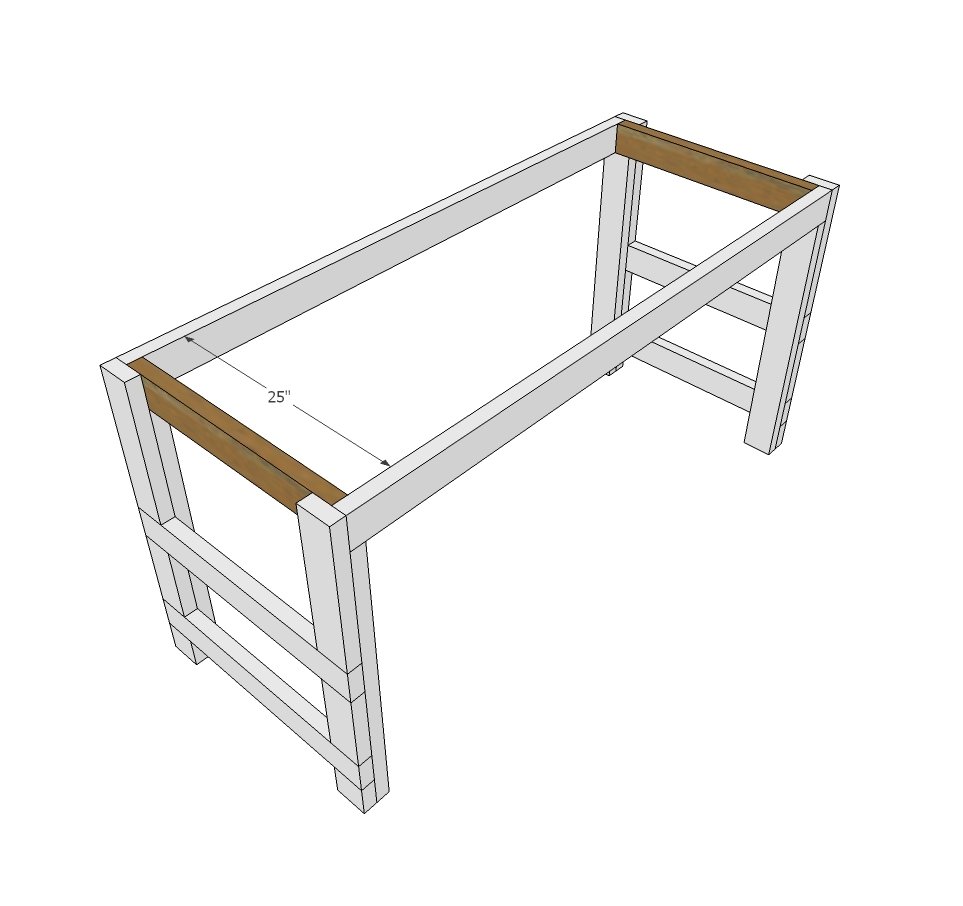
- 4 - 2x4 @ 25" - end aprons
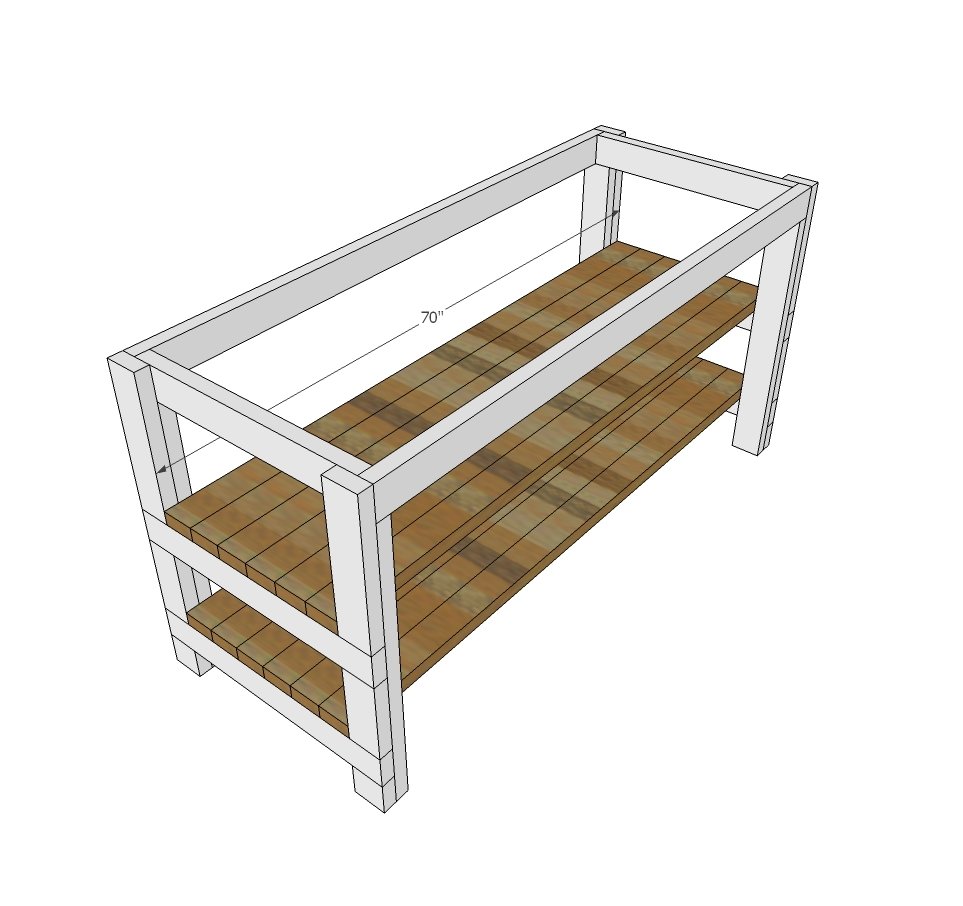
- 12 - 2x4 @ 70" - bottom shelf boards
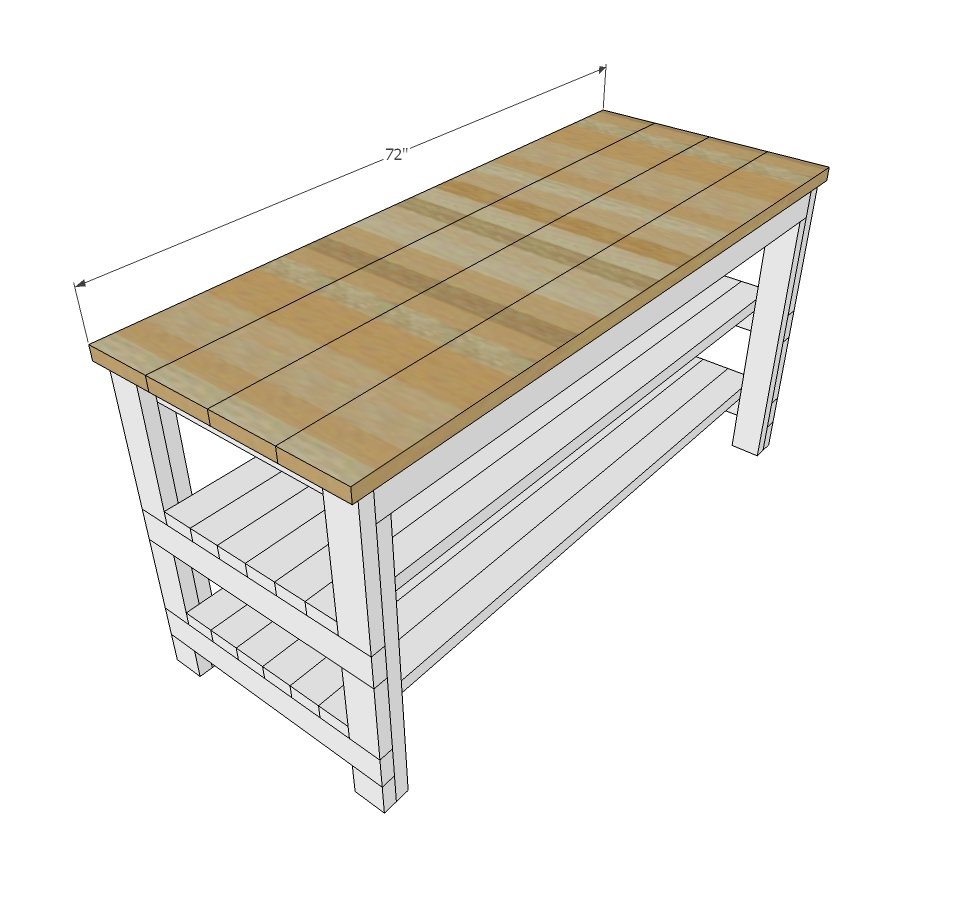
- 4 - 2x8 @ 72" - tabletop boards
Tools
- measuring tape
- square
- pencil
- hearing protection
- drill
- circular saw
- sander
Step-by-step Instructions
Step 1
Build two of the leg sets, attaching with glue and 2-3/4" wood screws. Take diagonal measurements and make sure they match exactly to ensure your leg sets are square.
Step 2
Fill in leg sets with outer leg pieces, attaching with glue and 2-3/4" screws.
Step 3
Screw long aprons to leg sets with 2-3/4" screws and glue.
Step 4
Add shorter aprons. Also add two additional support boards (same length as shorter aprons) between longer aprons for attaching tabletop boards in later steps. [[{"type":"media","view_mode":"media_original","fid":"3154943138","attributes":{"alt":"","class":"media-image","height":"906","typeof":"foaf:Image","width":"963"}}]]
Step 5
Step 6
Attach tabletop boards to
Finishing
Sand all surfaces, starting with a medium grit and finishing with fine. Wipe off the dust, fill any holes or gaps with wood filler, and sand smooth once dry. Apply primer if you're painting, then finish with your choice of paint or stain and seal with a durable clear topcoat. For outdoor projects, use exterior-rated primer, paint or stain, and sealer so the piece stands up to the weather.
Source (temporary): https://www.ana-white.com/woodworking-projects/rustic-kitchen-island-built-house-food-baby