Rustic Modern Farmhouse Nightstand
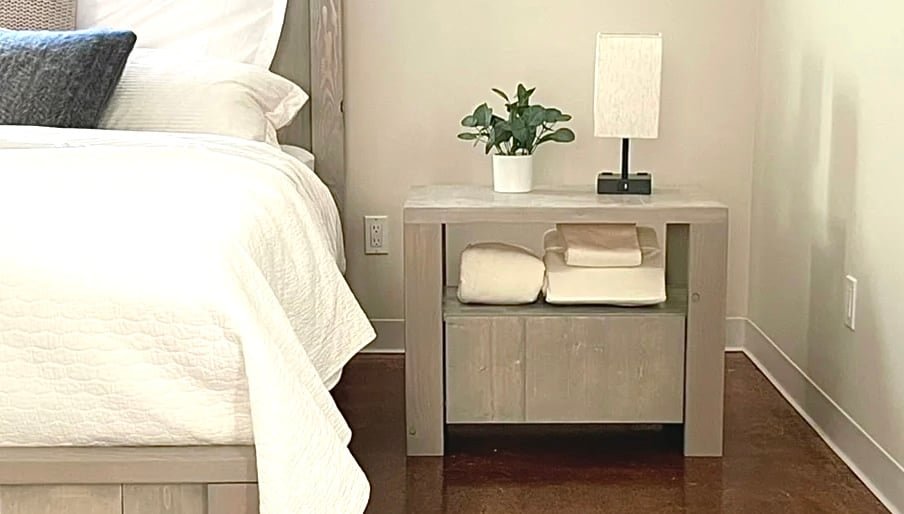
Build your own rustic modern nightstands, with an open shelf and large drawer. All pine wood boards can be painted or stained. with step by step diagrams, video and detailed instructions from RELATED: Rustic Modern Farmhouse Bed Plans
Specifications
| Project type | Nightstands |
|---|---|
| Room | Storage Solutions |
| Difficulty | Intermediate |
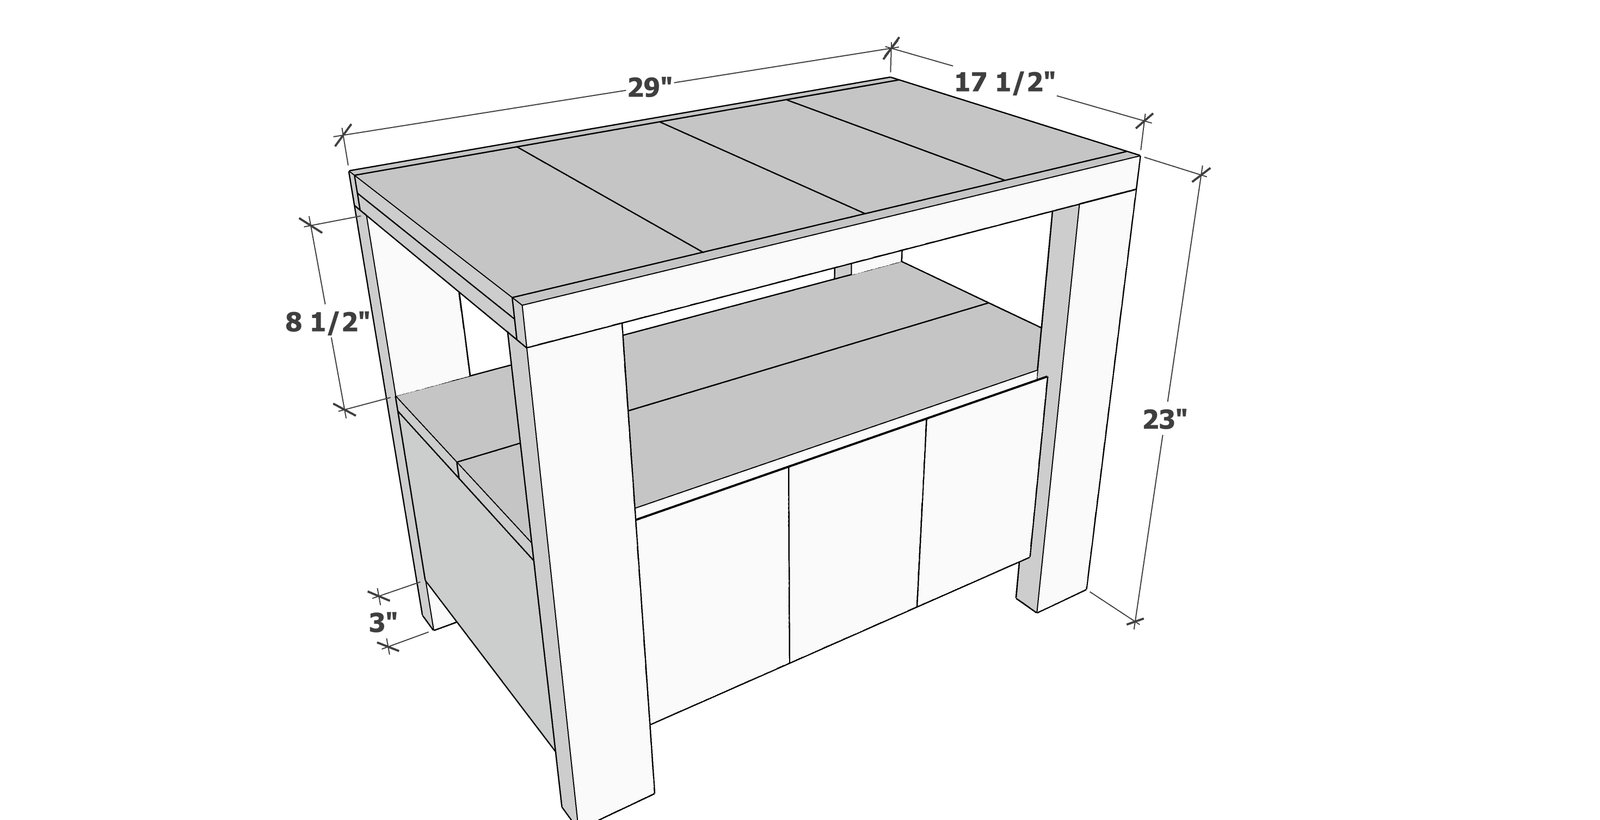
Dimensions
Use the size-specific shopping and cut lists below.
Shopping List
Materials needed for 1 nightstand
- 1x8 - 13 board feet total, can use 8' and 5' pieces
- 1x10 - 29" total needed
- 1x6 - 6 board feet total
- 1x2 - 5 board feet total
- 1x4 - 3 board feet total
- 2x4 - 1 8' long 2x4, pine or soft yellow wood is preferred
- 1/4" plywood - 16" x 21" piece
- 16" euro drawer slide (white bottom corner mount)
- 1-1/4" pocket hole screws (about 25)
- 2-1/2" pocket hole screws (8)
- 1-1/4" and 3/4" brad nails
- wood glue
- 120 and 220 grit sandpaper
- stain or paint
- poly top coat if staining
Cut List
Top
- 4 - 1x8 @ 16"
- 2 - 1x2 @ 29" (approximate, measure and cut to fit)
- 2 - 1x4 @ 16"
Frame
- 4 - 2x4 @ 21-1/2" - legs
- 2 - 1x10 @ 14-1/2" - sides
- 2 - 1x8 @ 29" (approximate, cut to fit 1x2 from top) - shelf boards
Drawer
- 2 - 1x6 @ 16" - drawer sides
- 2 - 1x6 @ 19-1/2"(approximate, measure and cut to fit) - drawer front and back
- 1 - 1/4" plywood @ 16" x 21" (approximate, 1" less than opening) - drawer bottom
- 3 - 1x8 @ 10" - drawer faces, also cut top at angle for finger pull
Tools
- measuring tape
- square
- pencil
- safety glasses
- kreg-jig
- drill
- compound miter saw
- table saw
- nailer
- sander
Step-by-step Instructions
Step 1
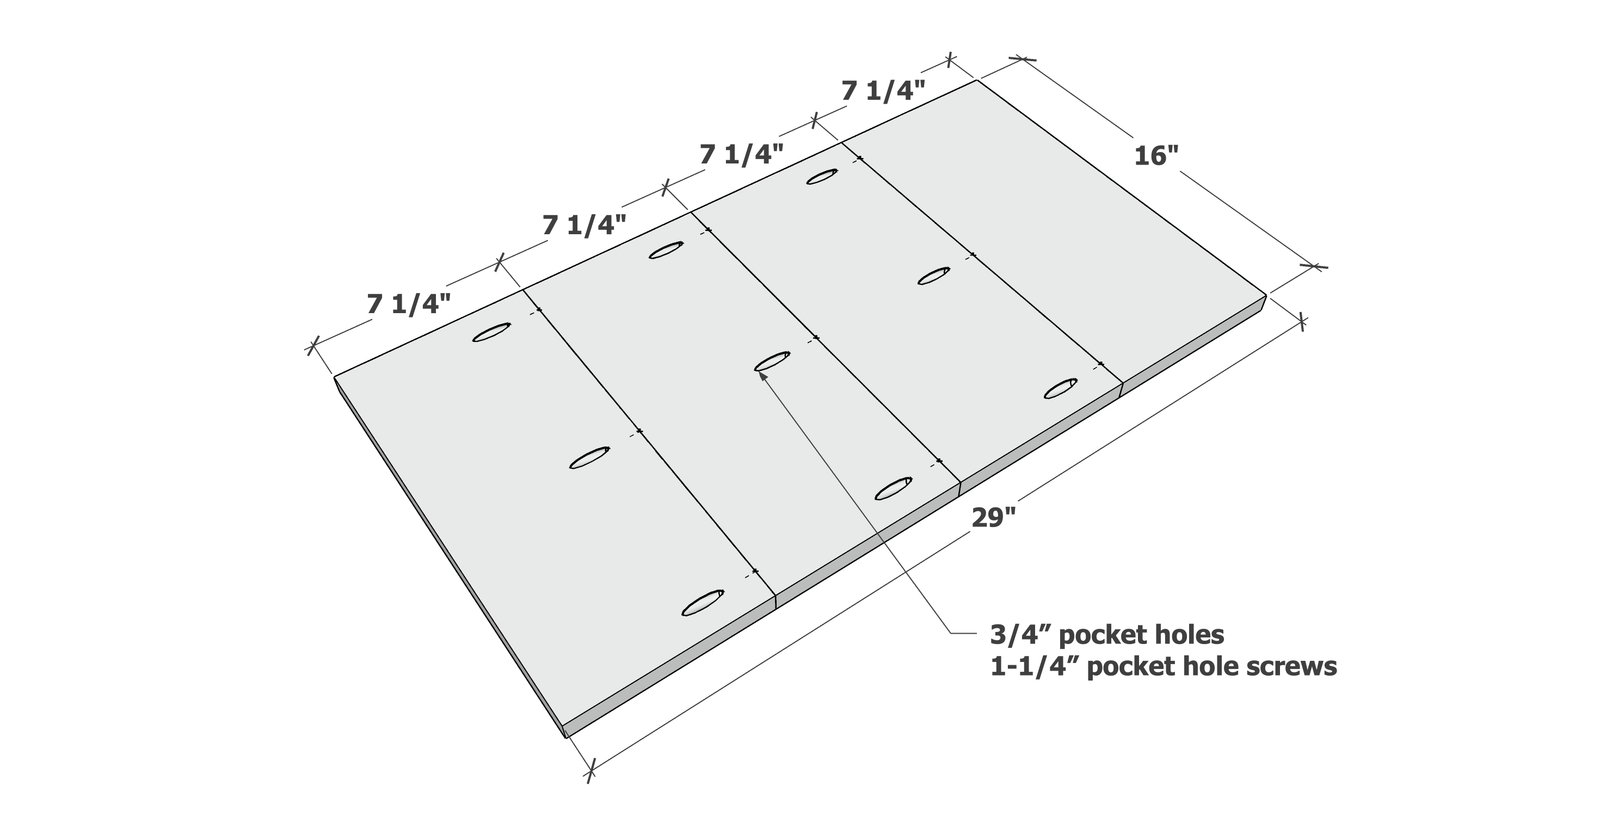
Note: this plan expects 1x8s to measure 7-1/4" wide. If your boards measure differently, a "cut as you go" approach is recommended. Cut the tabletop boards and drill 3/4" pocket holes on three of the four boards. Clamp and attach edge to edge with 1-1/4" pocket hole screws.
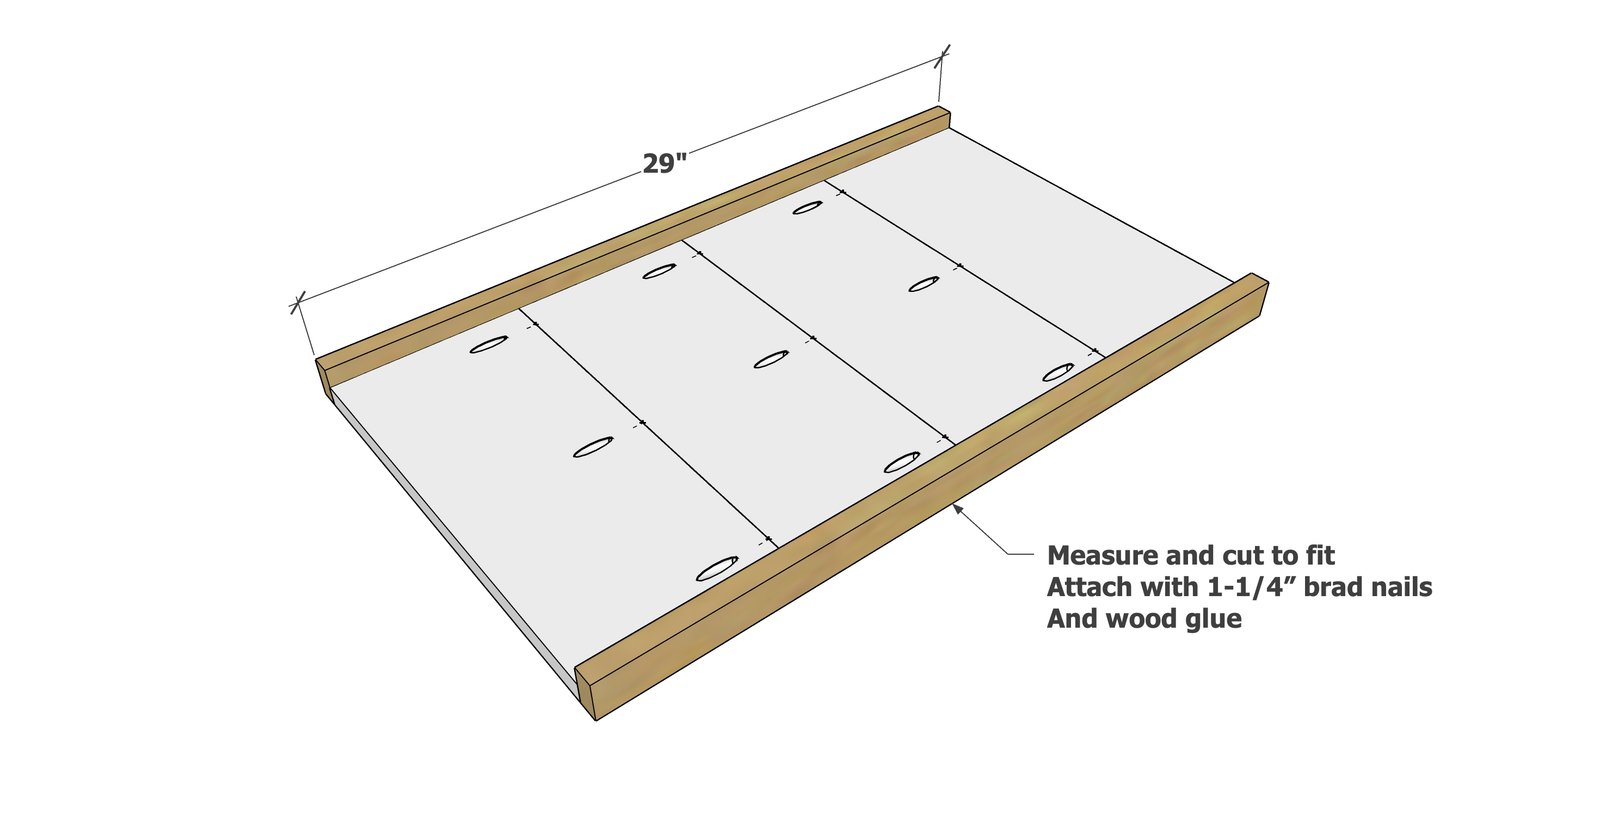
Measure and cut the 1x2 side trim.
Attach flush to front with 1-1/4" brad nails. Top should be smooth and flush.
Step 3
Attach 1x4s to inside of 1x2s with 1-1/4" brad nails and wood glue.
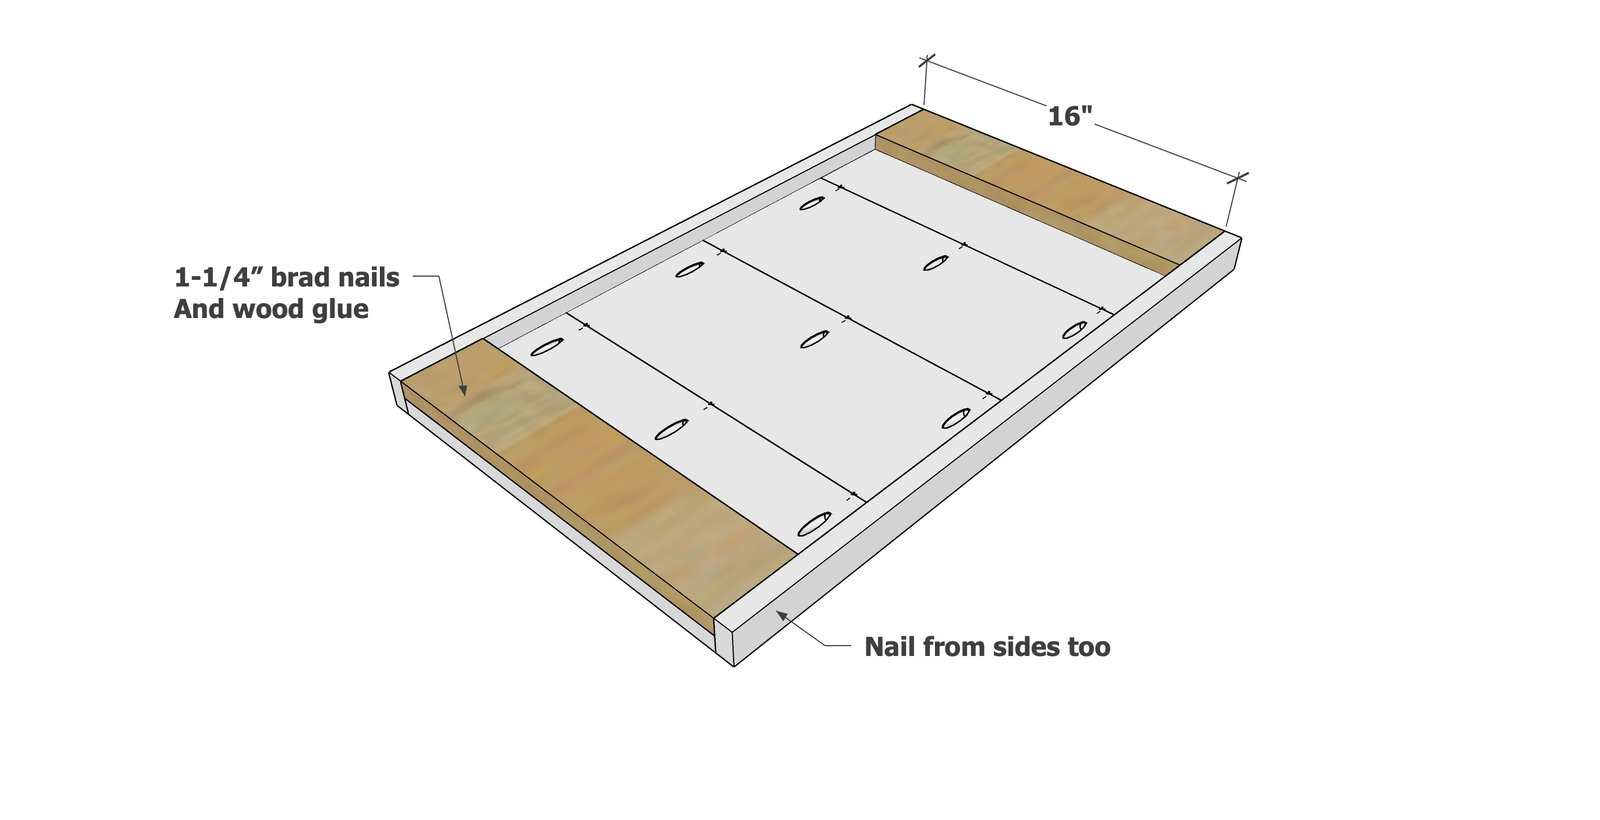
Set pocket hole jig for 1-1/2" material.
Drill two 1-1/2" pocket holes on one end of all four 2x4 leg boards. Attach as shown in the diagram to the tabletop, with the pocket holes all facing backwards.
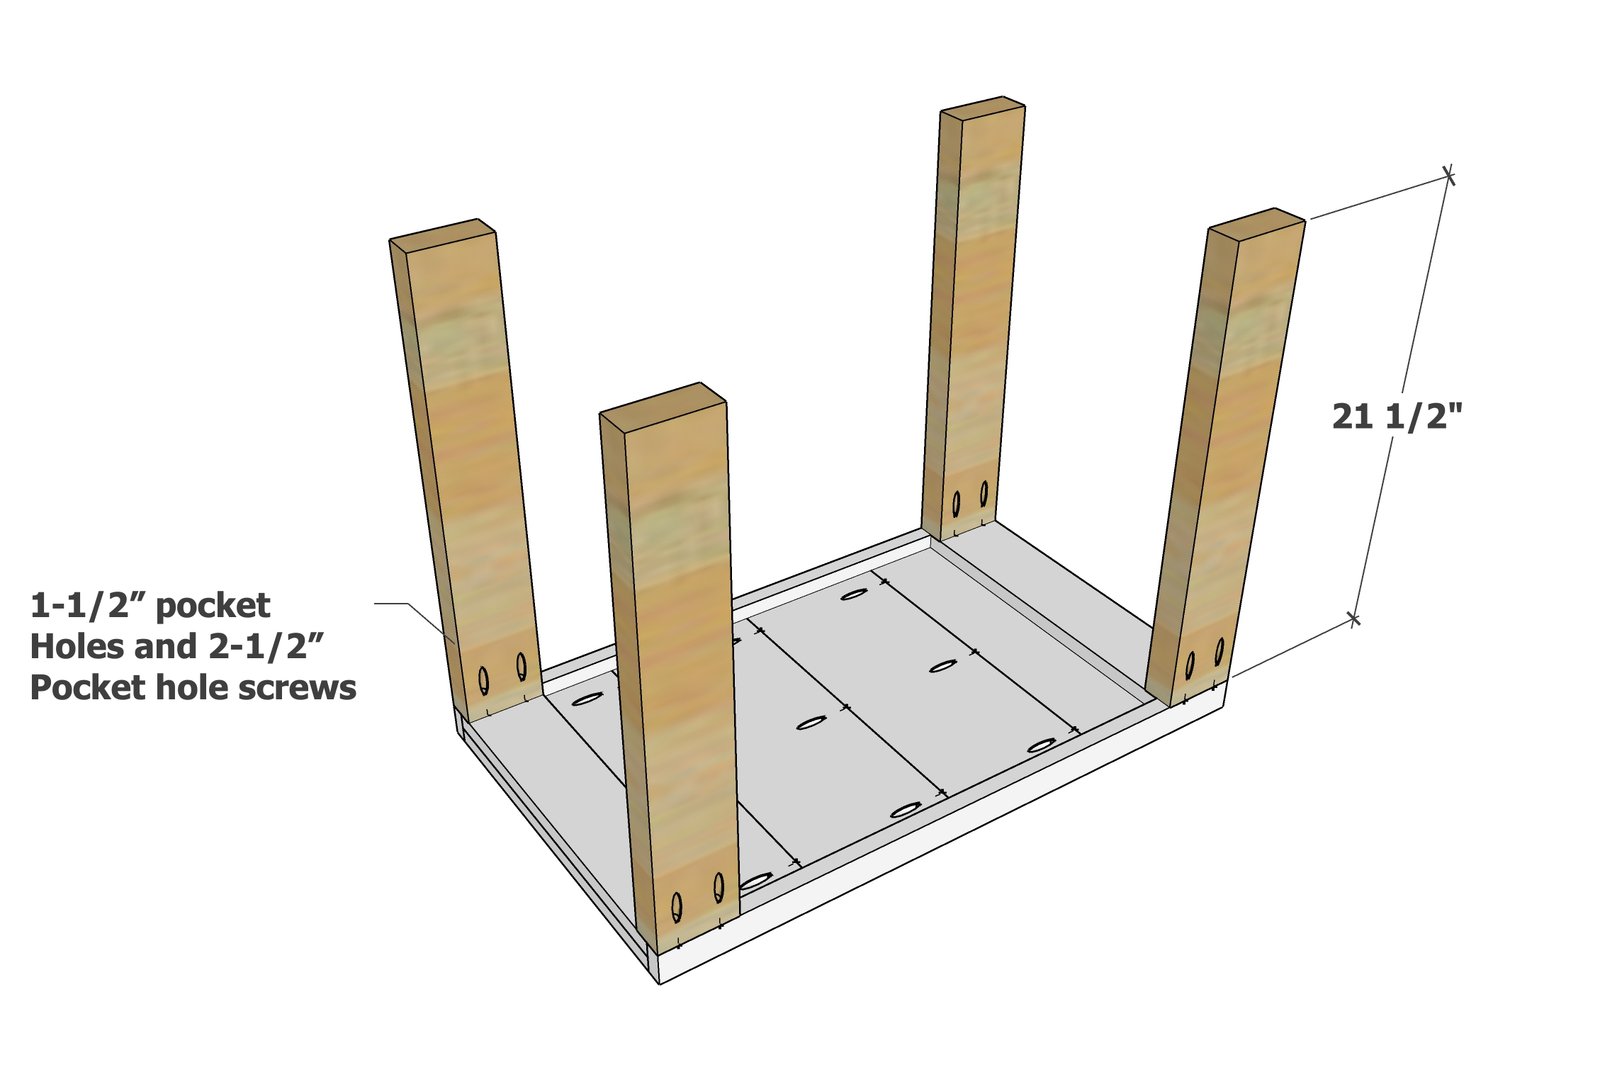
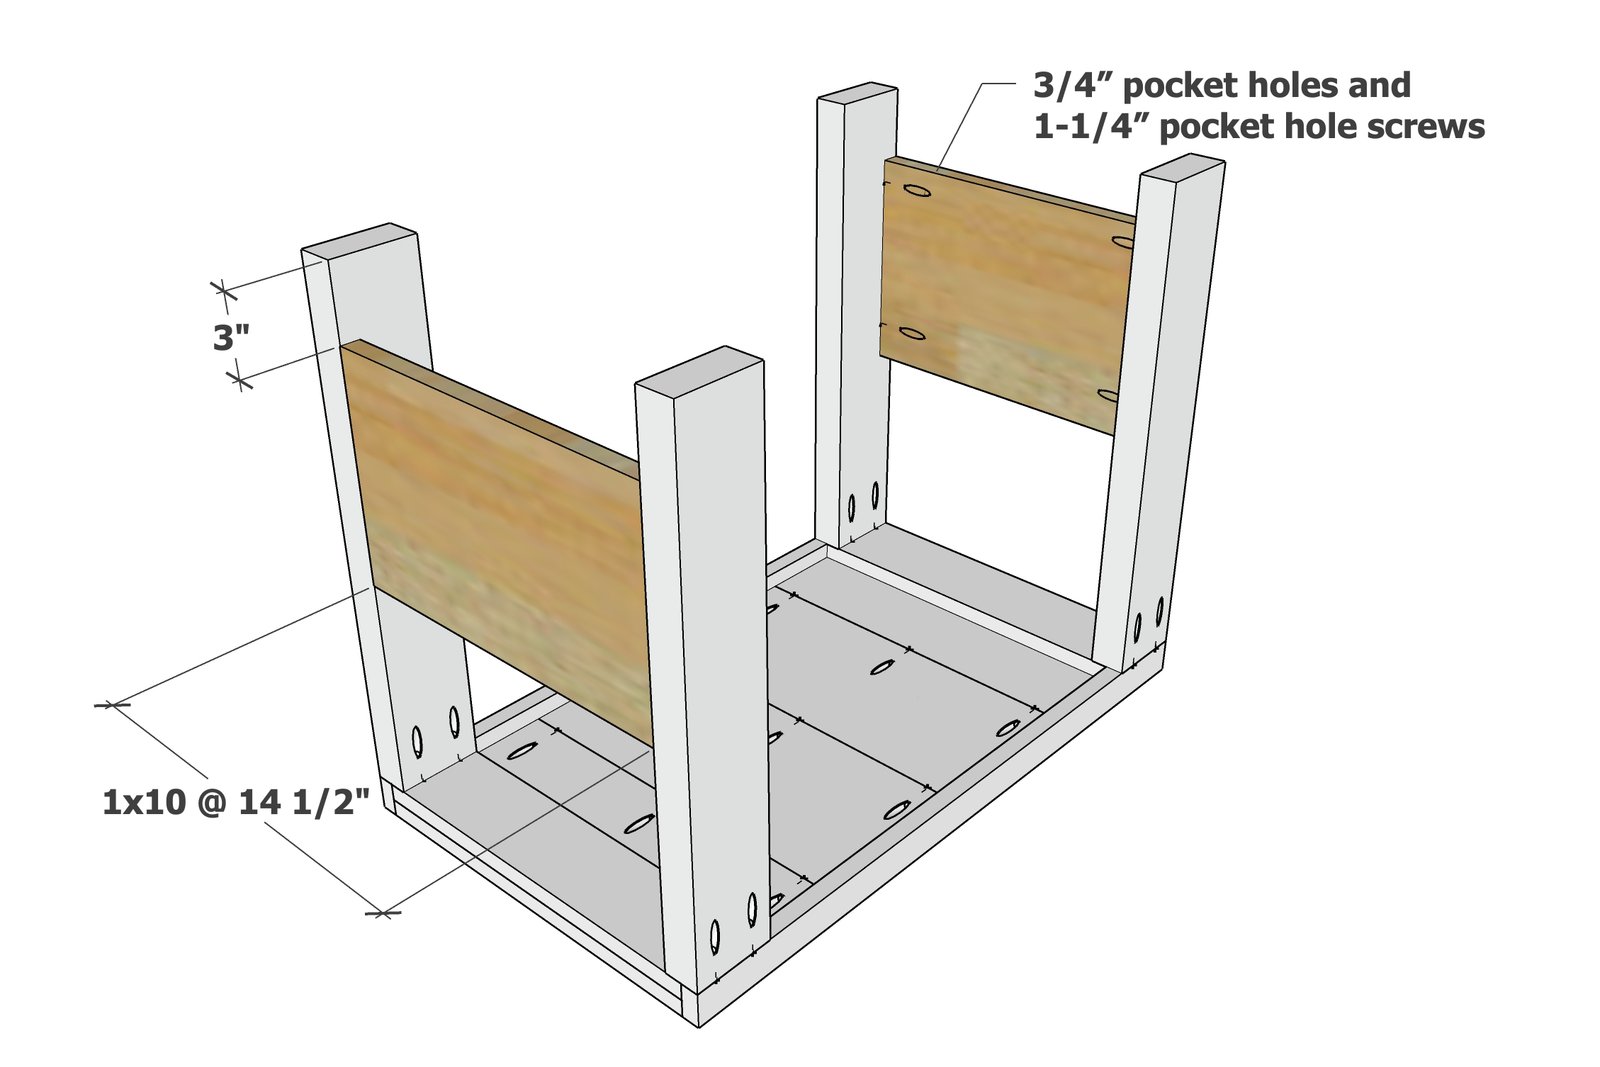
Set the pocket hole jig back to 3/4" setting.
Attach with 1-1/4" pocket hole screws to the legs, flush to the outside.
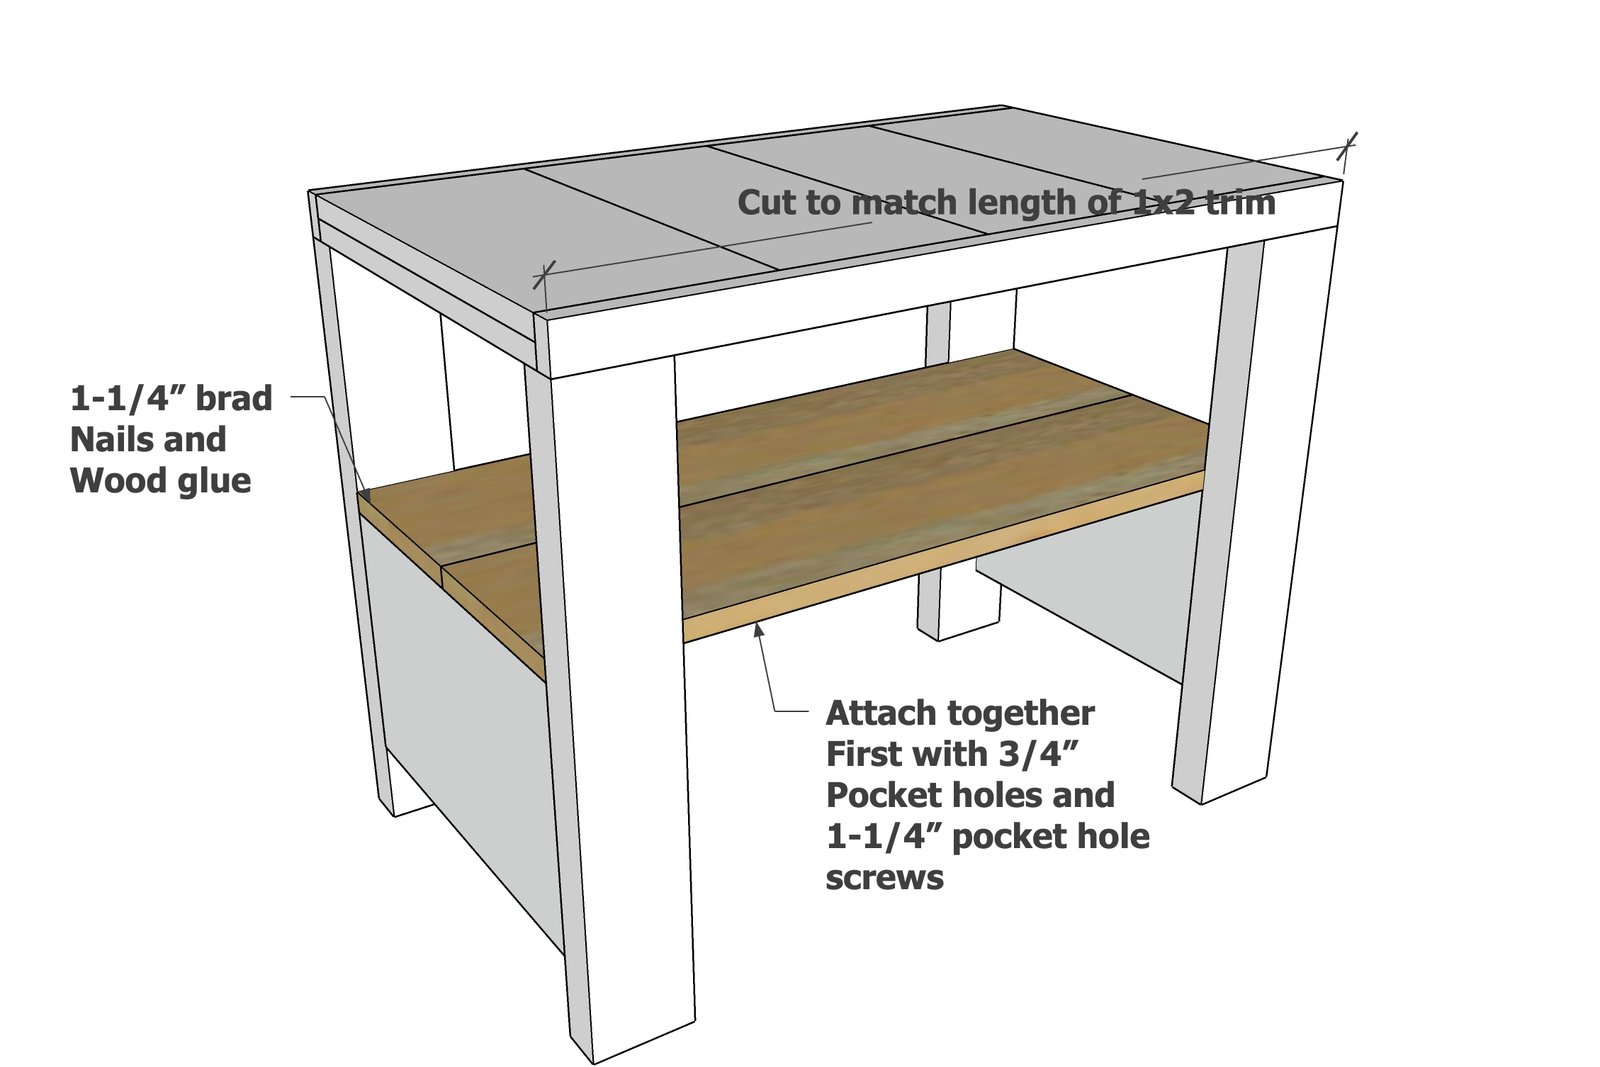
Cut the 1x8 shelf boards to match the length of the 1x2 top trim.
Join with 3/4" pocket holes and 1-1/4" pocket hole screws first. Then place the shelf inside the nightstand and attach with glue and 1-1/4" brad nails. Outside edges are flush.
Step 7
To support the drawer slides, attach 1x2s to the front inside edge of the legs with 1-1/4" brad nails. The 1x2 should be perfectly flush to the inside of the 2x4 leg.
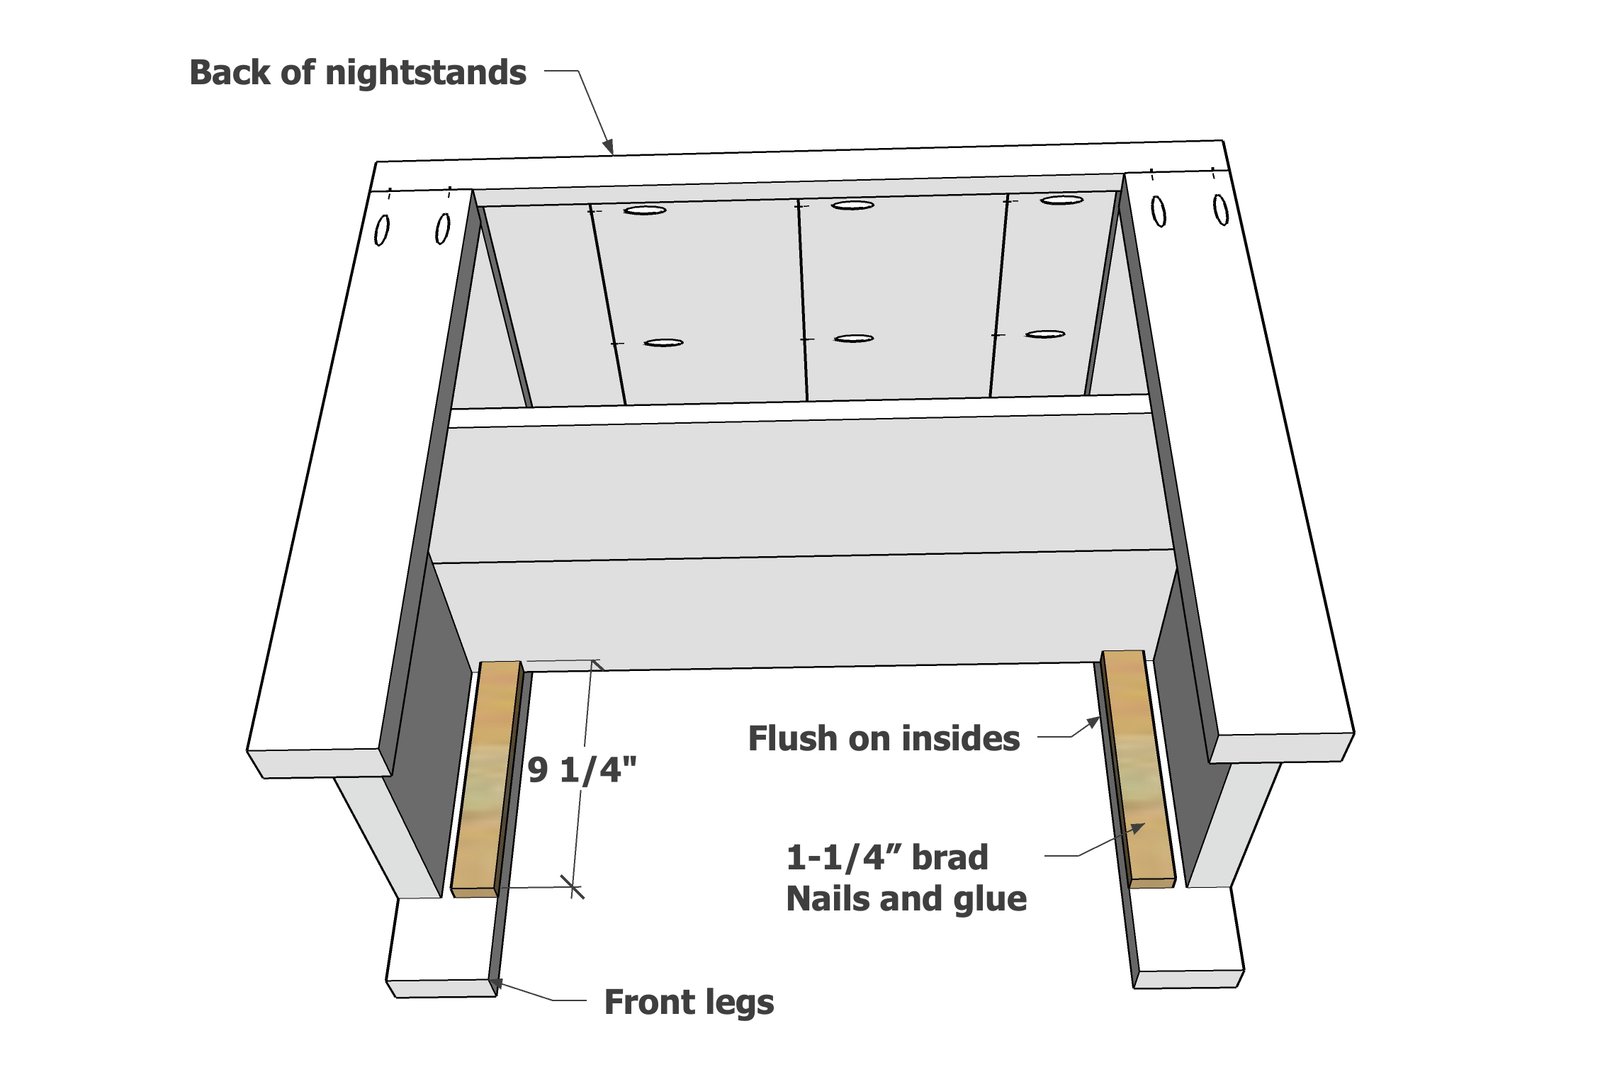
Read instruction for drawer slides.
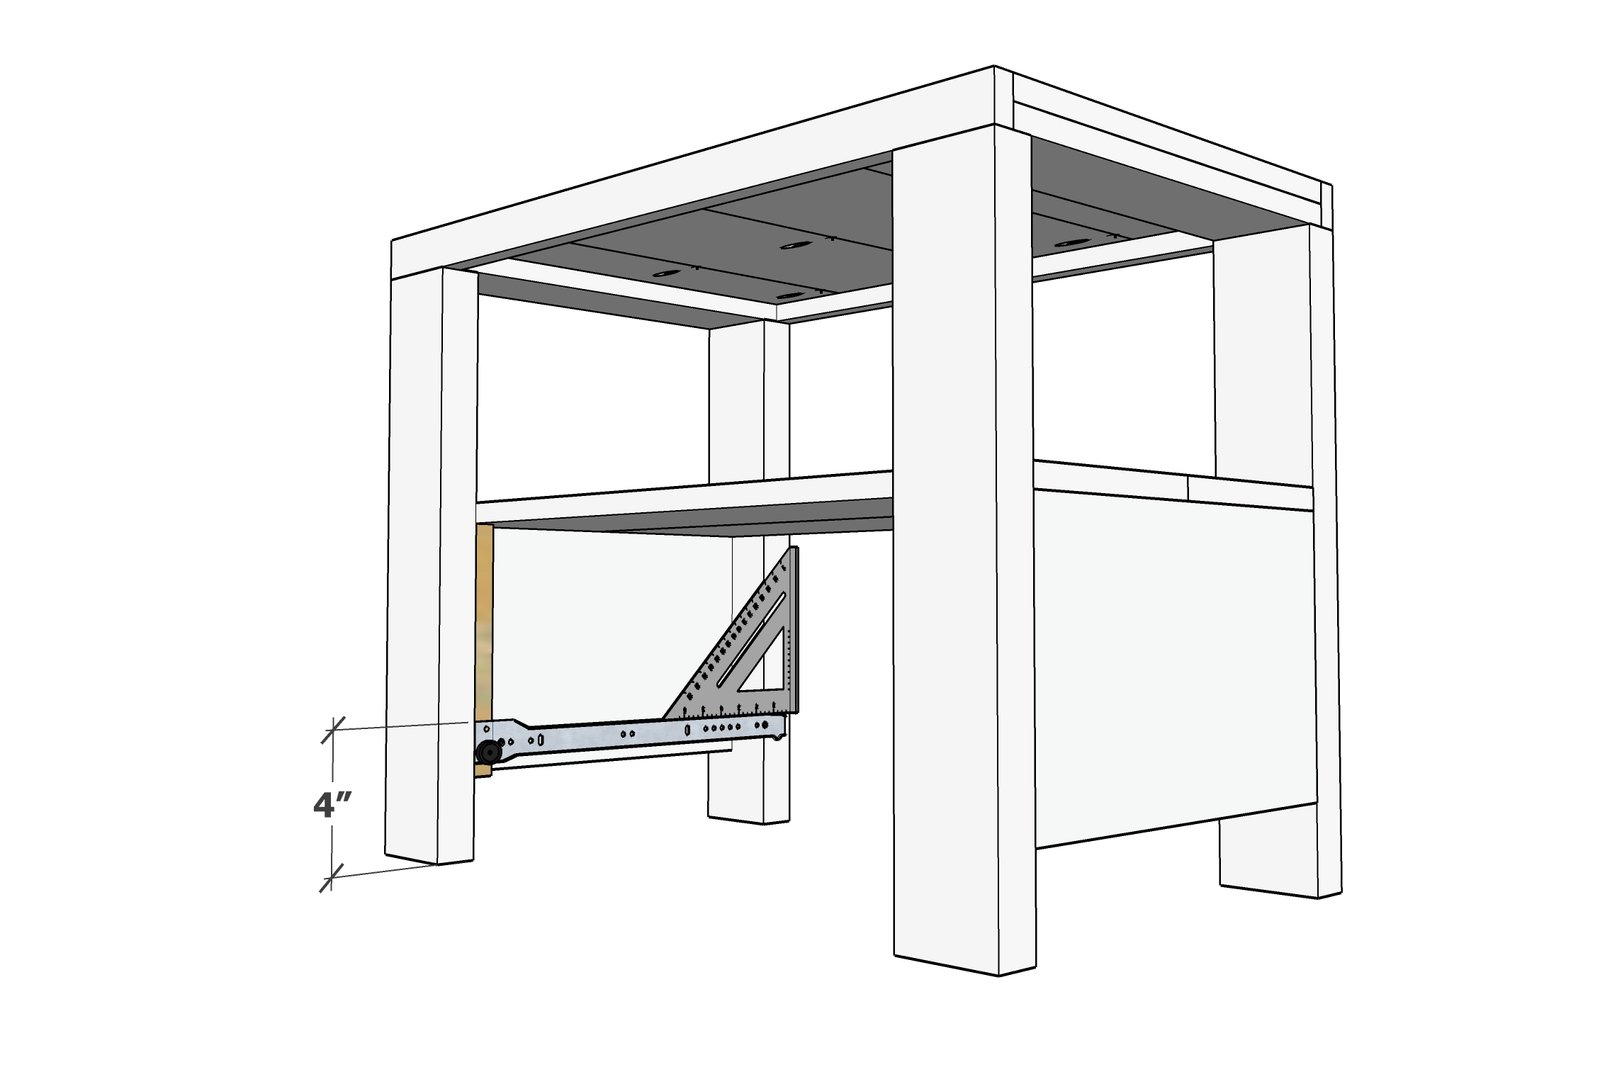
Attach drawer slide as shown, use a square to make sure top of drawer slide is level.
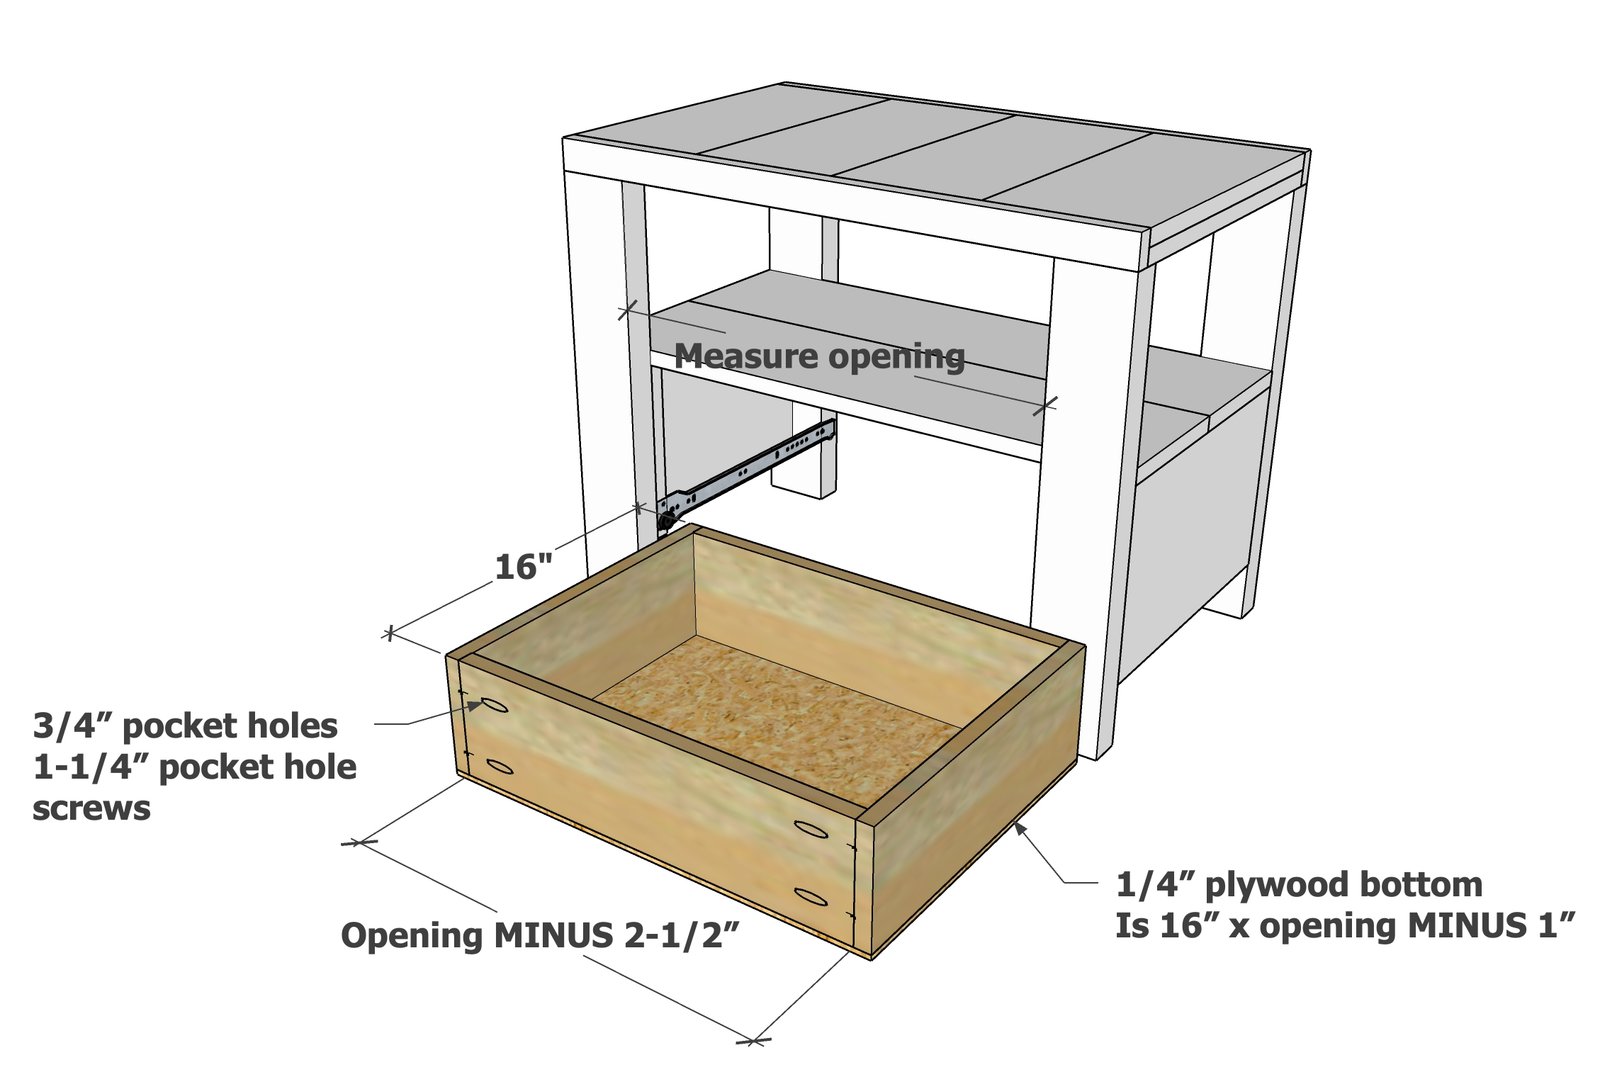
Build the drawer box as shown with 1x6s.
Cut the 1/4" plywood with a circular saw or tablesaw. Attach 1/4" plywood with 3/4" brad nails to bottom.
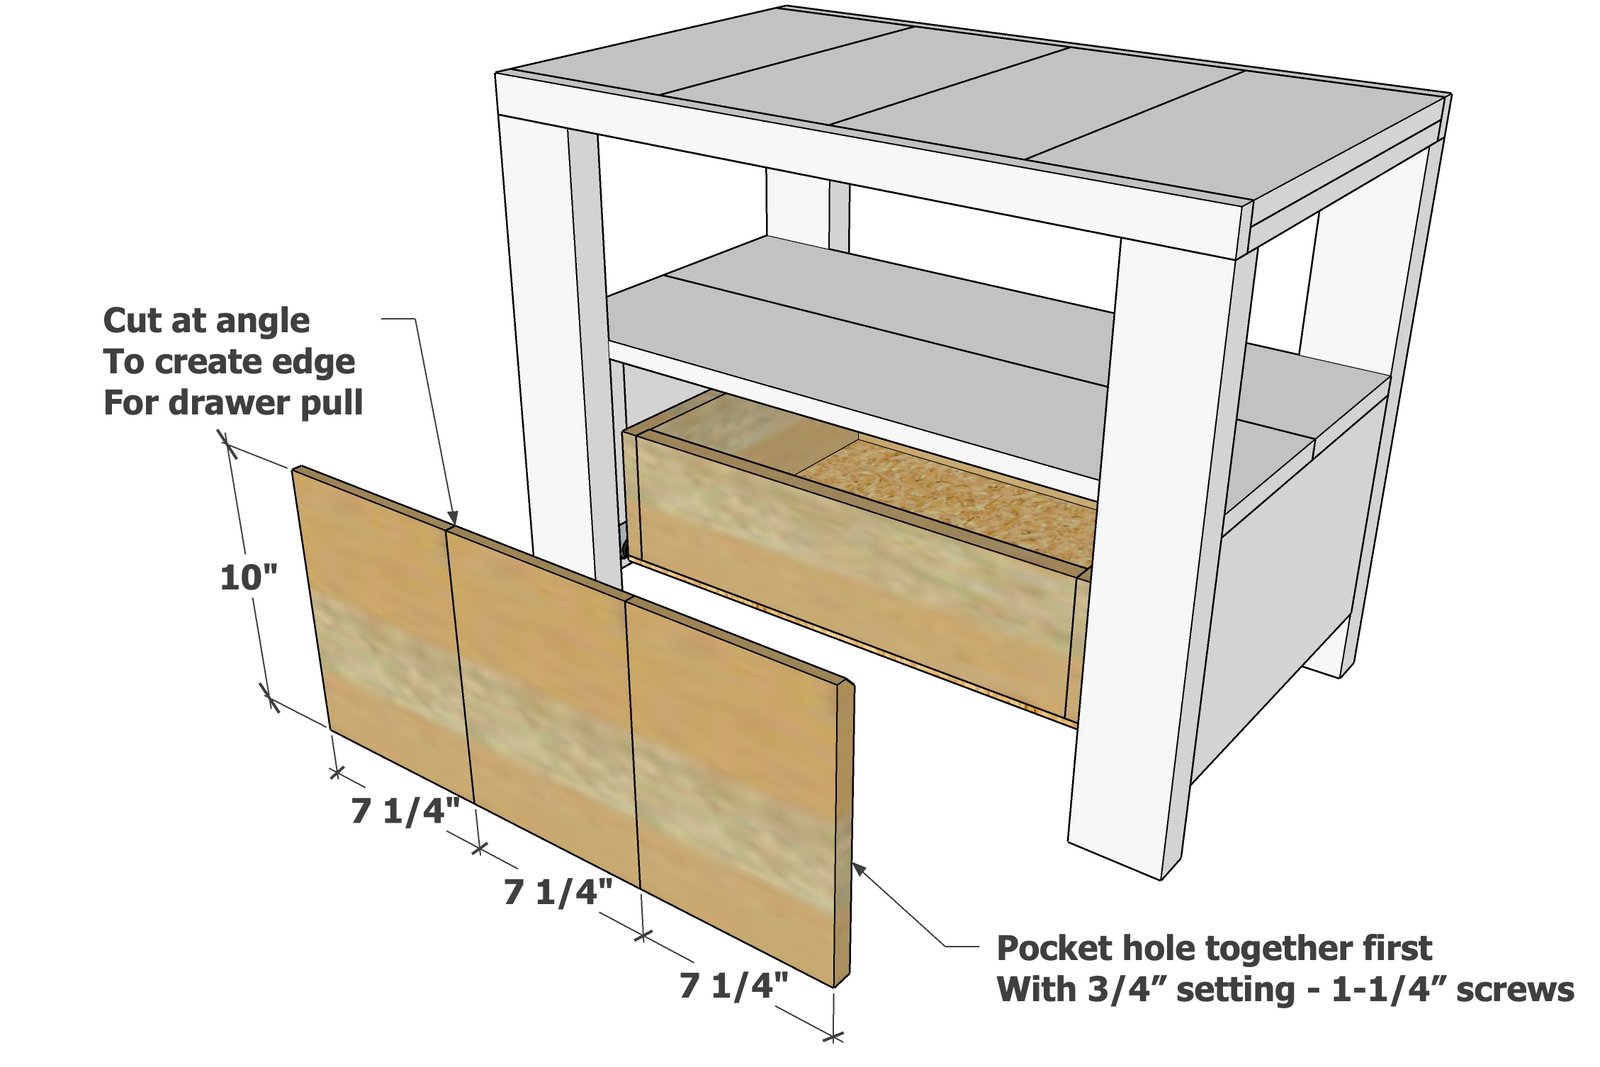
Cut the drawer face boards.
Recommended: Cut the back of the drawer faces boards at a 45 degree angle to create a lip to use as a drawer pull Join boards together with 3/4" pocket holes and 1-1/4" pocket hole screws (two per joint).
Step 11
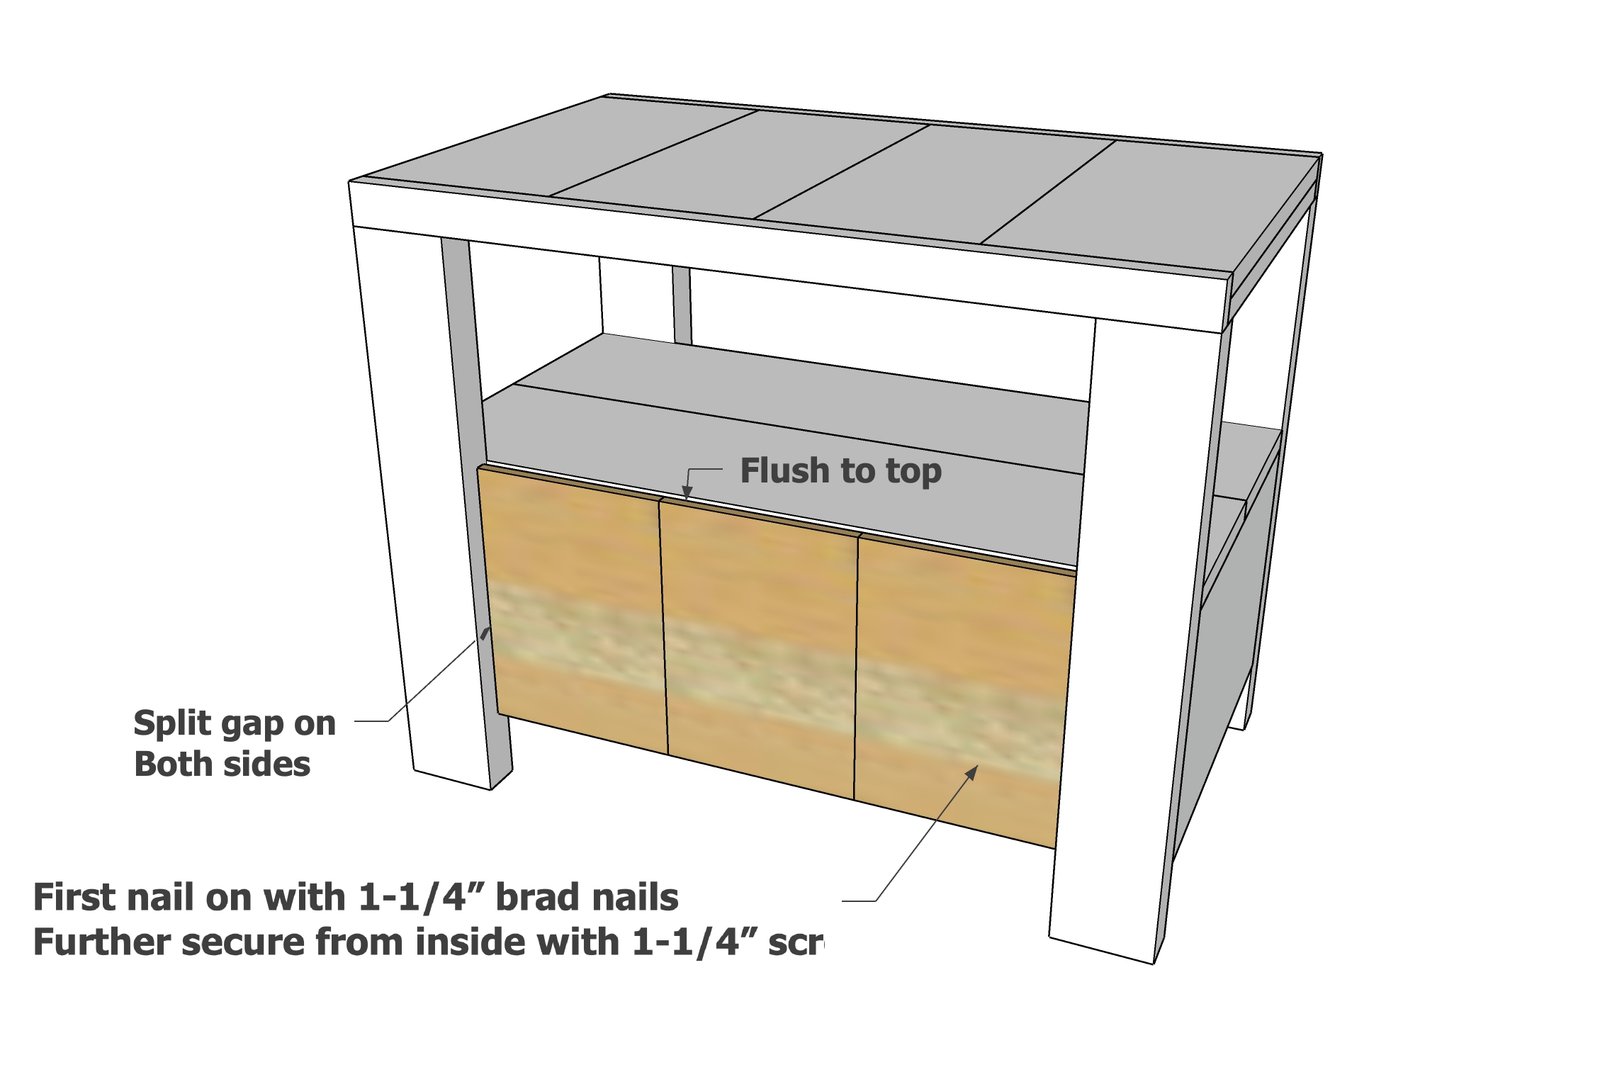
Attach the drawer face to the drawer box, even gaps on sides, top is level with the top of the shelf.
Finishing
Sand all surfaces, starting with a medium grit and finishing with fine. Wipe off the dust, fill any holes or gaps with wood filler, and sand smooth once dry. Apply primer if you're painting, then finish with your choice of paint or stain and seal with a durable clear topcoat. For outdoor projects, use exterior-rated primer, paint or stain, and sealer so the piece stands up to the weather.
Source (temporary): https://www.ana-white.com/woodworking-projects/rustic-modern-farmhouse-nightstand