Rustic Parsons Farmhouse Table
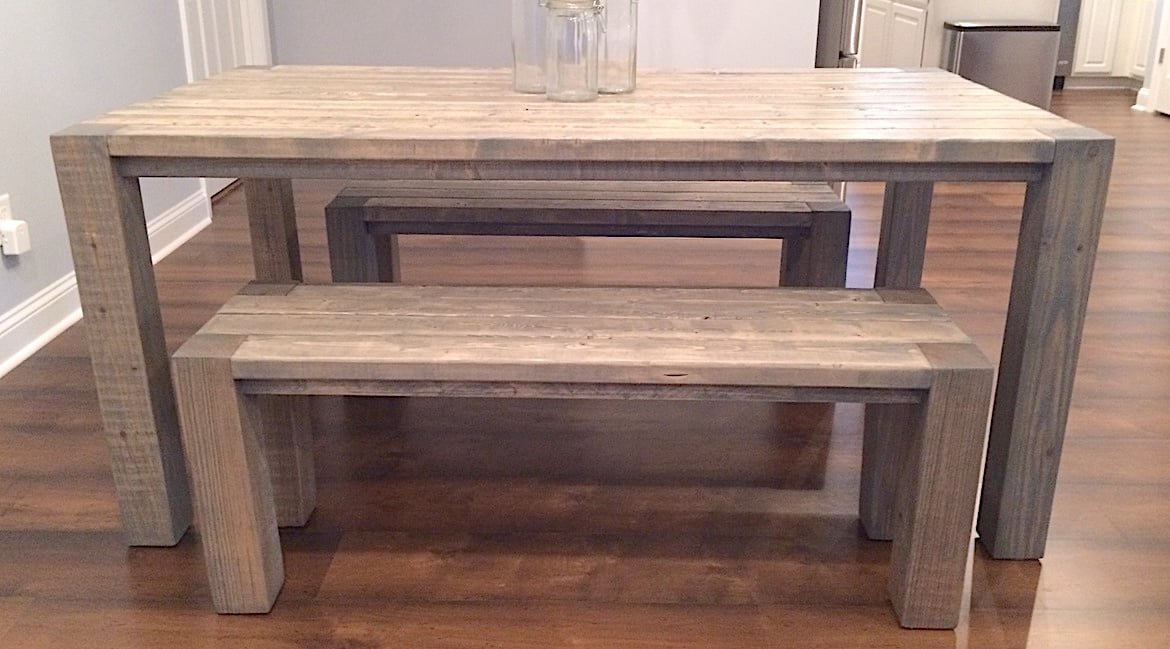
This dining table inspired by Parsons style tables features a solid, 4x4 legs, with the end grain exposed on the top. This is a, with diagrams, shopping and cut list.
Specifications
| Project type | Dining Table Plans |
|---|---|
| Room | dining room |
| Difficulty | Advanced |
| Estimated cost | $150 - $200 |
Dimensions
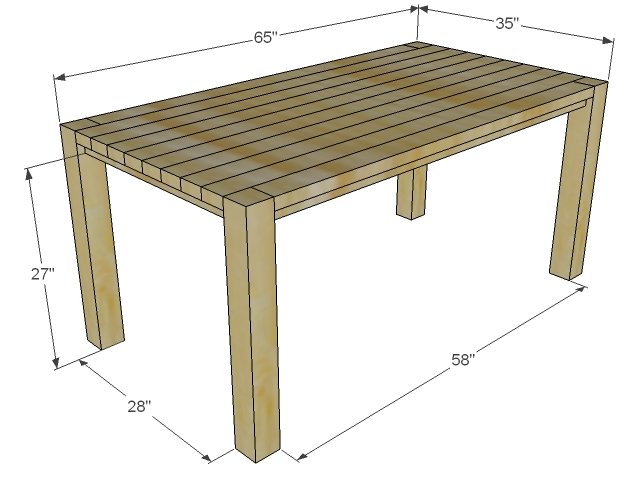
Use the size-specific shopping and cut lists below.
Shopping List
- 1- 10′ long 4×4 Post, cut into 29 7/8″ pieces
- 10 – 2×4, 8 foot or stud length
- 4 – 2×2 @ 8 foot long
- 1 – 2×3 @ 6 foot long
- 2 1/2″ self tapping wood screws
- 3″ self tapping wood screws
- Wood Glue
- Finishing Supplies
Cut List
- 4 – 4×4 Post @ 29 7/8″ (Legs)
- 6 – 2×2 @ 30″ (Under Table Joists)
- 8 – 2×4 @ 65″ (Tabletop Boards)
- 2 – 2×4 @ 58″ (Tabletop Side Boards)
- 2 – 2×3 @ 28″ (End Joists – you could use 2x2s here if you cannot find 2x3s)
- 2 – 2×2 @ 58″ (Side Aprons)
Tools
- measuring tape
- square
- pencil
- safety glasses
- hearing protection
- kreg-jig
- drill
- circular saw
- sander
- level
- countersink drill bit
Step-by-step Instructions
Matching Bench Plans
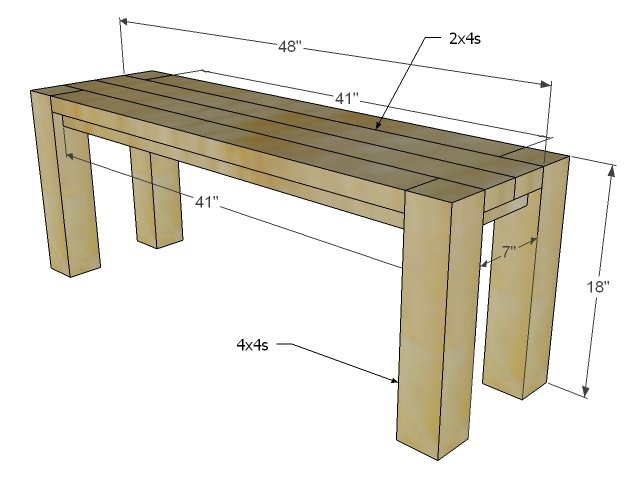
The matching bench can be built using the same methods. Here are the plans for it.
Tabletop
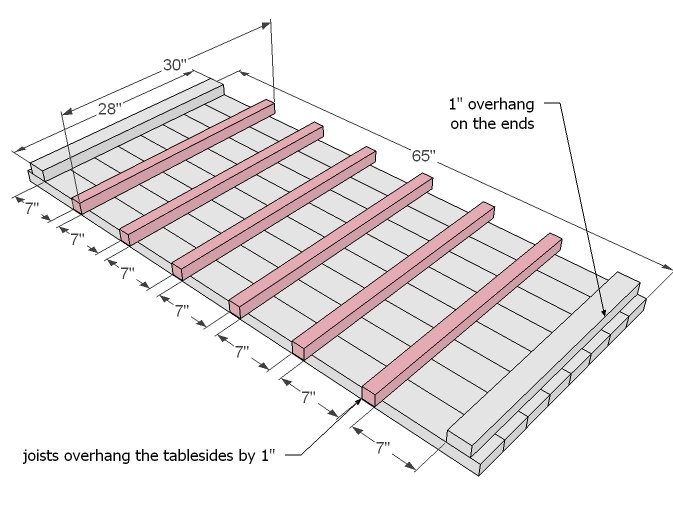
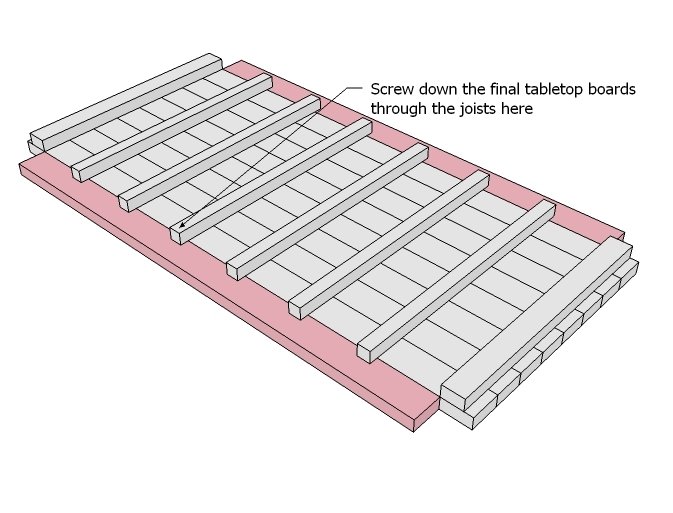
If you have a Pocket Hole Jig, you will want to build your tabletop first (all 10 tabletop boards) with 1-1/2" pocket holes drilled every 8-12" and 2-1/2" pocket hole screws, and then add the supports. Otherwise, you can screw through the supports into the underside of the tabletop boards, minimizing the gaps between the tabletop boards as you go. Use 2 1/2″ screws and glue. For those of you looking for that super smooth tabletop – you could run your 2x4s through a table saw and trim off any rounded edges first but beware that this will change the dimensions of your support boards. I did not run mine through a tablesaw, and think that’s what a farm table is all about – being a little rustic and obviously made of real boards. Predrill all holes.
Top Ends
Add the top ends as shown above. Minimize the gap between the tabletop boards and predrill and screw down with 2 1/2″ screws and glue.
Sides of Tabletop
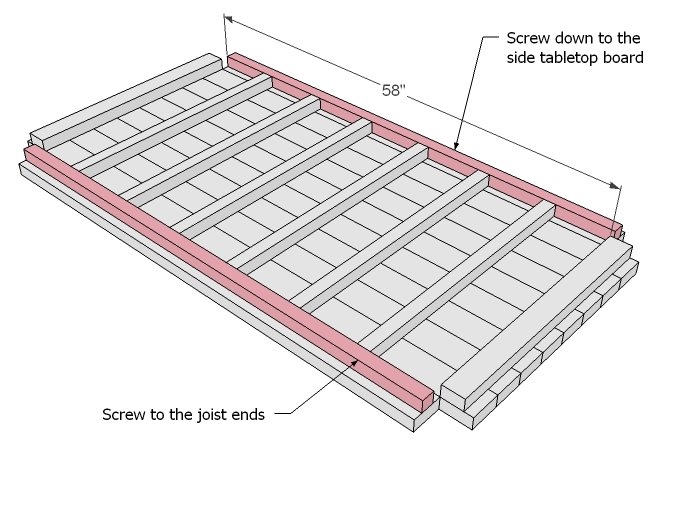
Now add the side aprons by screwing to both the tabletop end boards and the joists. Use glue and 2 1/2″ screws. Predrill all holes.
Step 5
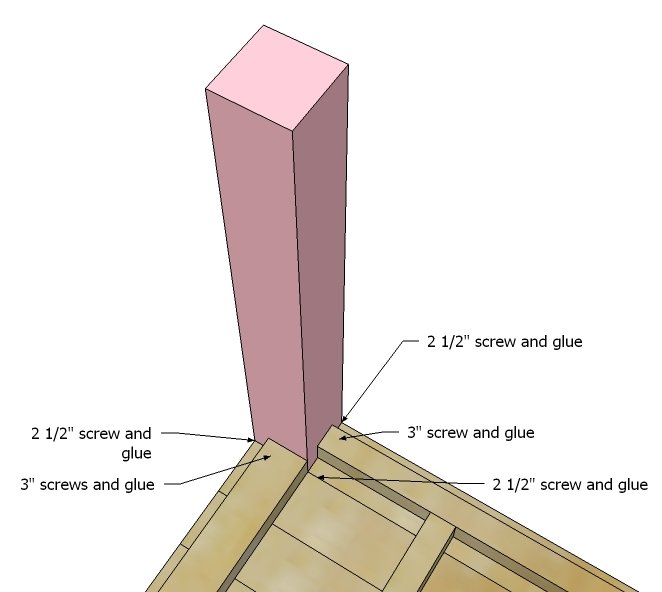
Attach the 2x2 supports to the undersides as shown.
Step 6
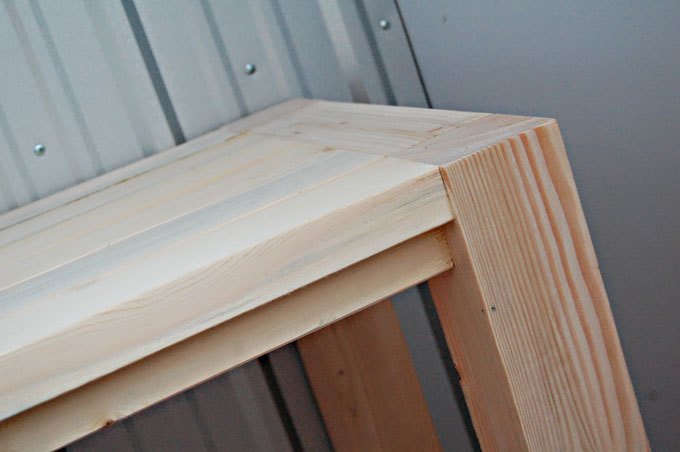
There should be no exposed holes visible on the outside of the table. I simply sanded my table with 120 grit sandpaper and vacuumed clean. Make sure you stain or seal your table to keep the wood from accepting food or other unwanted stains.
Finishing
Sand all surfaces, starting with a medium grit and finishing with fine. Wipe off the dust, fill any holes or gaps with wood filler, and sand smooth once dry. Apply primer if you're painting, then finish with your choice of paint or stain and seal with a durable clear topcoat. For outdoor projects, use exterior-rated primer, paint or stain, and sealer so the piece stands up to the weather.
Source (temporary): https://www.ana-white.com/woodworking-projects/rustic-parsons-farmhouse-table