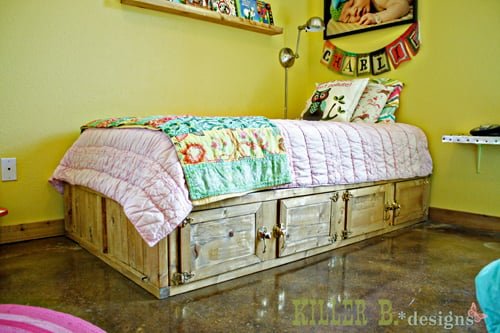
Rustic Storage Bed with Doors
DIY rustic storage bed from
Specifications
| Project type | Beds and Bed Frames |
|---|---|
| Room | Bedroom |
| Style | Children's and Kid's Room Furniture and Toy Plans |
| Difficulty | Intermediate |
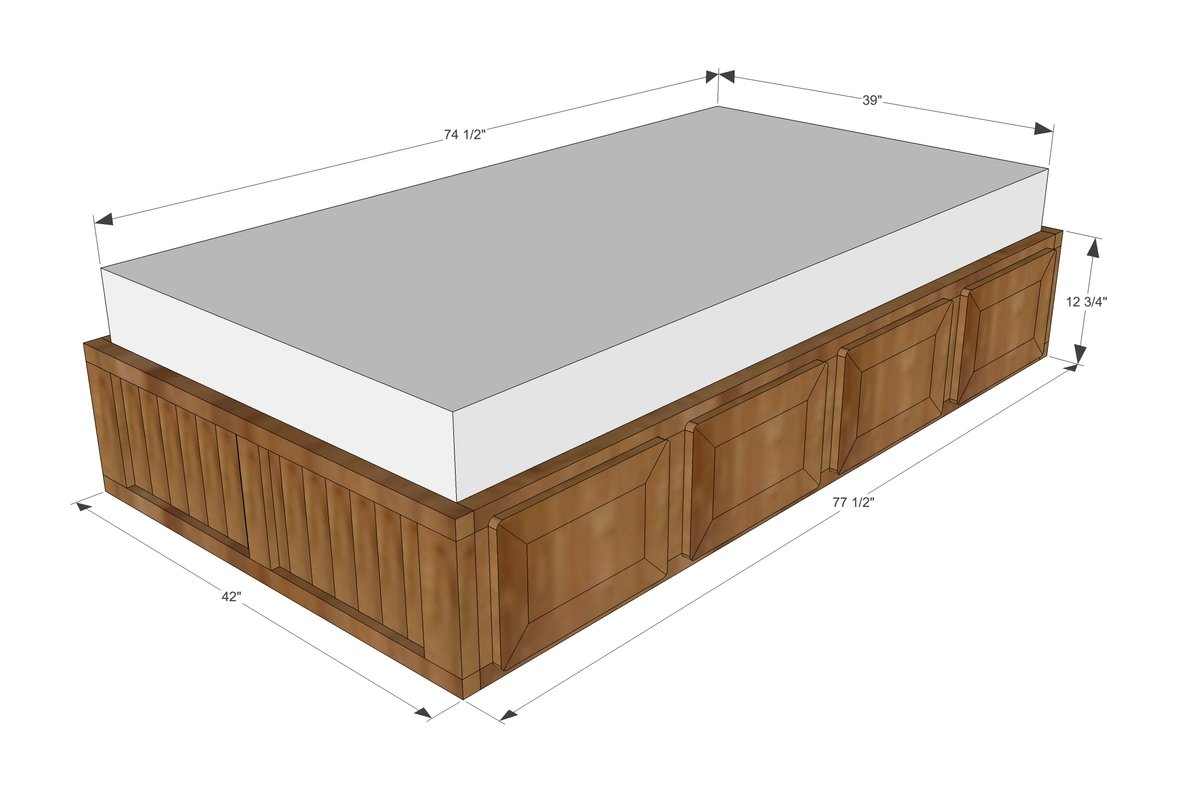
Dimensions
Use the size-specific shopping and cut lists below.
Shopping List
7 - 2x2x8
1 - 2x4x10
4 - 1x3x8
1 - 1x12x8
1 - 1x12x4
1 - 1x8x8
7 - 1x3x8 furring strips for slats
Cut List
8 - 2x2 @ 42"
10 - 2x4 @ 9 3/4"
30 - 1x3 @ 9 3/4"
4 - 2x2 @ 74 1/2"
2 - 1x12 @ 19 1/8"
1 - 1x12 @ 74 1/2"
16 - 1x2 @ 15" cut on a 45 degree angle, long point to long point
16 - 1x2 @ 9 1/2" cut on a 45 degree angle, long point to long point
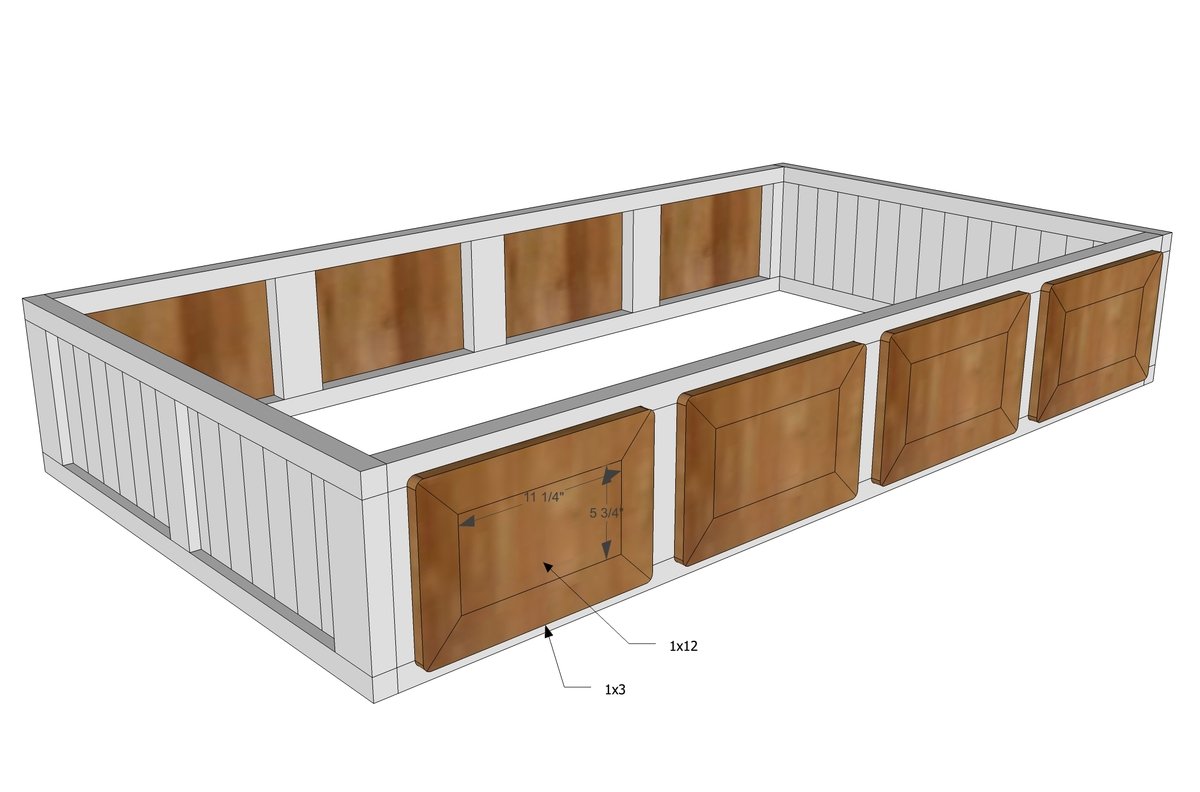
8 - 1x8 cut down to 12" x 6 1/2"
14 - 1x3 slats @ 39"
Tools
- measuring tape
- square
- pencil
- safety glasses
- hearing protection
- kreg-jig
- drill
- compound miter saw
- nailer
- sander
Step-by-step Instructions
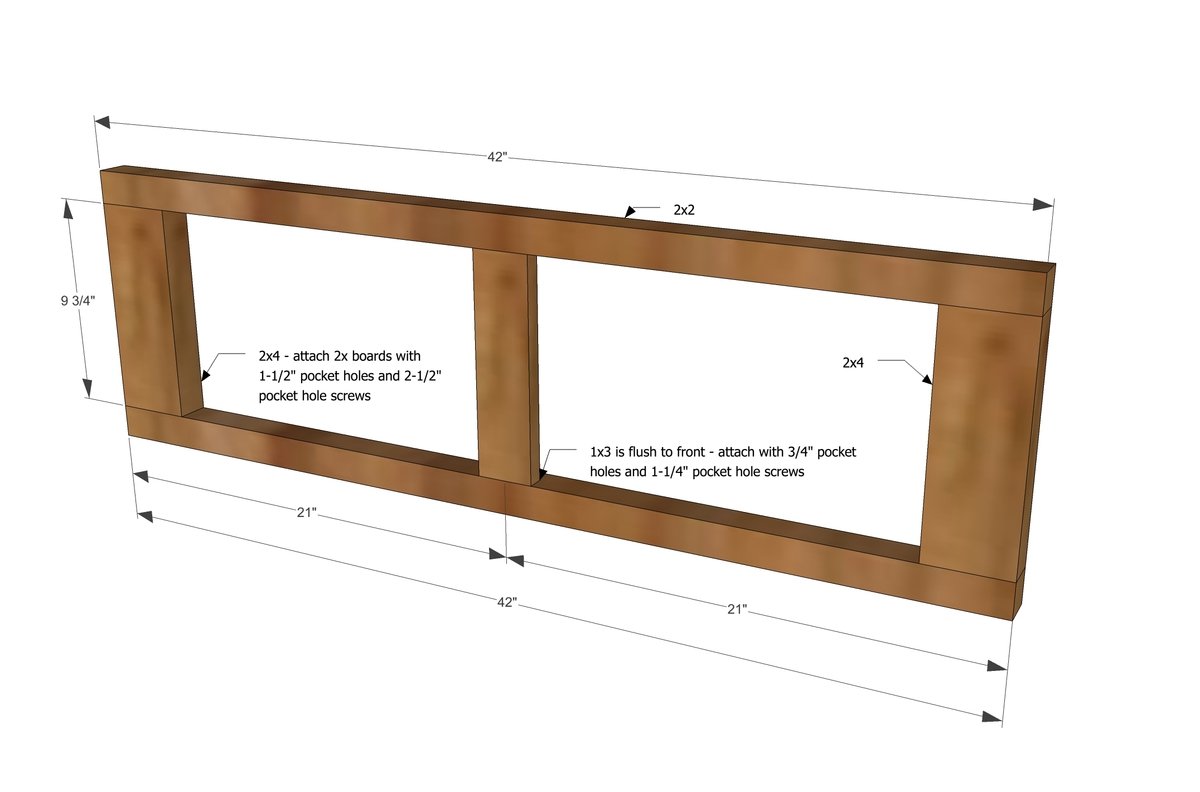
Step 1
Build two of the ends as shown in diagram.
Step 2
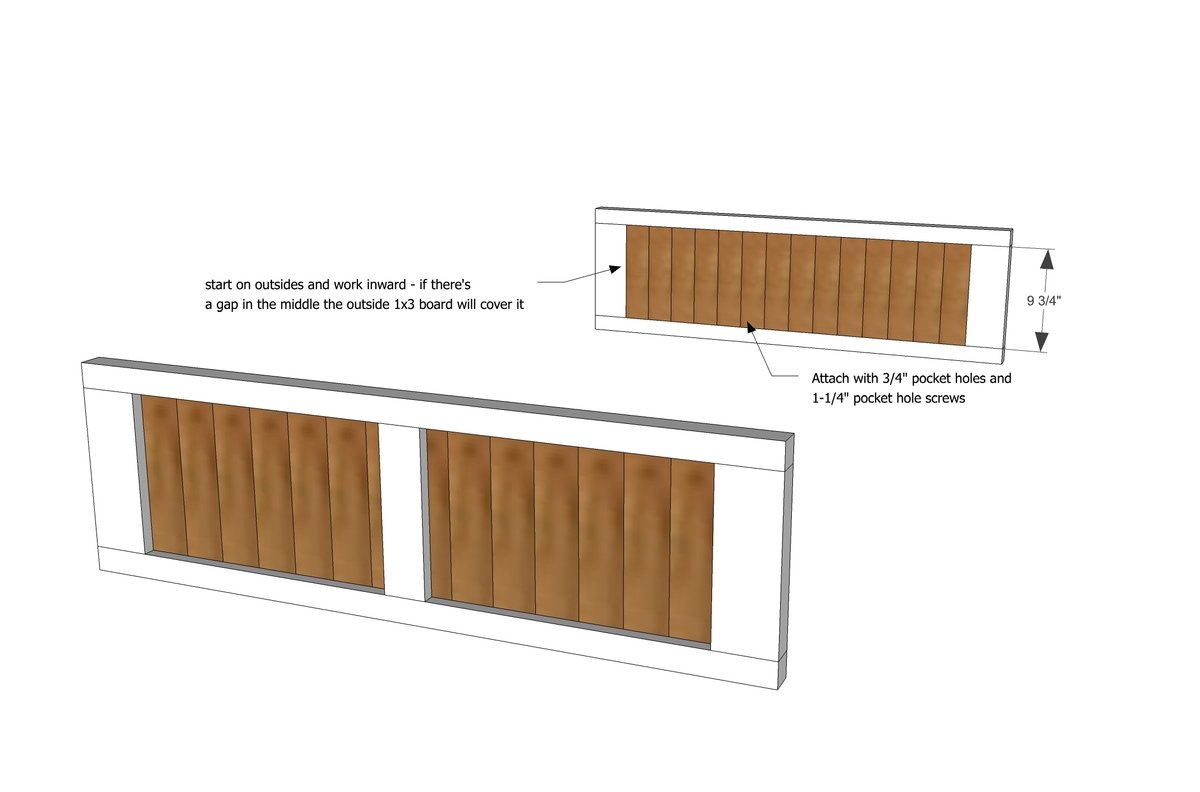
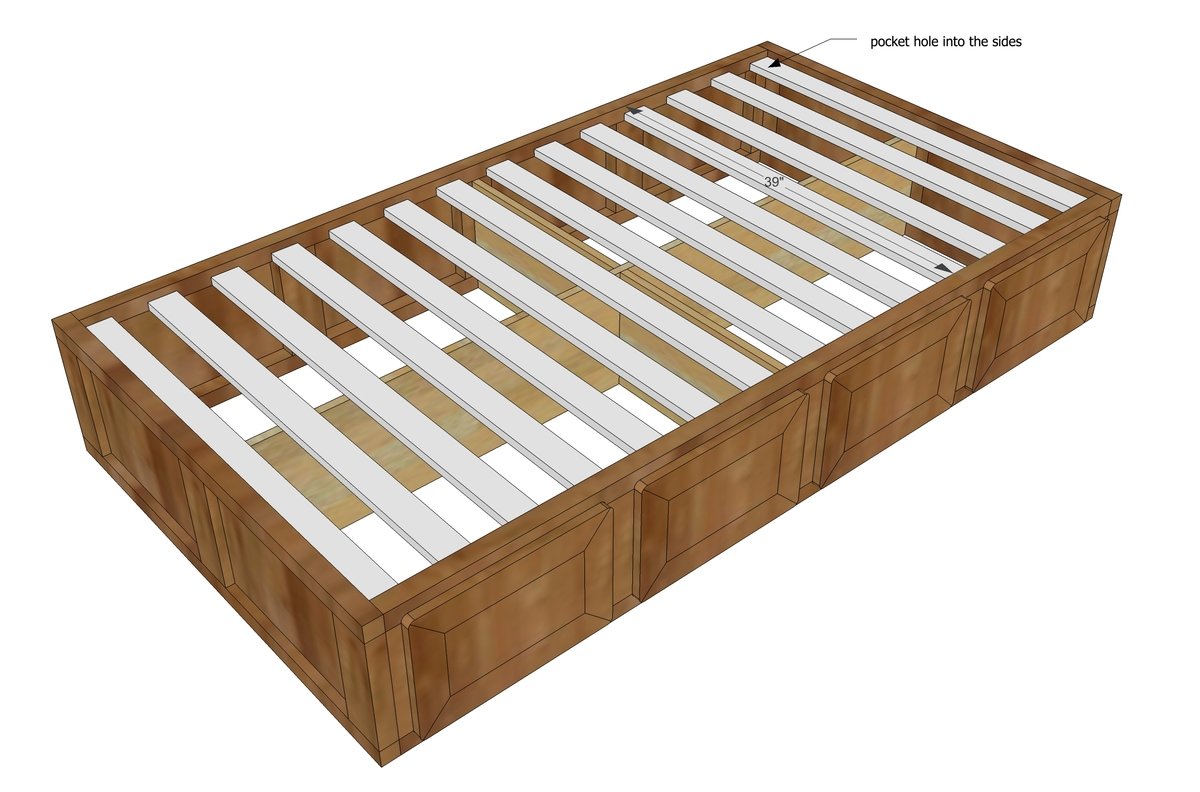
Attach slats to back side. Start on outside and work inward - if you end up with a gap, the center board will cover it:)
Step 3
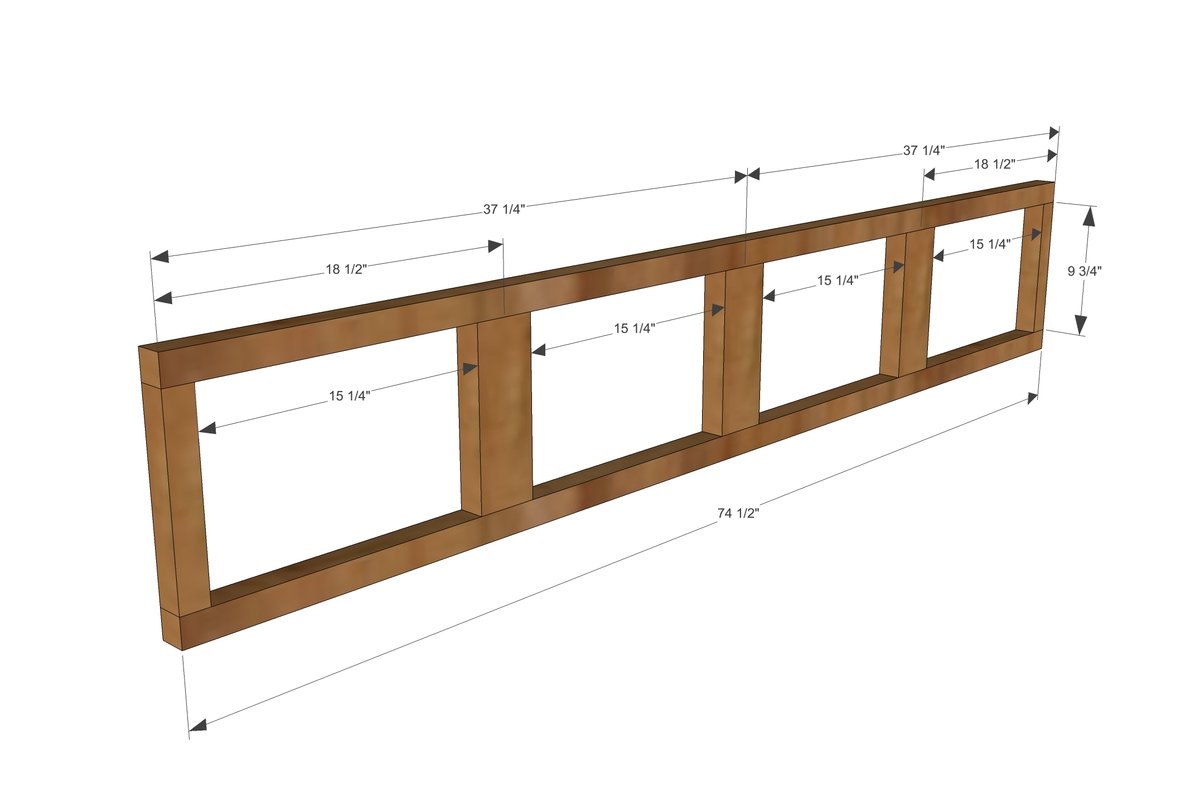
Next, frame out the two sides.
Step 4
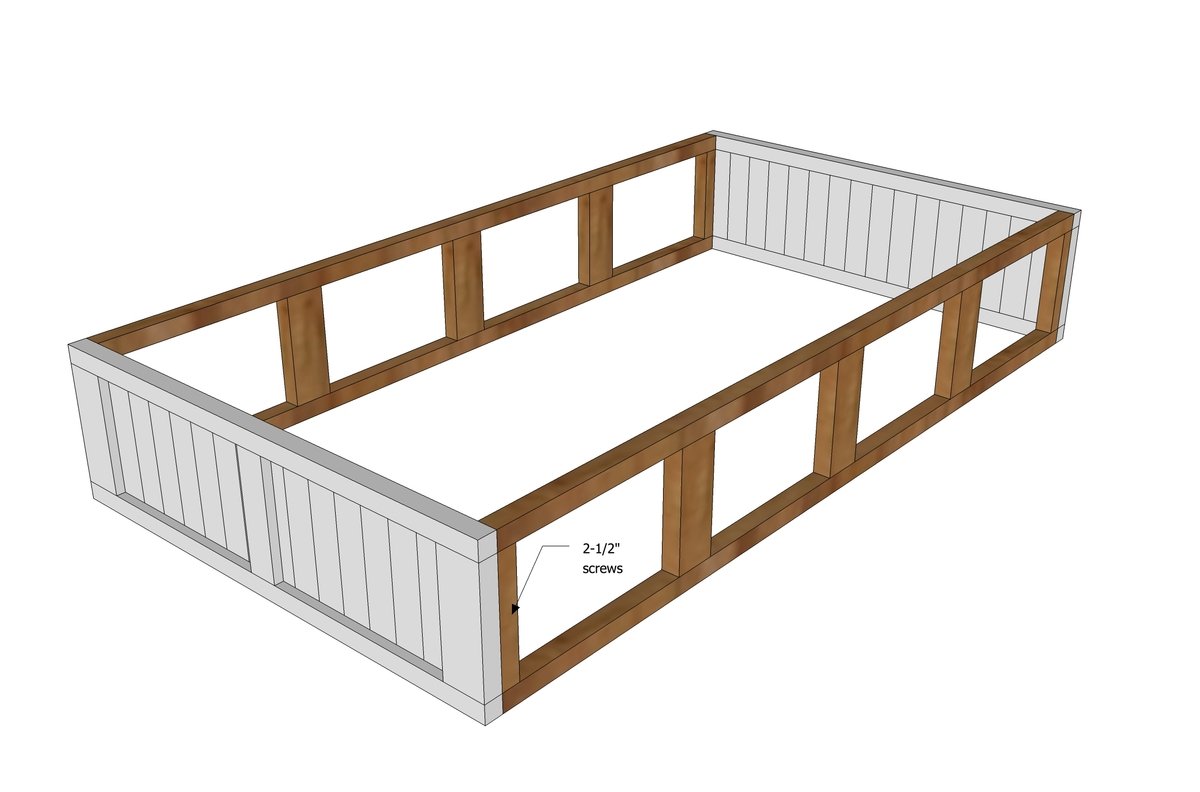
Attach the two side frames to the end panels.
Step 5
Step 6
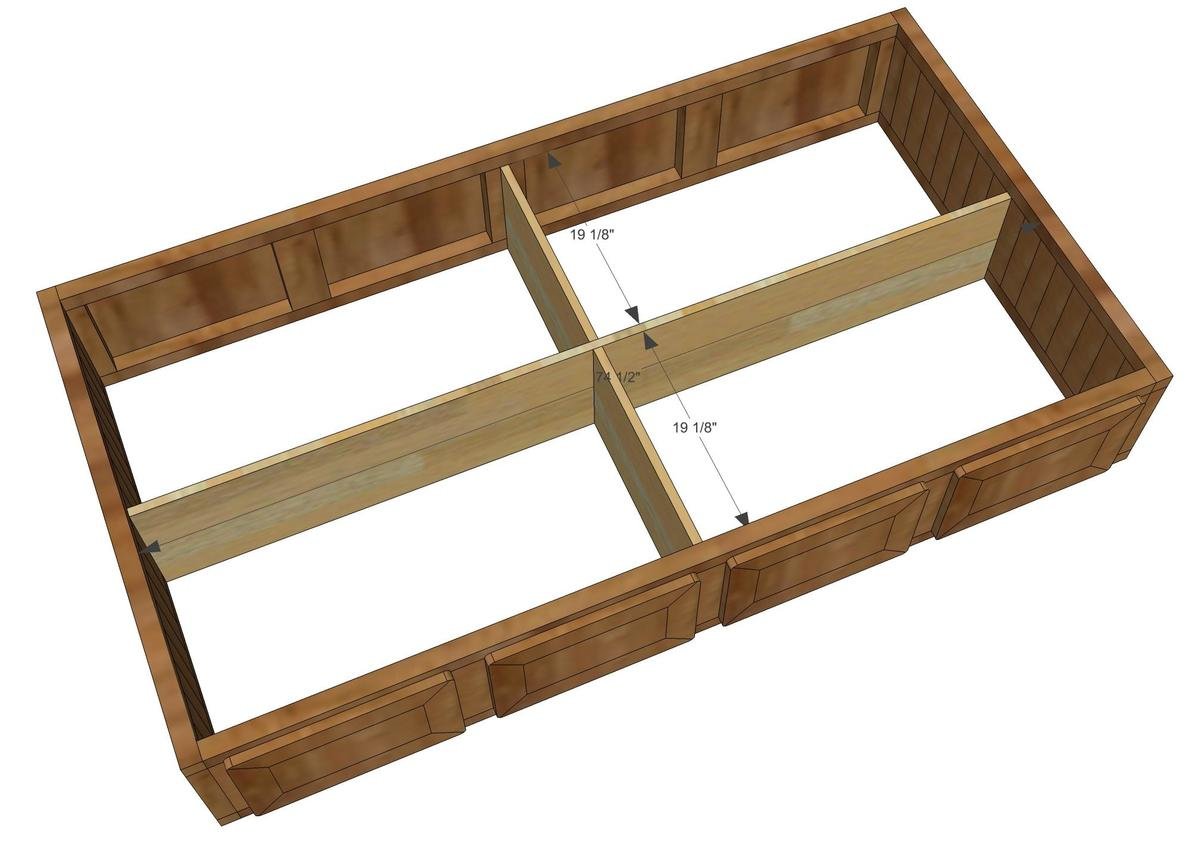
Section off the inside of the bed with 1x12s (or you could use 2x12s for additional support. If you don't have a pocket hole jig, get one, but for now, you can offset the center joint so you can attach from the outside easily.
Step 7
Attach slats on top of partitions. Attach to sides of bed as well with 3/4" pocket hole and 1-1/4" pocket hole screws (only need one per slat). You could also screw from outside or attach a small cleat underneath slats and rest slats on top (2x2 recommended).
Step 8
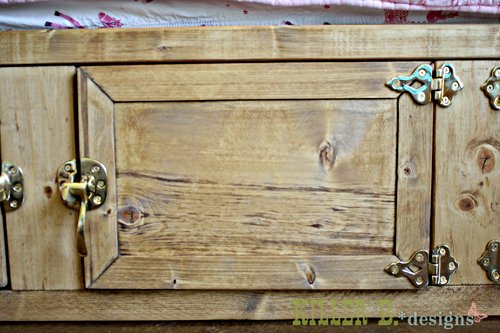
For finishing tips from Brooke and hardware source, please visit Brooke here.
Finishing
Sand all surfaces, starting with a medium grit and finishing with fine. Wipe off the dust, fill any holes or gaps with wood filler, and sand smooth once dry. Apply primer if you're painting, then finish with your choice of paint or stain and seal with a durable clear topcoat. For outdoor projects, use exterior-rated primer, paint or stain, and sealer so the piece stands up to the weather.
Source (temporary): https://www.ana-white.com/woodworking-projects/rustic-storage-bed-doors