Rustic X Bench
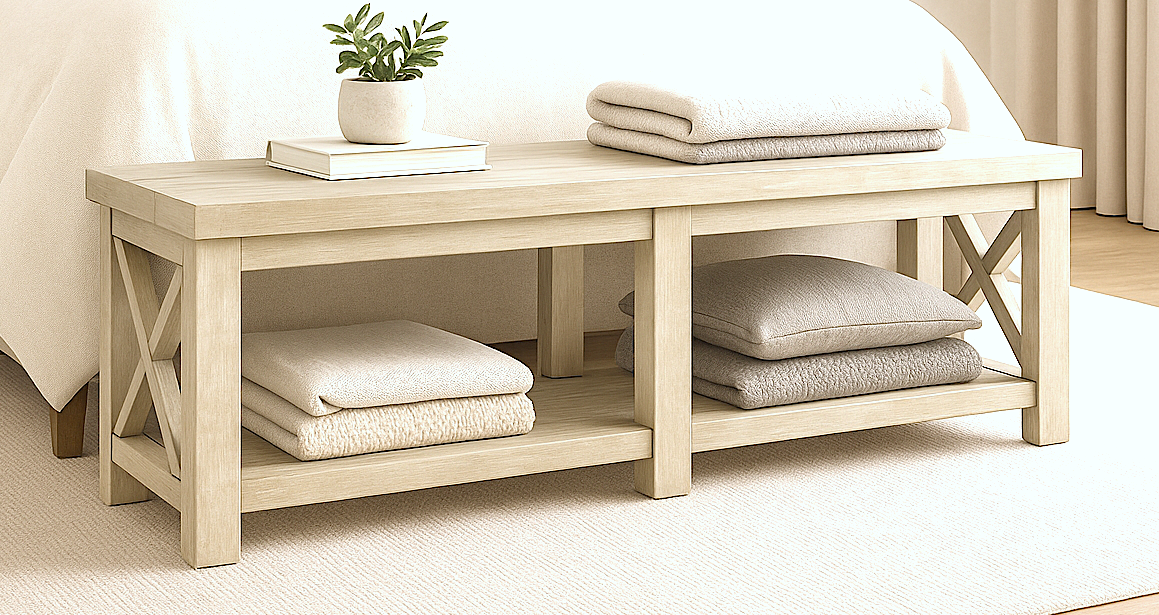
Free Farmhouse X-Bench Plans Bring rustic charm and functional style into your home with this DIY farmhouse bench! Perfect for entryways, living rooms, or placed at the foot of a bed, this versatile piece features sturdy X-brace detailing, clean lines, and a spacious lower shelf for baskets, blankets, or shoes. Designed for beginner to intermediate woodworkers, include step-by-step instructions and a complete cut list. • Finished size: 71 ½" L x 14 ½" D • Materials: 2x4 and 2x6 construction lumber • Style: Farmhouse / Rustic / Transitional • Features: X-brace ends, thick top, full-length lower shelf • Estimated build time: One weekend • Tools required: Miter saw, drill, sander, pocket hole jig Whether you're upgrading your bedroom or crafting the perfect hallway statement piece, this bench delivers timeless design with everyday utility. Download the and start building today! Also in this collection: Rustic X Console Table Plans, Rustic X Coffee Table Plans, Rustic X End Table Plans
Specifications
| Project type | Bench |
|---|---|
| Room | Storage Solutions |
| Style | Rustic Furniture Plans |
| Difficulty | Intermediate |
| Estimated cost | $20 - $50 |
Dimensions
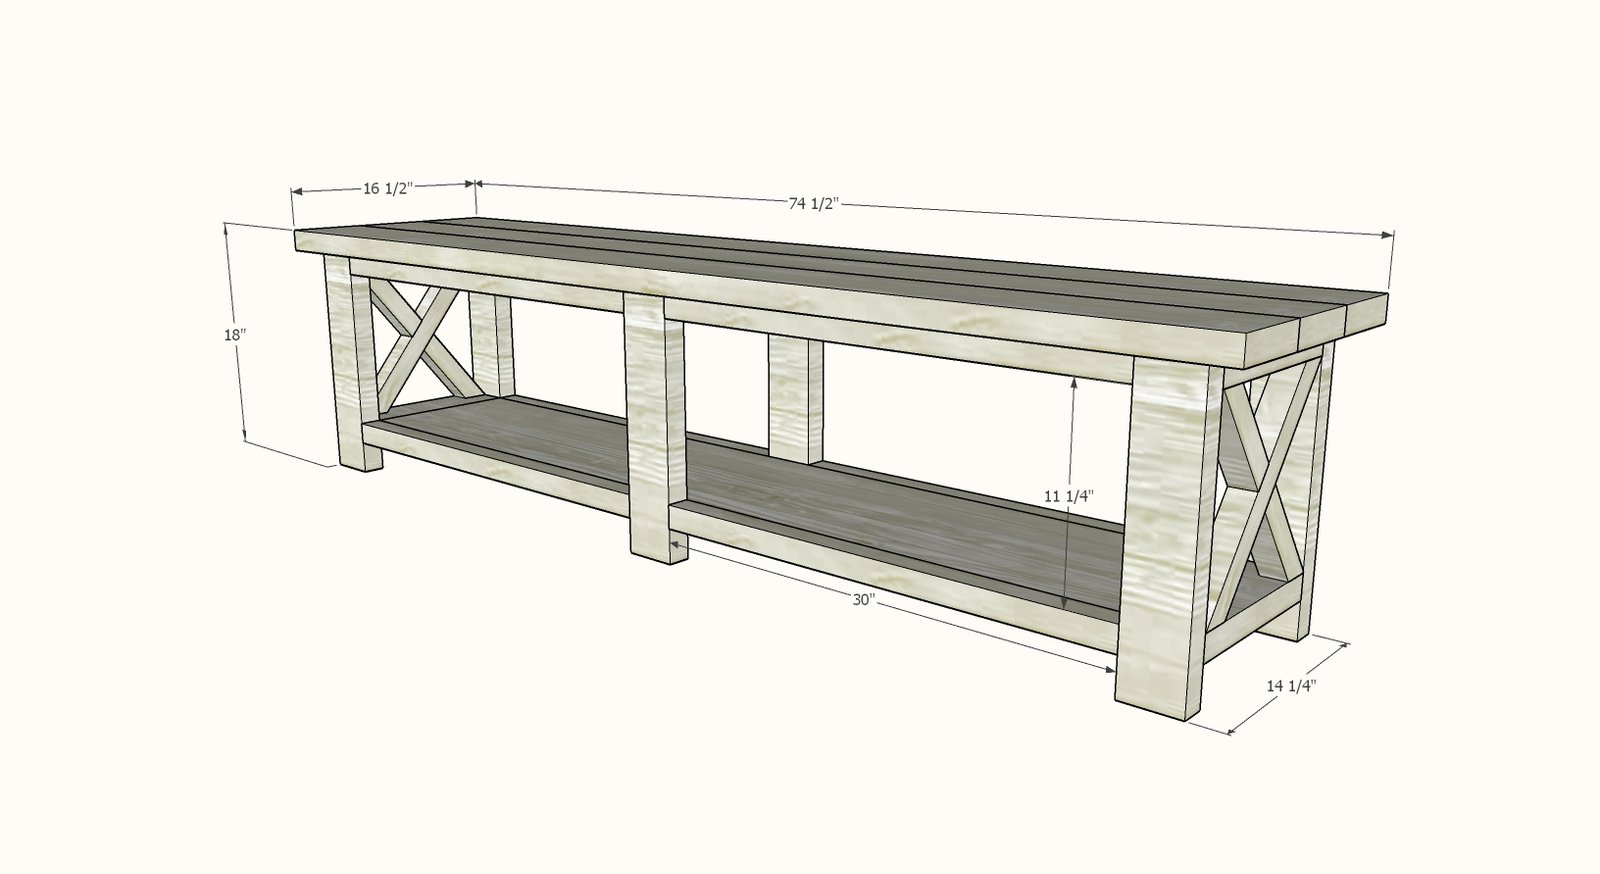
Use the size-specific shopping and cut lists below.
Shopping List
- 2 - 2x4 @ 8 feet long
- 3 - 2x6 @ 8 feet or stud length (whatever is cheaper)
- 1 - 1x12 @ 6 feet long
- 4 - 2x2 @ 8 feet long
- If you have a brad nailer, 2" brad nails would make construction easier but is not required
Cut List
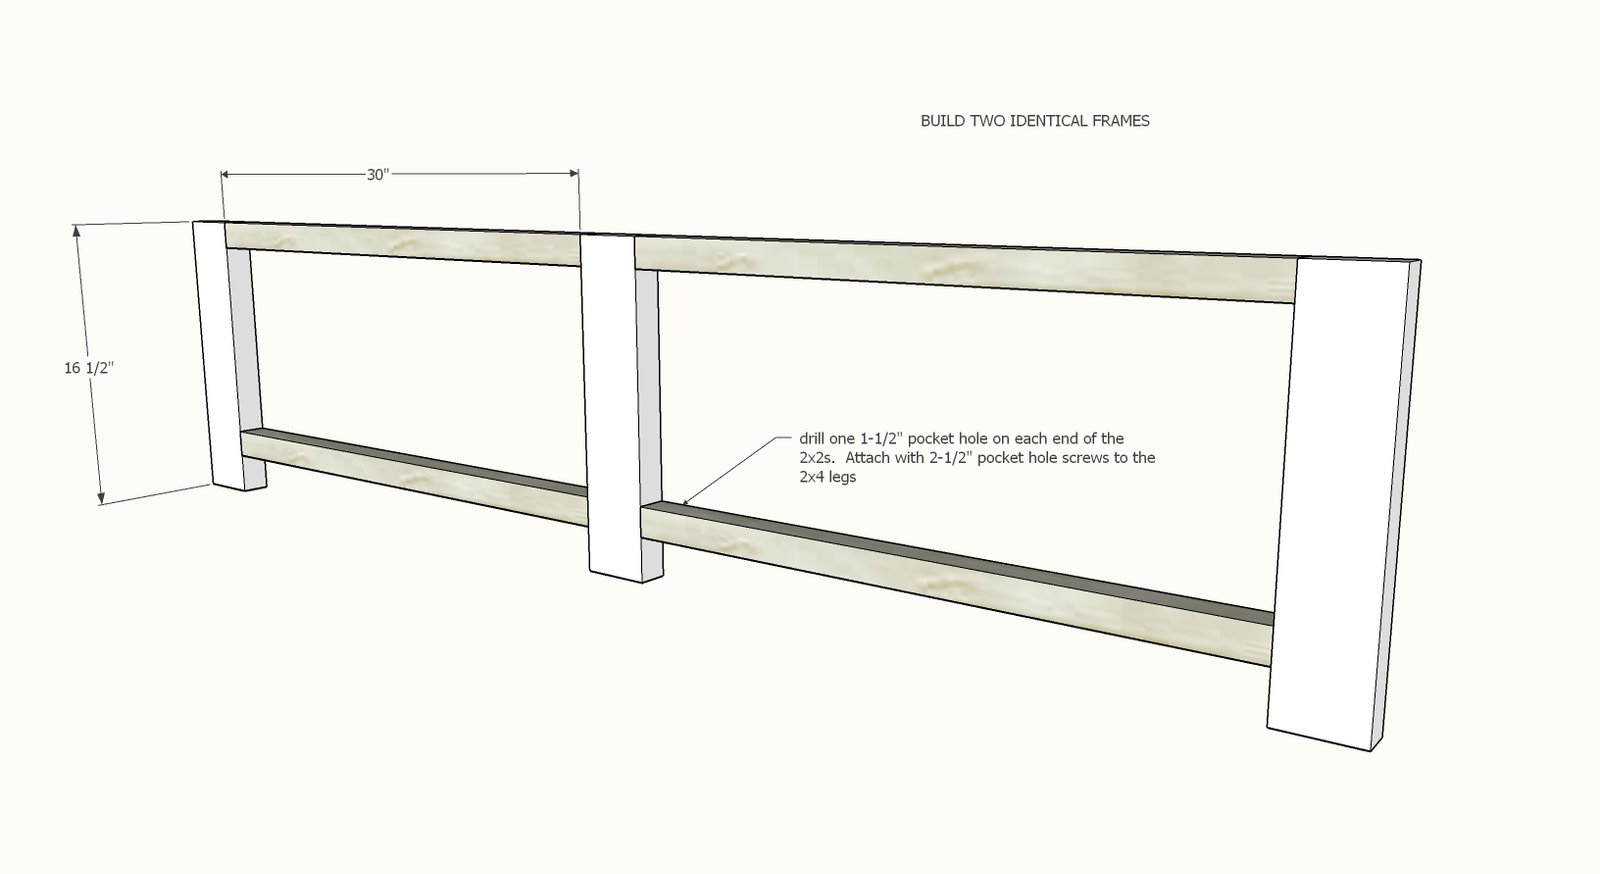
- 6 - 2x4 @ 16-1/2" - legs
- 8 - 2x2 @ 30" - aprons
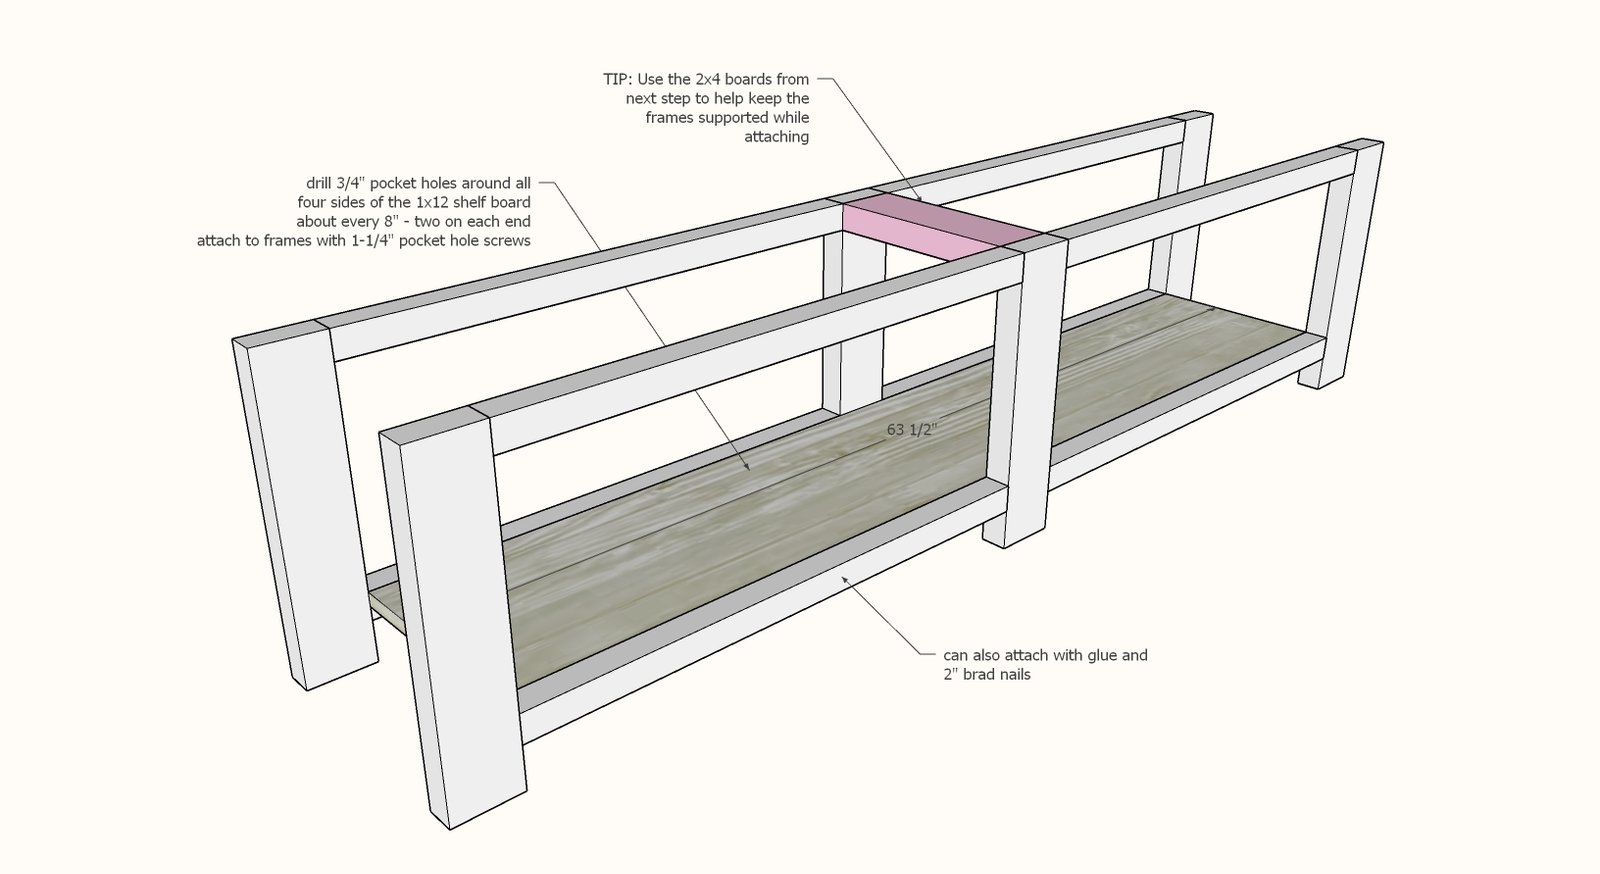
- 1 - 1x12 @ 63-1/2" - bottom shelf
- 5 - 2x4 @ 11-1/4" - side supports - adjust this length to match the width of your 1x12 boards
- 3 - 2x6 @ 74-1/2" - top
- 2x2 Xs should be cut to fit the openings
Tools
- measuring tape
- square
- pencil
- safety glasses
- hearing protection
- kreg-jig
- drill
- compound miter saw
- sander
Step-by-step Instructions
Step 1
Build two of the frames first on a flat level surface.
Step 2
Attach the 1x12 shelf to the bottom.
Step 3
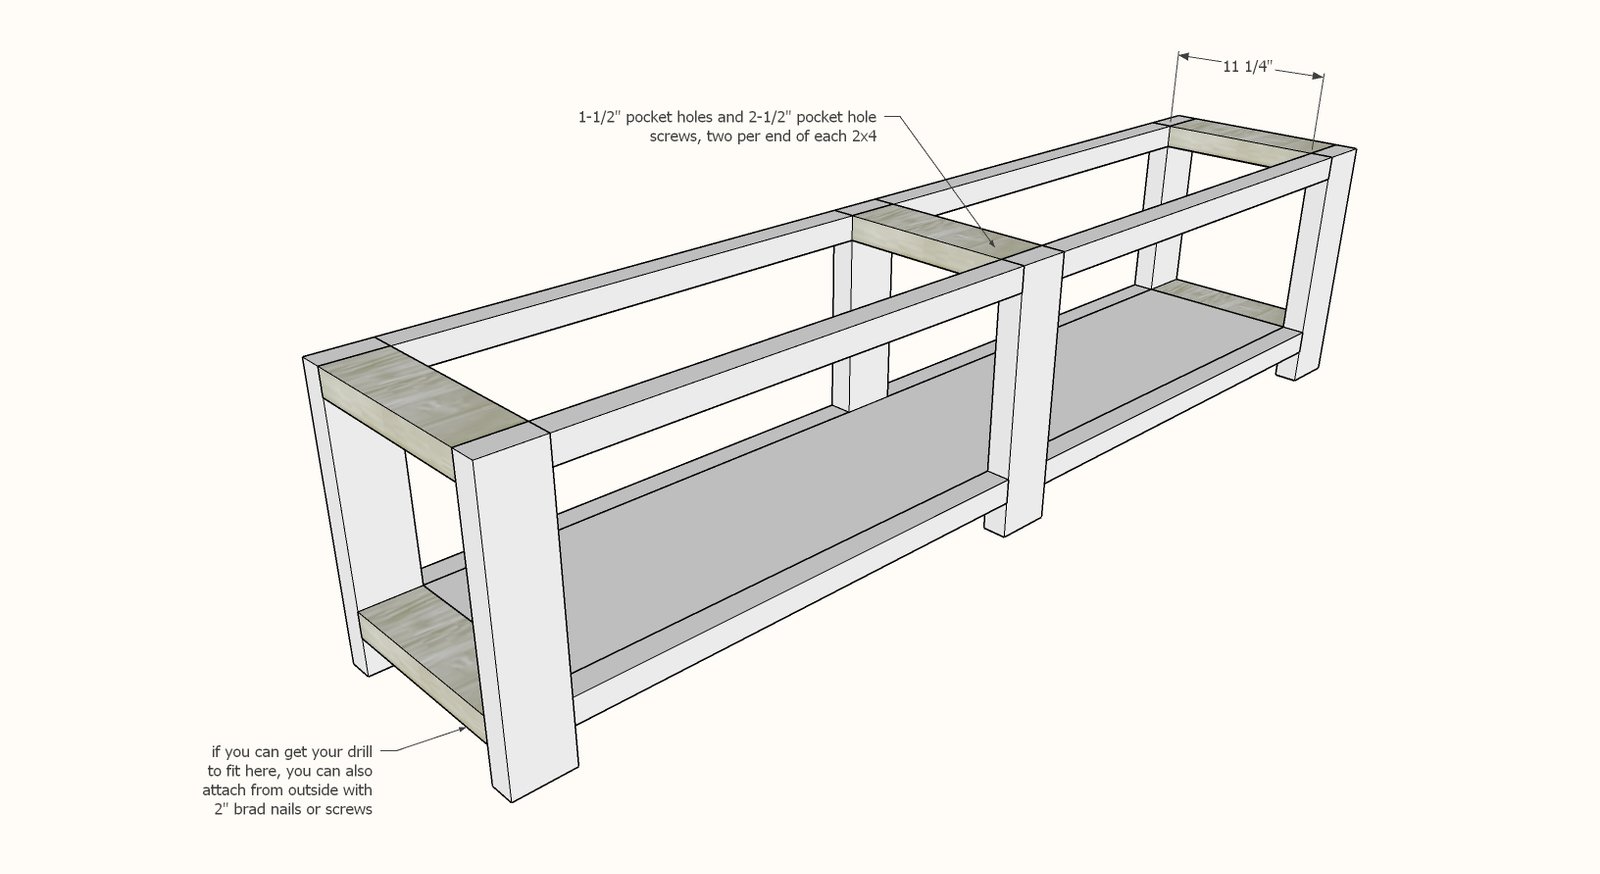
Attach the 2x4 end supports as shown.
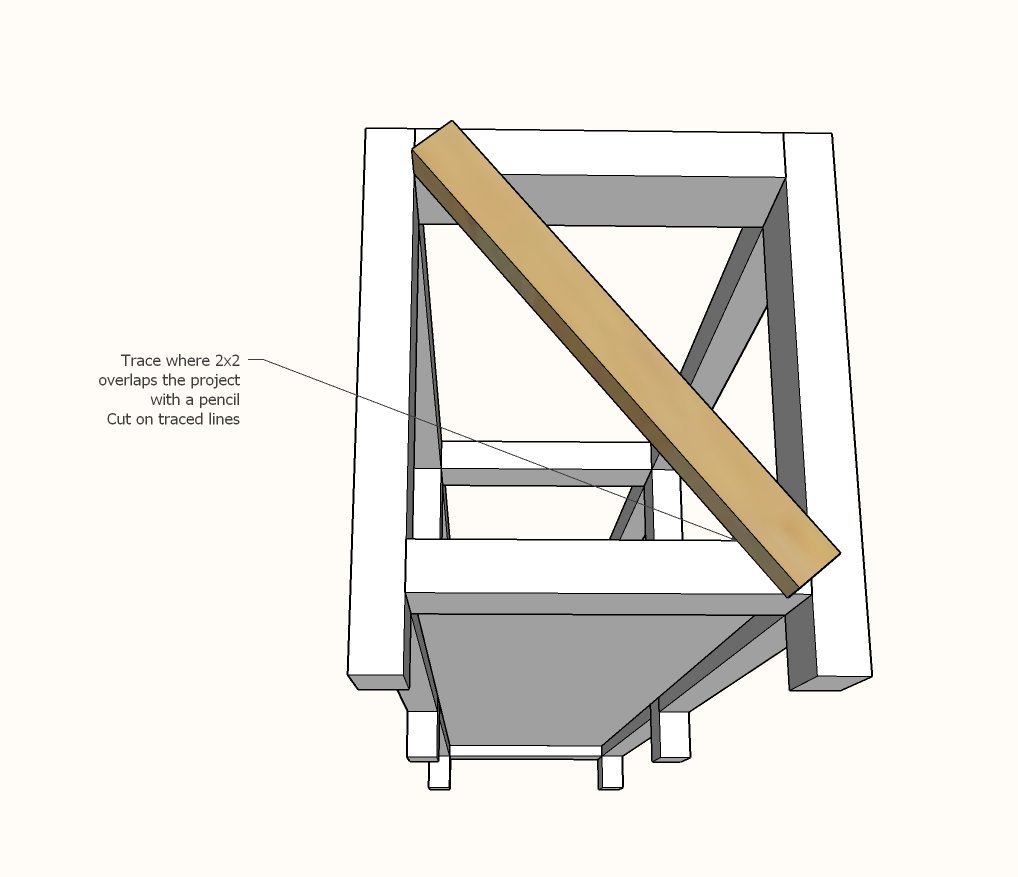
Trace the angles for the 2x2 supports.
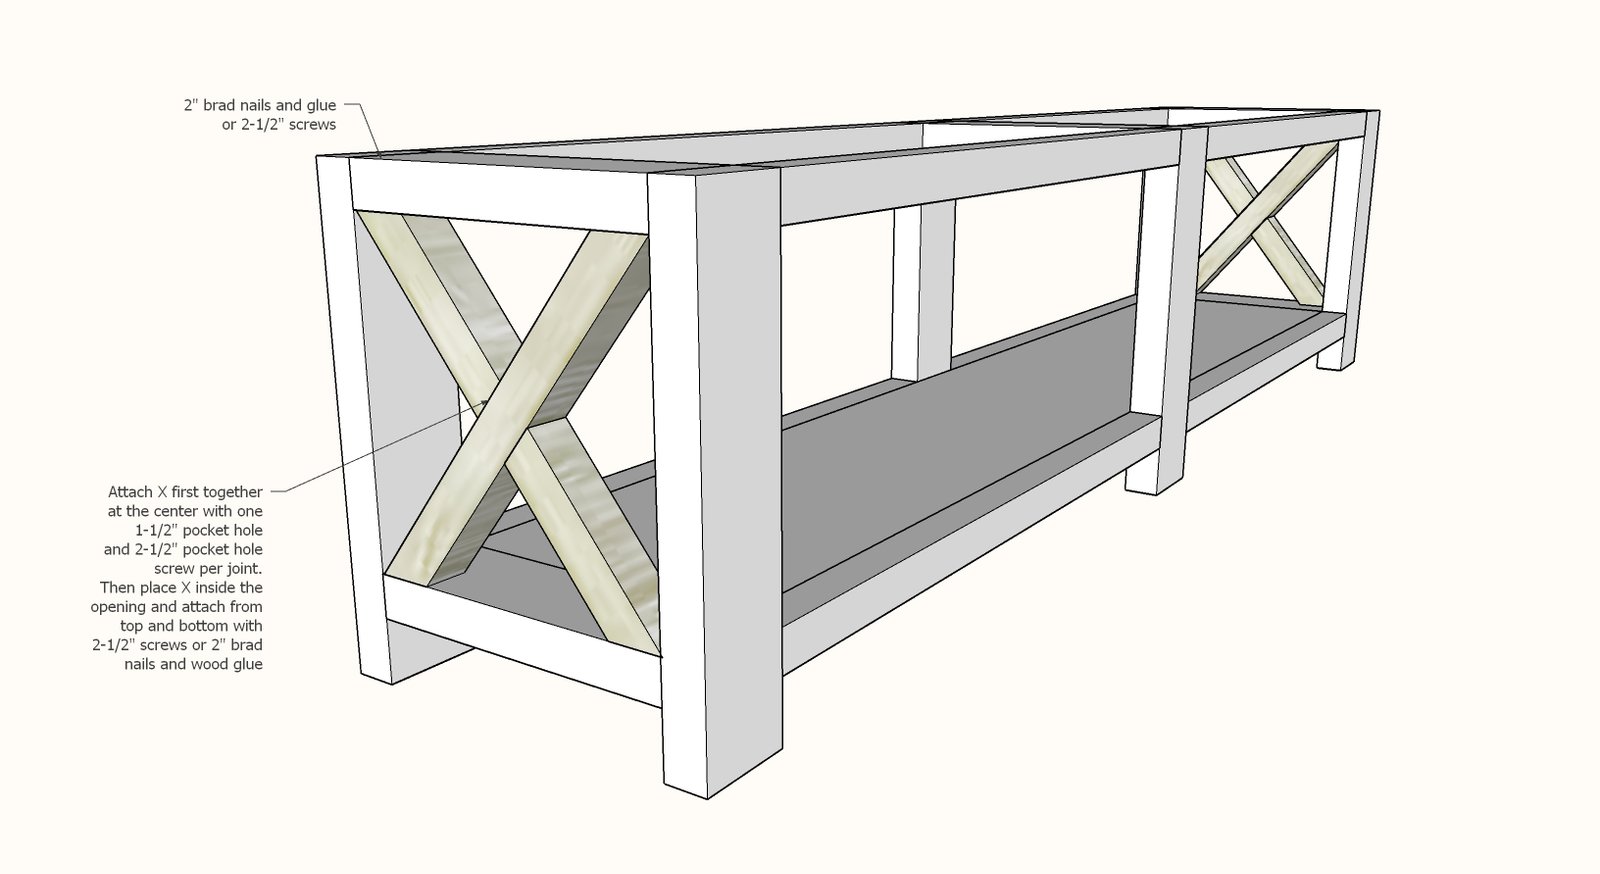
Cut with a circular saw or miter saw. Repeat for the shorter pieces. Join the X pieces on a flat level surface with a single 1-1/2" pocket hole and 2-1/2" pocket hole screw per joint.
Step 5
Attach entire X inside the bench. 2" brad nails are easier and cheaper (with glue) but you can also use screws (pocket hole screws are fine if you don't want to buy more screws).
Join the top boards together with a 1-1/2" pocket hole and 2" pocket hole screw every 12".
Attach completed top to the base with even overhangs on all sides.
Finishing
Sand all surfaces, starting with a medium grit and finishing with fine. Wipe off the dust, fill any holes or gaps with wood filler, and sand smooth once dry. Apply primer if you're painting, then finish with your choice of paint or stain and seal with a durable clear topcoat. For outdoor projects, use exterior-rated primer, paint or stain, and sealer so the piece stands up to the weather.
Source (temporary): https://www.ana-white.com/woodworking-projects/rustic-x-bench-free-plans