Rustic X Console Table
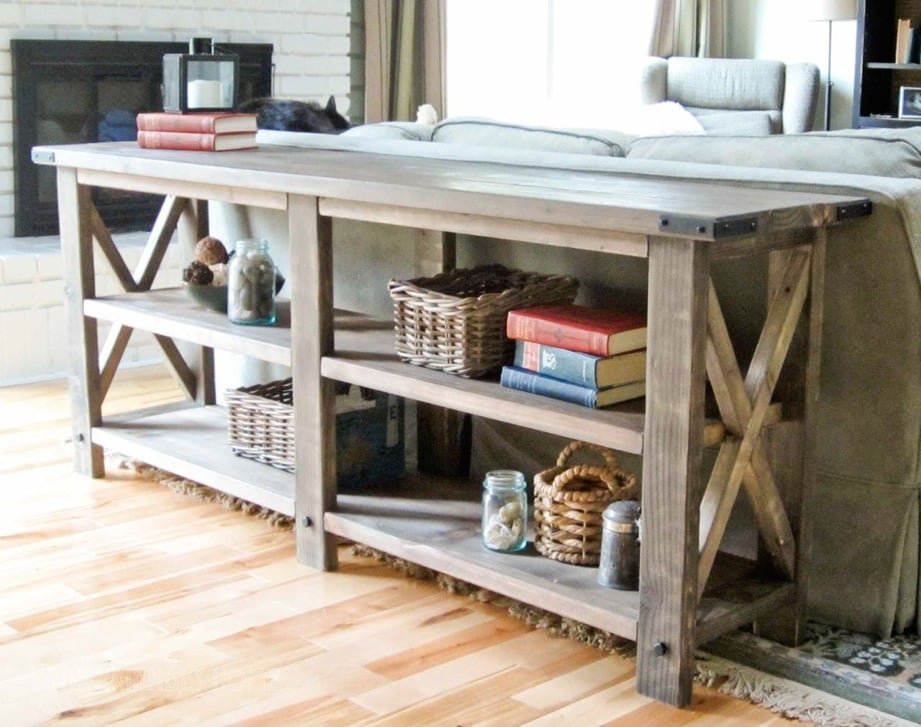
Build the super popular Rustic X Console Table with plans. This woodworking project has been built thousands of times and loved the world over. Its made of construction lumber (yes, 2x4s!) and the plans are easy to follow. Also in this Collection: Rustic X Coffee Table Plans, Rustic X End Table Plans and Rustic X Bench Plans
Specifications
| Project type | Media and Entertainment Centers |
|---|---|
| Room | dining room |
| Style | Farmhouse Furniture |
| Difficulty | Intermediate |
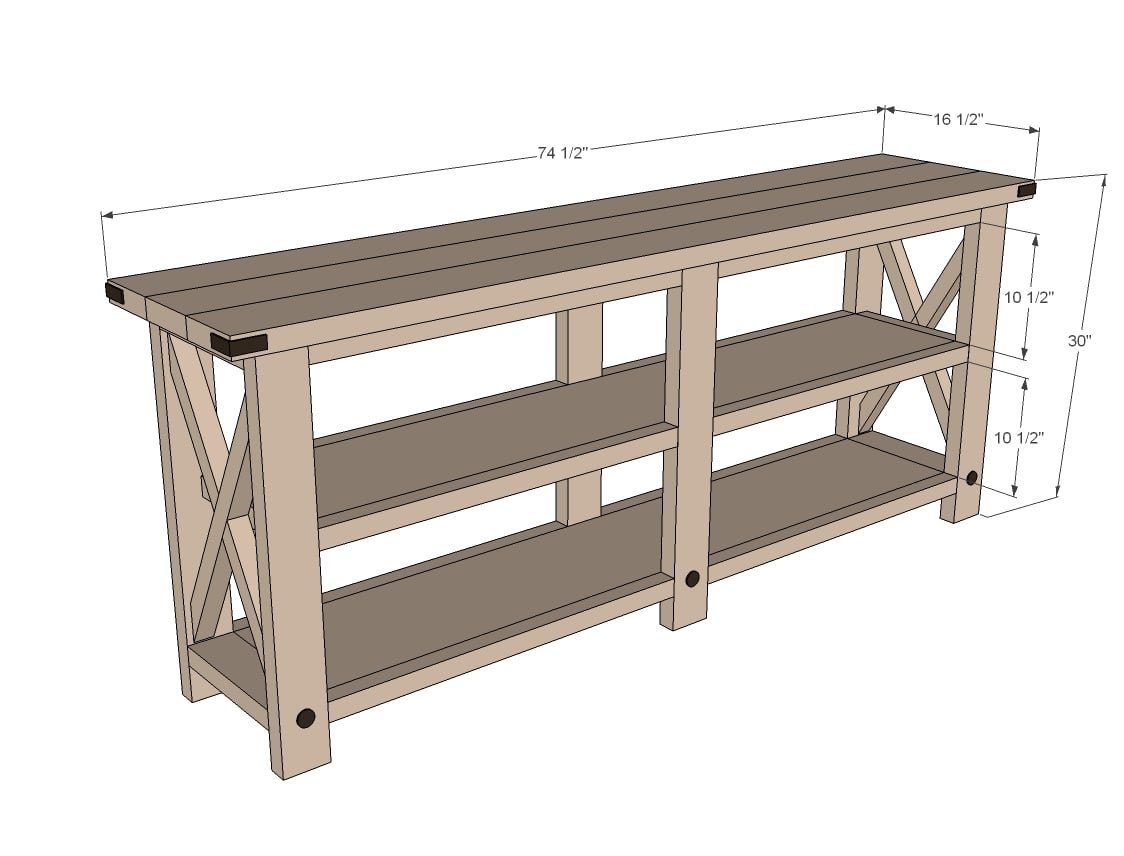
Dimensions
Use the size-specific shopping and cut lists below.
Shopping List
- 6 – 2x2 @ 8 feet long
- 3 – 2x4 @ 8 feet long
- 1 – 1x12 @ 12 feet long
- 3 – 2x6 @ stud length or 8 feet
- Corner hardware/decorative bolts
- 1 1/4" and 2 1/2" pocket hole screws
- 2 1/2" screws
Cut List
- 12 – 2x2 @ 30”
- 6 – 2x4 @ 28 1/2"
- 2 – 1x12 @ 63 1/2"
- 5 – 2x4 @ 11 1/4"
- 2 – 2x2 @ 11 1/4"
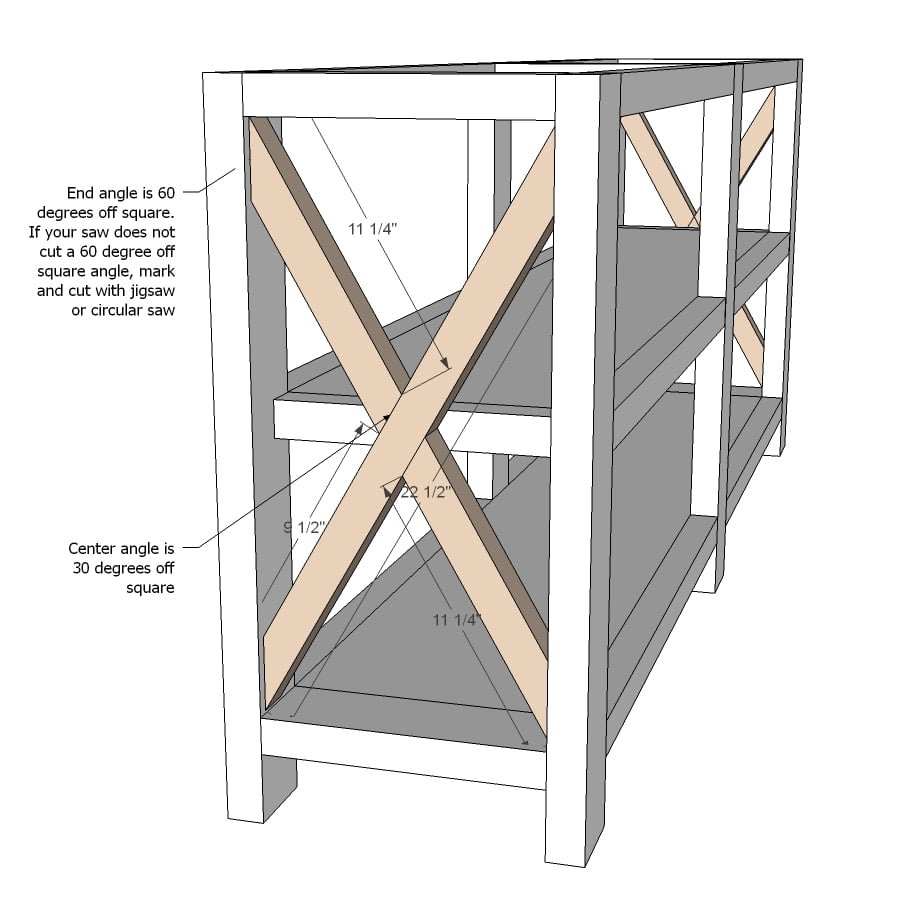
- 2 – 2x2 @ 22 1/2" (long point to short point, ends parallel, cut at 60 degrees off square)
- 4 – 2x2 @ 11 1/4" (longest point to shortest point, long end cut at 60 degrees off square, short point cut at 30 degrees off square, angles are in same direction)
- 3 – 2x6 @ 74 1/2"
Tools
- measuring tape
- square
- pencil
- hammer
- hearing protection
- kreg-jig
- drill
- compound miter saw
- sander
Step-by-step Instructions
Step 1
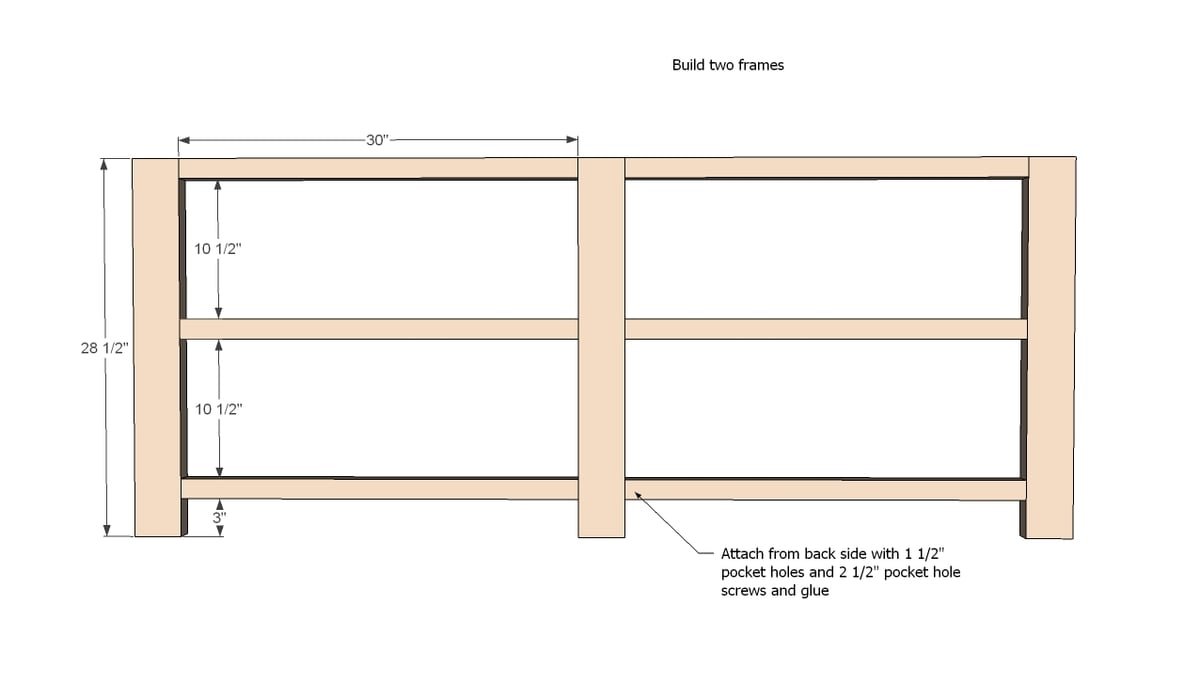
First build two frames as shown in diagram.
Step 2
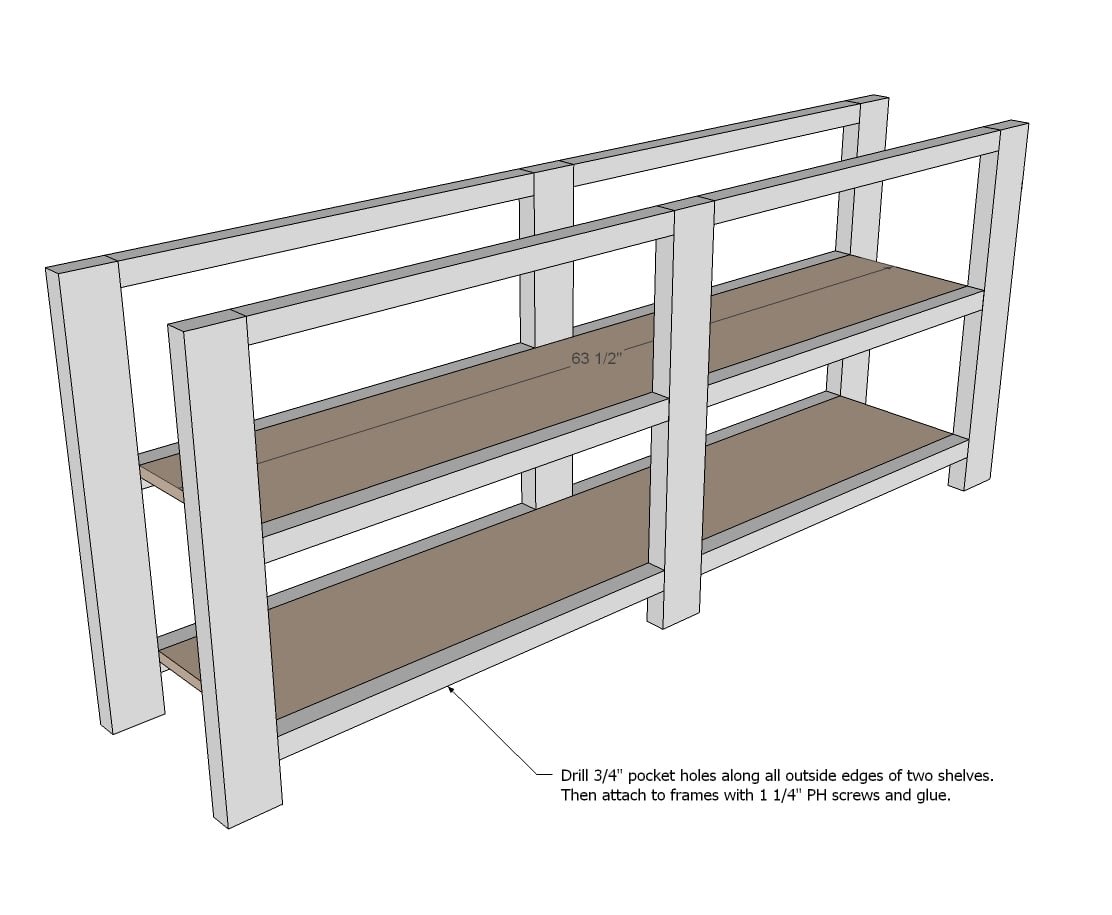
Then attach frames to shelves. NOTE: I recommend drilling 3/4" pocket holess with Kreg Jig around all sides of each shelf for attaching all shelf trim with 1 1/4" Pocket Hole screws later on.
Step 3
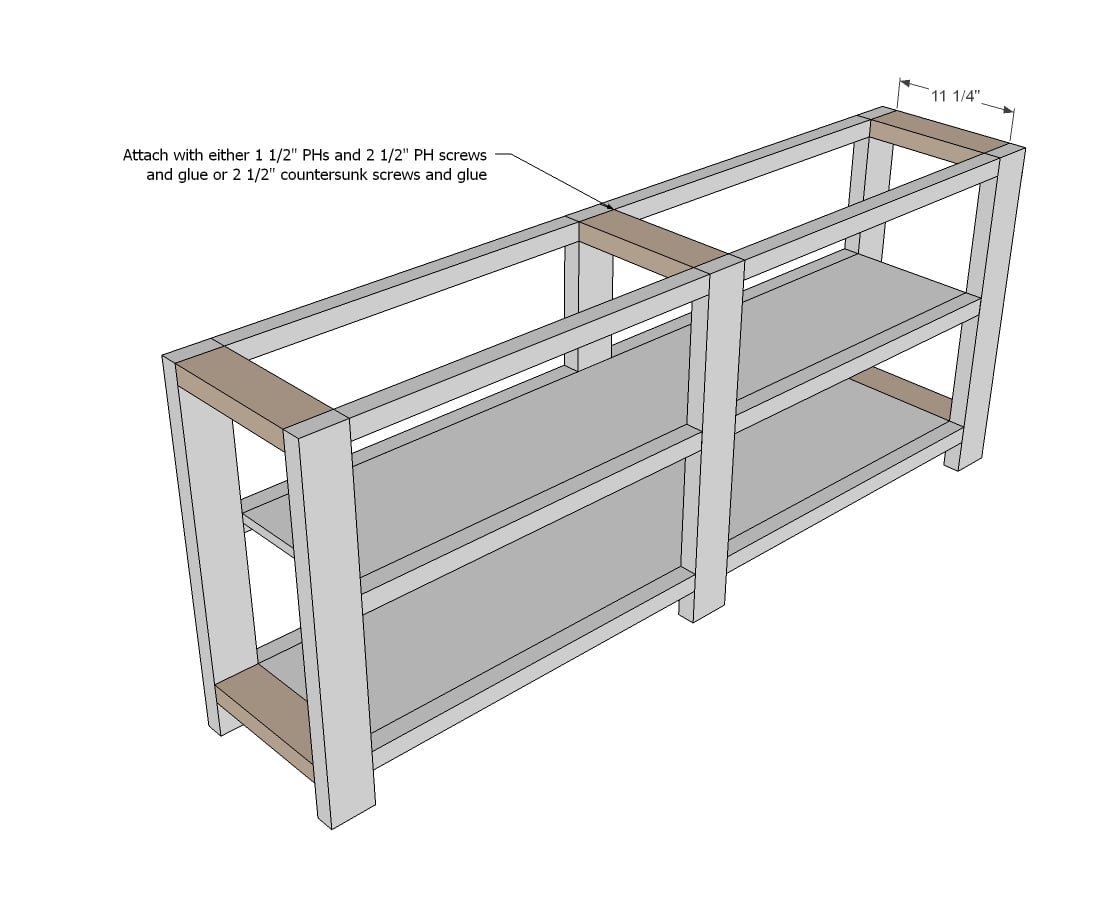
2x4 end supports need to be the same width as your 1x12 boards - expected to be 11 1/4" wide. Measure the width of your 1x12s and cut the 2x4 supports to match this width. Attach to frames and shelves. For attaching to frames, use 1-1/2" pocket holes with 2-1/2" pocket hole screws.
Step 4
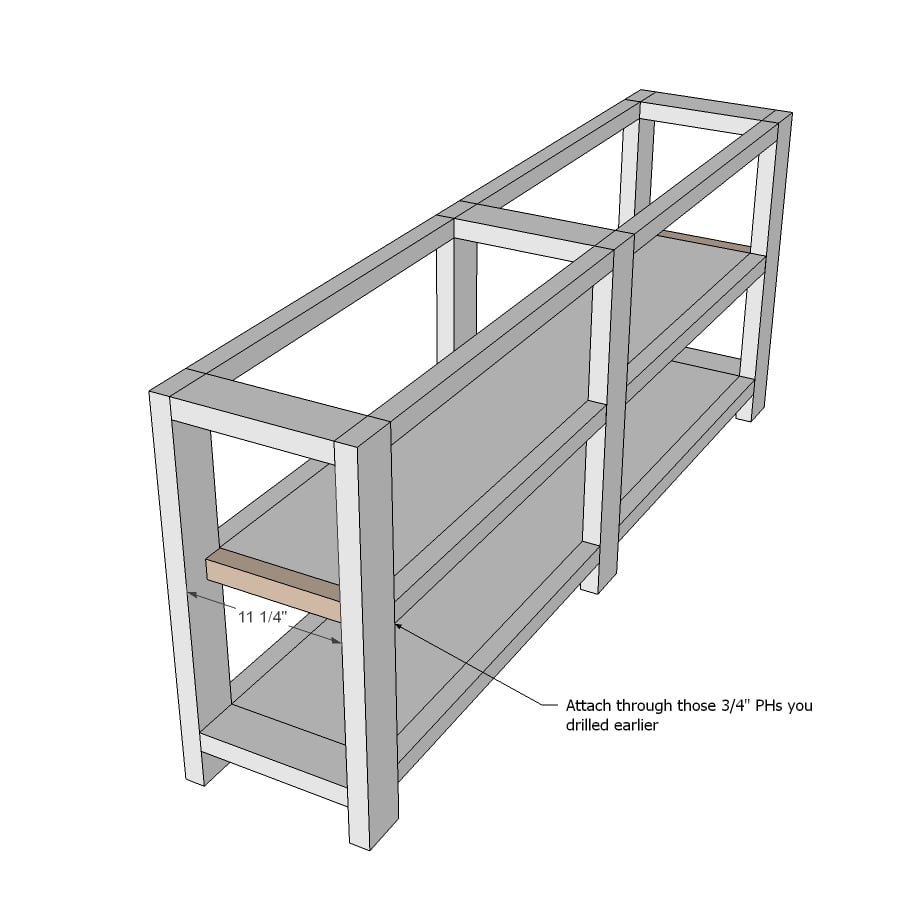
Add trim to the shelf.
Step 5
The X can be cut by just placing the uncut board alongside it's permanent position, and marking the overlap with a pencil, and then cutting the pencil lines with a circular saw or jigsaw. First do the longer piece, then place inside the project, but don't attach yet. The figure the smaller piece cuts and make those cuts. Fit the smaller pieces in the project, and trace where they need to be joined to the larger piece. Remove all pieces and attach the smaller pieces to the longer piece. Then place the entire X inside the opening and attach.
Step 6
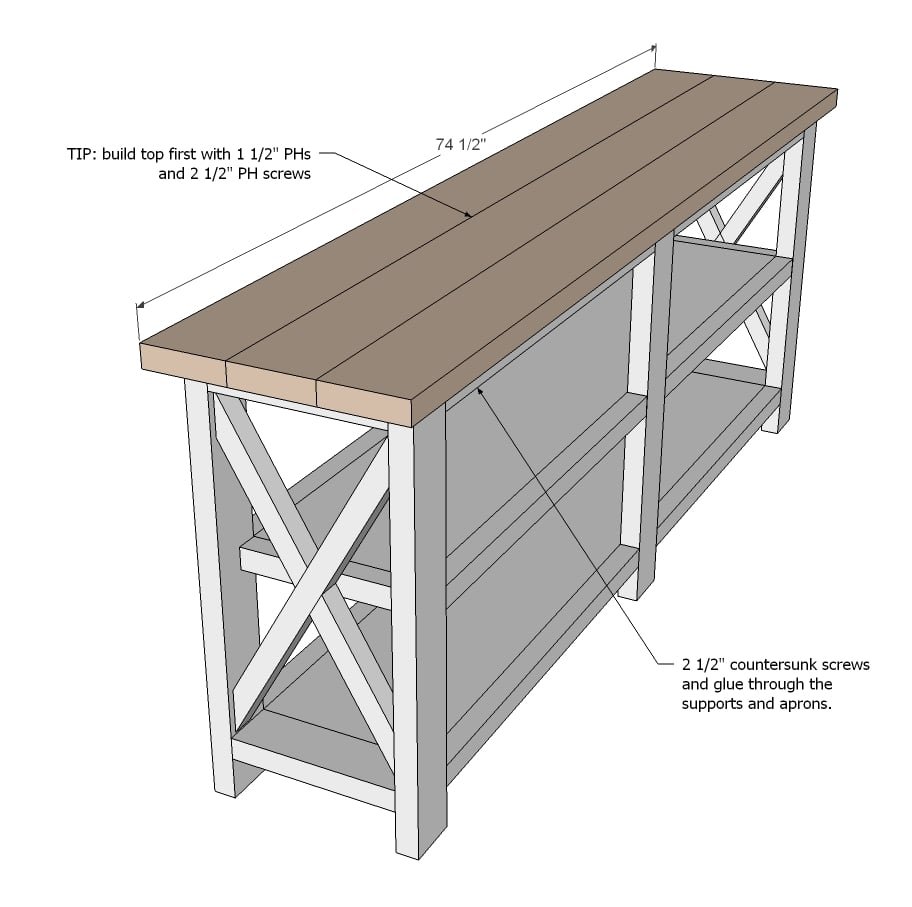
And then add the top. You can build top first with 1 1/2" pocket holes and 2 1/2" pocket hole screws and then attach to top through 2x4/2x2 aprons or just plank the top for a rustic look - it's up to you. TIP: Just use your 2 1/2" pocket hole screws to attach the top so you don't have to go out and buy more 2 1/2" screws.
Finishing
Sand all surfaces, starting with a medium grit and finishing with fine. Wipe off the dust, fill any holes or gaps with wood filler, and sand smooth once dry. Apply primer if you're painting, then finish with your choice of paint or stain and seal with a durable clear topcoat. For outdoor projects, use exterior-rated primer, paint or stain, and sealer so the piece stands up to the weather.
Source (temporary): https://www.ana-white.com/woodworking-projects/rustic-x-console-table