Rustic X End Table
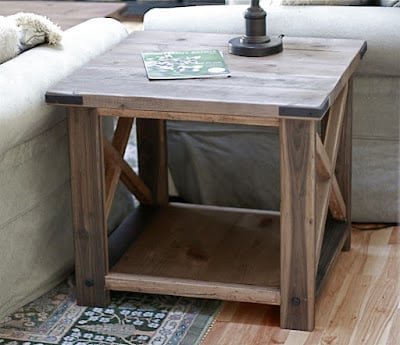
Build your own end tables! These gorgeous rustic style end tables are built from 2x4s and lumber. We love the large size and the open bottom shelf. Stain or paint any color. Our beginner friendly plans make it easy with step by step diagrams, shopping list and cut list. Also in this Collection: Rustic X Console Table, Rustic X Coffee Table and Rustic X Bench Plans
Specifications
| Project type | Side and End Table Plans |
|---|---|
| Room | living room |
| Style | Farmhouse Furniture |
| Difficulty | Intermediate |
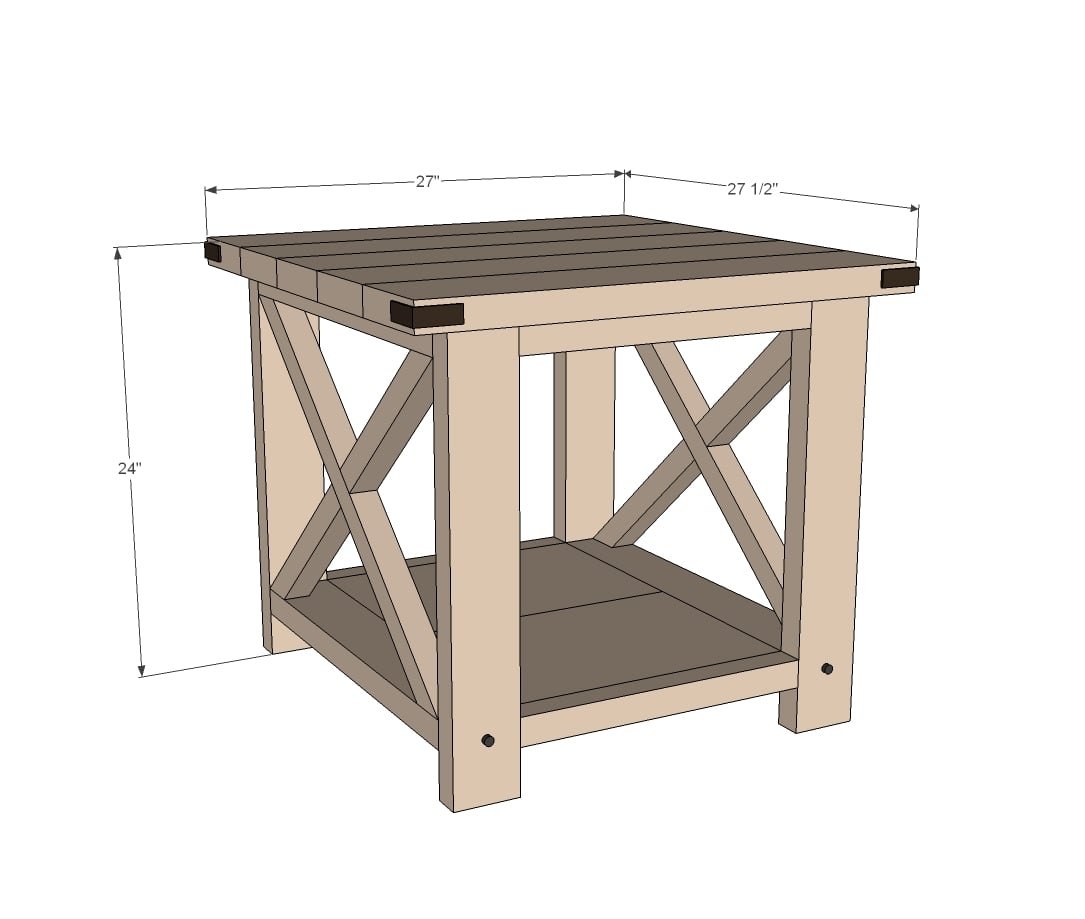
Dimensions
Use the size-specific shopping and cut lists below.
Shopping List
- 2 - 2x4 @ 8 feet long
- 1 - 1x12 @ 3 feet long
- 2 - 2x2 @ 8 feet long
- 2 - 2x6 @ 8 feet long corner bracket hardware decorative bolts
- 2 1/2" and 1 1/4" Pocket Hole screws
- wood glue
Cut List
- 8 - 2X4 @ 22 1/2" - Legs
- 4 - 2X2 @ 16" - Trim
- 2 - 1X12 @ 16" - Bottom shelf
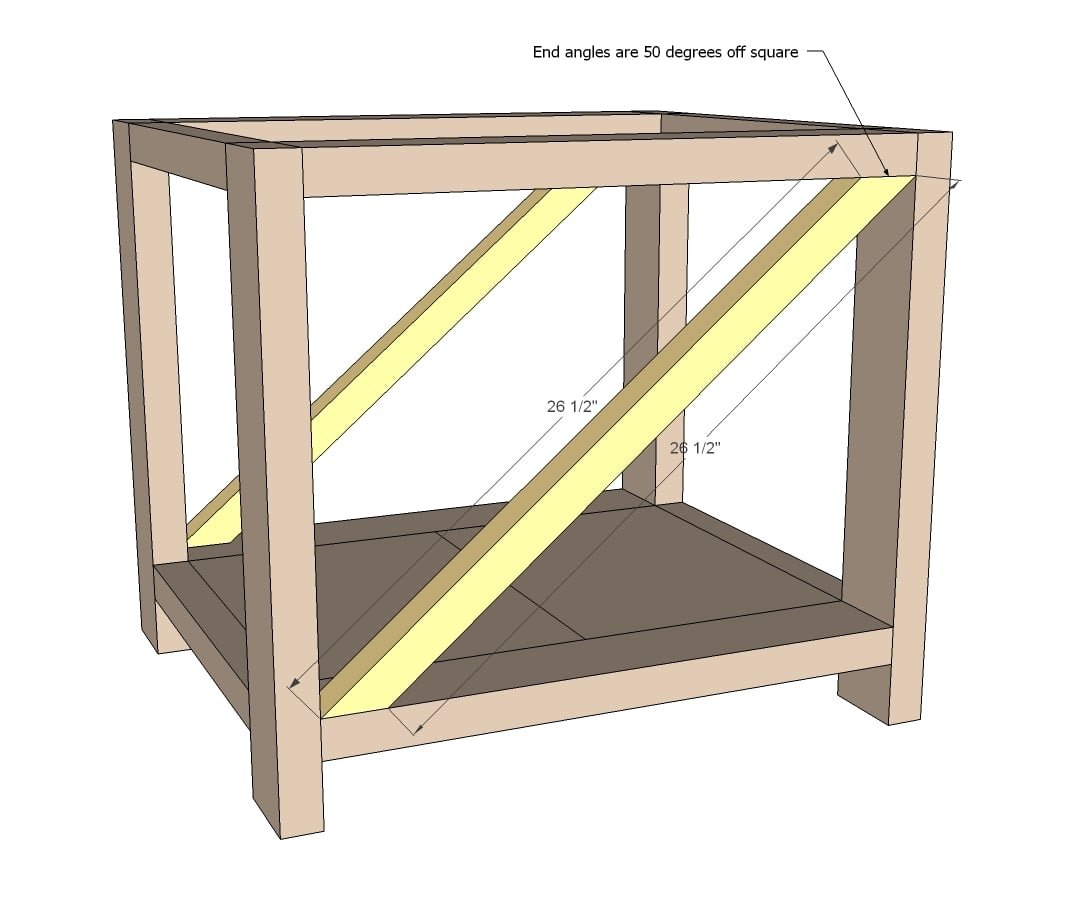
- 2 - 2X2 @ 26 1/2" (LONG POINT TO SHORT POINT, ENDS ARE PARALLEL, 50 DEGREES OFF SQUARE) *
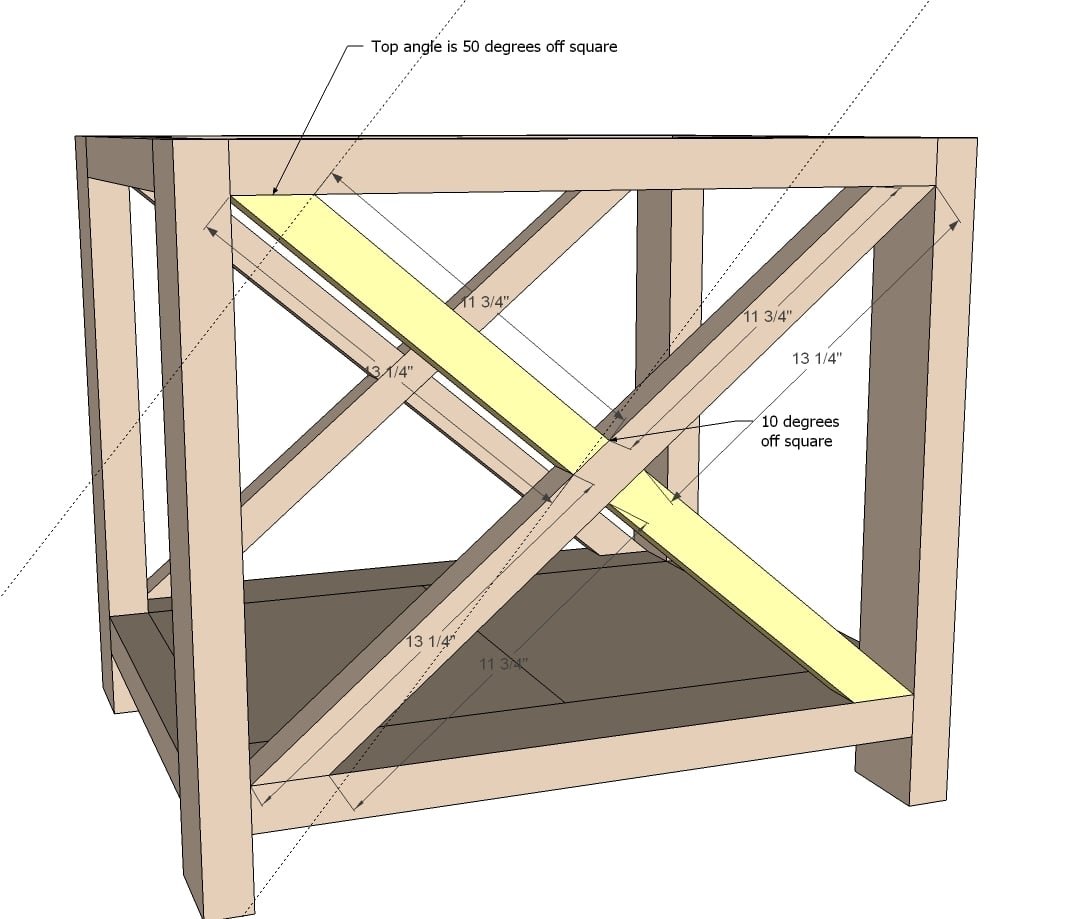
- 4 - 2x2 @ 13 1/4" (Longest edge, one end cut at 50 degrees off square, other end cut at 10 degrees off square, see diagram) *
- 5 - 2x6 @ 27" - Top
*You may wish to trace and cut these in place
Tools
- measuring tape
- square
- pencil
- safety glasses
- hearing protection
- kreg-jig
- drill
- compound miter saw
- sander
- countersink drill bit
Step-by-step Instructions
Step 1
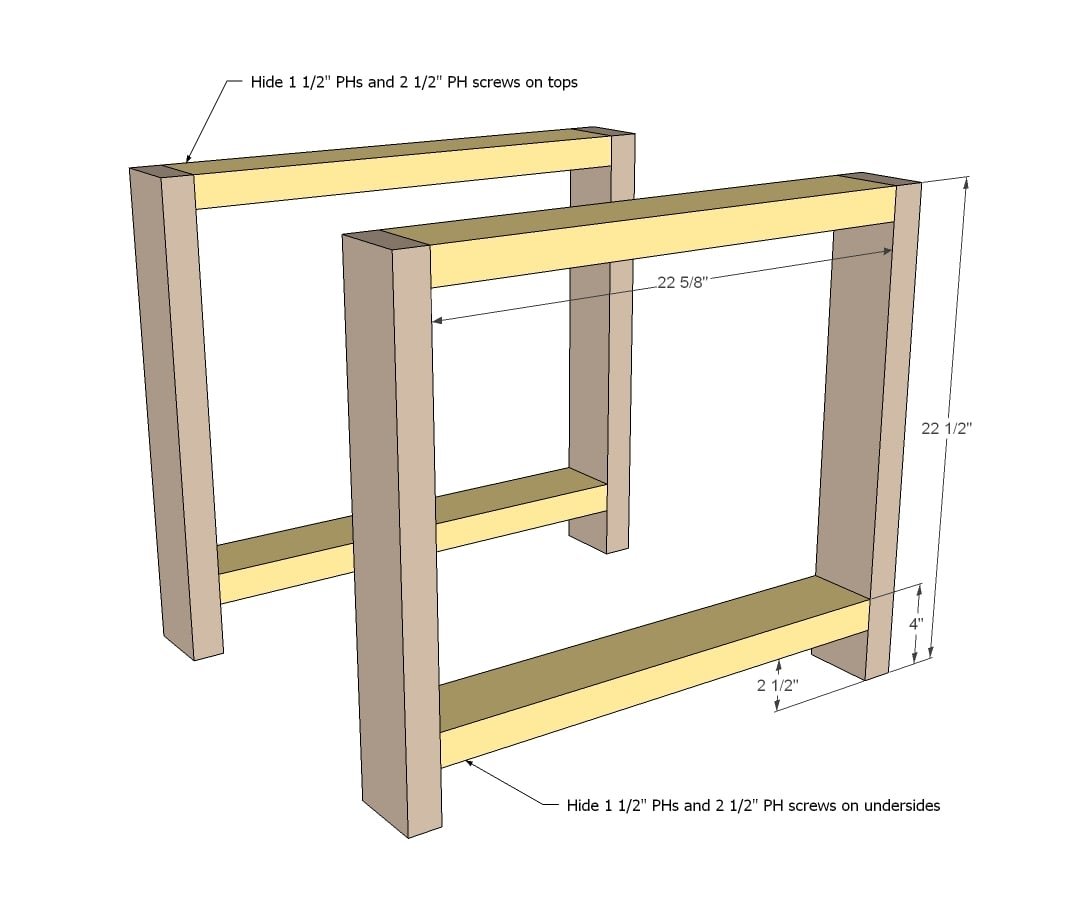
Start by building two ends as depicted in diagrams. You can also attach with countersunk 2 1/2" screws and glue. NOTE: Yellow board width should be 22 1/2"
Step 2
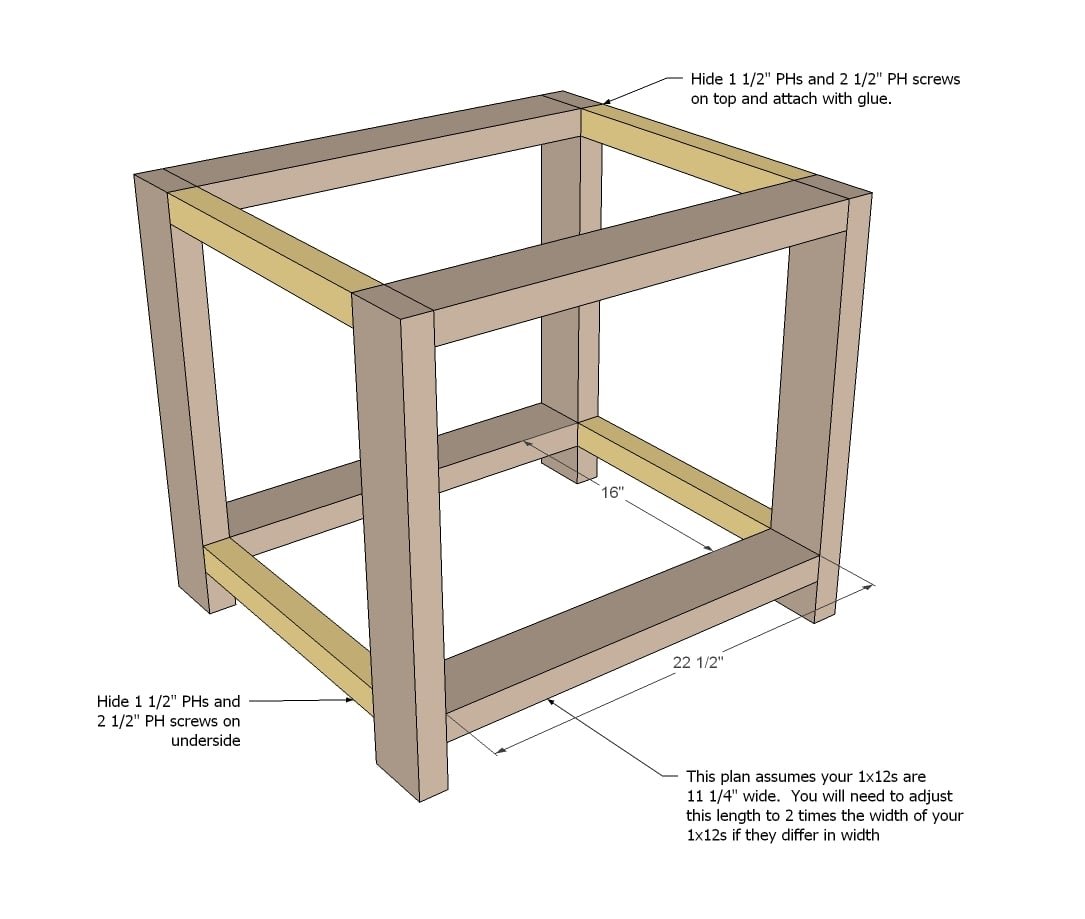
Next attach the 2x2 sides.
Step 3
And then build your bottom shelf and attach to bottom of console.
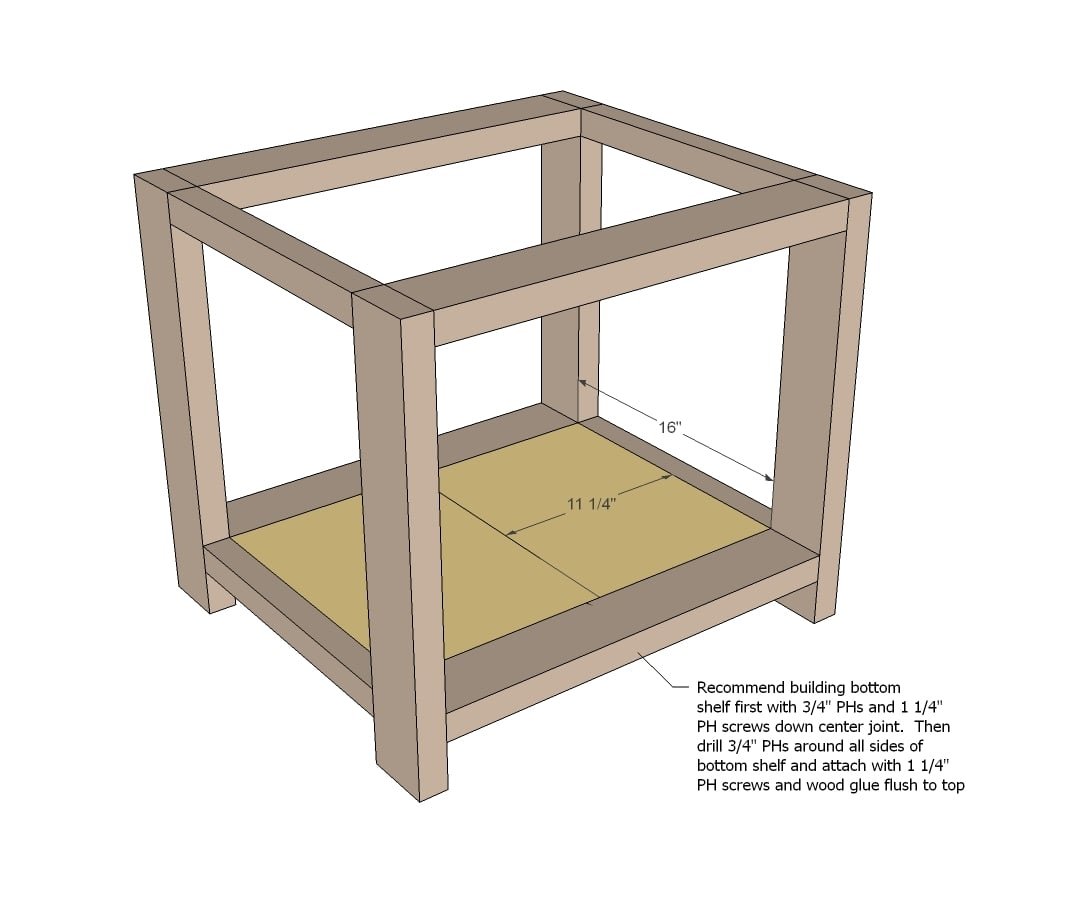
Step 4
Now it's time to fit your cross braces. A standard miter saw should cut a 50 degree angle off square. If not, you will need to mark it with a square (remember 50 degrees is off square, so that means the angle off the board edge would be 40 degrees. Another trick is to just hold the board in place, mark the angles, and cut. These aren't support boards or anything like that, so some glue and a few nails or countersunk screws from top/bottom will do the trick. TIP: We recommend building the entire X first, the attaching the complete X inside the end table.
Step 5
The smaller X pieces can be cut to fit. Attach with a 1-1/2" pocket hole and 2-1/2" pocket hole screw, one screw per joint.
Step 6
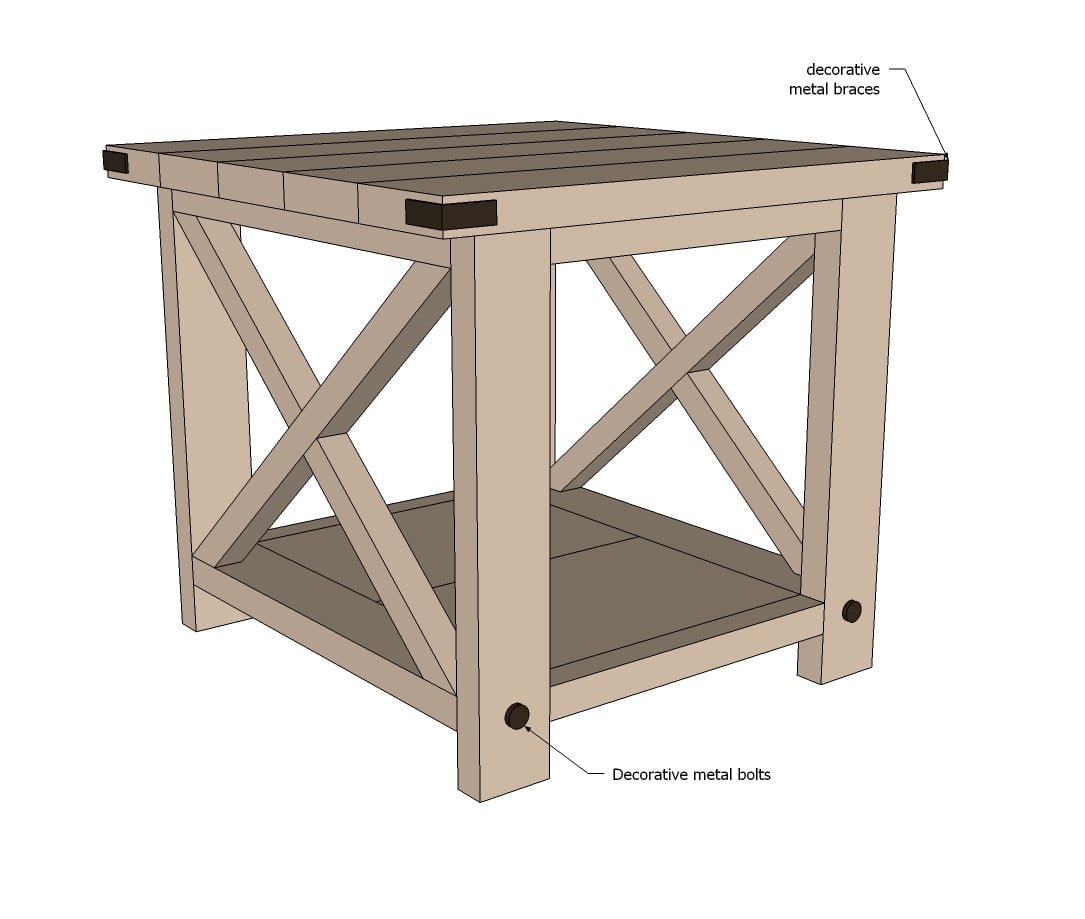
Next build your top... and attach in place with countersunk 2 1/2" screws. If you have the PH screws on hand, I just use a few of those!

Step 7
And then add the decorative hardware!
Finishing
Sand all surfaces, starting with a medium grit and finishing with fine. Wipe off the dust, fill any holes or gaps with wood filler, and sand smooth once dry. Apply primer if you're painting, then finish with your choice of paint or stain and seal with a durable clear topcoat. For outdoor projects, use exterior-rated primer, paint or stain, and sealer so the piece stands up to the weather.
Source (temporary): https://www.ana-white.com/woodworking-projects/rustic-x-end-table