Rustic X Hall Tree
Create a beautiful entry for about $80 with our rustic hall tree. Built using 2x lumber, it's sturdy, functional, and gorgeous! include shopping and cut lists, and full diagrams.
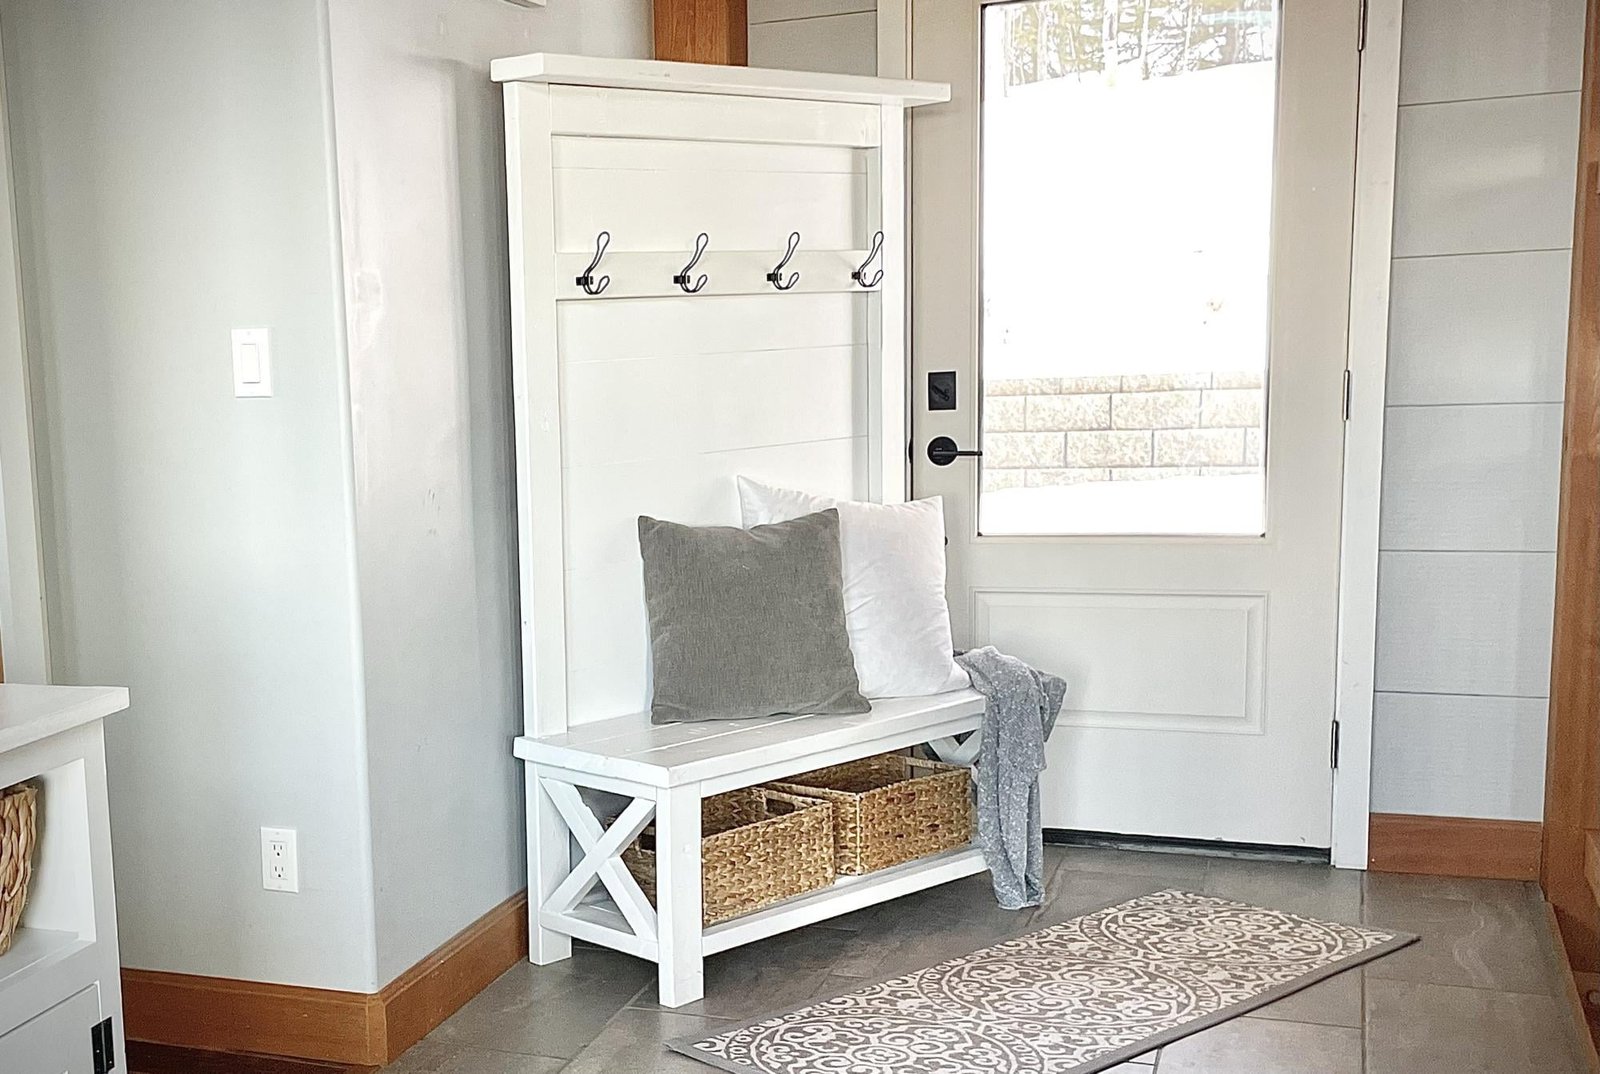
Specifications
| Project type | Entryway Furniture |
|---|---|
| Room | Entryway and Mudroom |
| Style | Farmhouse Furniture |
| Difficulty | Intermediate |
| Estimated cost | $50 - $100 |
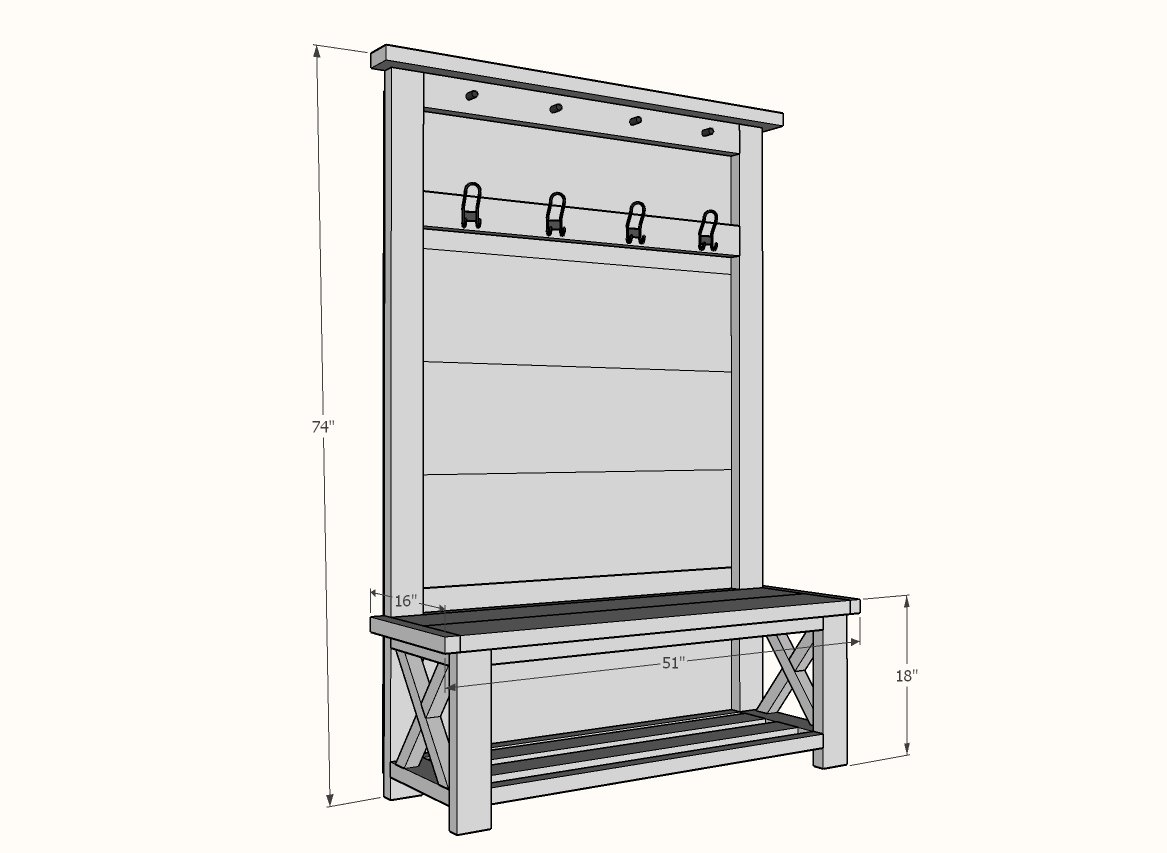
Dimensions
Use the size-specific shopping and cut lists below.
Shopping List
- 6 - 2x4 x 8 feet long
- 3 - 2x2 x 8 feet long
- 1 - 2x8 x 8 feet long
- 50 - 2-1/2" pocket hole screws
- 25 - 2-1/2" self tapping wood screws for attaching the top (can use the pocket hole screws too)
- 3/4" brad nails for attaching the back and wood glue
- 4 hooks
Cut List
- 2 - 2x4 @ 16-1/2" - front legs
- 4 - 2x4 @ 12-1/2" - ends
- 2 - 2x4 @ 72-1/2" - back legs
- 5 - 2x4 @ 41" - horizontal tie ins
- 3 - 2x2 @ 41" - horizontal tie ins
- 2x2s for the Xs scribed and cut in plan
- 2 - 2x8 @ 48" - seat
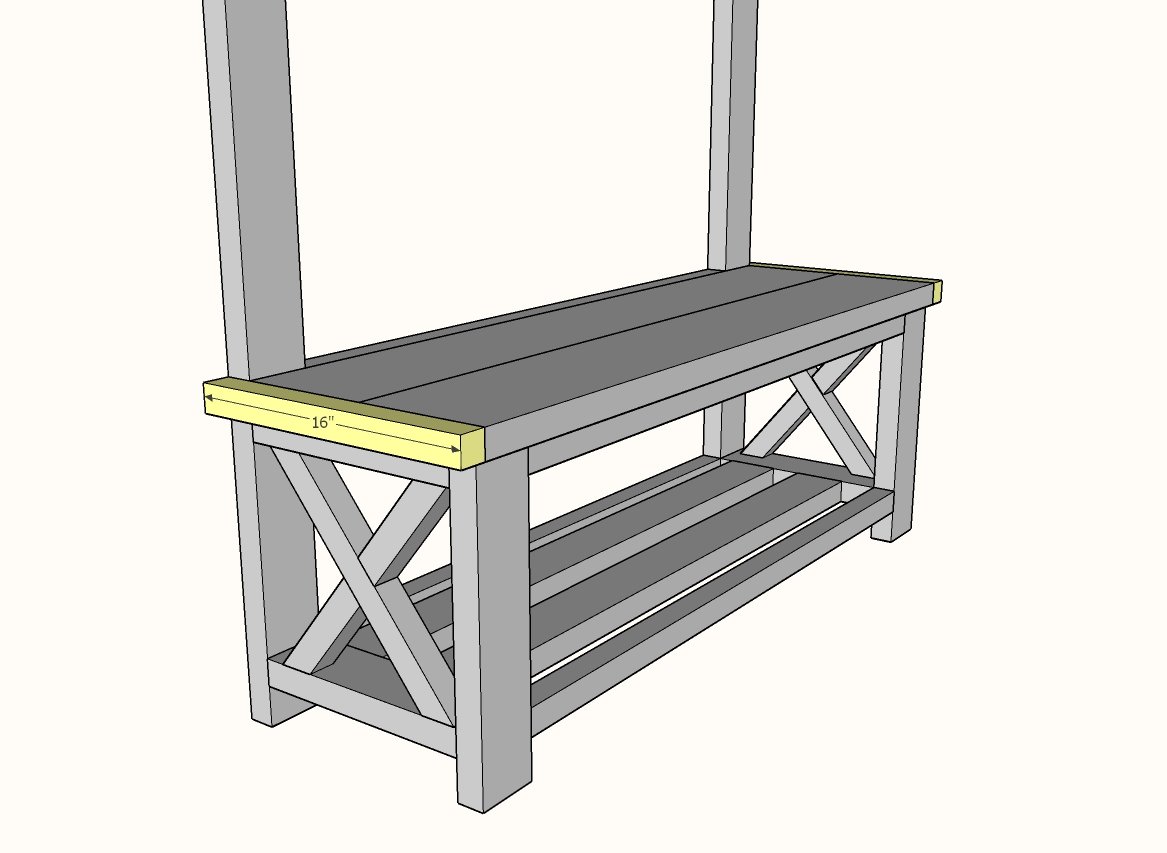
- 2 - 2x2 @ 16" - seat ends
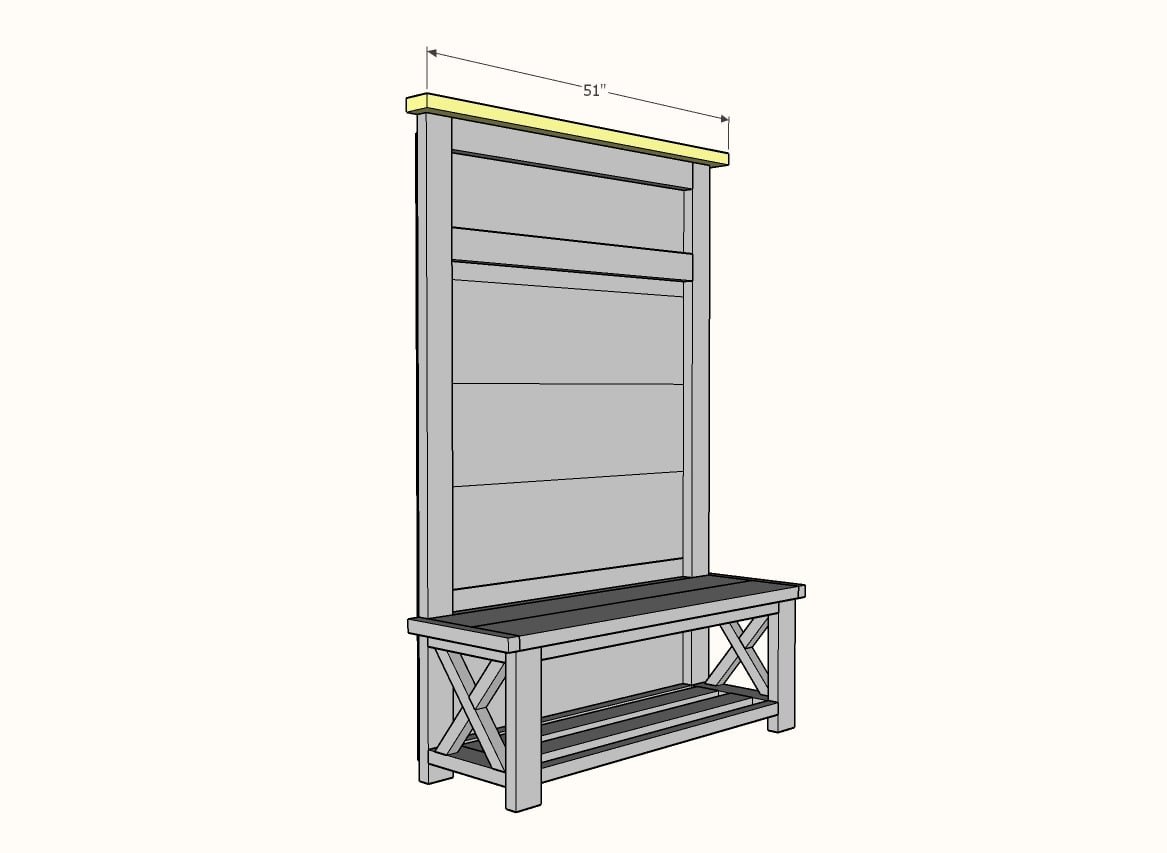
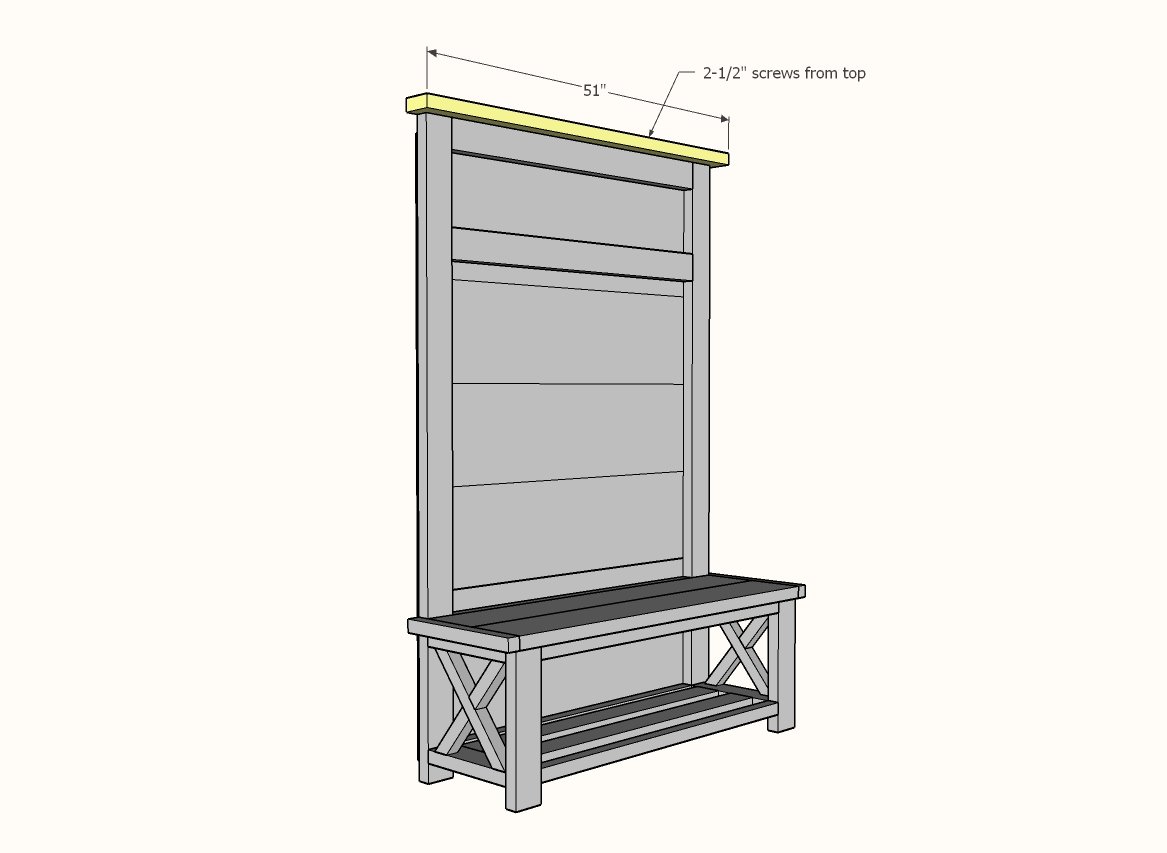
- 1 - 2x4 @ 51" - top
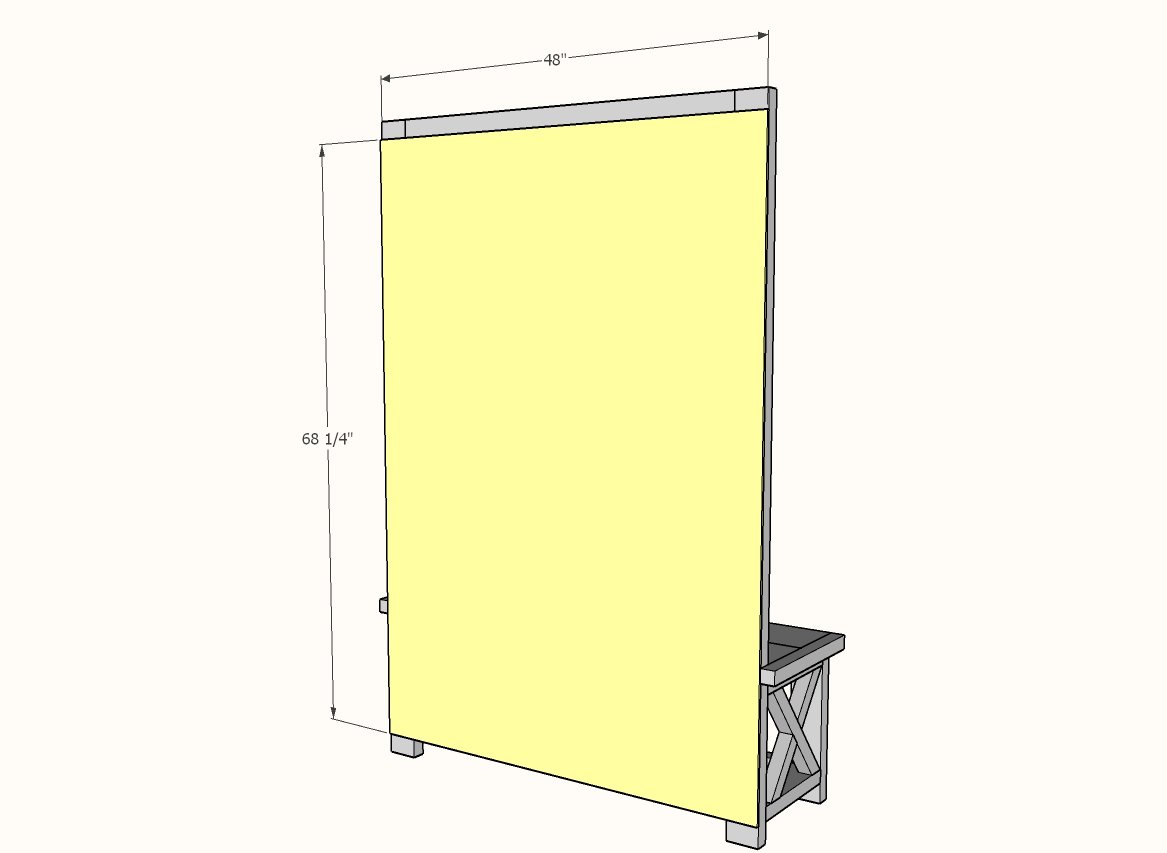
- 1/4" plywood 48" x 68-1/2" - back
Tools
- measuring tape
- square
- pencil
- safety glasses
- hearing protection
- kreg-jig
- drill
- circular saw
- nailer
- sander
Step-by-step Instructions
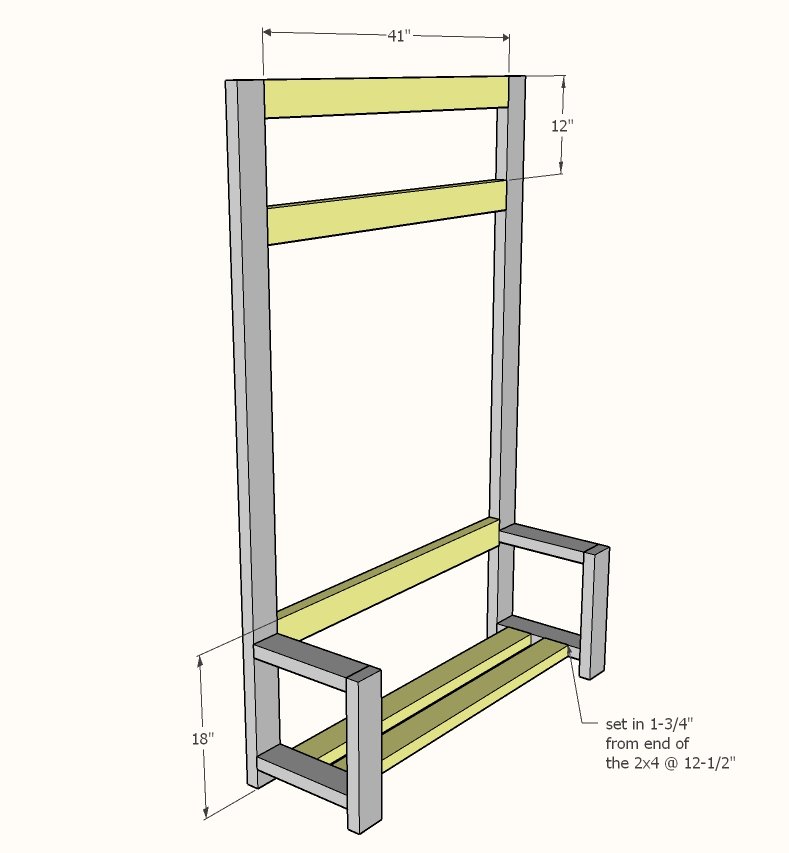
Drill two 1-1/2" pocket holes on each end of all of the 2x4 @ 12-1/2" long.
Attach to the front legs as shown in the diagram with 2-1/2" pocket hole screws.
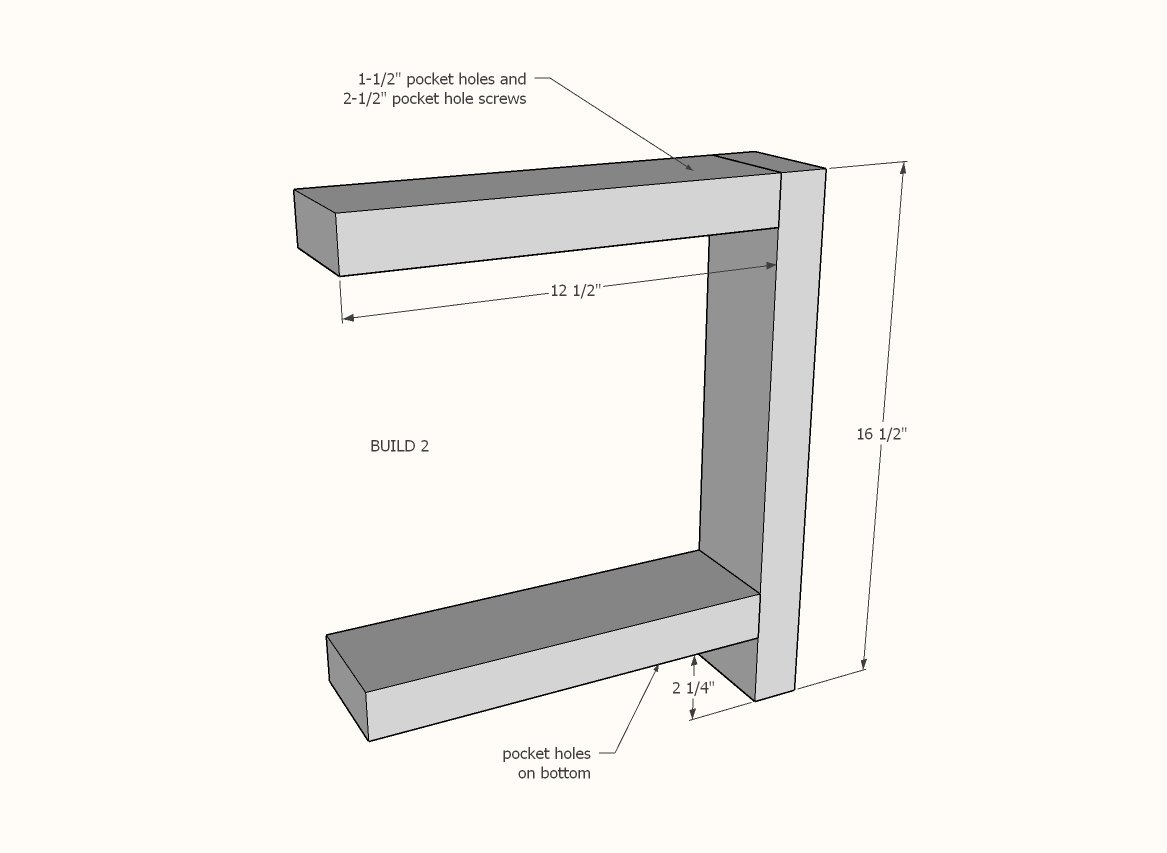
Step 2
Attach to the back leg with 2-1/2" pocket hole screws.
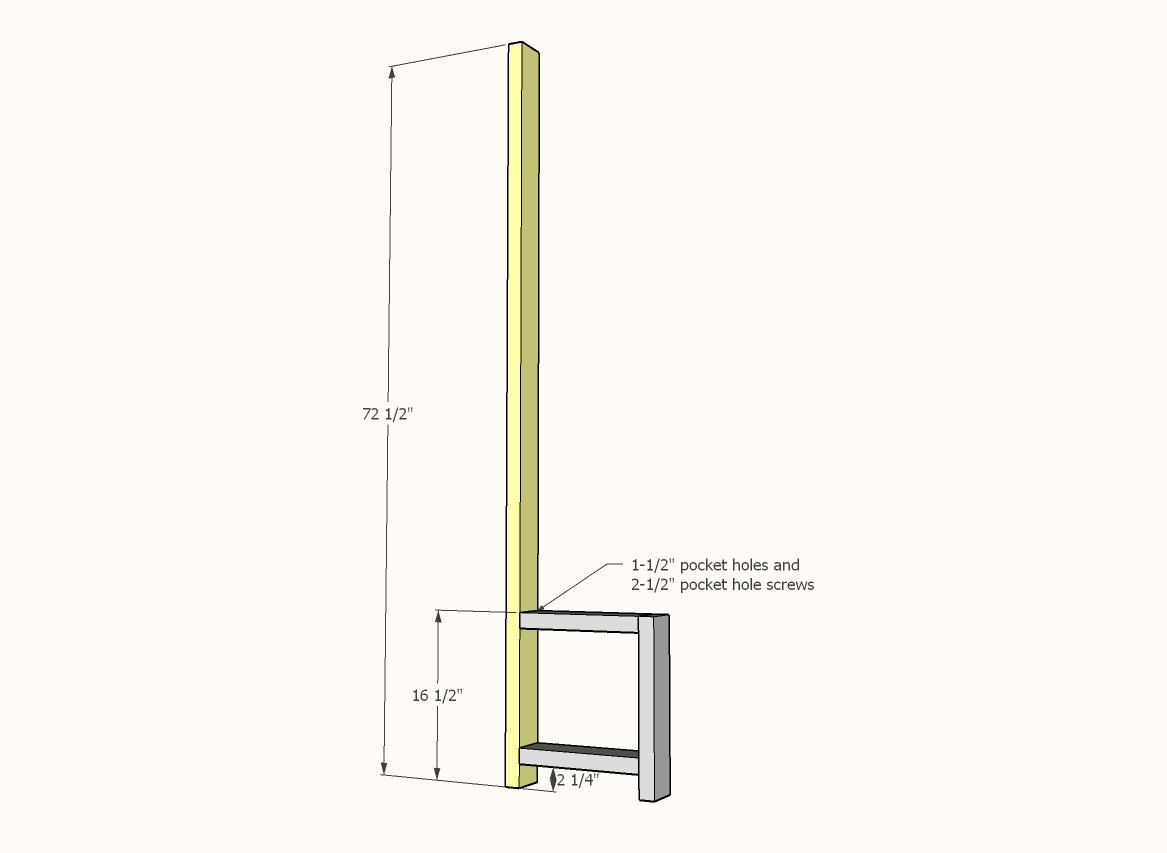
Drill two 1-1/2" pocket holes on each end of the 2x4 @ 41".
Attach to the legs with 2-1/2" pocket hole screws.
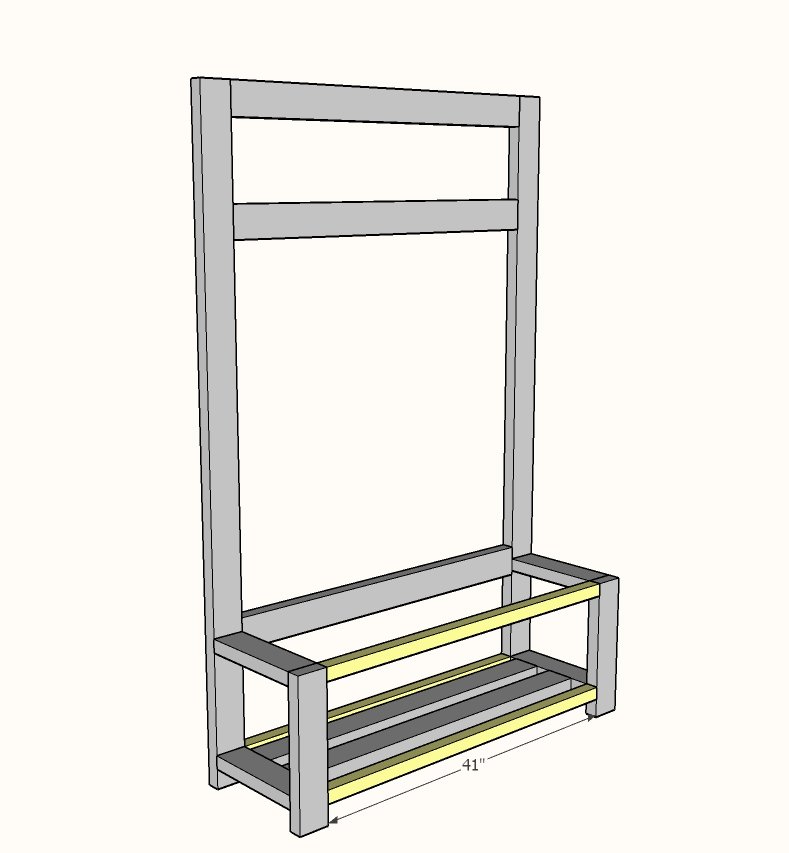
Drill one 1-1/2" pocket hole on the ends of the 2x2s @ 41".
Attach to the legs with 2-1/2" pocket hole screws.
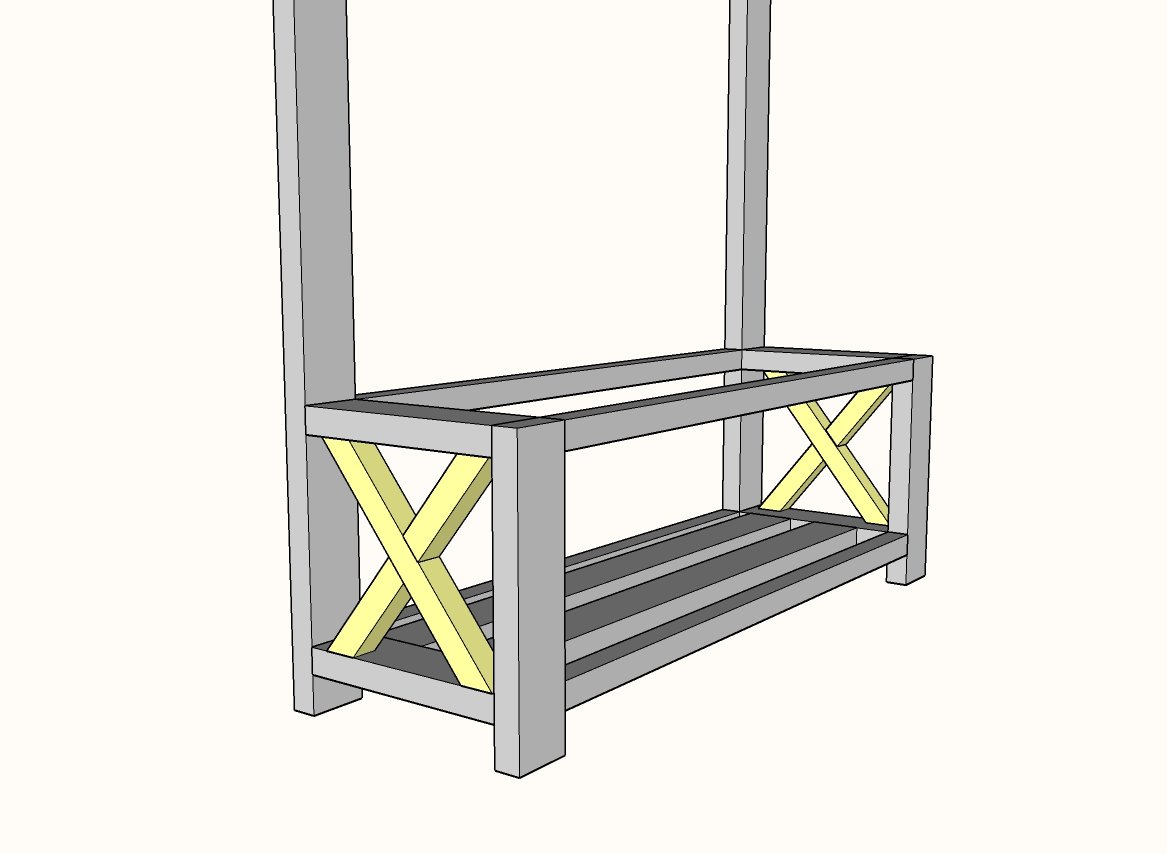
Scribe and cut the Xs as demonstrated in the video.
Attach the smaller X pieces to the larger piece with single 1-1/2" pocket holes with 2-1/2" pocket hole screws. Then use 2-1/2" screws to attach the X from the outside of the legs. You can also use 2-1/2" pocket hole screws if you don't have other screws.
Step 6
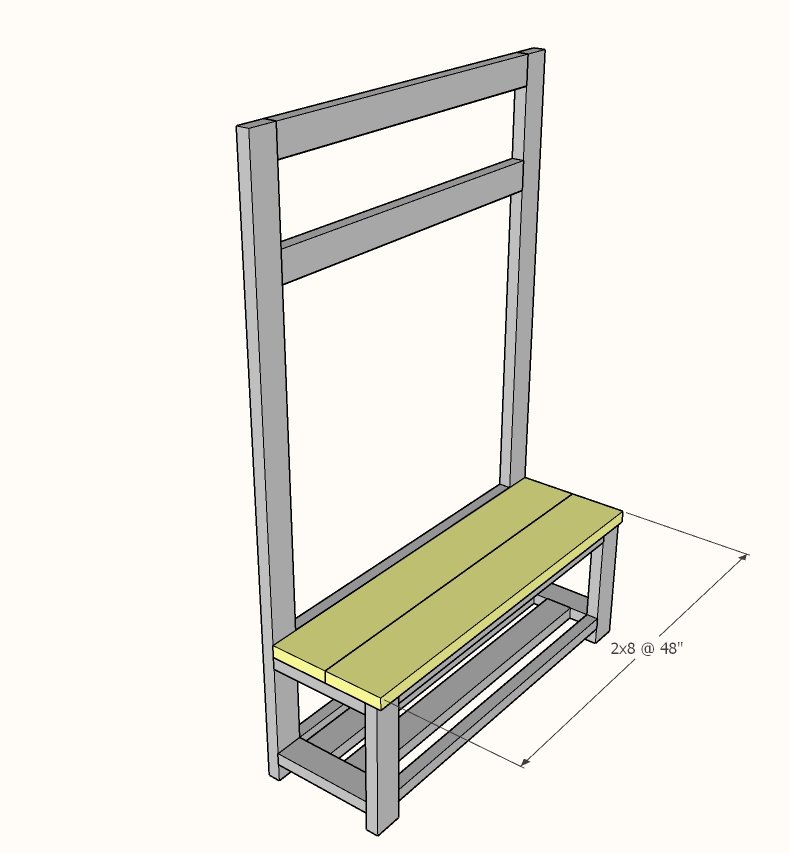
We recommend attaching the two 2x8 boards together along the long edge with 1-1/2" pocket holes and 2-1/2" pocket hole screws. Then attach the entire top from underneath with 2-1/2" screws, four screws should be plenty.
Step 7
Use either 2" brad nails or 2-1/2" self tapping screws (can use pocket hole screws) to attach the 2x2 end trim.
Step 8
Attach back with 3/4" brad nails and wood glue.
Step 9
Attach header with 2-1/2" self tapping screws (can also use pocket hole screws).
Step 10
Finishing
Sand all surfaces, starting with a medium grit and finishing with fine. Wipe off the dust, fill any holes or gaps with wood filler, and sand smooth once dry. Apply primer if you're painting, then finish with your choice of paint or stain and seal with a durable clear topcoat. For outdoor projects, use exterior-rated primer, paint or stain, and sealer so the piece stands up to the weather.
Source (temporary): https://www.ana-white.com/woodworking-projects/rustic-x-hall-tree