Rustic X Small Rolling Kitchen Island
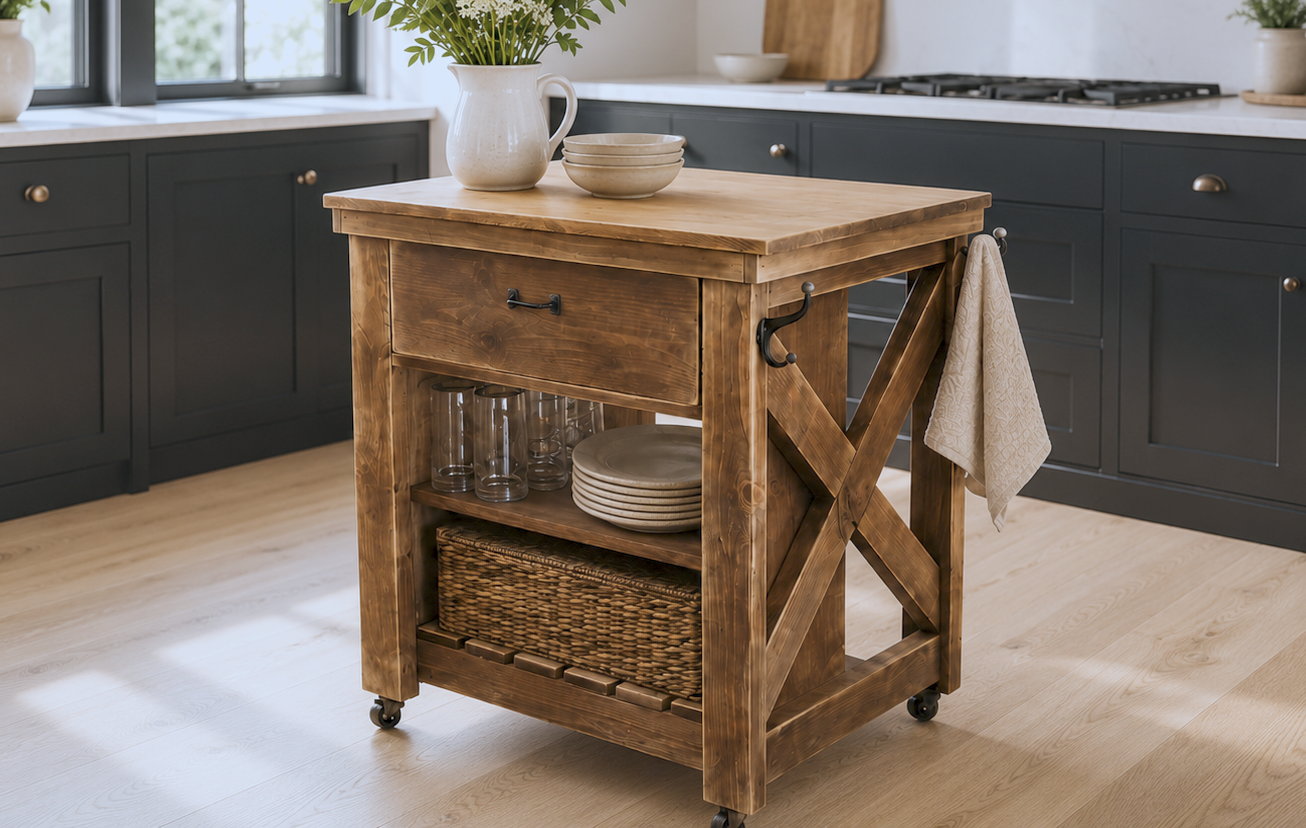
Build a rustic X small rolling kitchen island with. This compact farmhouse-style kitchen cart features a solid wood frame, X-side details, drawer storage, open shelving, towel hooks, and caster wheels for easy movement. Perfect for small kitchens, apartments, or extra prep space, this budget-friendly project gives you a Pottery Barn-inspired look for less. Includes a shopping list, cut list, step-by-step building instructions, and finishing tips. Built and tested by Shanty2Chic.
Specifications
| Project type | Kitchen Island Plans |
|---|---|
| Room | kitchen |
| Difficulty | Advanced |
Dimensions
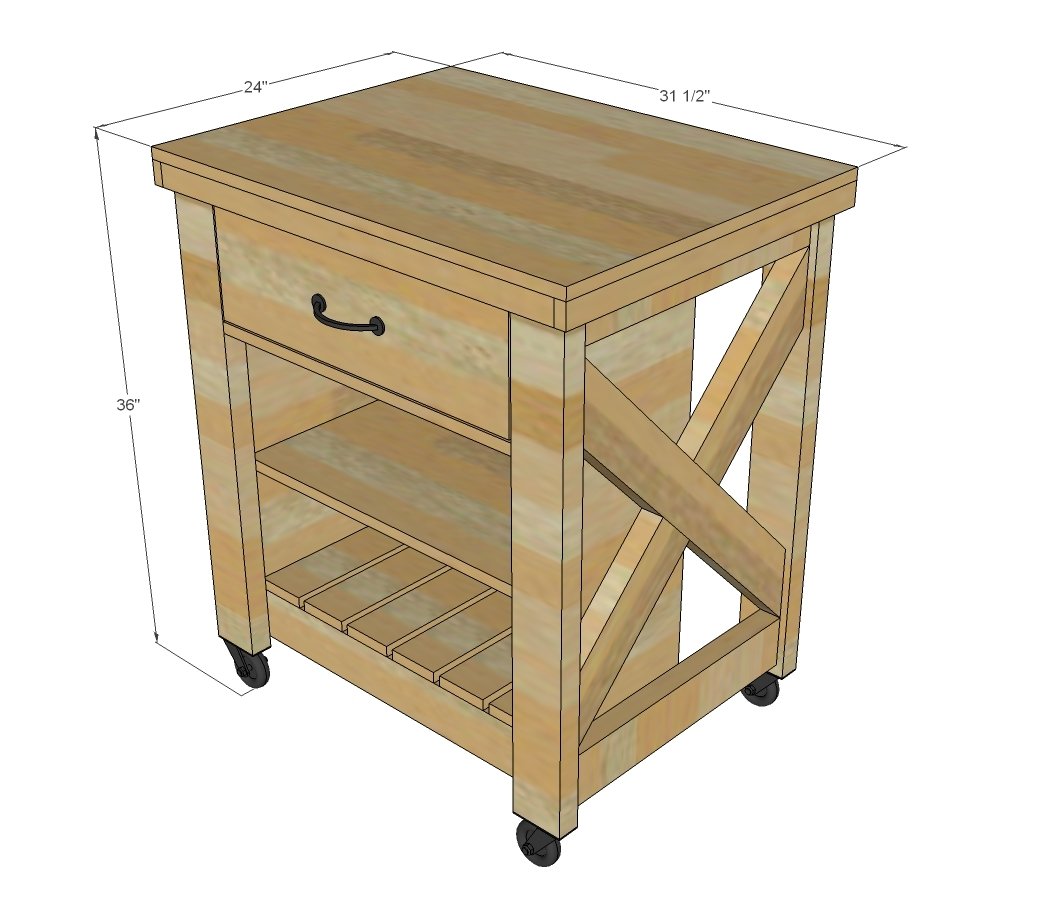
Use the size-specific shopping and cut lists below.
Shopping List
- 1 - Project Panel 24" wide x 32" long
- 4 caster wheels with overall clearance of 3"
- 1 handle
- 4 - 2x4 @ 8 feet long
- 1 - 1x4 @ 6 feet long
- 1 - 1x12 @ 8 feet long
- 1 - 2x2 @ 2 feet long
- 2 - 1x2 @ 8 feet long
- 1 - 1x6 @ 8 feet long
- 1 - 1x8 @ 2 feet long
- 1/4" plywood piece 10 1/2" x 19 3/4" (for drawer bottom)
Cut List
CUT LIST LEGS
- 4 - 2x4 @ 32 1/4"
- 4 - 2x4 @ 19 1/2"
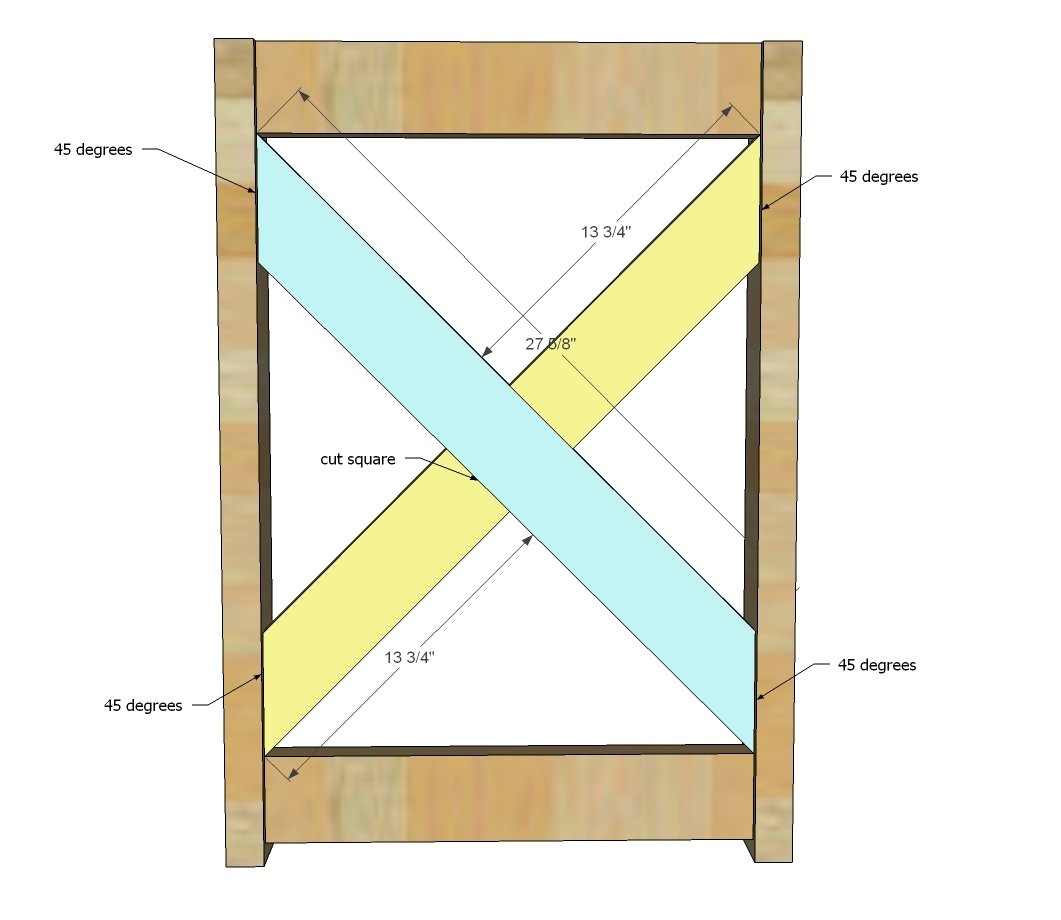
- 2 - 2x4 @ 27 5/8" - both ends cut at 45 degree angle, ends ARE parallel
- 4 - 2x4 @ 13 3/4" - one end cut at 45 degree angle, long point measurement
MIDDLE
- 2 - 2x4 @ 26"
- 2 - 1x12 @ 28"
- 6 - 1x4 @ 11 1/4"
- 2 - 2x2 @ 11 1/4"
- 1 - 1x2 @ 23" (drawer trim)
- 1 - 1x12 @ 24 1/2" (shelf)
DRAWER - cut to fit per your drawer slide recommendations
- 2 - 1x6 @ 19 3/4"
- 2 - 1x6 @ 12"
- 1 - 1/4" plywood @ 19 3/4" x 10 1/2"
- 2 - 1x2 @ 12"
- 1 - 1x8 @ 22 3/4"
TOP
- 2 - 1x2 @ 30"
- 2 - 1x2 @ 24"
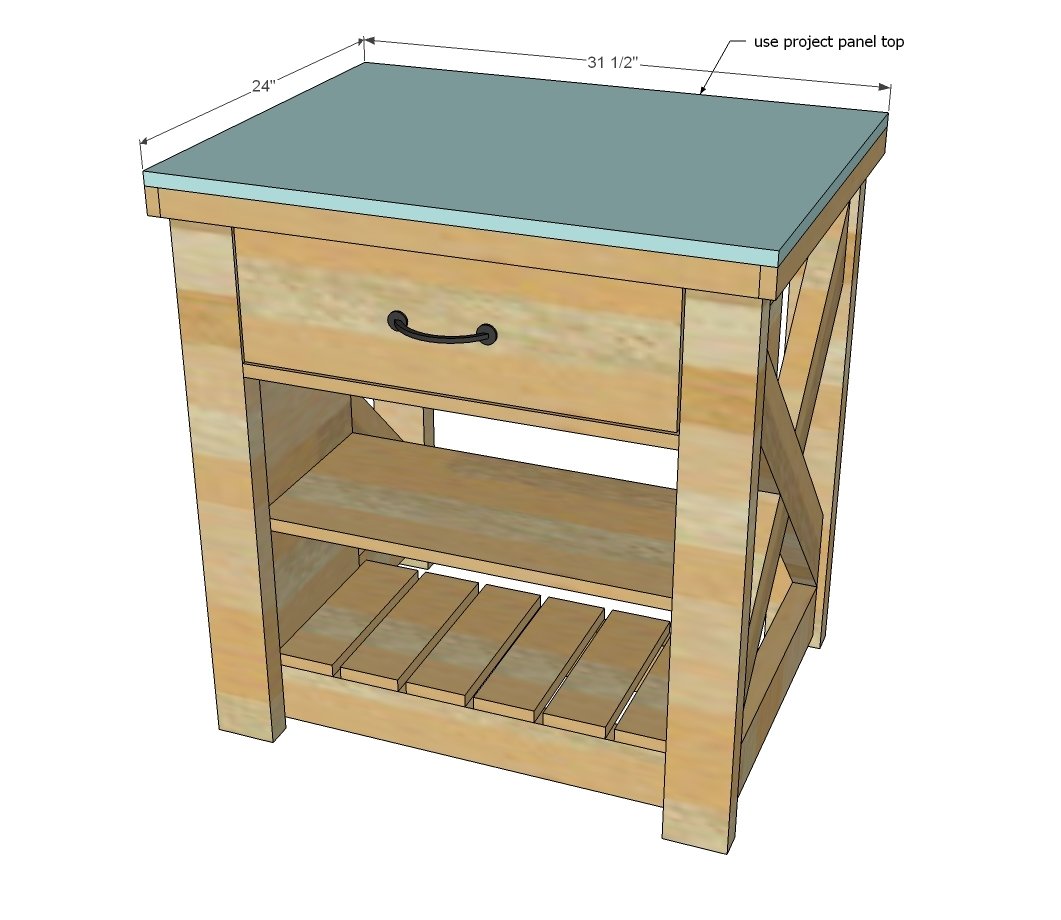
- 1 - project panel 24" wide x 31 1/2" long
Tools
- measuring tape
- square
- pencil
- safety glasses
- kreg-jig
- drill
- compound miter saw
- nailer
- sander
Step-by-step Instructions
Step 1
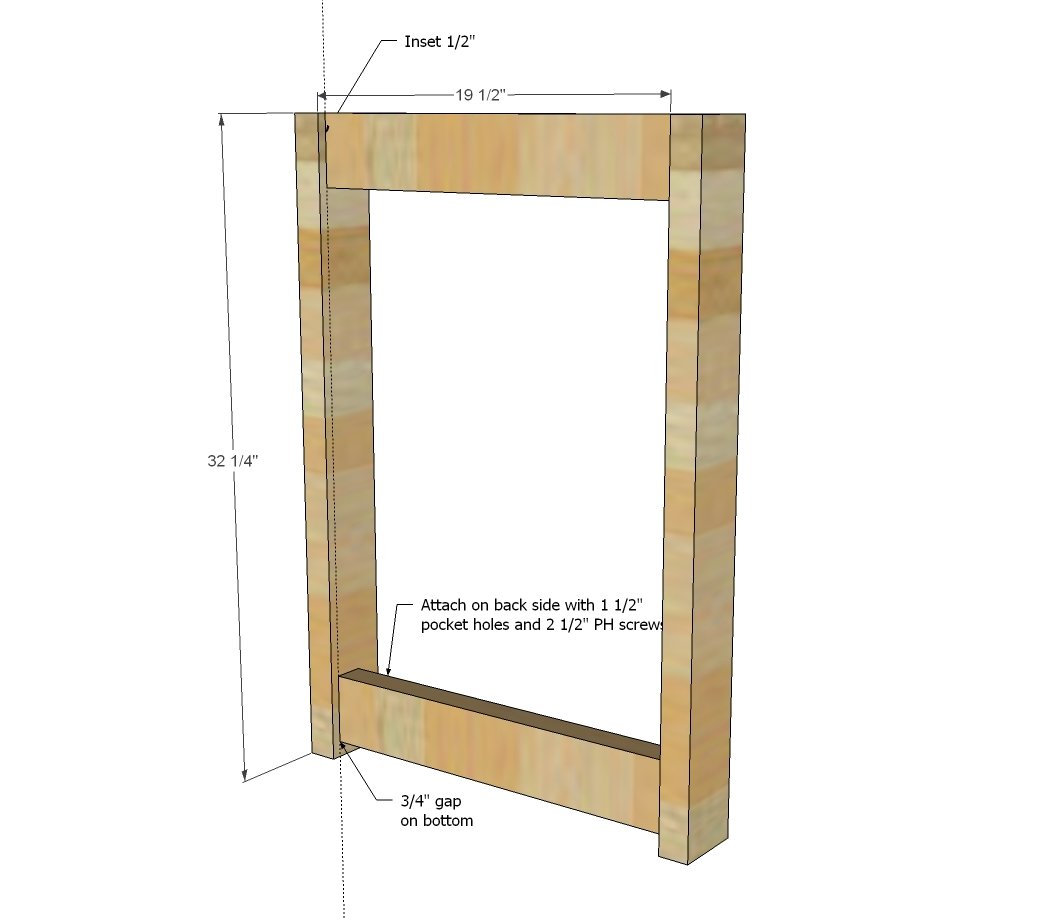
Build two of the legs frames with 1 1/2" pocket holes and 2 1/2" pocket hole screws.
Step 2
Fit the Xs in place and attach with 1 1/2" pocket holes and 2 1/2" pocket hole screws, flush to the top and bottom 2x4s from step 1.
Step 3
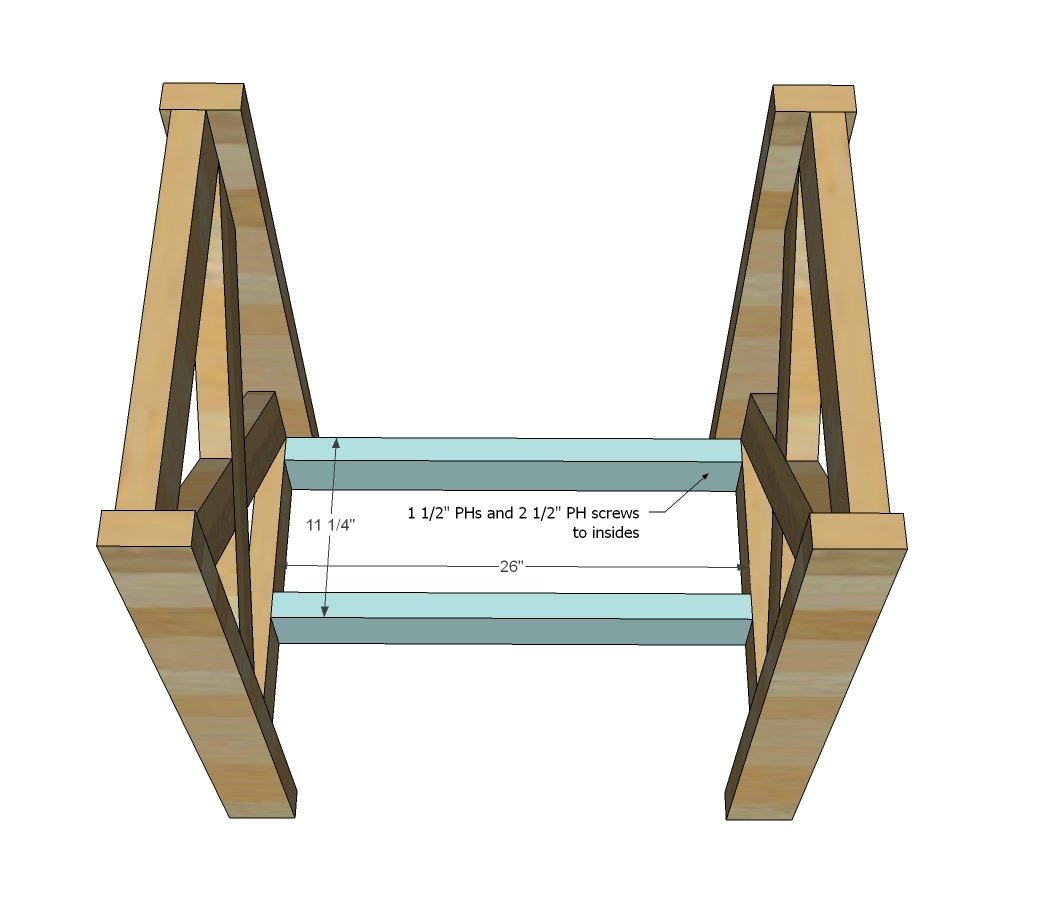
Attach the two leg sets togther with the 2x4s 26" long. Place 1 1/2" pocket holes on insides, and attach with 2 1/2" pocket hole screws and glue. Keep the 2x4 shelf supports 11 1/4" appart to match the width of a 1x12 board.
Step 4
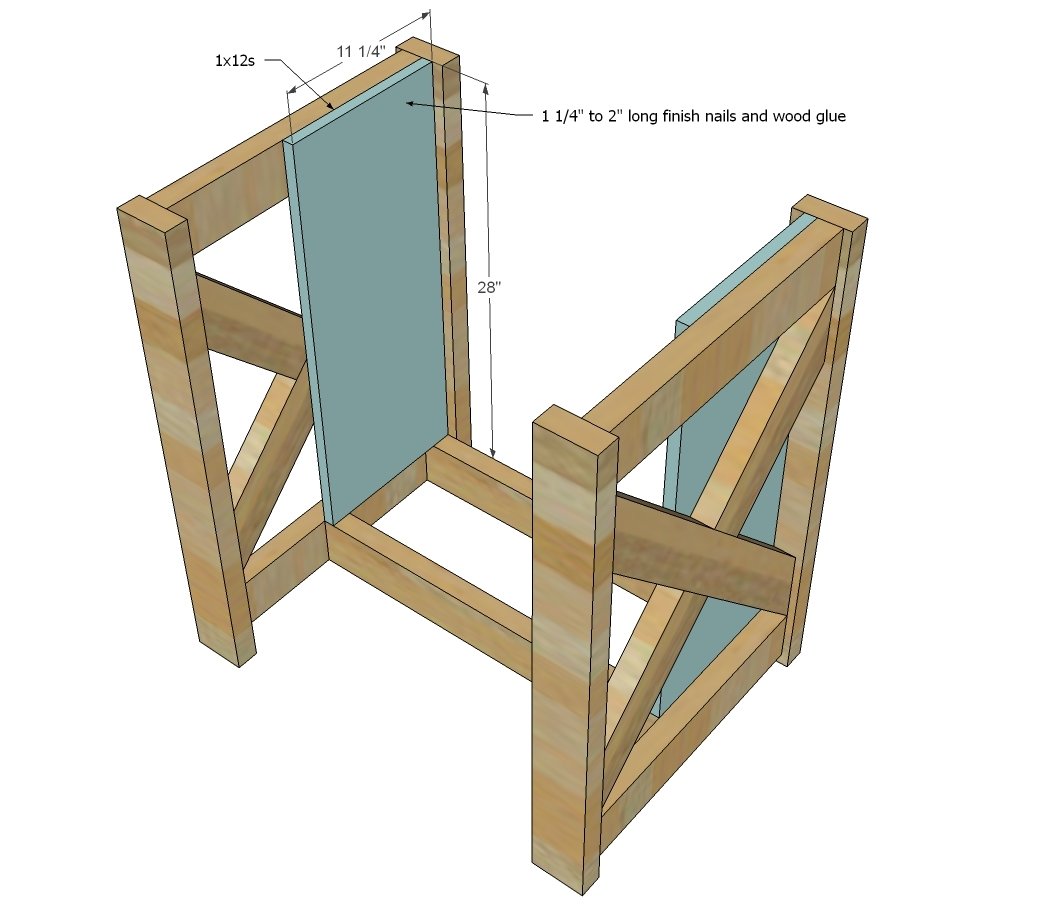
Place 1x12 boards on insides of side legs - this will create the storage area in the island. Use nails and glue to attach. You can also attach to the 2x4s at the bottom shelf supports with a 3/4' pocket hole and 1 1/4" pocket hole screw.
Step 5
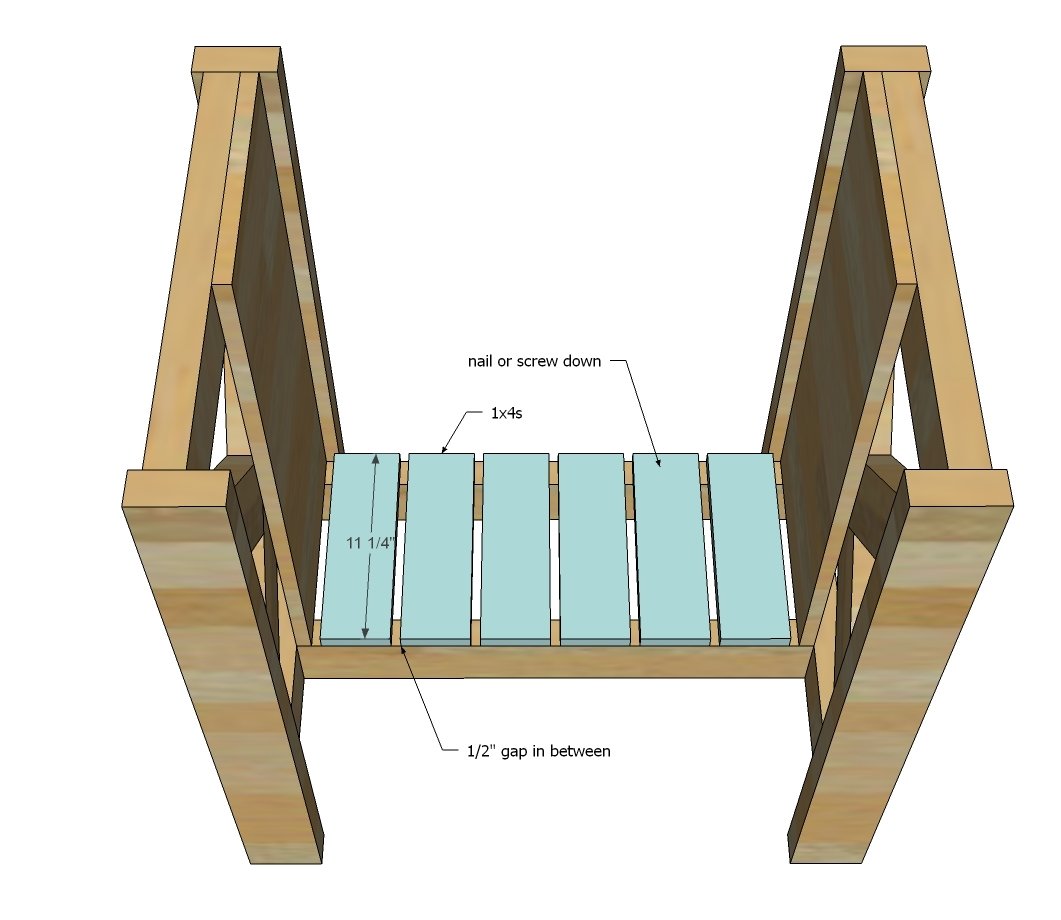
Add the bottom slats to the bottom shelf with the brad nails.
Step 6
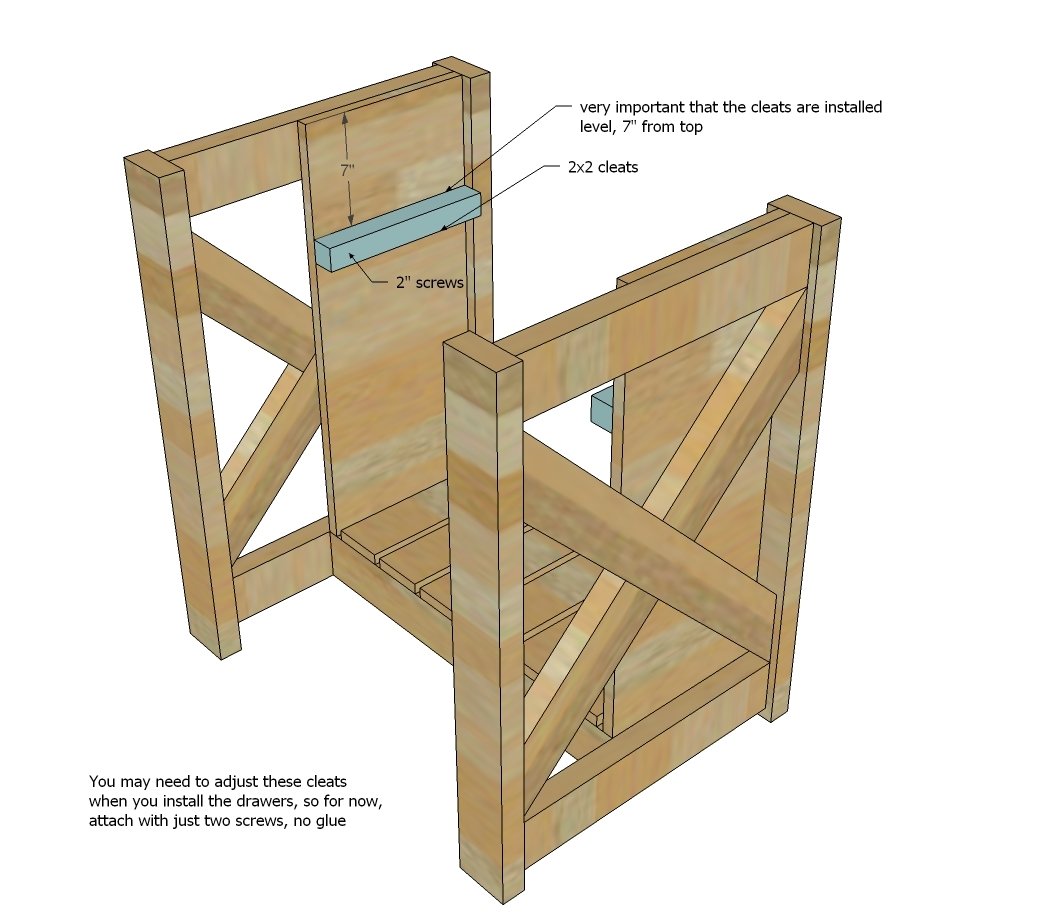
Add cleats for the drawers with 2" screws. Don't glue just yet as you may need to adjust to get your drawer just right.
Step 7
Let's move on to the top. Attach 1x2 trim to top with 2" wood screws and glue.
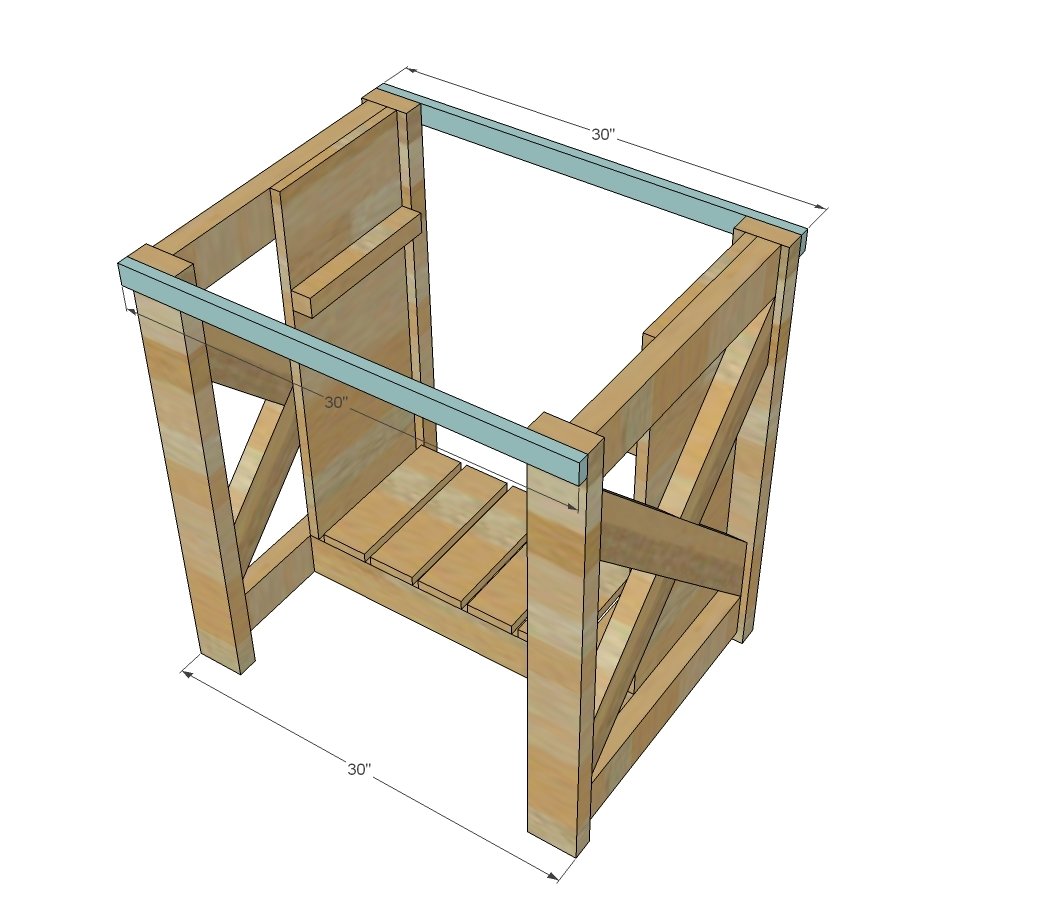
Step 8
Then finish out top sides with additional 1x2s.
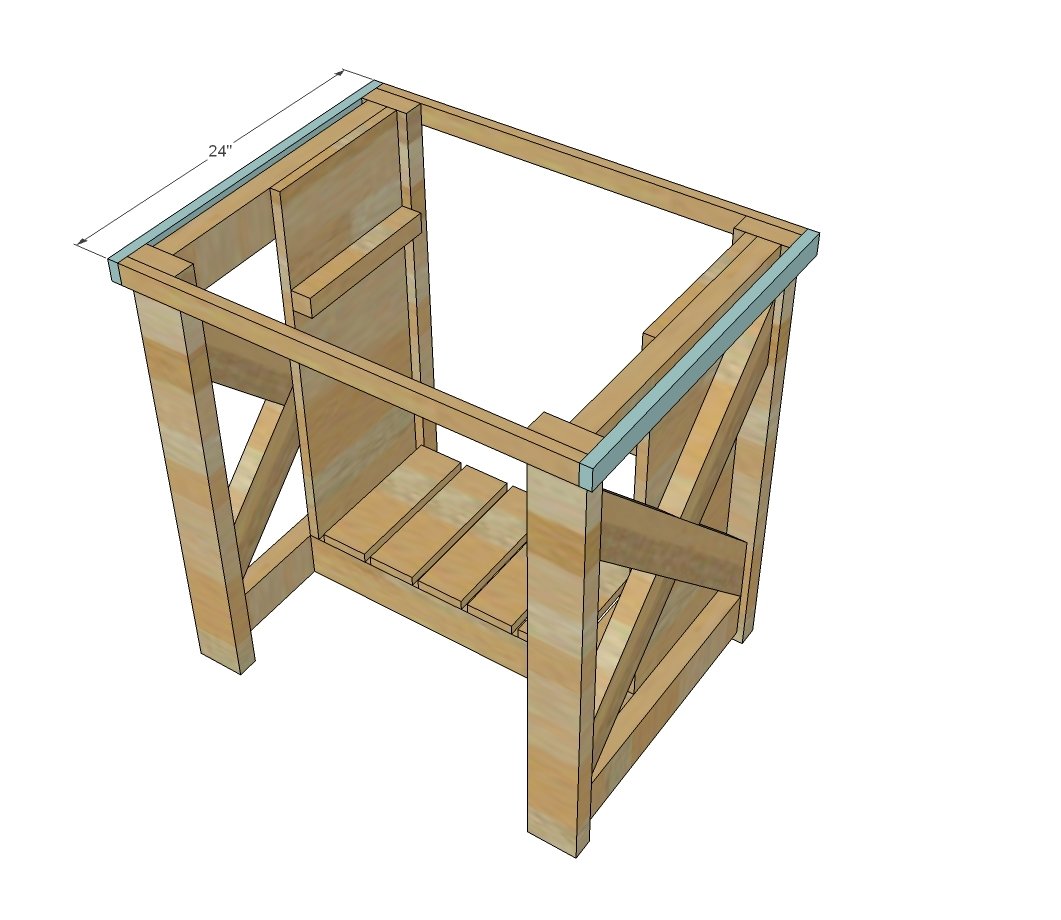
Step 9
Build the drawer out of 1x6s, attach bottom.
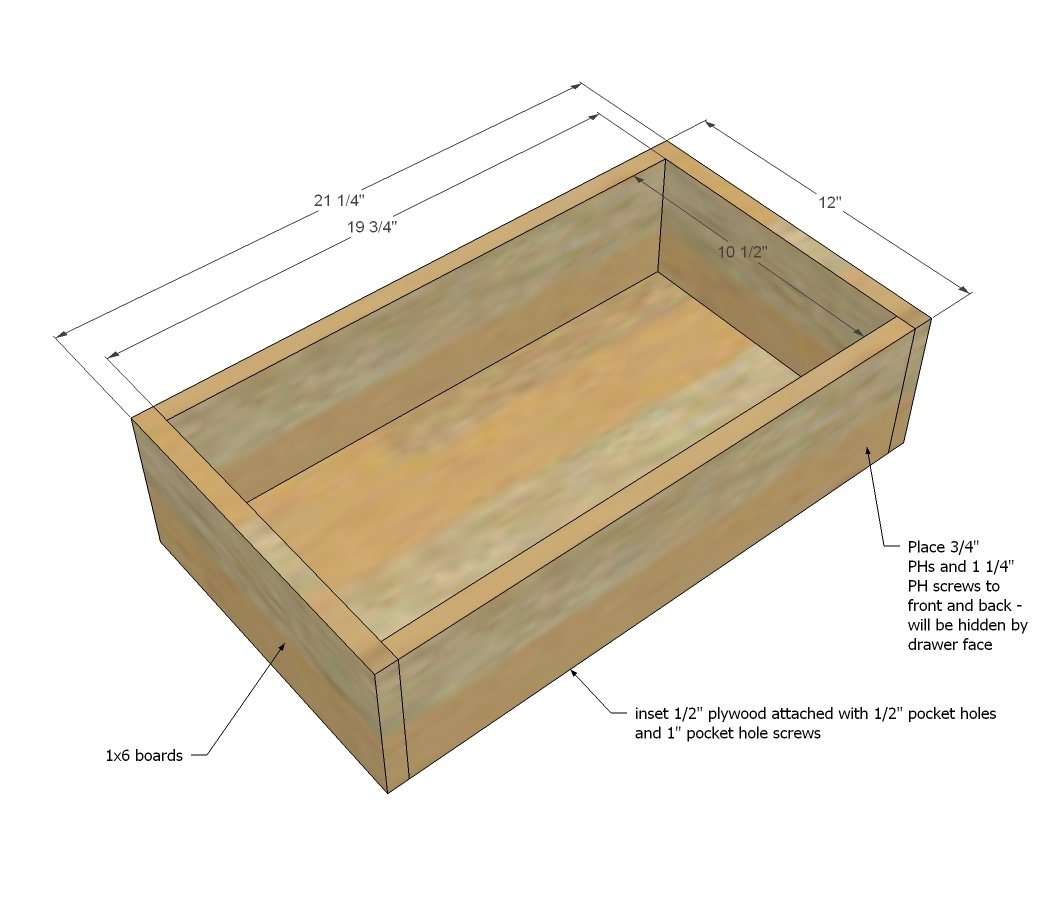
Step 10
Attach cleats level and precisely to sides of drawer with 1 1/4" screws. You could get away with nails here but the issue is you may need to adjust these cleats, so screws are ideal. The screw heads will need ot be below the surface of the cleat for the drawer to slide out.
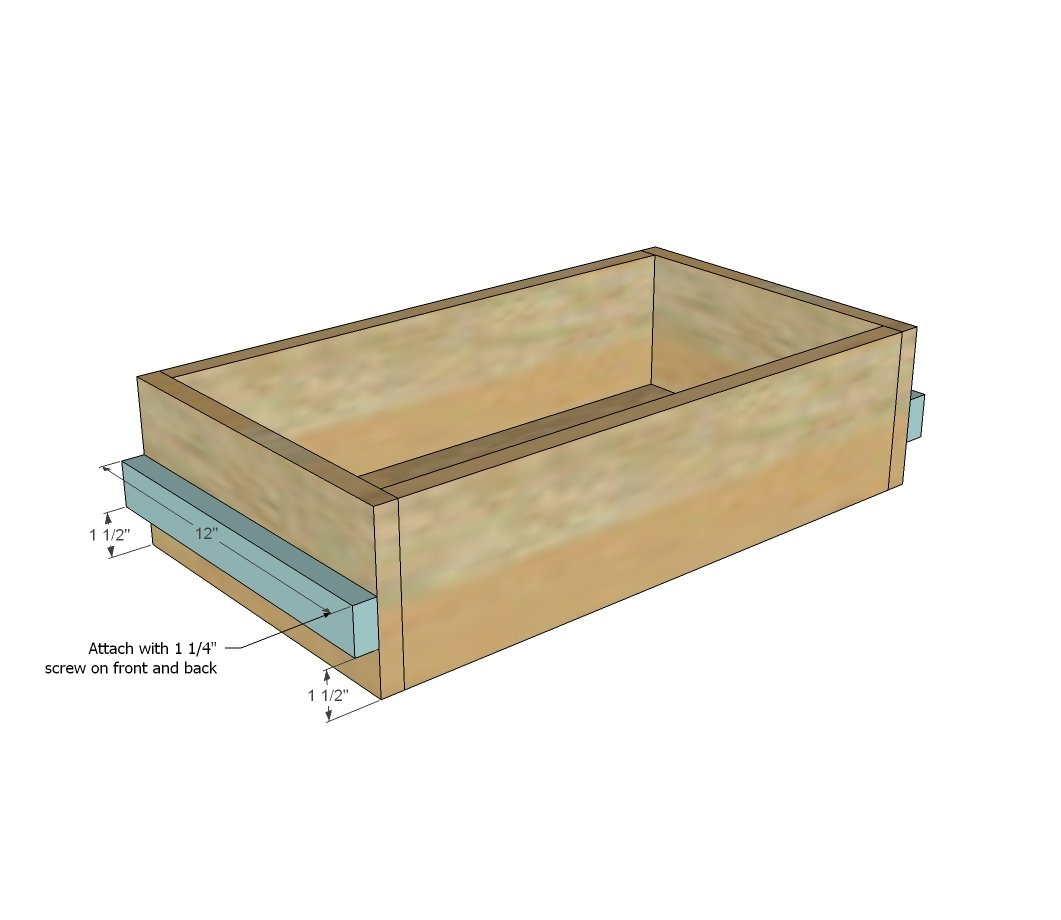
Step 11
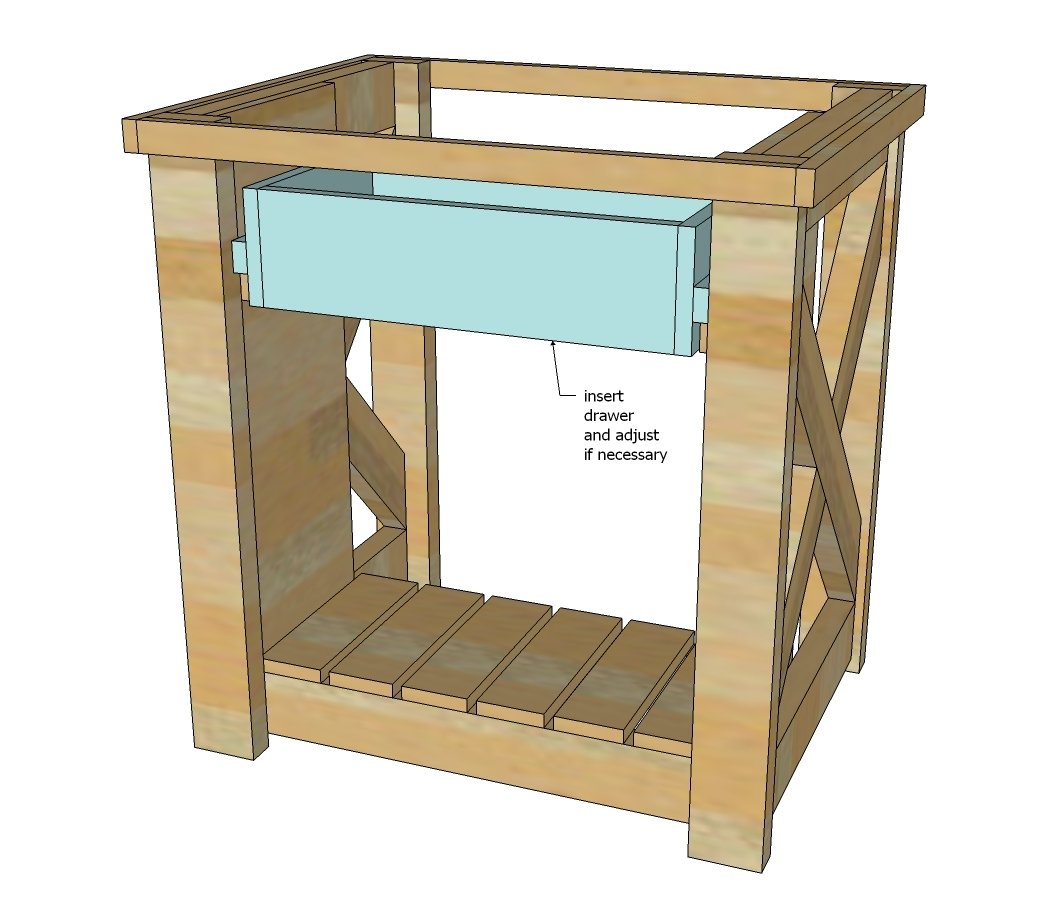
Fit the drawer in the island, on top of the 2x2 cleats from earlier. Adjust until your drawer slides perfectly. TIP: rub a candle on the cleats to get them to slide smoother.
Step 12
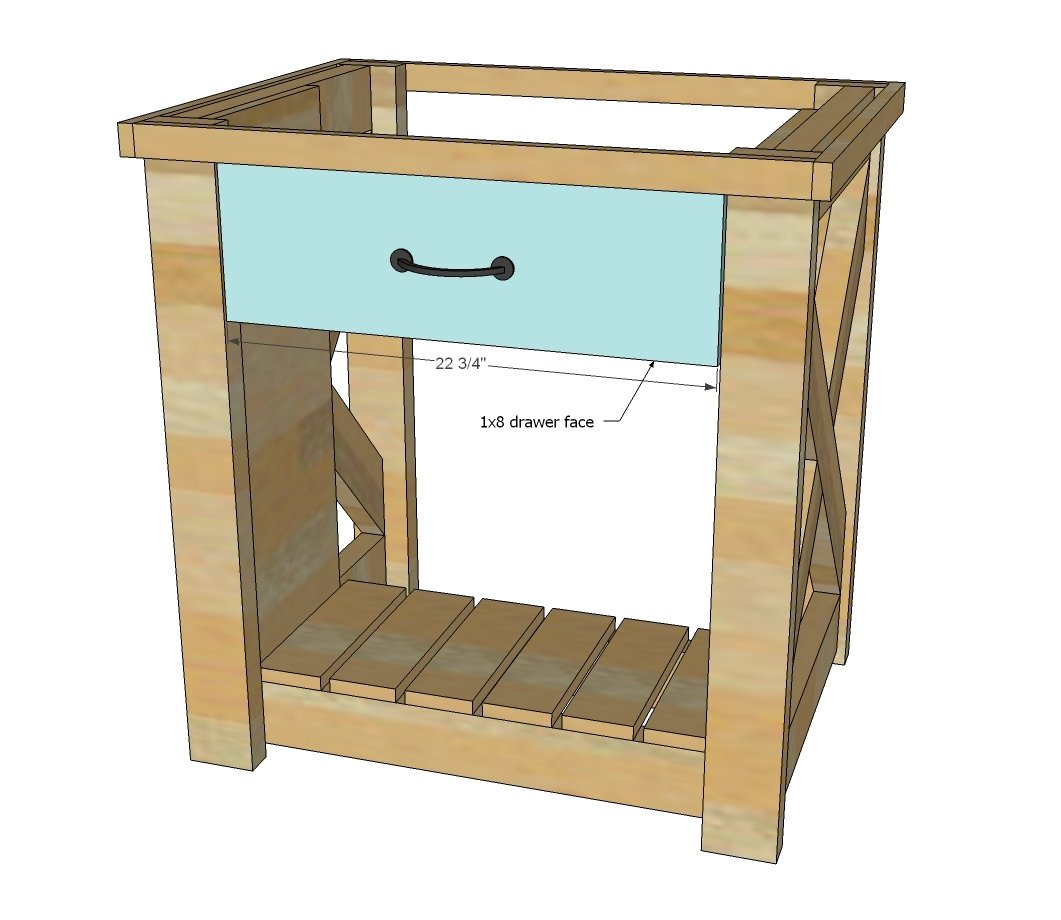
Attach drawer face with an 1/8" gap to sides and top.
Step 13
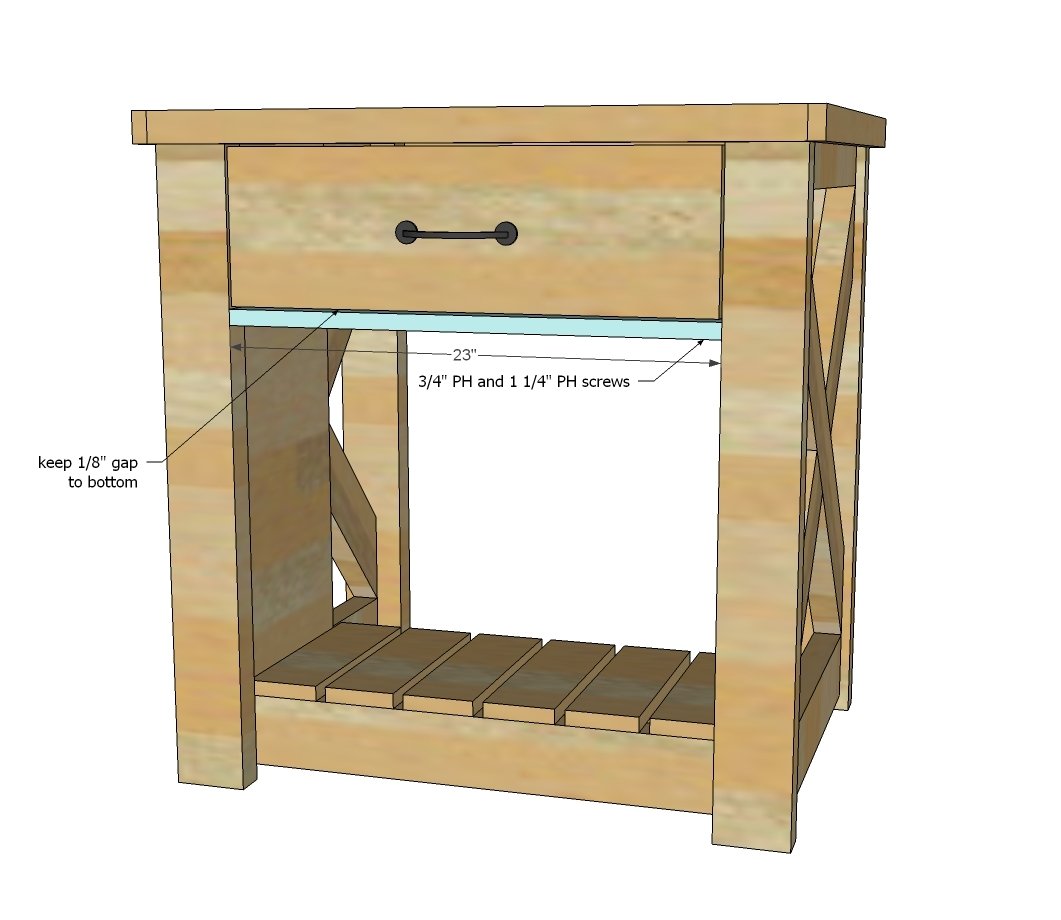
Attach bottom drawer trim with 3/4" pocket holes and 1 1/4" pocket hole screws to the legs, leaving an 1/8" gap under drawer face.
Step 14
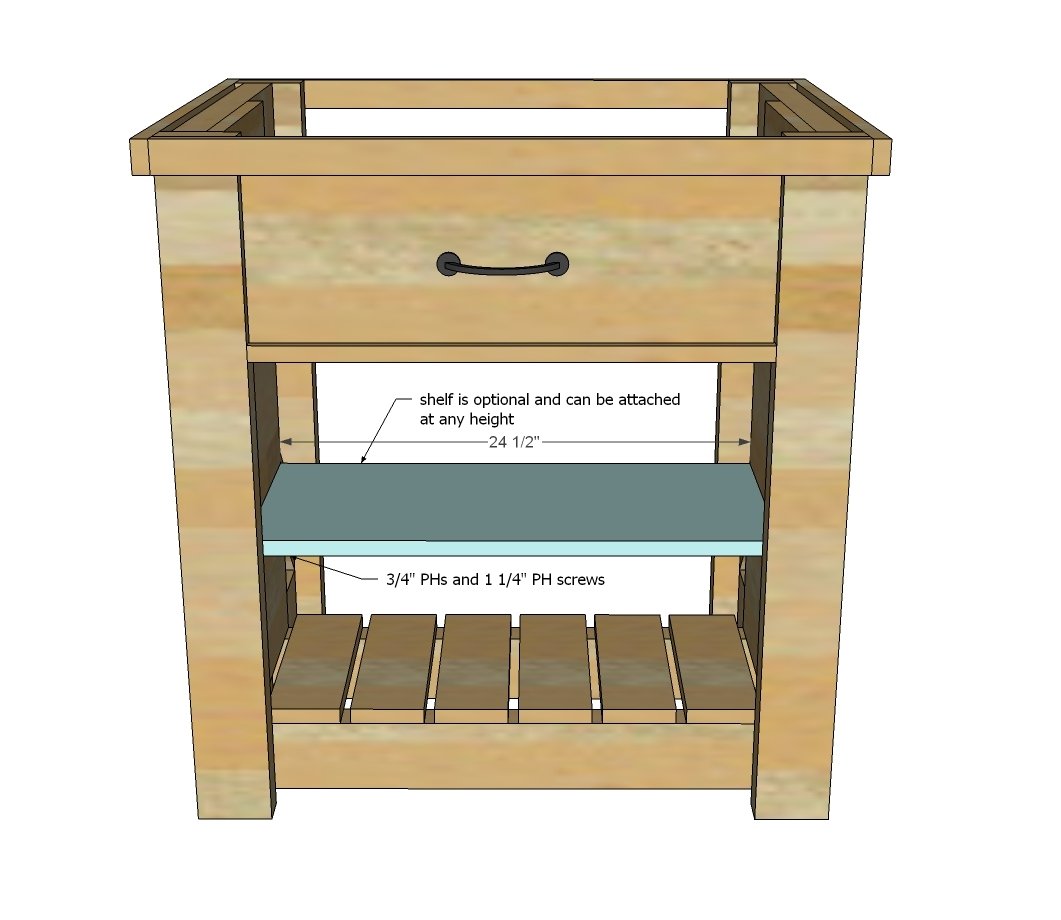
Shelf can be added at any height. Easiest way to attach is with 3/4" pocket holes and 1 1/4" pocket hole screws and glue.
Step 15
Attach premade top to island. You can hide screws by placing carefully on underside of 1x2 trim, using 2" screws countersunk. You must predrill for these screws as the 1x2s will split out on you.
Step 16
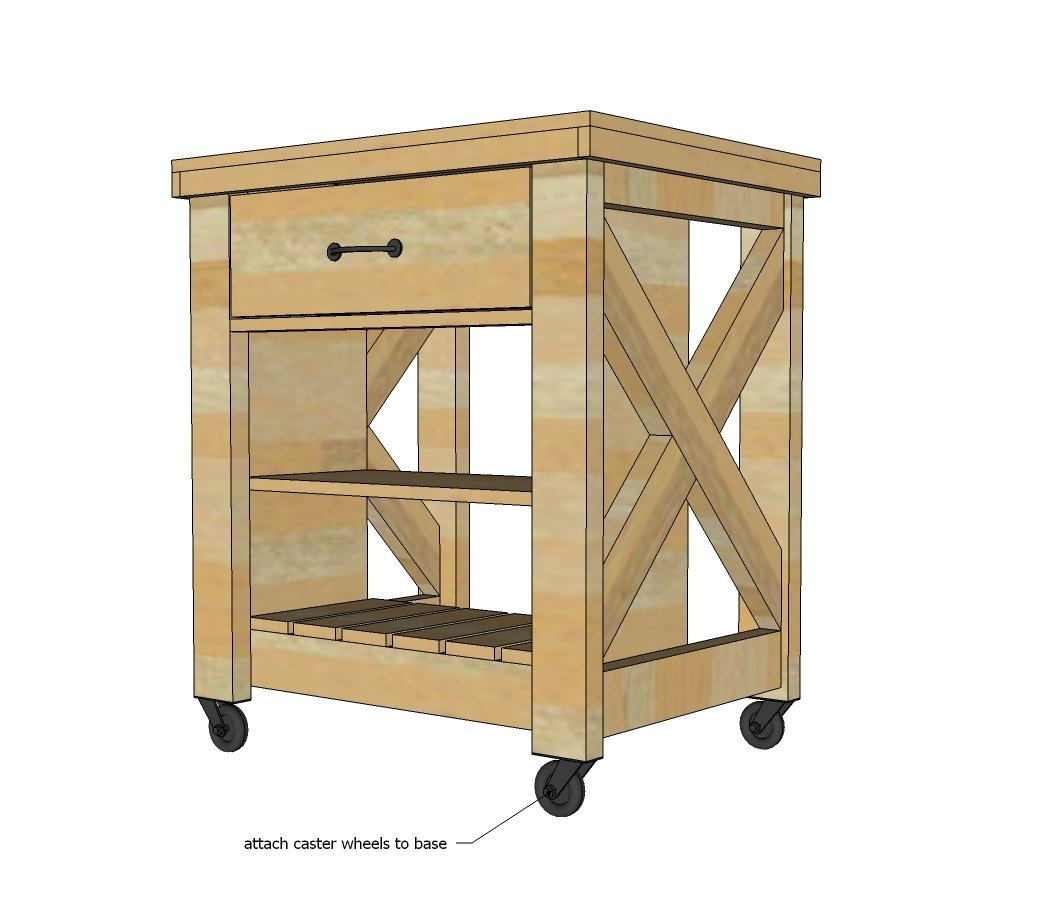
Attach caster wheels to base.
Finishing
Sand all surfaces, starting with a medium grit and finishing with fine. Wipe off the dust, fill any holes or gaps with wood filler, and sand smooth once dry. Apply primer if you're painting, then finish with your choice of paint or stain and seal with a durable clear topcoat. For outdoor projects, use exterior-rated primer, paint or stain, and sealer so the piece stands up to the weather.
Source (temporary): https://www.ana-white.com/woodworking-projects/rustic-x-small-rolling-kitchen-island