Rustic X Tall Bookshelf
Rustic X-Detail Bookshelf — Bring craftsmanship and timeless style into your home with this DIY bookshelf featuring X-frame detailing. Built entirely from sturdy 2x lumber, this design combines durability with the classic farmhouse look of cross-braced sides. With its solid build and versatile dimensions, this bookshelf is equally at home in a modern living room, farmhouse entryway, or cozy reading nook. The open, airy sides with X detailing not only add structural strength but also highlight the rustic design character, making the piece both functional and decorative. Features: • Strong 2x lumber construction for durability and longevity • X-frame sides for added stability and farmhouse charm • Multiple spacious shelves for books, baskets, plants, and décor • Wide, sturdy top surface for displaying larger items • Designed with a clean, neutral style that blends easily with modern, transitional, or rustic interiors • Can be finished in paint, stain, or natural wood tones for complete customization Specifications (adjustable per plan): • Height: Ideal for vertical storage and display • Width: Balanced proportions for small or large rooms • Depth: Wide enough for oversized books or storage baskets • Material: Standard 2x lumber (affordable and easy to source) Perfect For: • Living rooms — Display books, framed photos, plants, or collectibles • Entryways — Store baskets for shoes, bags, or seasonal accessories • Dining rooms — Showcase serving ware, décor, or wine storage baskets • Offices — Organize books, storage bins, and work essentials What You Get in the: • Cut list and materials list using common 2x lumber • Step-by-step building instructions with diagrams • Assembly tips for strong joints and a professional finish • Finishing guide for stain, paint, or rustic weathered looks Why Build It Yourself? Buying a farmhouse bookshelf of this quality in stores can cost hundreds of dollars. With this plan, you can build it yourself using inexpensive, durable 2x lumber while customizing the finish to perfectly match your home. The build is straightforward enough for a weekend project but yields a professional-looking piece that will last for years. Download the today and create a bookshelf that combines functionality, durability, and rustic farmhouse charm. Whether you’re an experienced woodworker or a DIY beginner ready to take on a rewarding project, this X-Detail Bookshelf will be a centerpiece in your home.
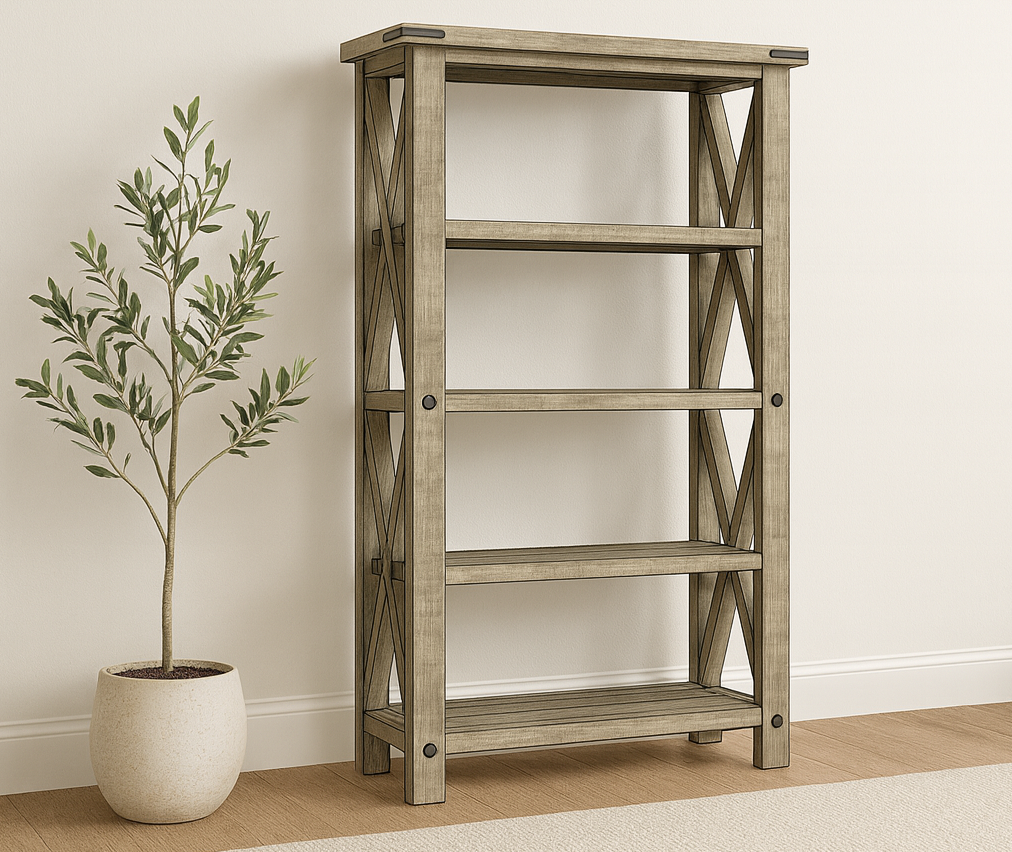
Specifications
| Project type | Bookshelf and Bookcase Plans |
|---|---|
| Room | Storage Solutions |
| Style | Farmhouse Furniture |
| Difficulty | Intermediate |
| Estimated cost | $50 - $100 |
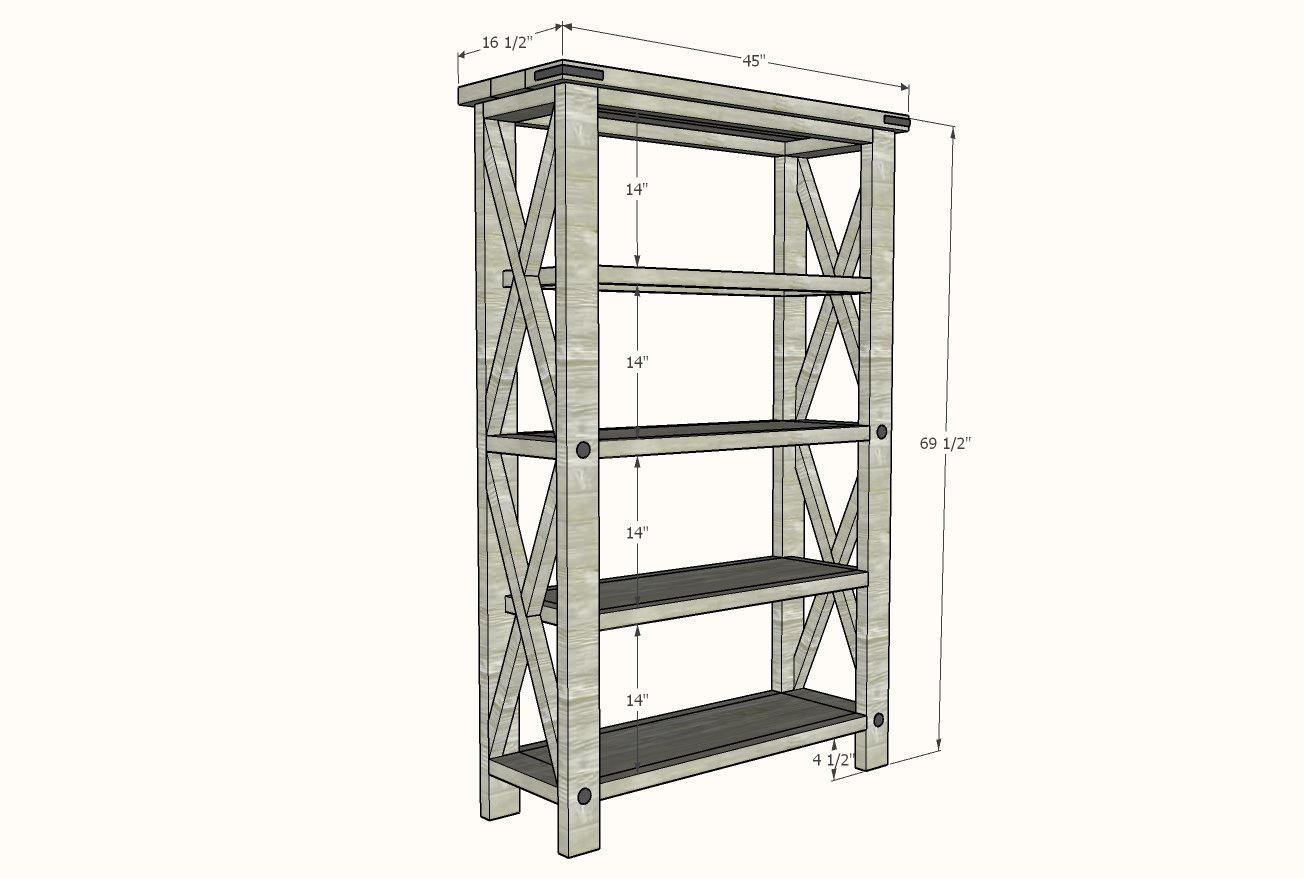
Dimensions
Use the size-specific shopping and cut lists below.
Shopping List
- 8 - 2x2 @ 8 feet long
- 4 - 1x12 @ 6 feet long
- 4 - 2x4 @ 8 feet long or stud length
- 1 - 2x6 @ 12 feet long (can be cut down to 8 feet for transport)
Cut List
- 4 - 2x4 @ 68"
- 10 - 2x2 @ 35-1/2"
- 6 - 2x4 @ 11-1/4" - matches width of 1x12s
- 4 - 2x2 @ 11-1/4" - matches width of 1x12s
- 4 - 1x12 @ 35-1/2"
- 3 - 2x6 @ 45"
- 2x2 X detailing should be cut to fit
Tools
- measuring tape
- square
- pencil
- safety glasses
- hearing protection
- kreg-jig
- drill
- circular saw
- compound miter saw
- sander
Step-by-step Instructions
Step 1
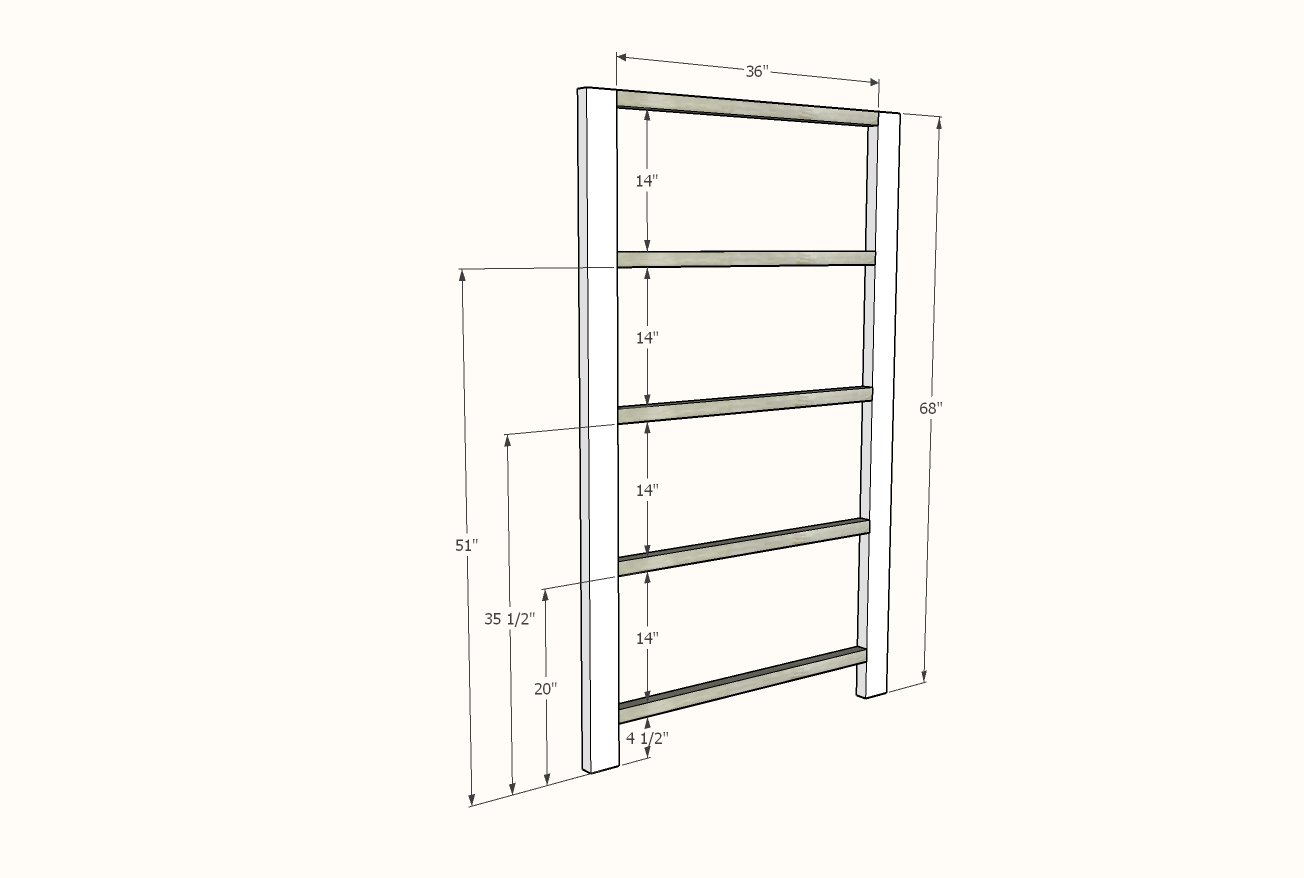
TIP: You may wish to drill all the 3/4" pocket holes on the 1x12s in step 3 first, then set your Kreg Jig to the 1-1/2" setting for all remaining pocket holes, so you don't have to reset your Kreg Jig. Drill a pocket hole on each end of the 2x2 @ 36" on the 1-1/2" setting. Attach to 2x4 legs, clamping while you join, with 2-1/2" pocket hole screws and wood glue. Build two identical frames.
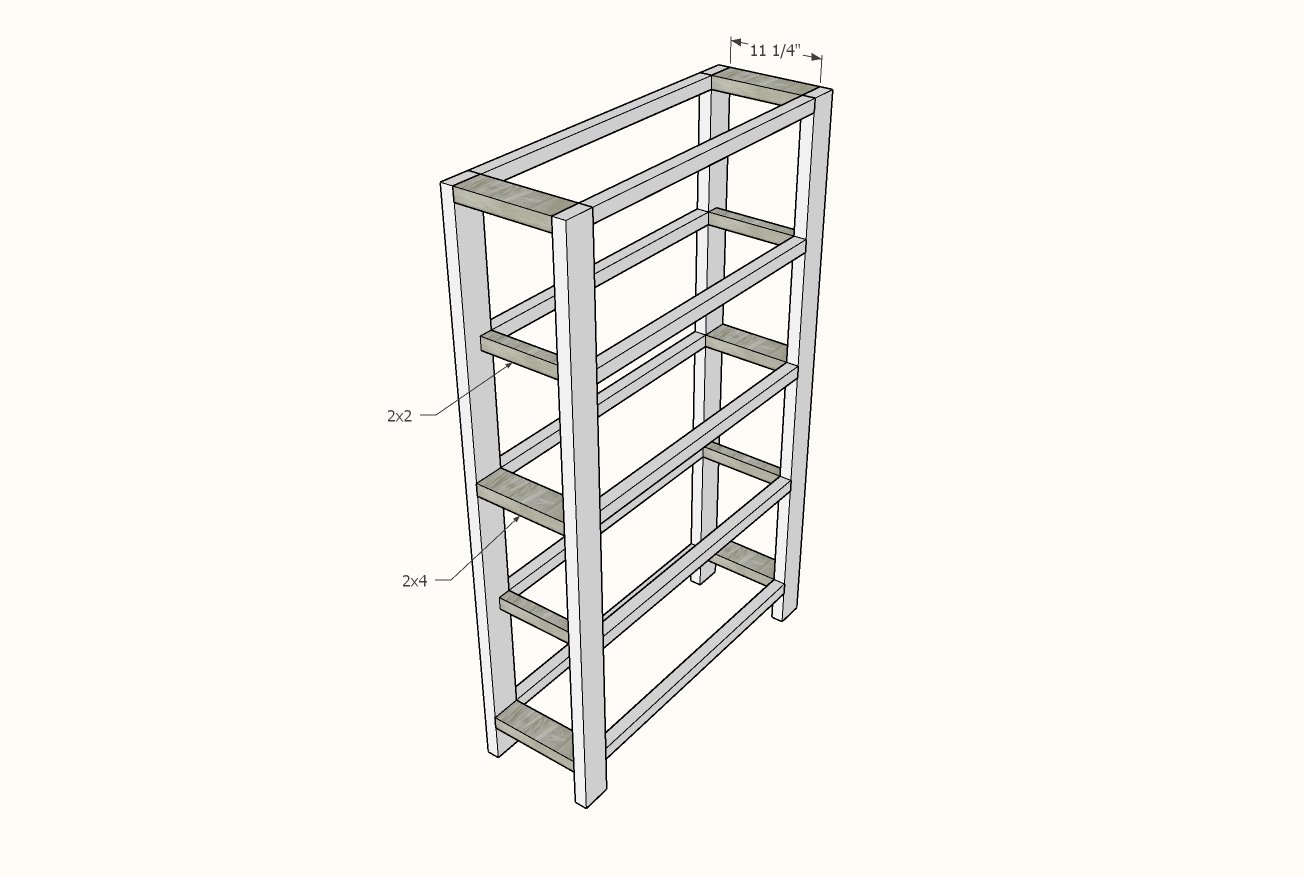
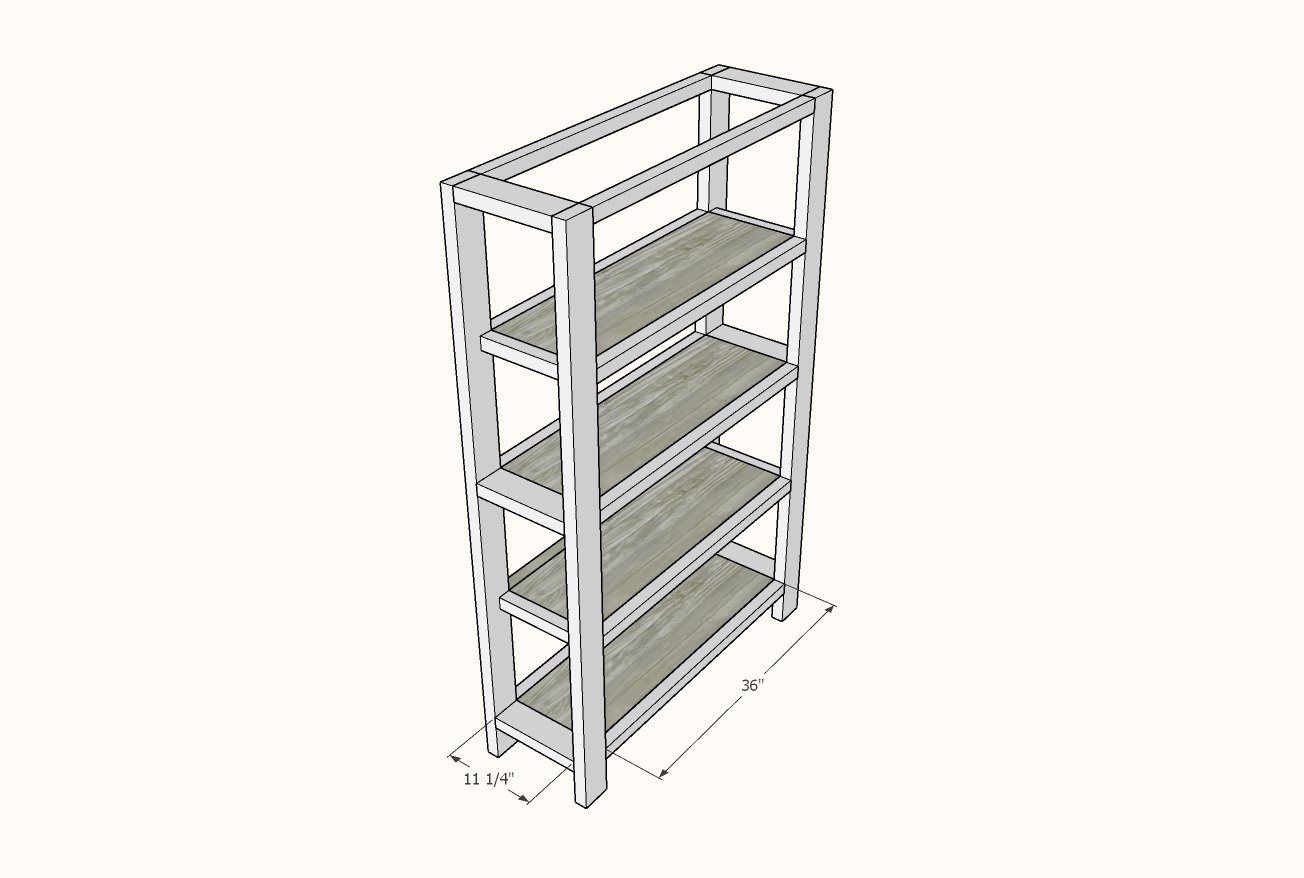
Measure the width of your 1x12s. They should be 11-1/4" wide.
Cut the 2x4s and 2x2s to match this width. Drill two pocket holes on ends of 2x4s, one on ends of 2x2s. Attach to the frames with 2-1/2" pocket hole screws and wood glue.
Drill 3/4" pocket holes, two per ends, and three along long edges, of the 1x12 shelves.
Attach with 1-1/4" pocket hole screws inside the bookshelf.
Step 4
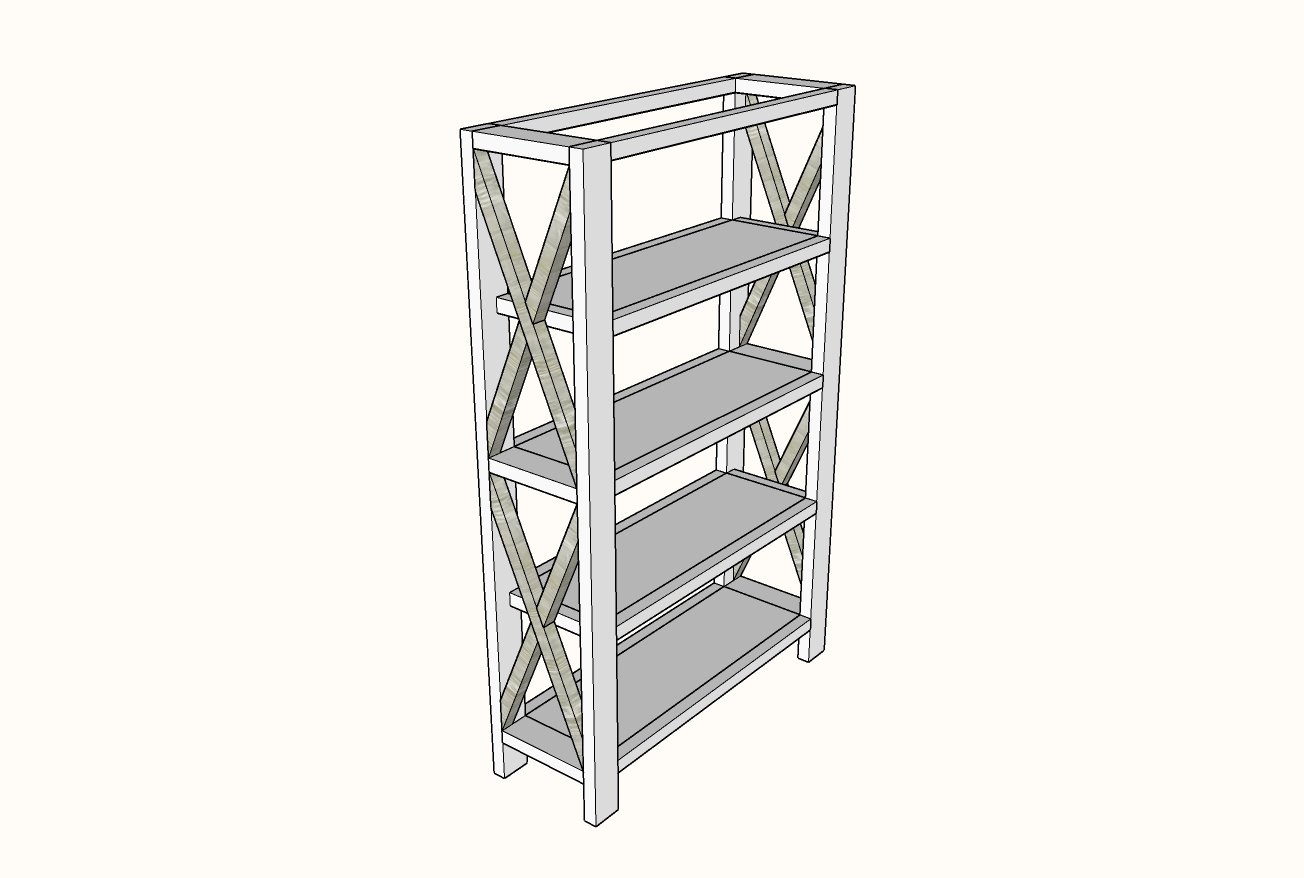
The best way to do the Xs is place 2x2s alongside where you want them to go, and trace the angles, and then cut the angles with a circular saw. I recommend attaching the shorter X pieces to the longer X piece before attaching the entire X inside the bookshelf. To see how I do this, you can watch this video.
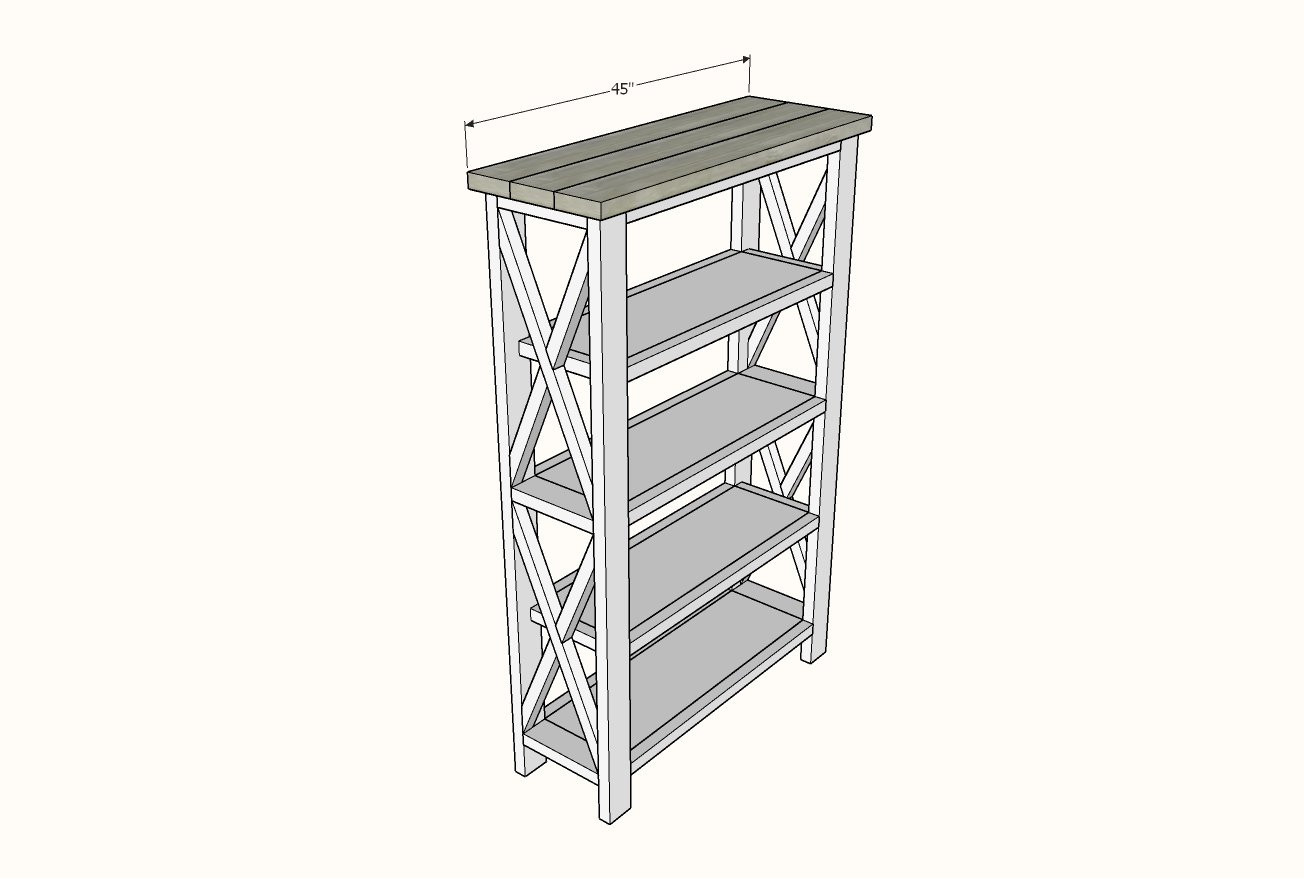
Lay the 2x6s on top of the bookshelf, with even overhangs on all sides.
Mark where the 2x6s cross the top 2x4 on your shelf ends. Remove and attach the 2x6s together, inside where you marked, so the pocket holes will be hidden. Apply glue all the way down the joint. Attach the entire top to the top of your bookshelf with 2-1/2" screws (you can use pocket hole screws, but they are more expensive than regular self tapping wood screws)
Finishing
Sand all surfaces, starting with a medium grit and finishing with fine. Wipe off the dust, fill any holes or gaps with wood filler, and sand smooth once dry. Apply primer if you're painting, then finish with your choice of paint or stain and seal with a durable clear topcoat. For outdoor projects, use exterior-rated primer, paint or stain, and sealer so the piece stands up to the weather.
Source (temporary): https://www.ana-white.com/woodworking-projects/rustic-x-tall-bookshelf