Sand and Water Play Table
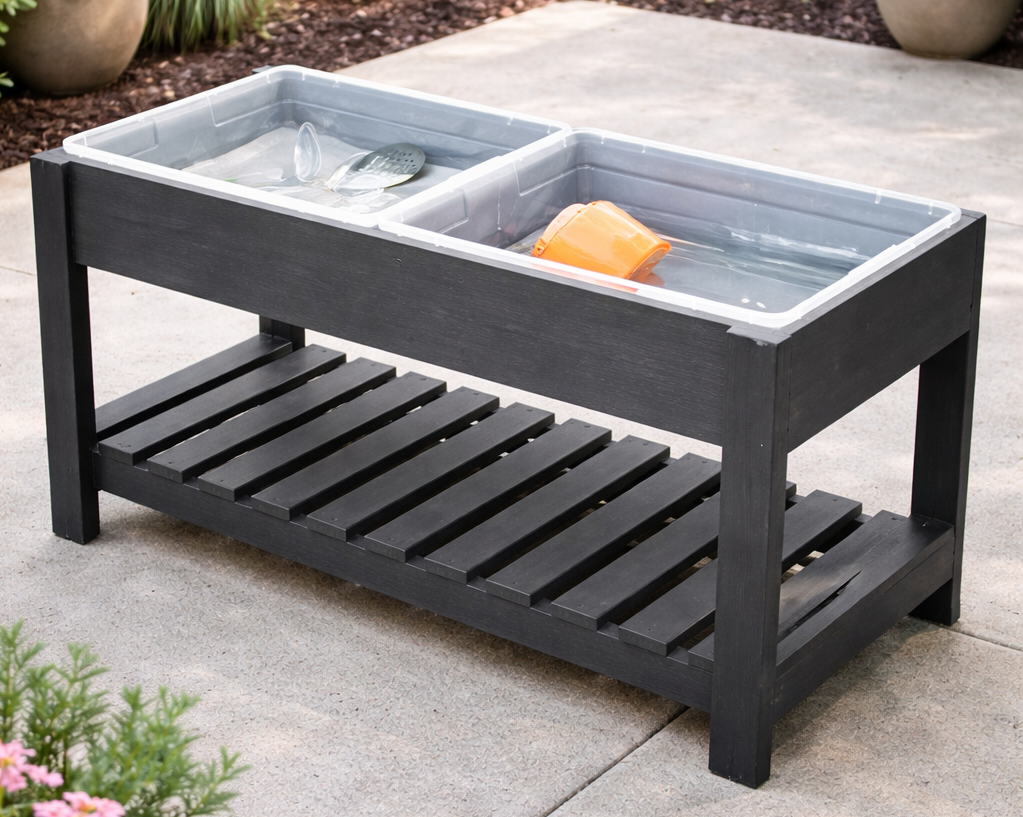
Build your own sand and water play table. Uses $6 storage bins for tubs. Free easy!
Specifications
| Project type | Kids Tables and Chairs |
|---|---|
| Room | Outdoor |
| Style | Children's and Kid's Room Furniture and Toy Plans |
| Difficulty | Beginner Projects |
| Estimated cost | $20 - $50 |
Dimensions
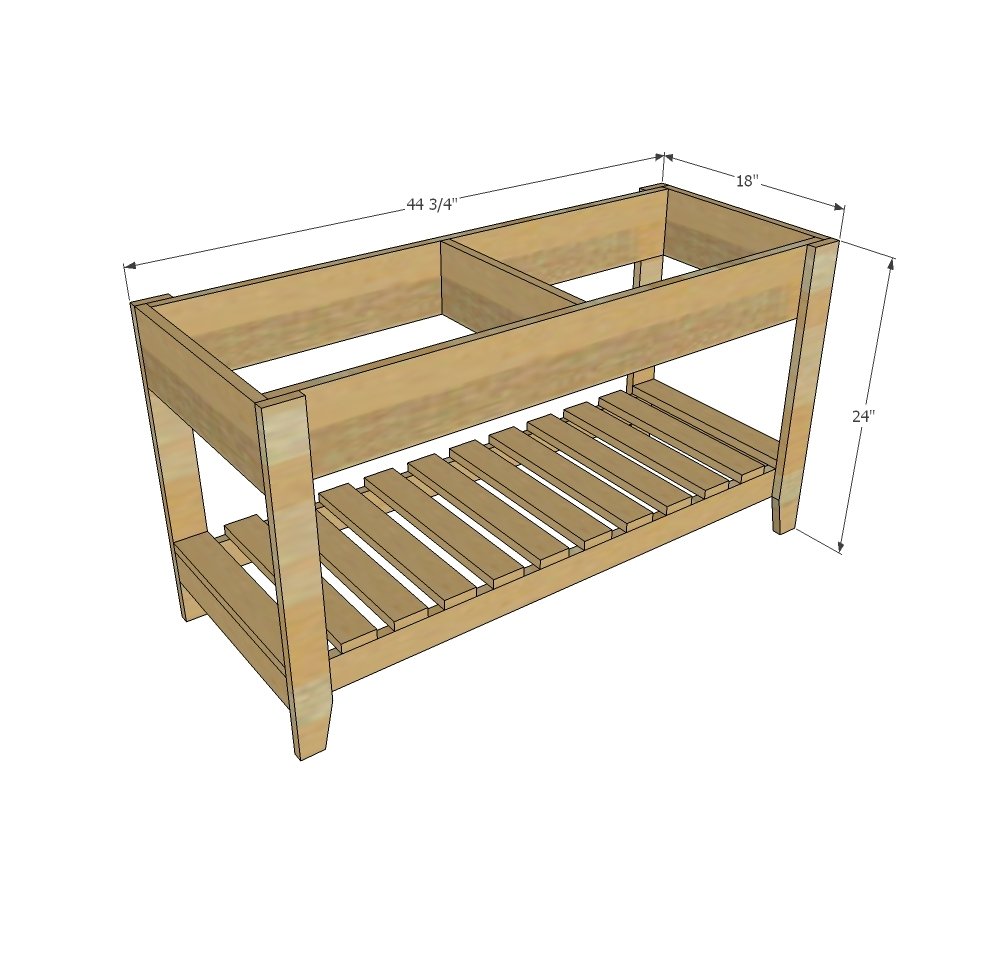
Use the size-specific shopping and cut lists below.
Shopping List
- 2 - plastic tubs ( we used these, if using different tubs, make sure you adjust the plans)
- 5 - 1x3 @ 8 feet long
- 1 - 1x6 @ 12 feet long (can cut into 4' and 8' pieces for transport - be careful to place cuts to get all the pieces out of the board)
Recommend screws for attaching if used outdoors without rain cover (wood will swell when it gets wet, and this will push nails out over time. Use #8 exterior rated self tapping screws, 2" and 1-1/4" length. May need to predrill though the 1x3 boards as they do tend to split out.
Cut List
- 2 - 1x6 @ 43-1/4" - top sides
- 1 - 1x6 @ 15" - top divider
- 2 - 1x6 @ 16-1/2" - top ends
- 2 - 1x3 @ 43-1/4" - shelf sides
- 2- 1x3 @ 16-1/2" - shelf ends
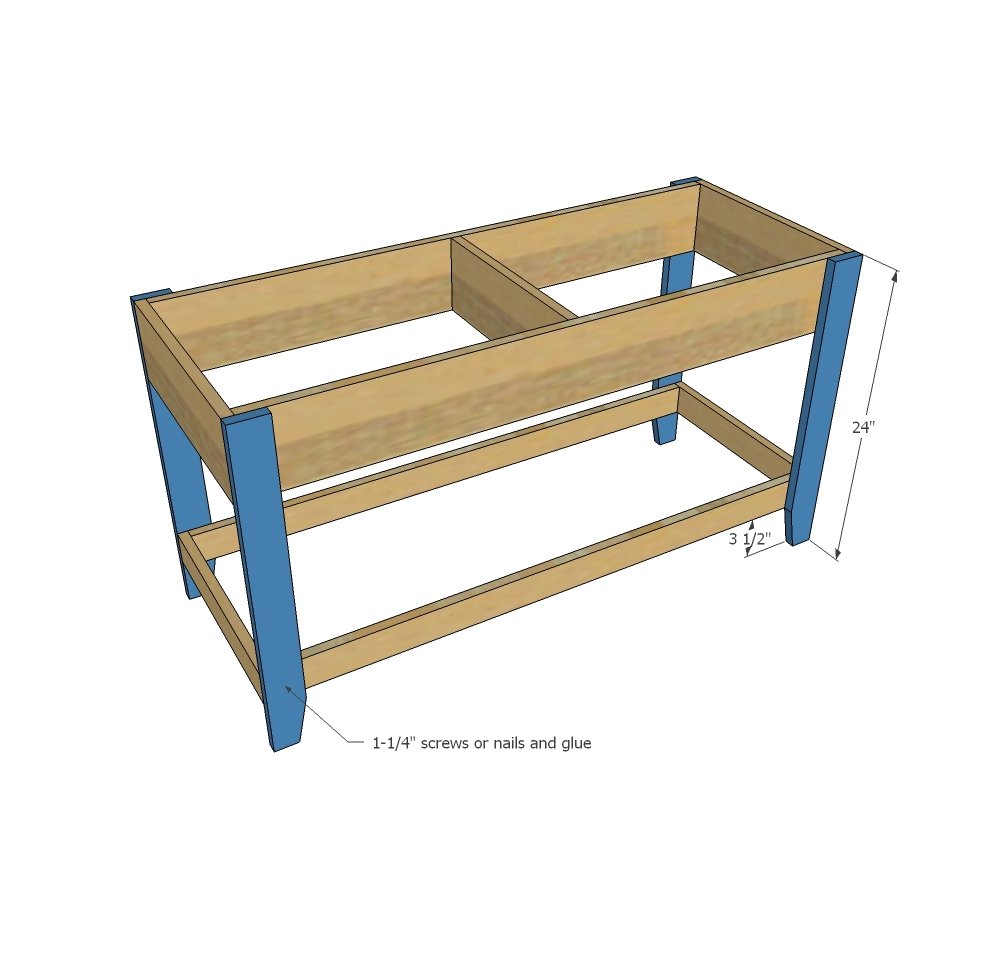
- 4 - 1x3 @ 24" - legs
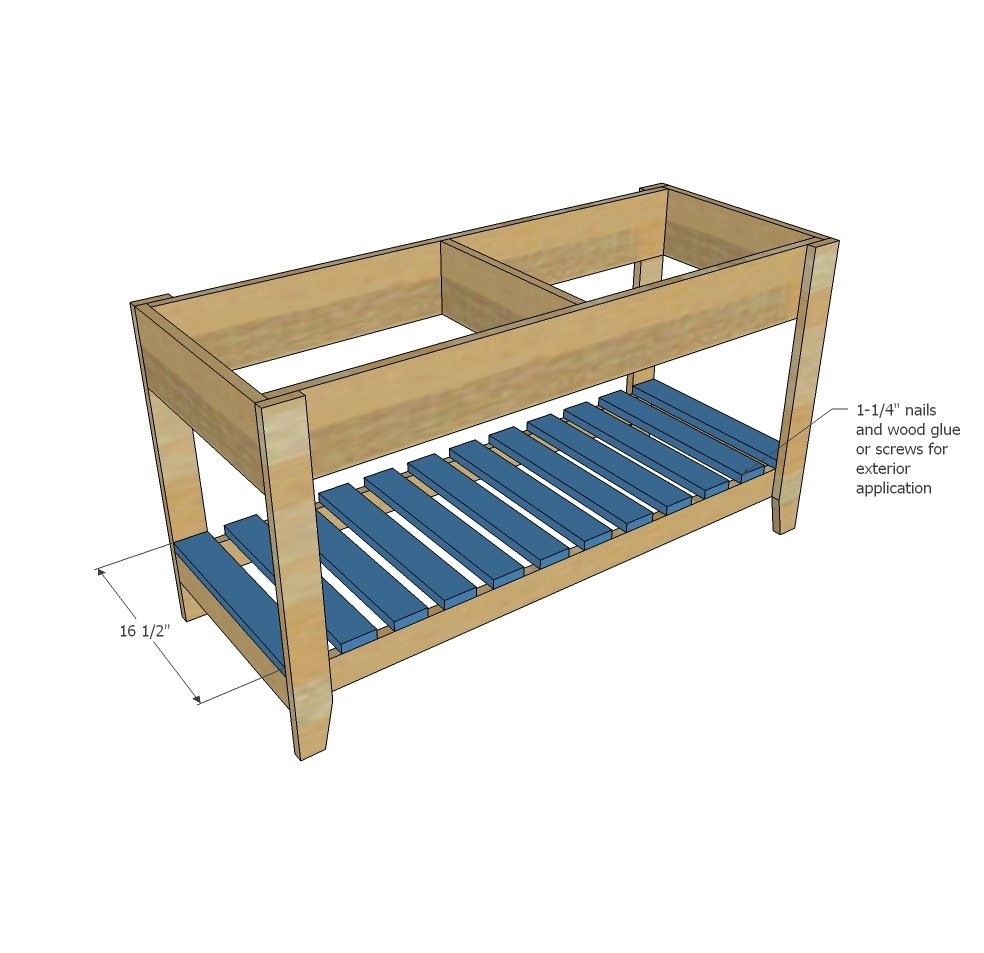
- 12 - 1x3 @ 16-1/2" - shelf slats
Tools
- measuring tape
- square
- pencil
- safety glasses
- hearing protection
- drill
- compound miter saw
- sander
Step-by-step Instructions
Step 1
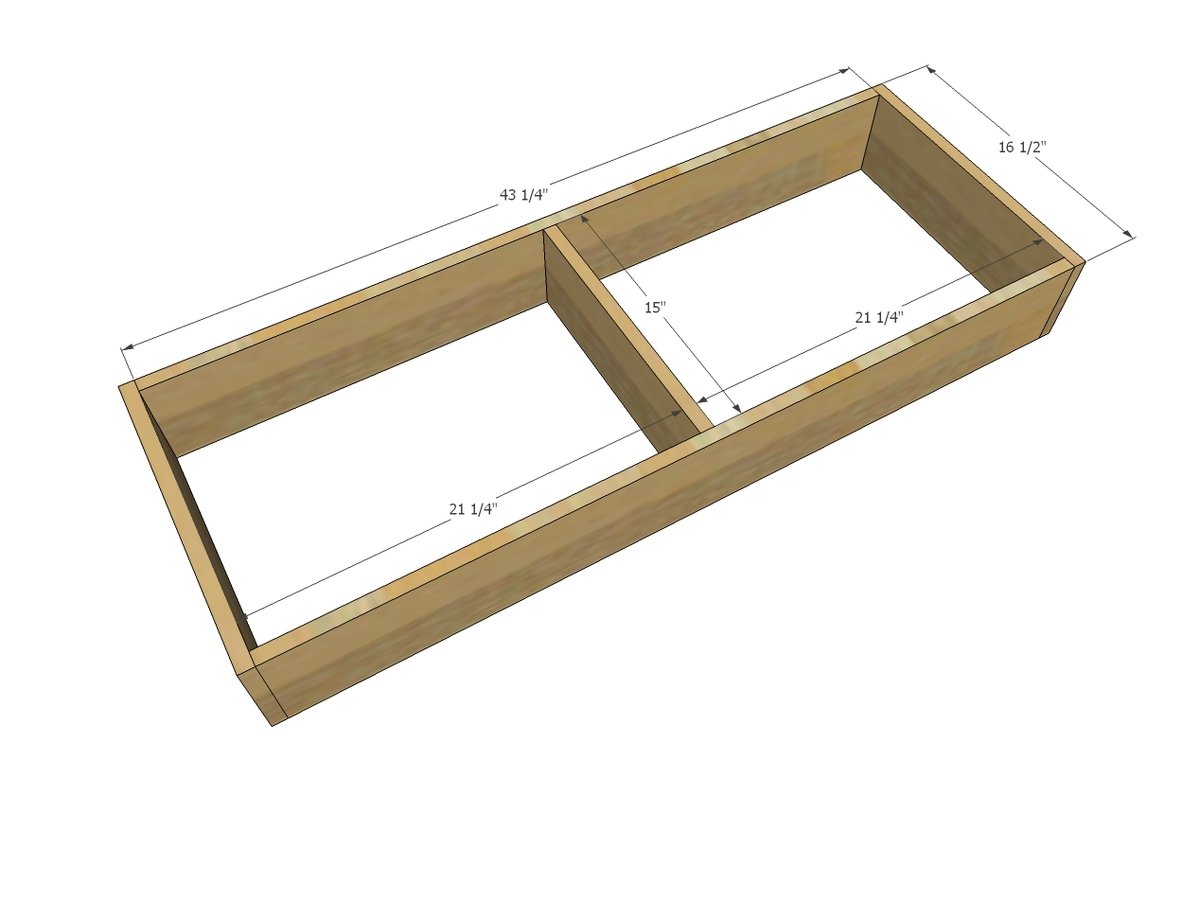
Build the top frame out of the 2x6 boards. Use exterior glue at joints and 2" screws.
Step 2
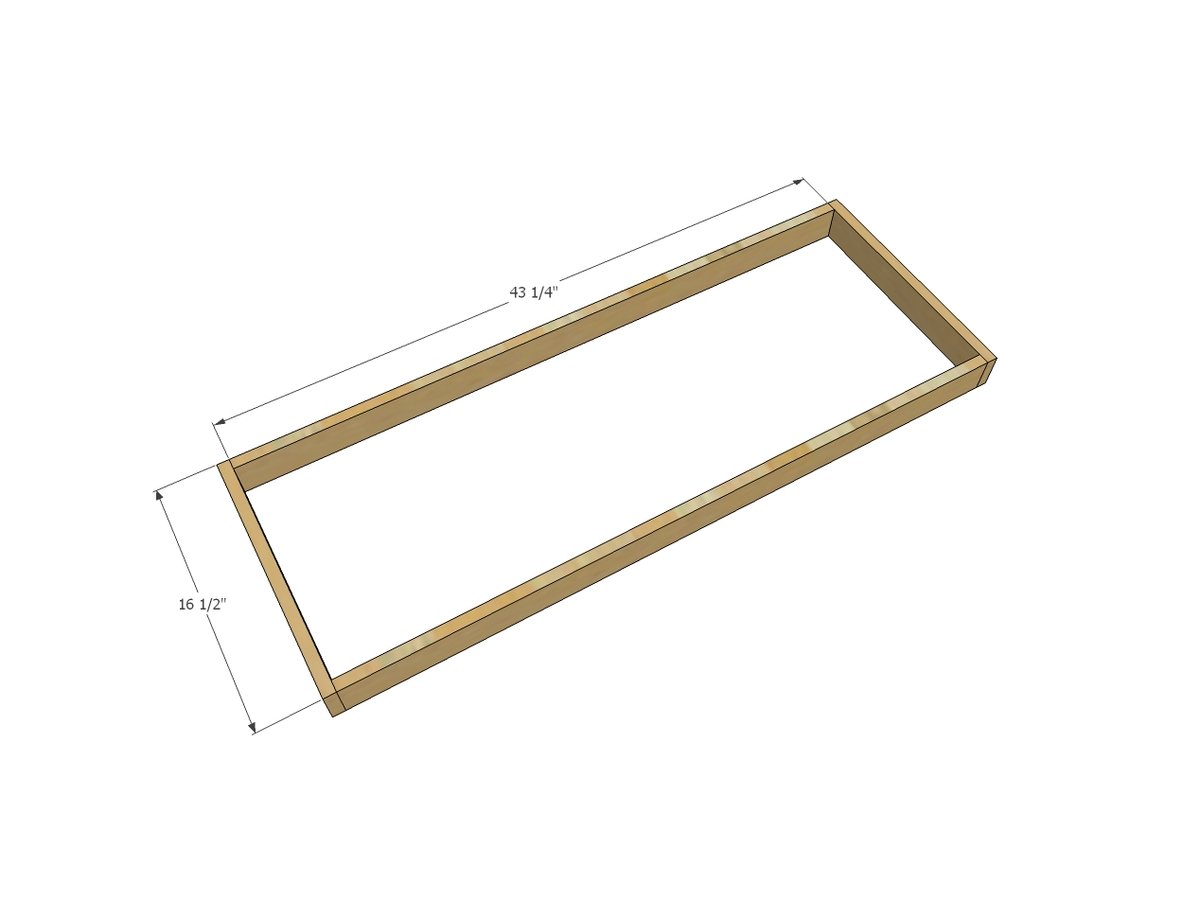
Build shelf frame same as upper frame.
Step 3
Place lower frame on level work surface, face down. Attach legs at all four corners. Then position lower frame in place and attach to legs. Use 1-1/4" screws and wood glue.
Step 4
Attach bottom slats to shelf with 1-1/4" screws and glue.
Finishing
Sand all surfaces, starting with a medium grit and finishing with fine. Wipe off the dust, fill any holes or gaps with wood filler, and sand smooth once dry. Apply primer if you're painting, then finish with your choice of paint or stain and seal with a durable clear topcoat. For outdoor projects, use exterior-rated primer, paint or stain, and sealer so the piece stands up to the weather.
Source (temporary): https://www.ana-white.com/woodworking-projects/sand-and-water-play-table