Sand Box with Built-In Seats
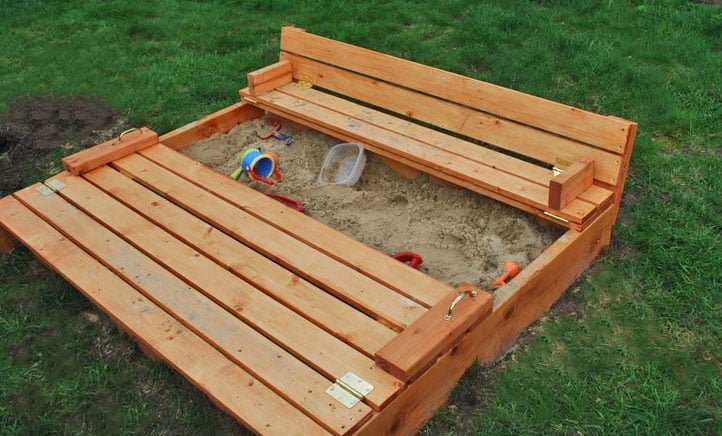
Everyone with a sand box knows that lids are a necessity. But double-duty lids are crazy awesome, especially if they convert to a seat! This easy to build sandbox with built-in seats is a reader favorite and has been built thousands of times. For more awesome projects (or to leave some love if you've built this) visit my blog at
Specifications
| Project type | Other Projects |
|---|---|
| Room | Outdoor |
| Style | Children's and Kid's Room Furniture and Toy Plans |
| Difficulty | Beginner Projects |
| Estimated cost | $20 - $50 |
Dimensions
Use the size-specific shopping and cut lists below.
Shopping List
- 2 - 1 x 8 @ 8 Feet Long
- 6 - 1 x 4 @ 8 Feet Long
- 1 - 2 x 4 @ 8 or Stud Length
You will also need:
- 4 sets of exterior grade hinges
- Rope OR 4 exterior grade handles (search "gate pull" or "gate handle")
Cut List
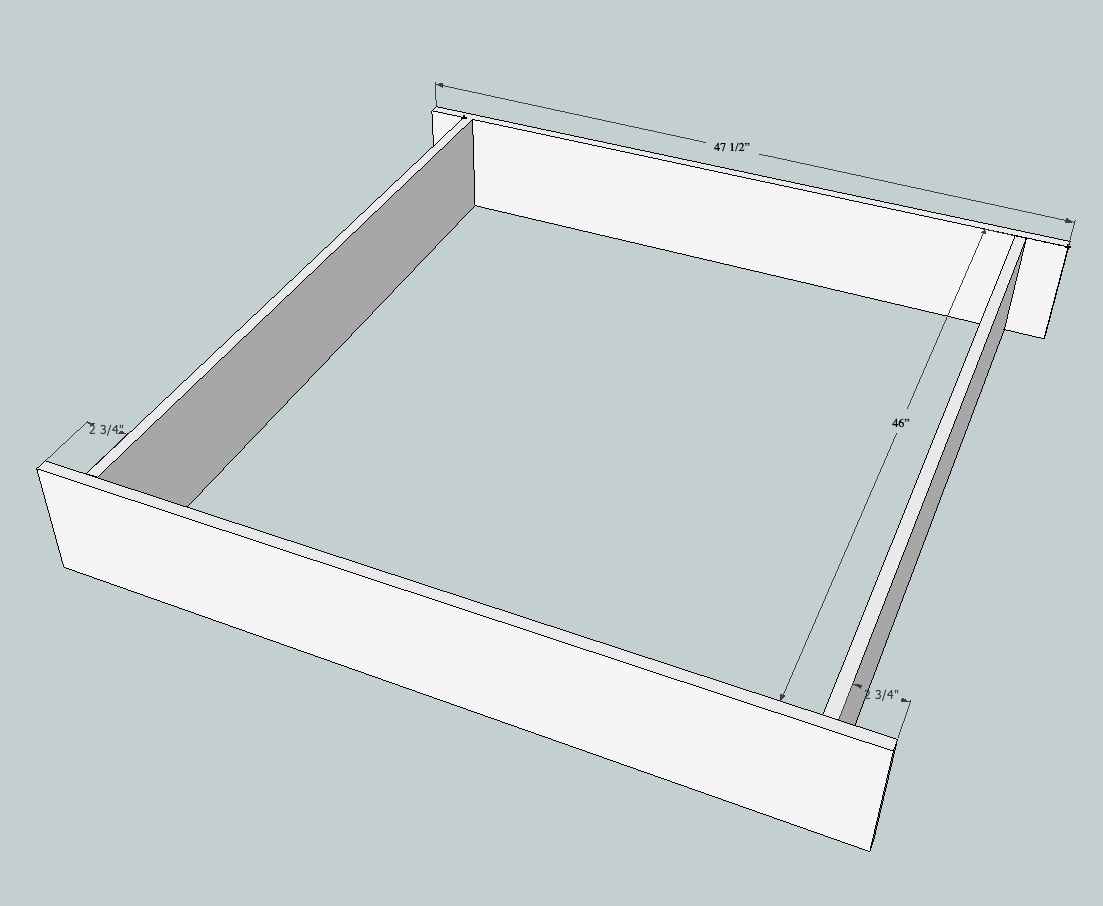
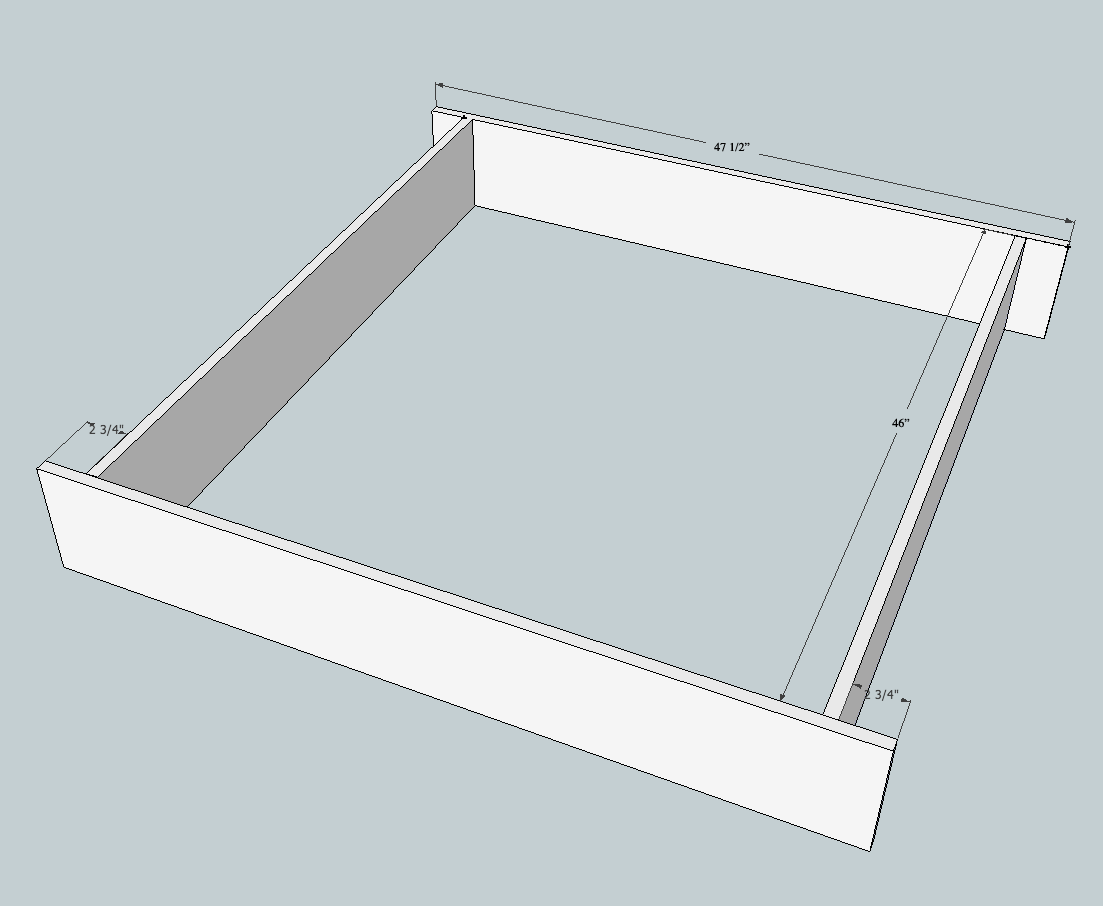
(a) 2 - 1 x 8 @ 47 1/2" - long sides of box
(b) 2 - 1 x 8 @ 46" - short sides of box
(c) 12 - 1 x 4 @ 47 1/2" - top planks
(d) 4 - 2 x 4 @ 7 1/2" - arm rests
(e) 4 - 2 x 4 @ 12 1/2" - back support/handle
Tools
- measuring tape
- square
- pencil
- safety glasses
- hearing protection
- kreg-jig
- drill
- circular saw
- compound miter saw
- sander
- countersink drill bit
Step-by-step Instructions
Step 1
Create a basic box, insetting the short sides as shown above. You can either use pocket holes or pre-drill through the long sides and use 1 1/4" screws.
Step 2
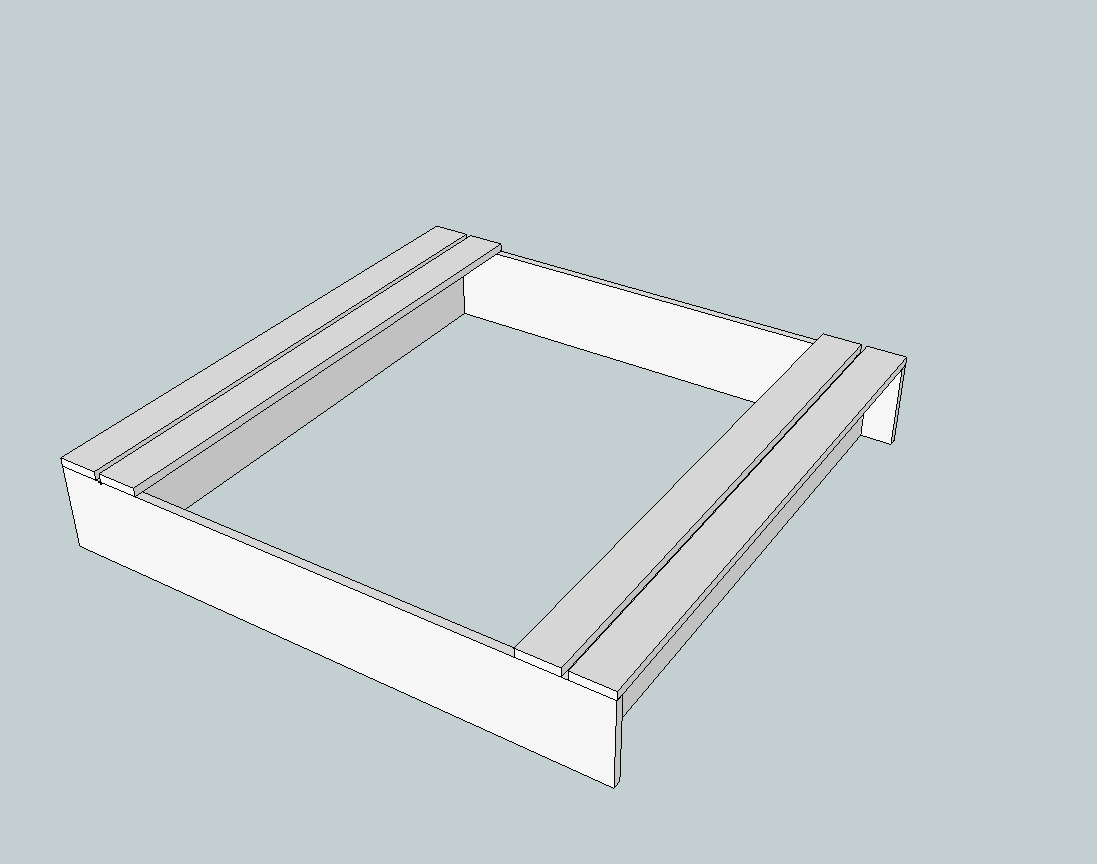
Screw in two planks on each side, countersinking your screws through the top. Space the boards 1/2" apart
Step 3
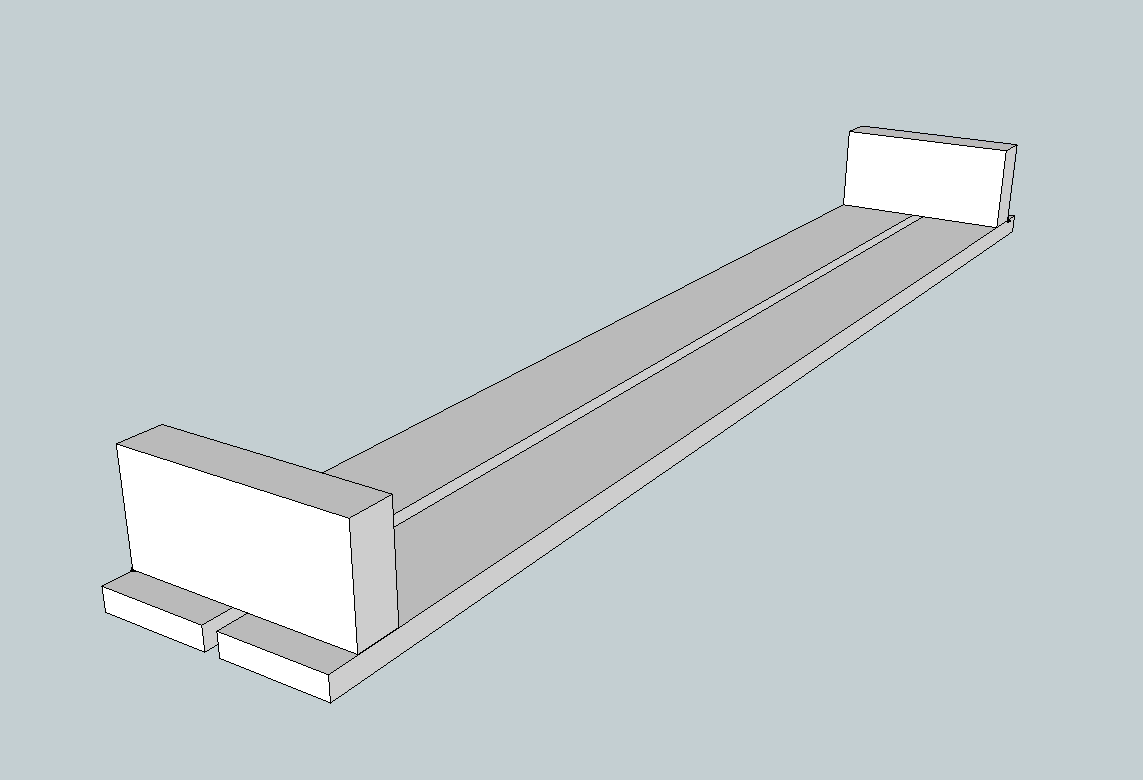
Create what will become the seat. Screw the 1 x 4 boards (1/2" apart) onto the 2 x 4 arm rests (d). Make sure that the 2 x 4s are at least 1" inset from the edge to allow for them to fold into the box nicely. (you'll be making two of these)
Step 4
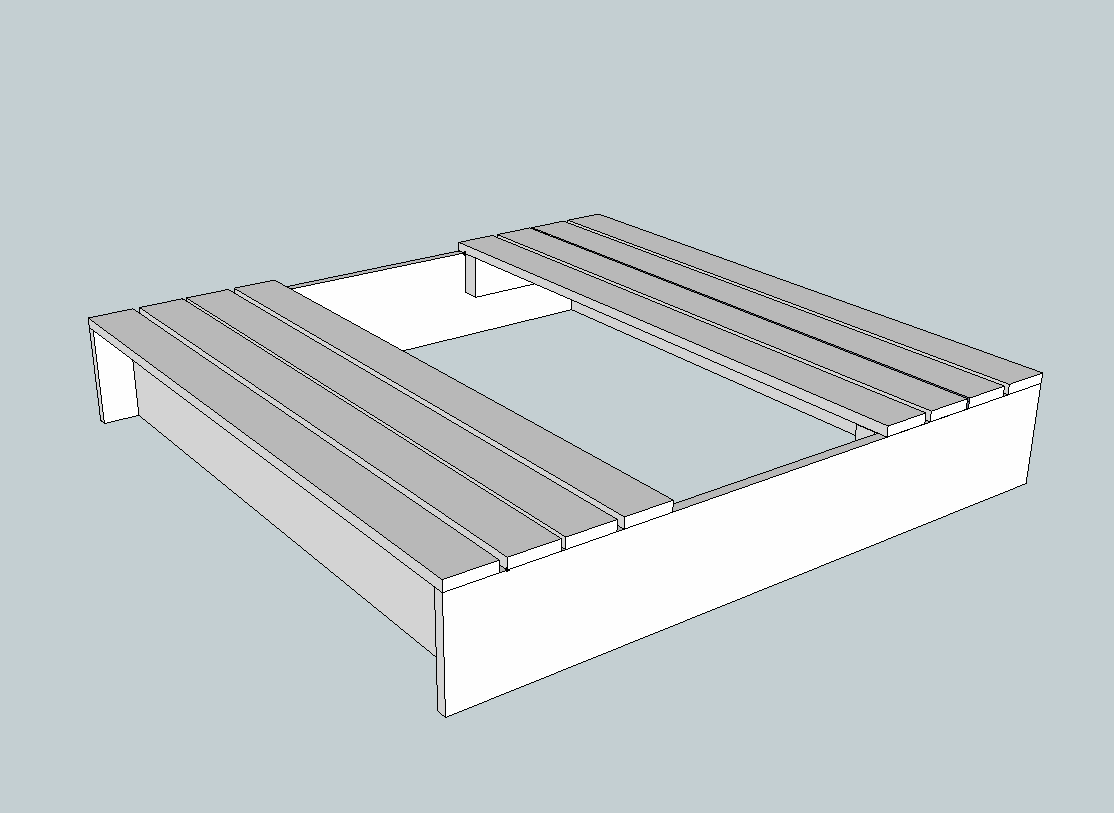
I have NO idea how to add hinges in sketch-up, but attach the seat that you made in step 3 to the plank you screwed in in step 2. I found it easier to attach the hinge to the seat (on the side opposite the arm rests) and THEN attach it to the screwed-in plank. Make sure to space them 1/2" apart.
Step 5
Step 6
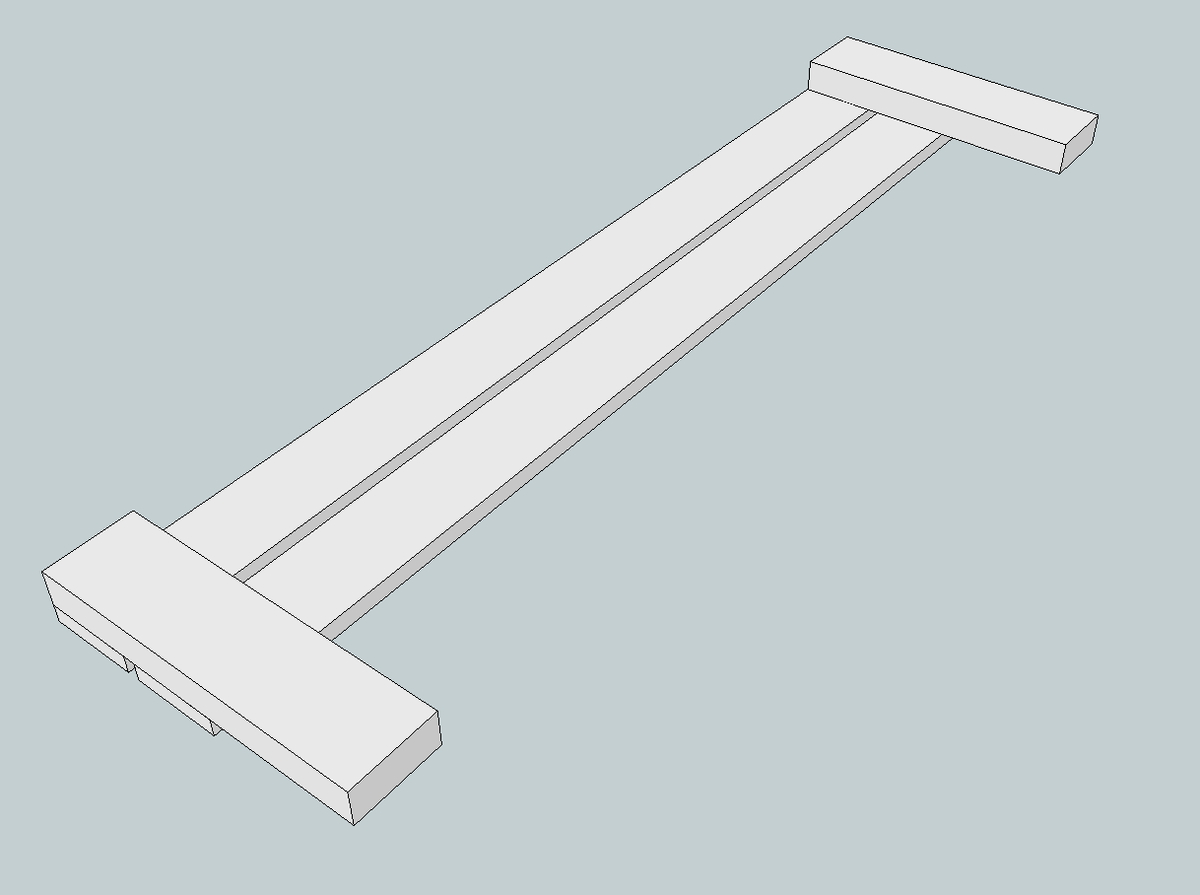
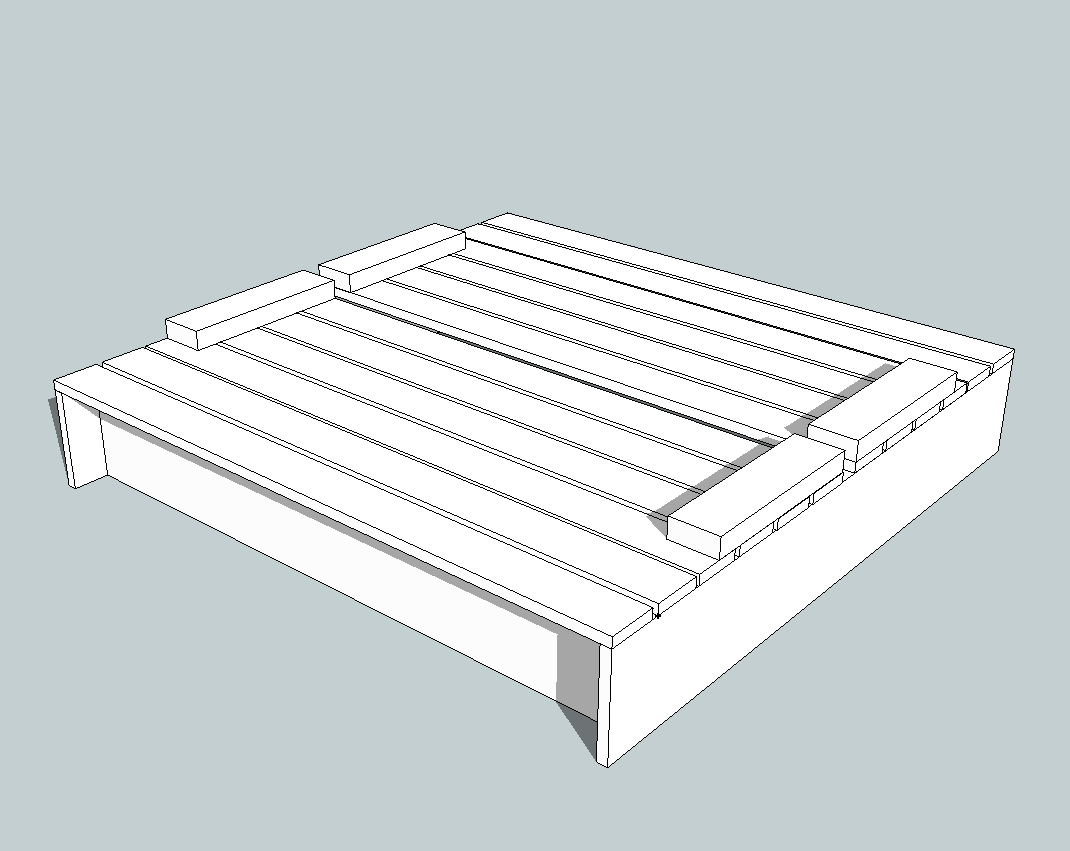
Attach your second set of hinges to the seat back, on the opposite side of the 2 x 4s, and then attach to the seat (easy to do with the seat "up"). Make sure to space the 1/2" apart.
Finishing
Sand all surfaces, starting with a medium grit and finishing with fine. Wipe off the dust, fill any holes or gaps with wood filler, and sand smooth once dry. Apply primer if you're painting, then finish with your choice of paint or stain and seal with a durable clear topcoat. For outdoor projects, use exterior-rated primer, paint or stain, and sealer so the piece stands up to the weather.
Source (temporary): https://www.ana-white.com/woodworking-projects/sand-box-built-seats