Sawhorse Outdoor Bench
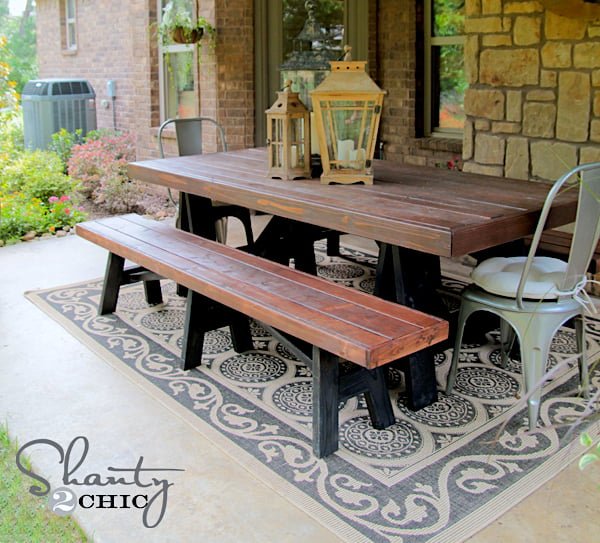
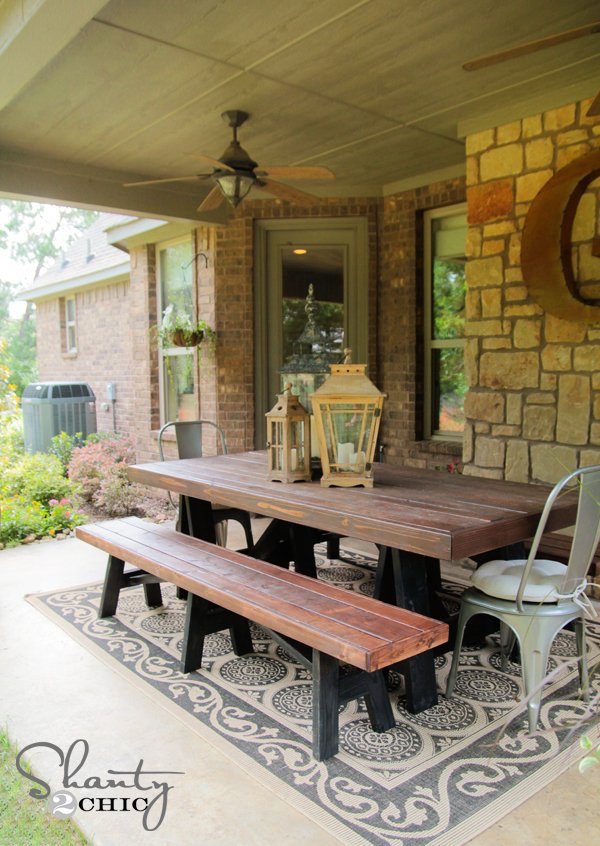
Build your own outdoor benches to match our Sawhorse Outdoor Table Plans. with diagrams from
Specifications
| Project type | Bench |
|---|---|
| Room | Outdoor |
| Style | Farmhouse Furniture |
| Difficulty | Advanced |
Dimensions
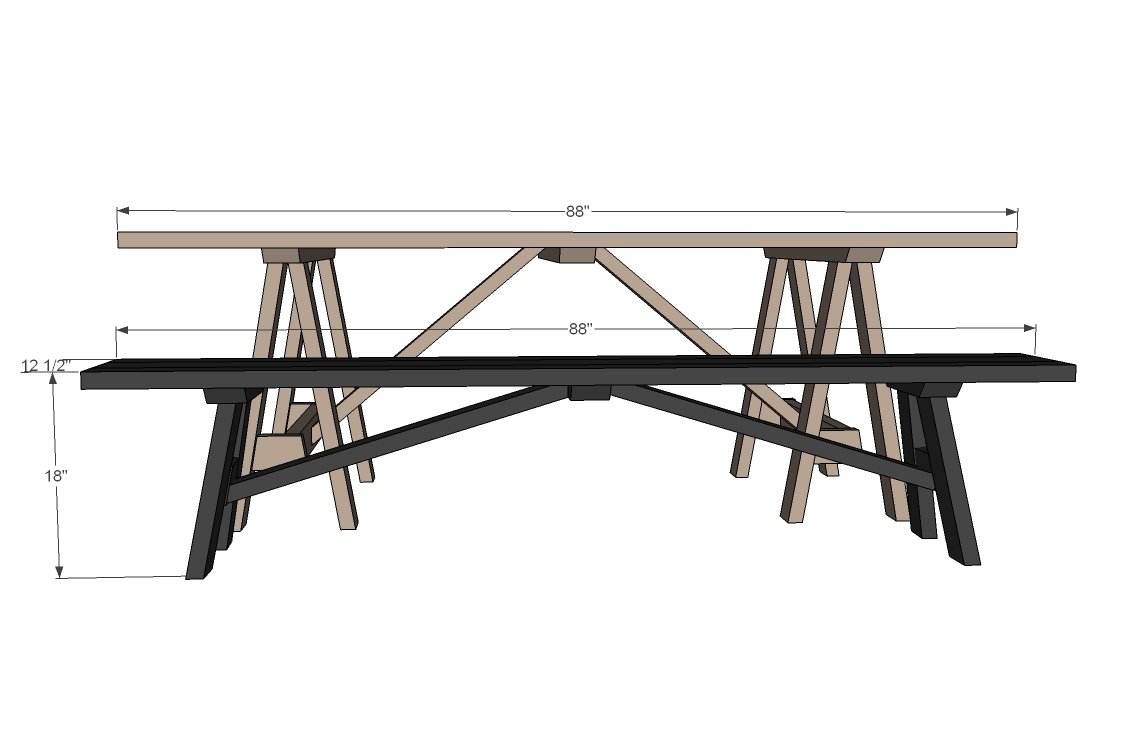
Use the size-specific shopping and cut lists below.
Shopping List
5 - 2x4 @ 8 feet long
1 - 2x6 @ 8 feet long
Cut List
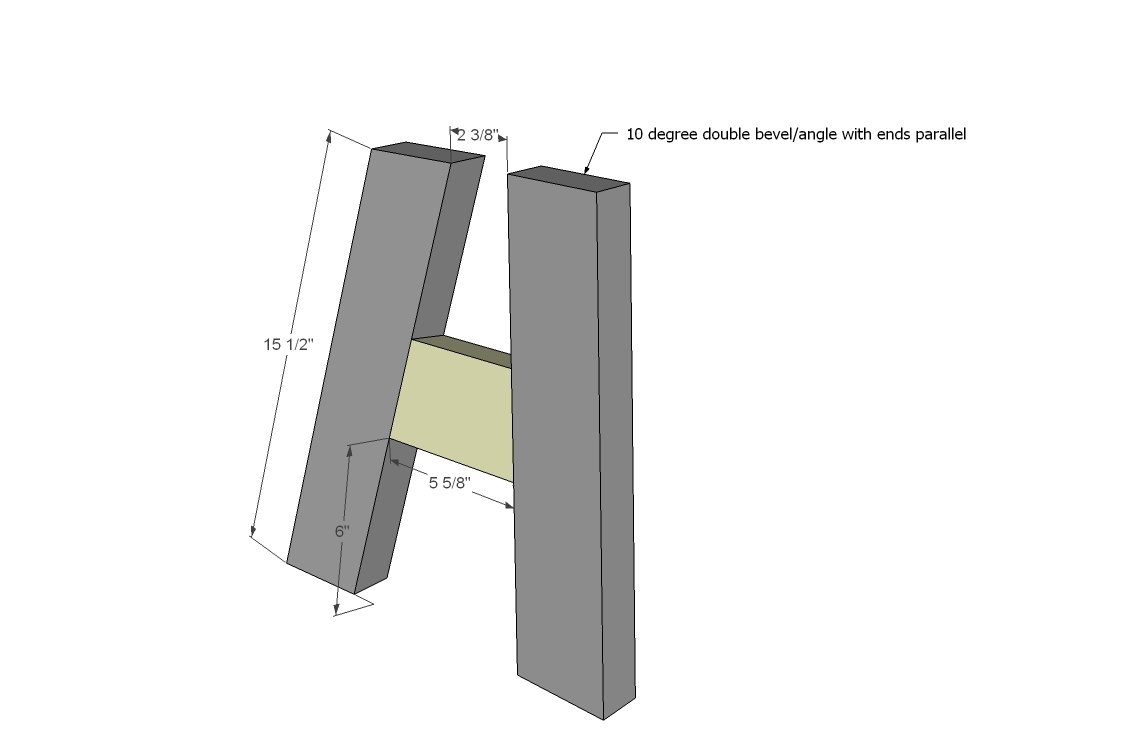
- 4 - 2x4 @ 15 1/2" long (both ends cut at 10 degree double bevel ends ARE parallel)
- 2 - 2x4 @ 15 1/4" long, both ends cut at 10 degree ANGLE off square, ends ARE parallel (not a double bevel like the end legs)
- 3 - 2x4 @ 5 5/8" long (longest point, both ends cut at 10 degrees off square, ends NOT parallel)
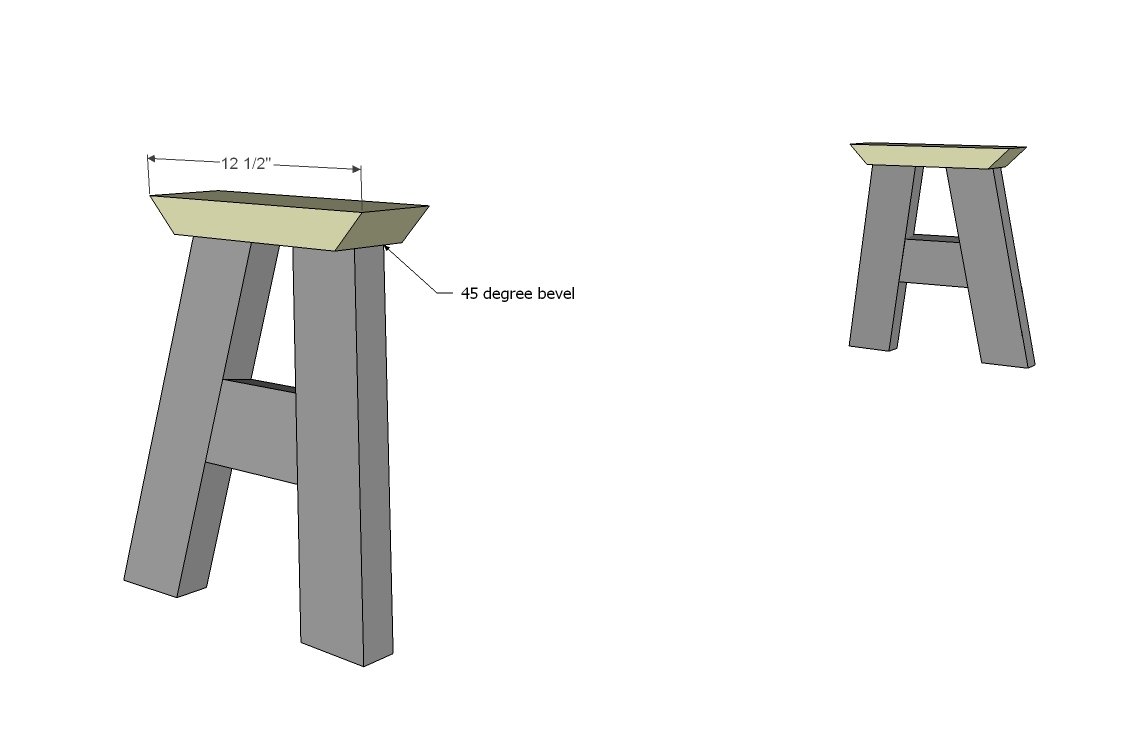
- 3 - 2x4 @ 12 1/2" long (both ends cut at 45 degree bevel, ends NOT parallel)
- 2 - 2x4 @ 88"
- 1 - 2x6 @ 88"
- 2 - 2x4 @ 32 1/4" (one end cut at 25 degree bevel, other at 17 degree bevel, cut in same bevel direction)
Tools
- measuring tape
- square
- pencil
- safety glasses
- kreg-jig
- drill
- compound miter saw
- countersink drill bit
Step-by-step Instructions
A Kreg Jig is highly recommended for construction of this project.
Build your two end leg sets using 1 1/2" pocket holes and 2 1/2" pocket hole screws and glue. You can also build the center leg (see last diagram) now.
Step 2
Attach legs to headers with 1 1/2" pocket holes and 2 1/2" pocket hole screws and glue.
Step 3
Build your bench top with pocket holes first (unles you are using outdoors and will require water drainage, then leave spacing between boards to allow water to drain). Then attach legs to the underside of bench top. Overhang is 10 1/4' from ends (see diagram 5)
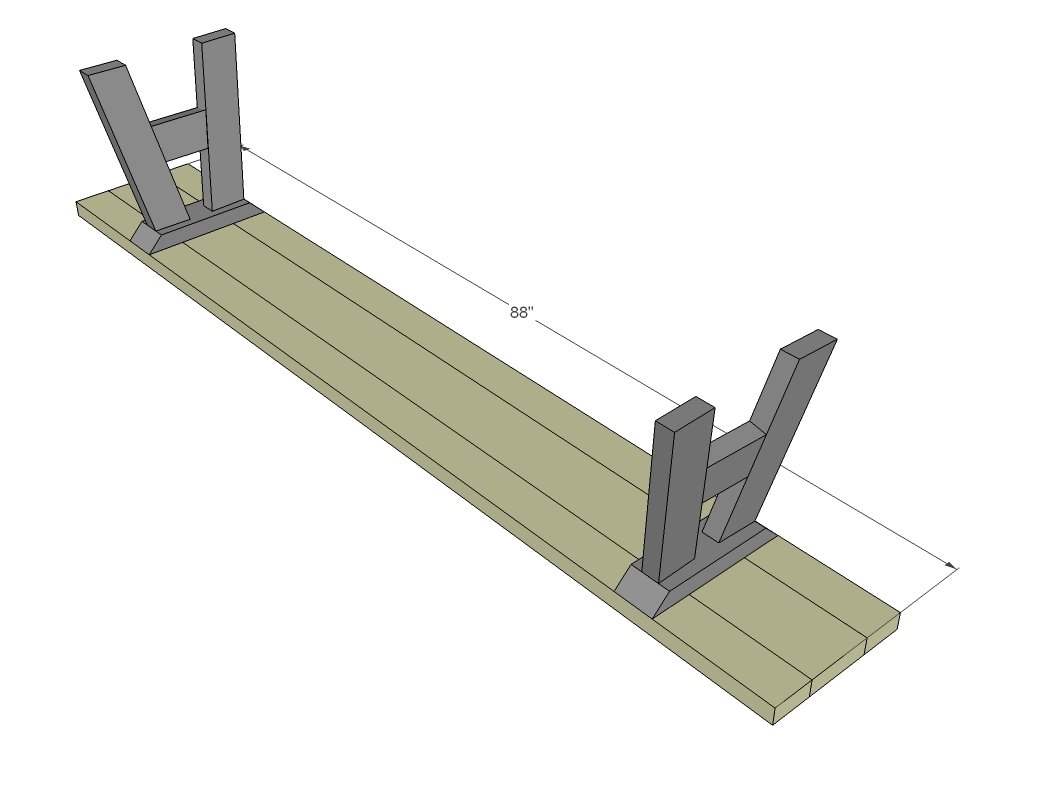
Step 4
You can either build the entire center leg (see last diagram) and attach you did the outside legs, or attach middle header here.
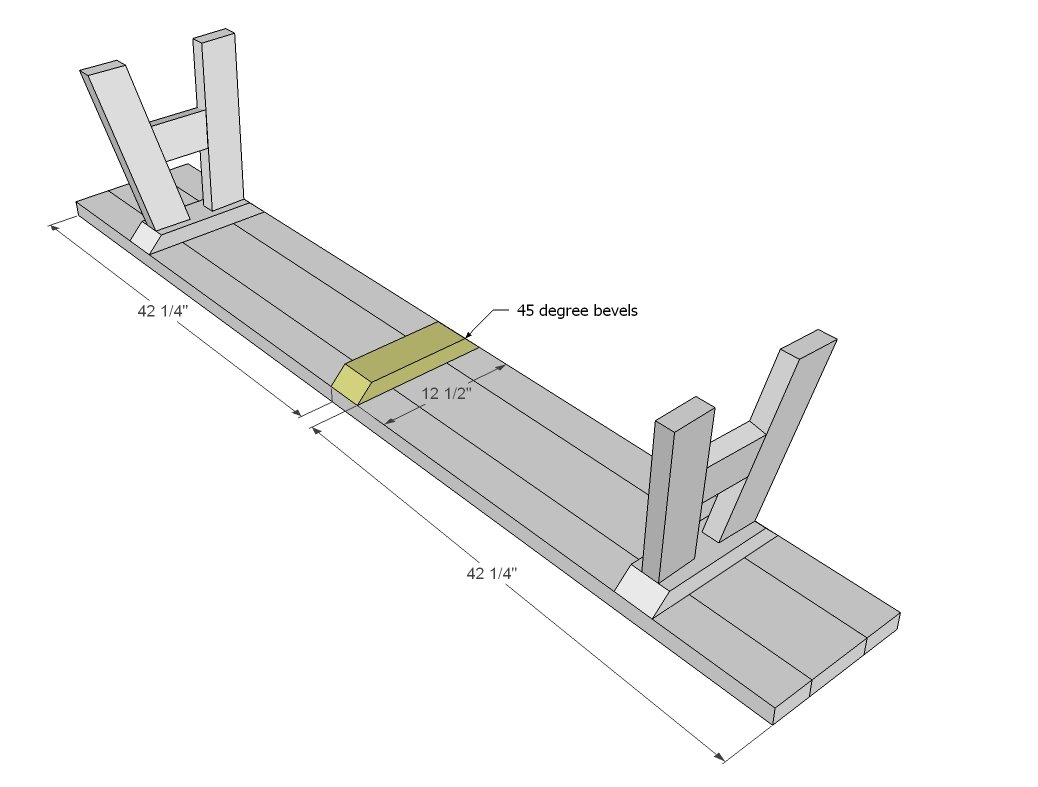
Step 5
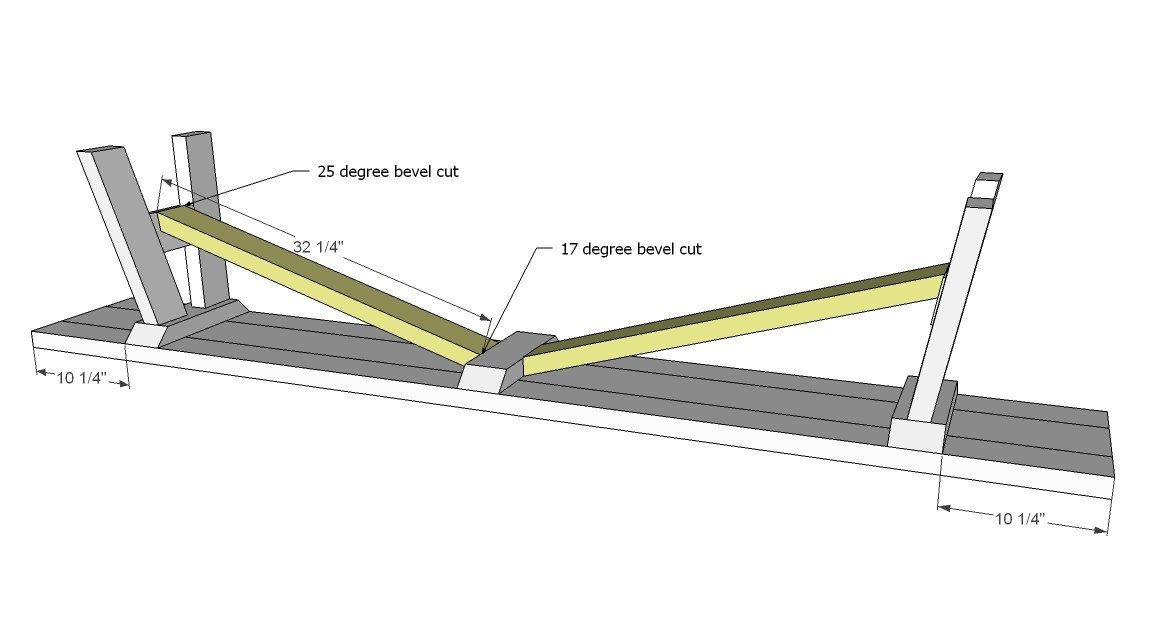
Attach center leg to center.
For additional support, the center leg could also be tied into the outside legs.
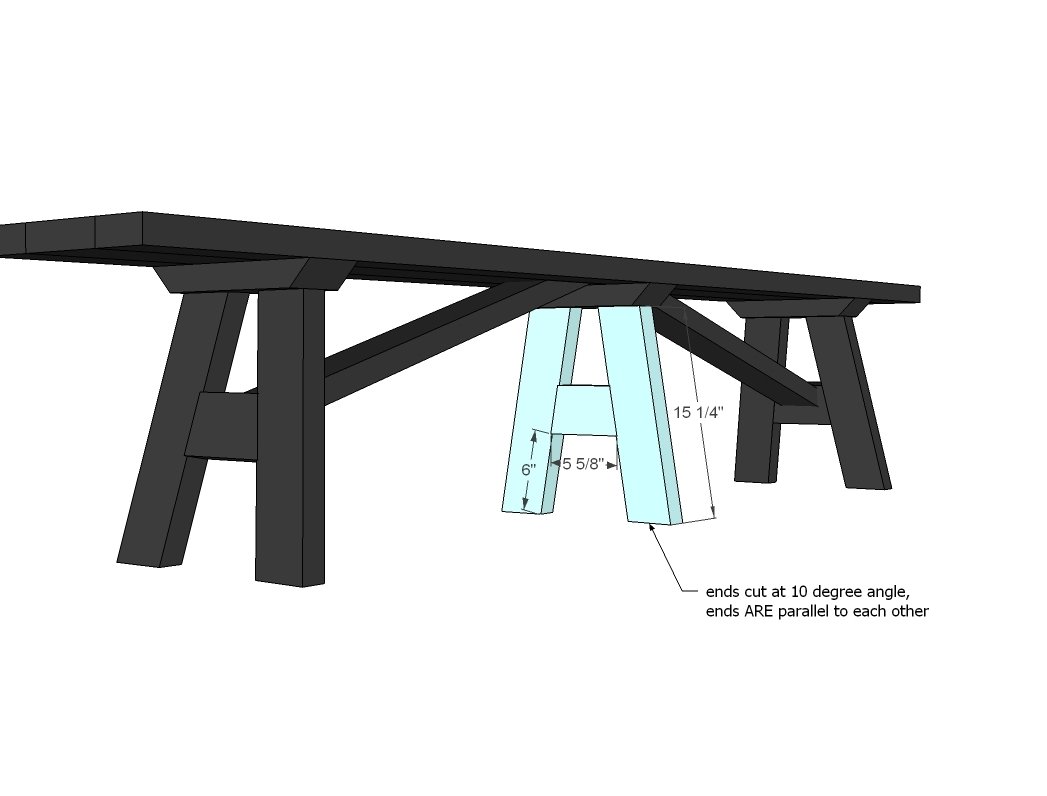
Step 7
Whitney also framed the bench top out for additional support and looks - check out how she did that here.
Finishing
Sand all surfaces, starting with a medium grit and finishing with fine. Wipe off the dust, fill any holes or gaps with wood filler, and sand smooth once dry. Apply primer if you're painting, then finish with your choice of paint or stain and seal with a durable clear topcoat. For outdoor projects, use exterior-rated primer, paint or stain, and sealer so the piece stands up to the weather.
Source (temporary): https://www.ana-white.com/woodworking-projects/sawhorse-outdoor-bench