Sawhorse Outdoor Table
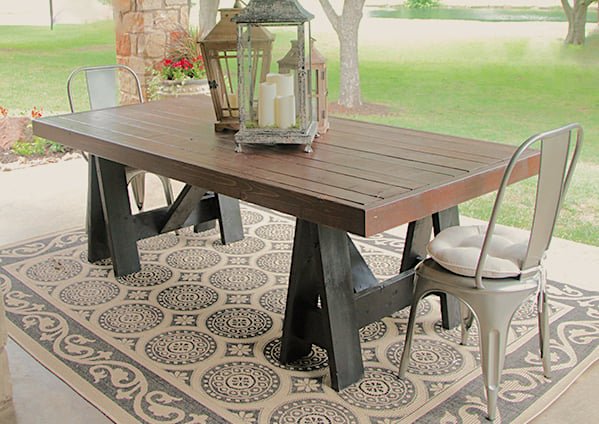
Build your own stylish and substantial outdoor table! This easy to build design features a modern sawhorse style base and a thick top. for outdoor table from include lots of detailed diagrams. Build using 2x4s and 2x6s. See also: Matching Sawhorse Outdoor Bench Plans
Specifications
| Project type | Dining Table Plans |
|---|---|
| Room | Outdoor |
| Style | Farmhouse Furniture |
| Difficulty | Intermediate |
| Estimated cost | $50 - $100 |
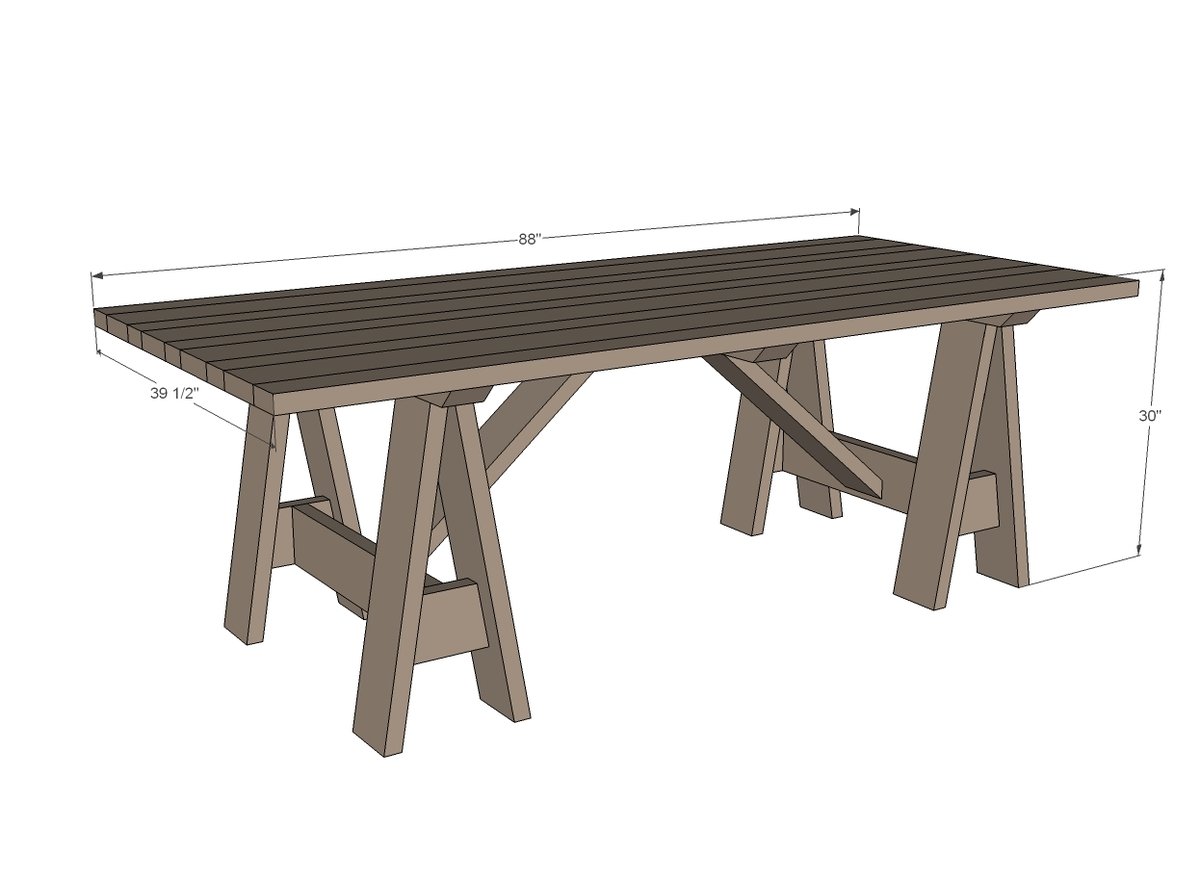
Dimensions
Use the size-specific shopping and cut lists below.
Shopping List
- 9 - 2x6 @ 8 feet long
- 7 - 2x4 @ 8 feet long
- to frame the outside of the top, need 3 more 2x4x8s
Cut List
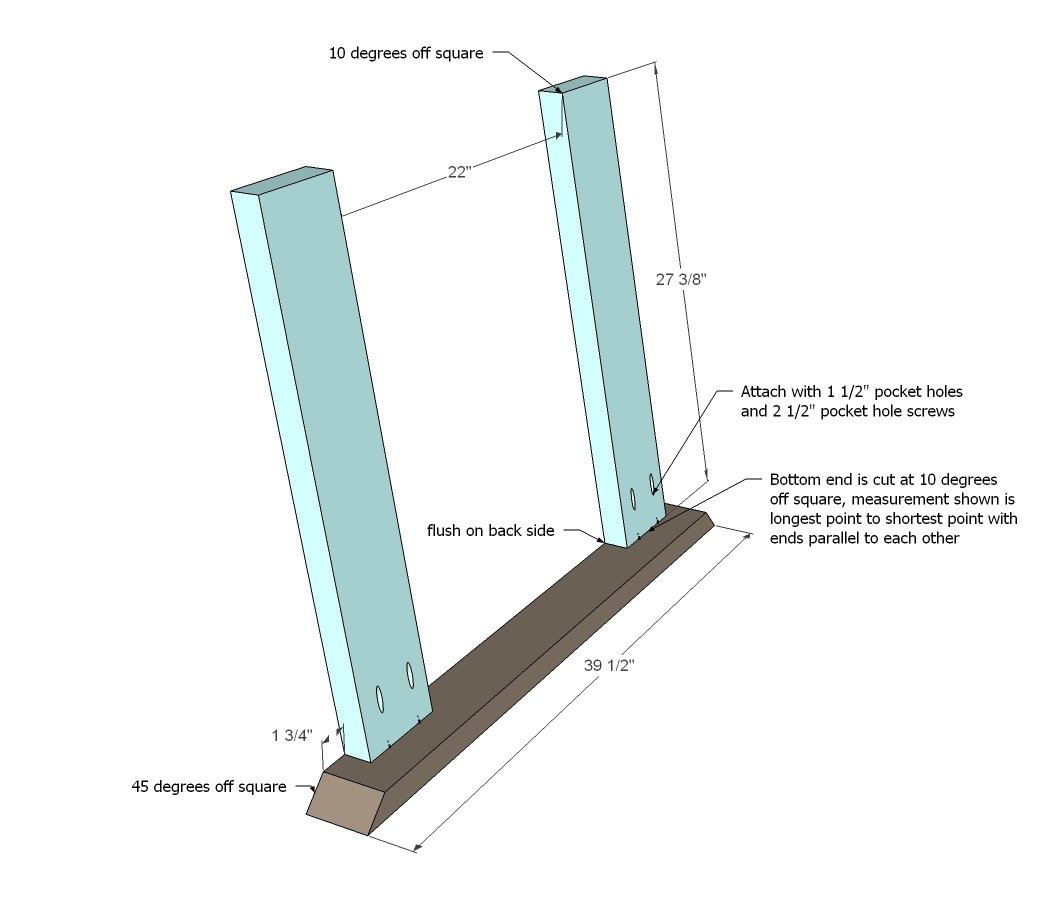
- 8 - 2x6 @ 27 3/8" (long point to short point, both ends cut at 10 degrees BEVEL)
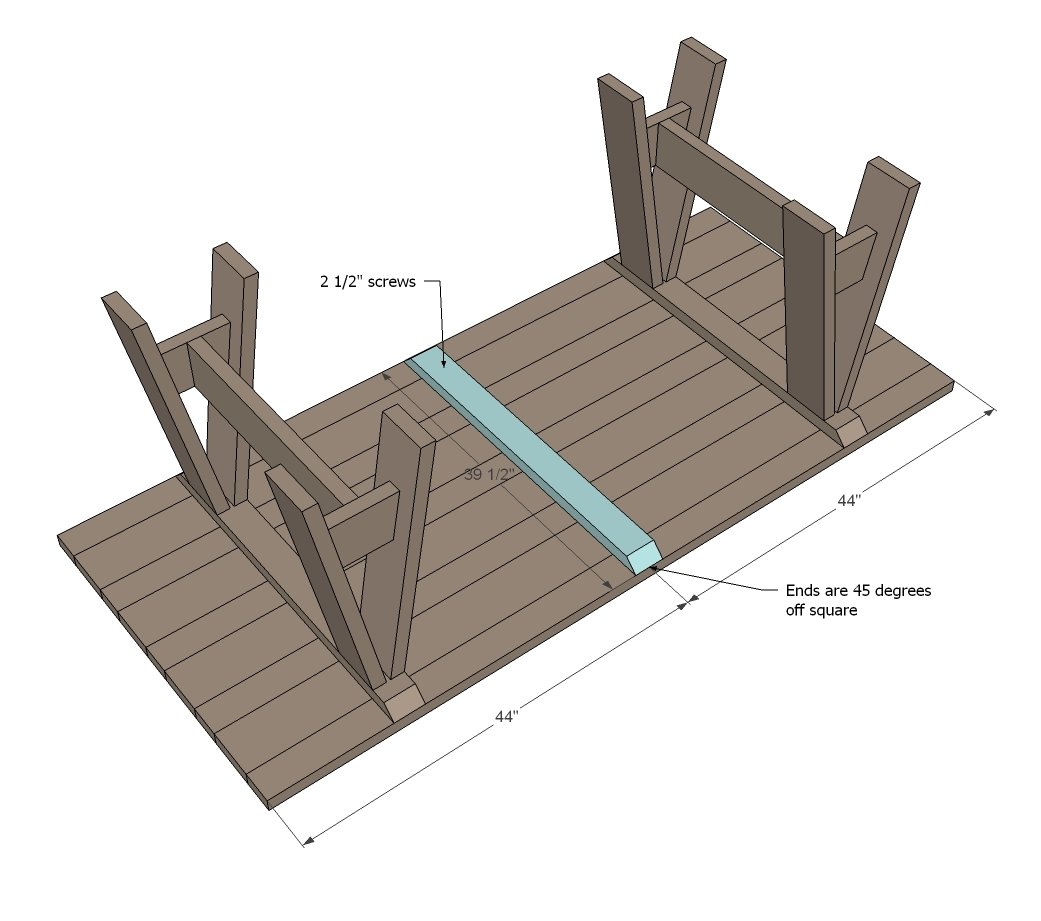
- 3 - 2x4 @ 39 1/2" ( long point to long point, both ends cut NOT parallel at 45 degree BEVEL)
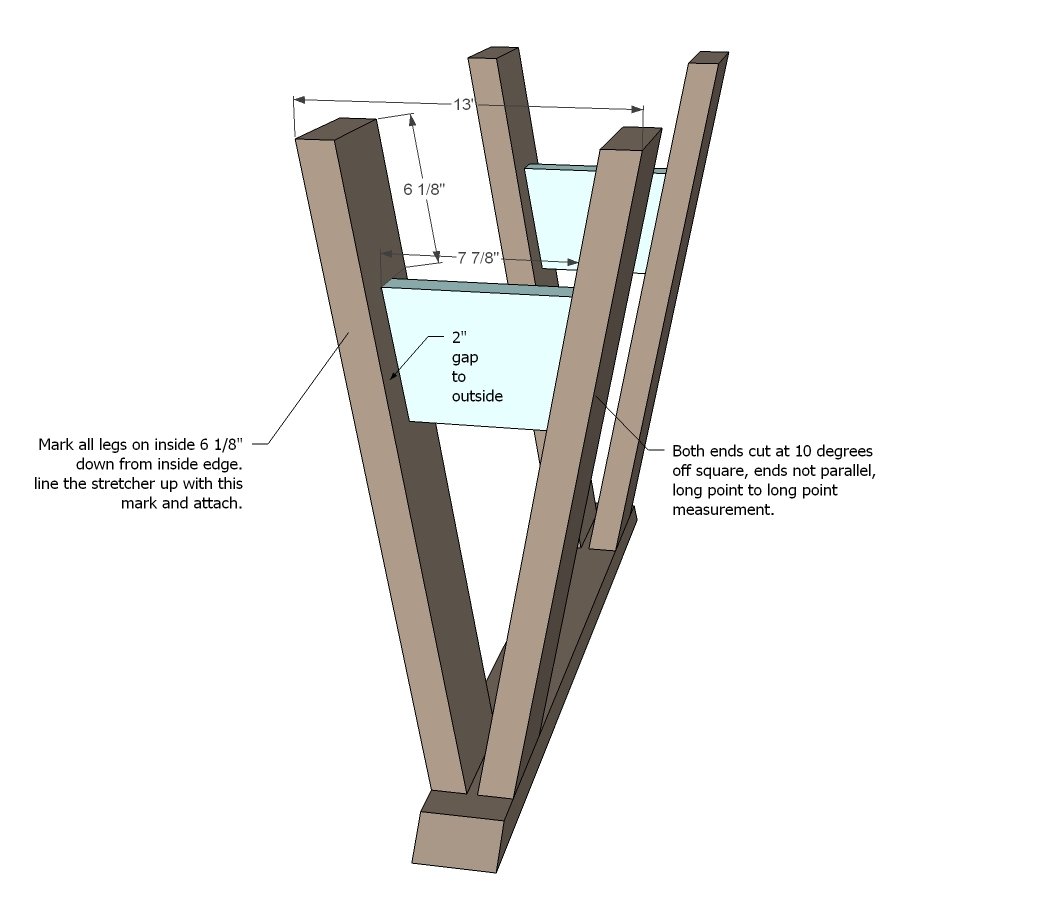
- 4 - 2x6 @ 7 7/8" (long point to long point both ends cut NOT parallel at 10 degrees off square)
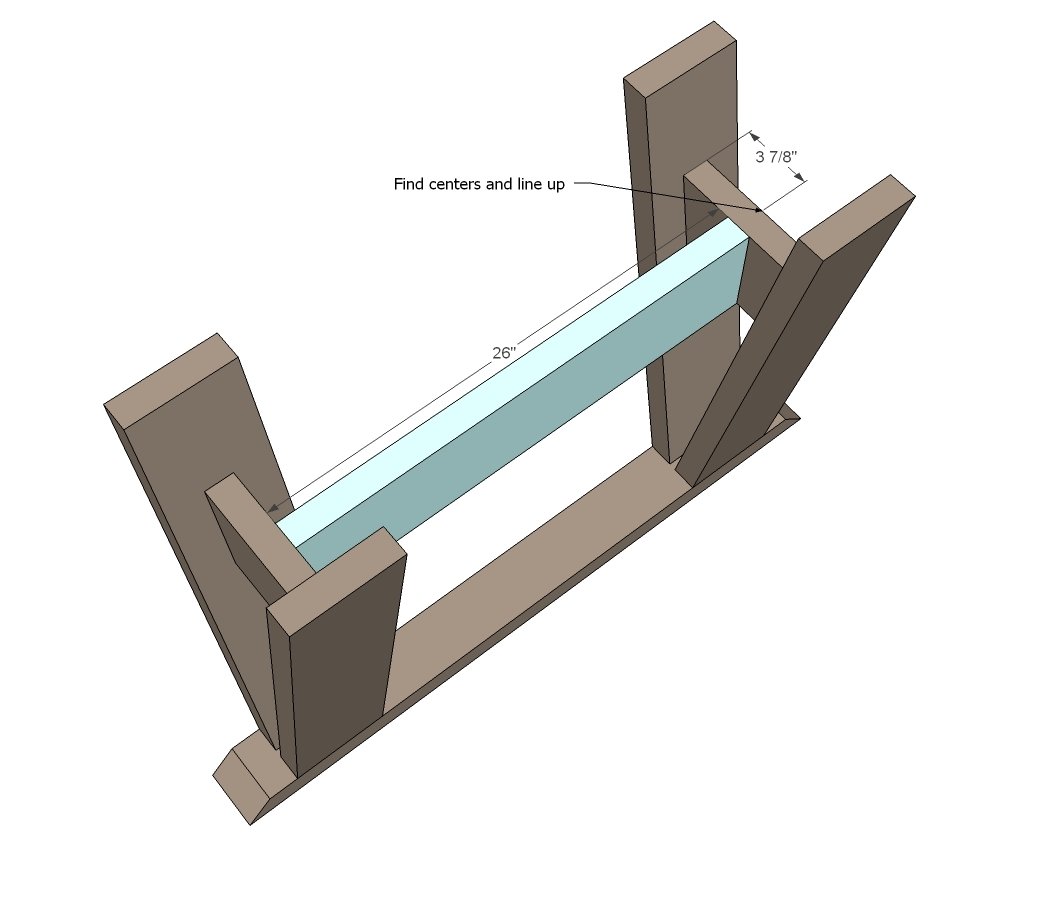
- 2 - 2x6 @ 26"
- 4 - 2x6 @ 88"
- 5 - 2x4 @ 88" cross supports 34" long - both ends beveled - one at 40 and one at 50 (you may be able to get away with both at 45 to make things easier)
Tools
- measuring tape
- square
- pencil
- safety glasses
- hearing protection
- kreg-jig
- drill
- compound miter saw
- sander
- countersink drill bit
Step-by-step Instructions
Step 1
Attach legs to base supports with 1 1/2" pocket holes and 2 1/2" pocket hole screws and glue.
Step 2
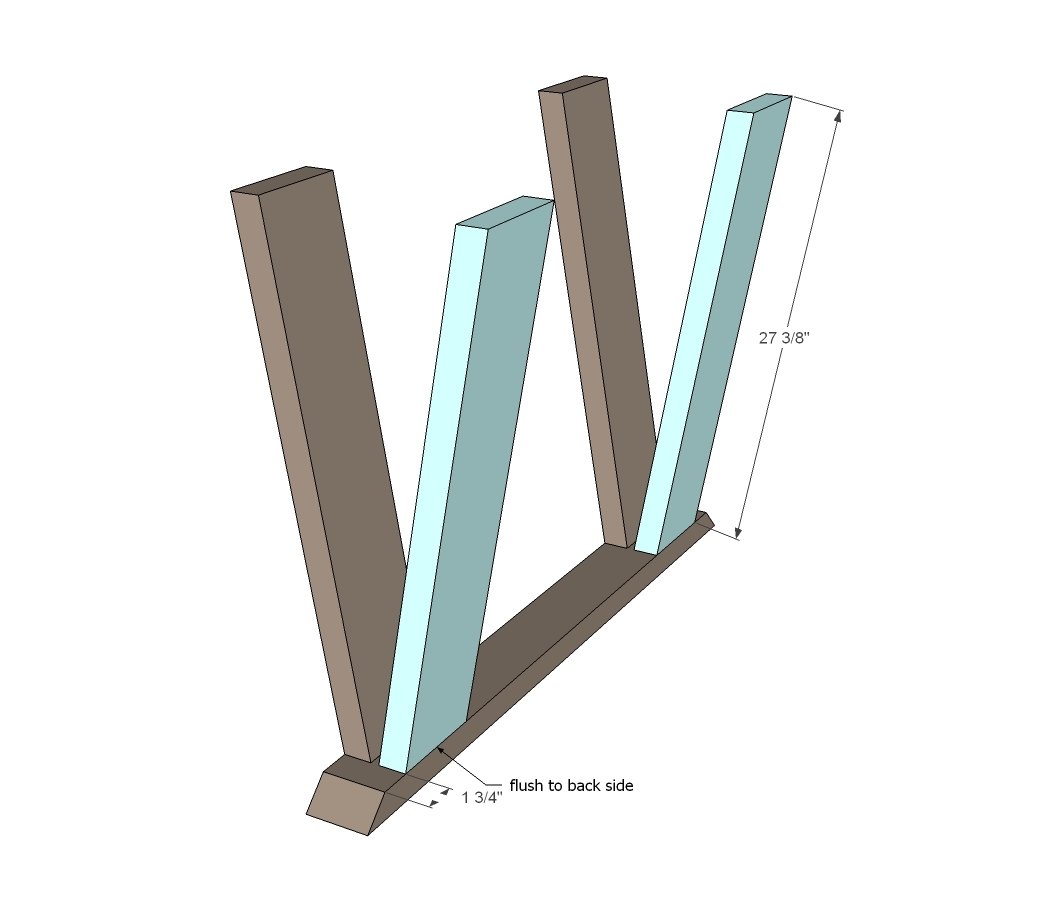
Attach remaining legs to base support.
Step 3
Attach the angled stretchers between legs. Countersunk screws or pocket holes here.
Step 4
And then the straight stretcher between the angled legs, centering. You can use countersunk screws or pocket holes here.
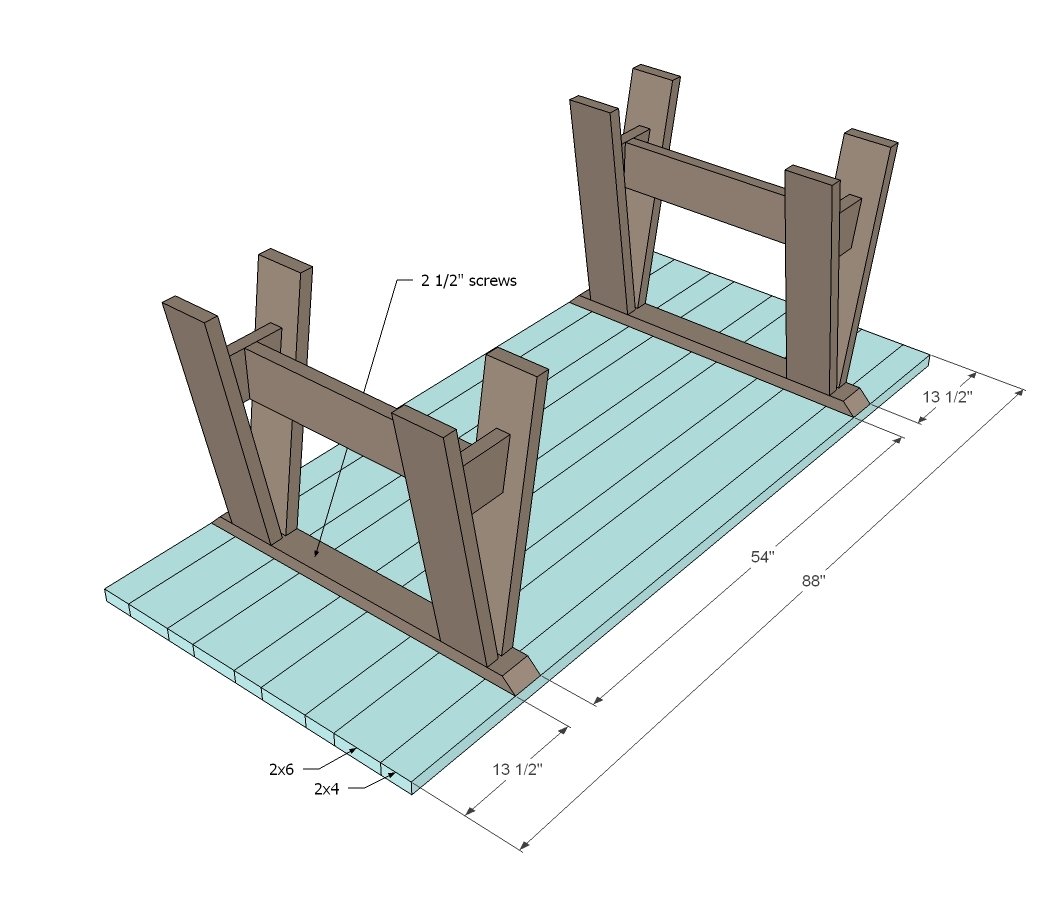
Lay the tabletop boards out flat.
Attach the sawhorses with 2-1/2" screws from underneath.
Step 6
Add your middle base support with screws and glue. If you've put everything together with pocket hole screws, no need to buy new screws - the 2 1/2" long ones will work here.
Step 7
And then the cross supports. If your saw doesn't do 50 degree bevels, you may be able to get away with a 45, and just alter the position of the cross support on the stretcher/underside of the table.
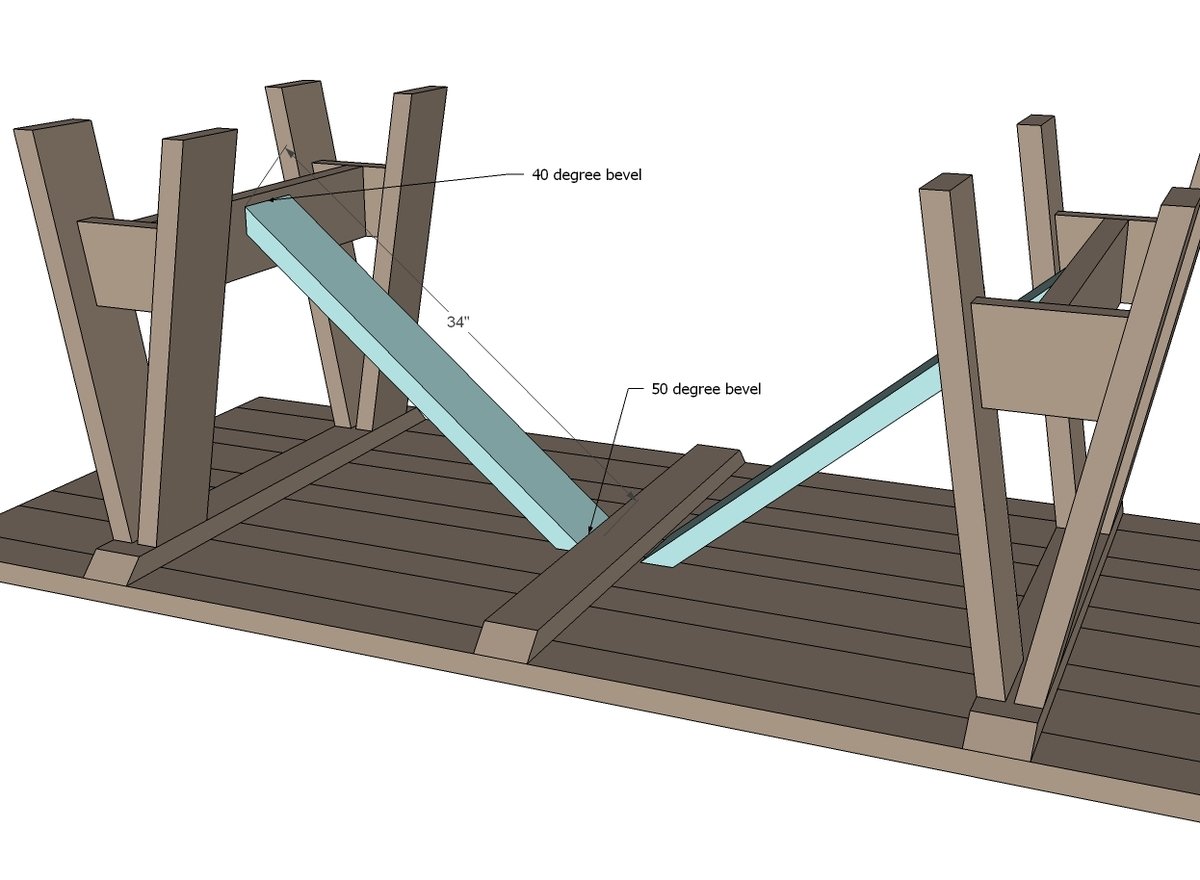
Step 8
Whitney added the 2x4 frame around the table for additional support - I love the way it looks! Just cut boards to length and attach.
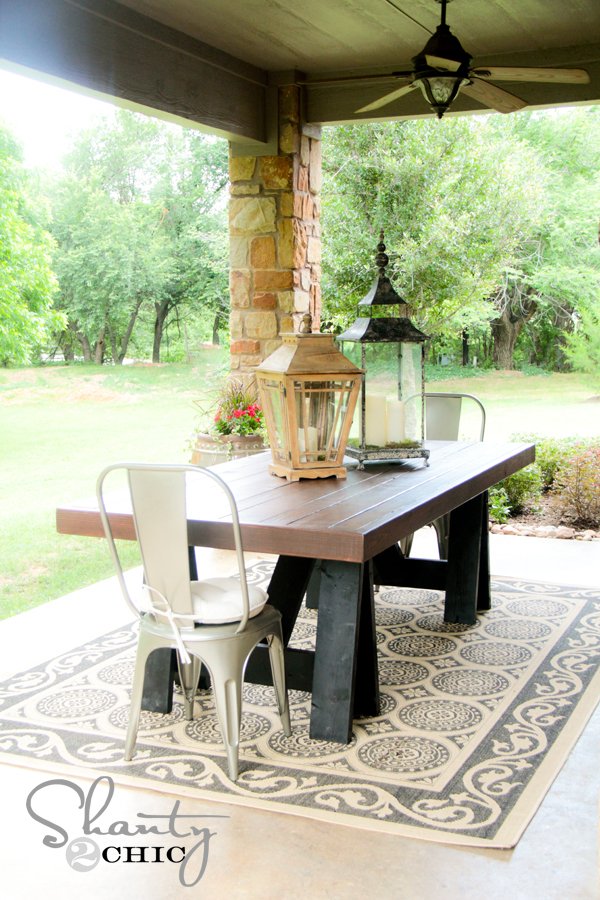
Finishing
Sand all surfaces, starting with a medium grit and finishing with fine. Wipe off the dust, fill any holes or gaps with wood filler, and sand smooth once dry. Apply primer if you're painting, then finish with your choice of paint or stain and seal with a durable clear topcoat. For outdoor projects, use exterior-rated primer, paint or stain, and sealer so the piece stands up to the weather.
Source (temporary): https://www.ana-white.com/woodworking-projects/sawhorse-outdoor-table