Sawhorse Storage Leg Desk
Build your own sawhorse storage leg desk - from
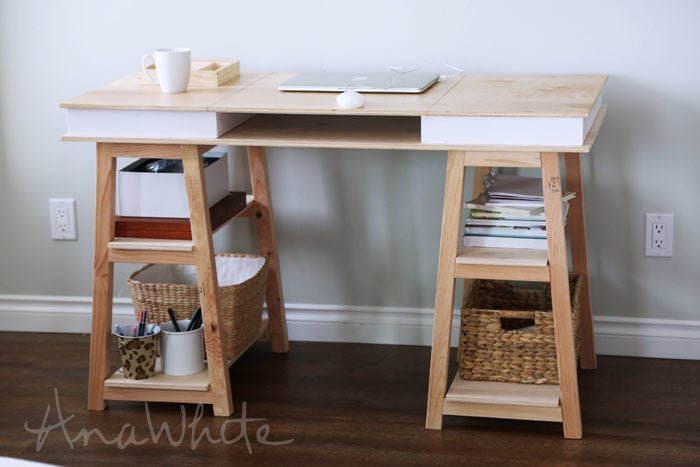
Specifications
| Project type | Desk, Desk Systems and Project Table Plans |
|---|---|
| Room | Teens |
| Style | Modern Style Furniture Plans |
| Difficulty | Intermediate |
Dimensions
Use the size-specific shopping and cut lists below.
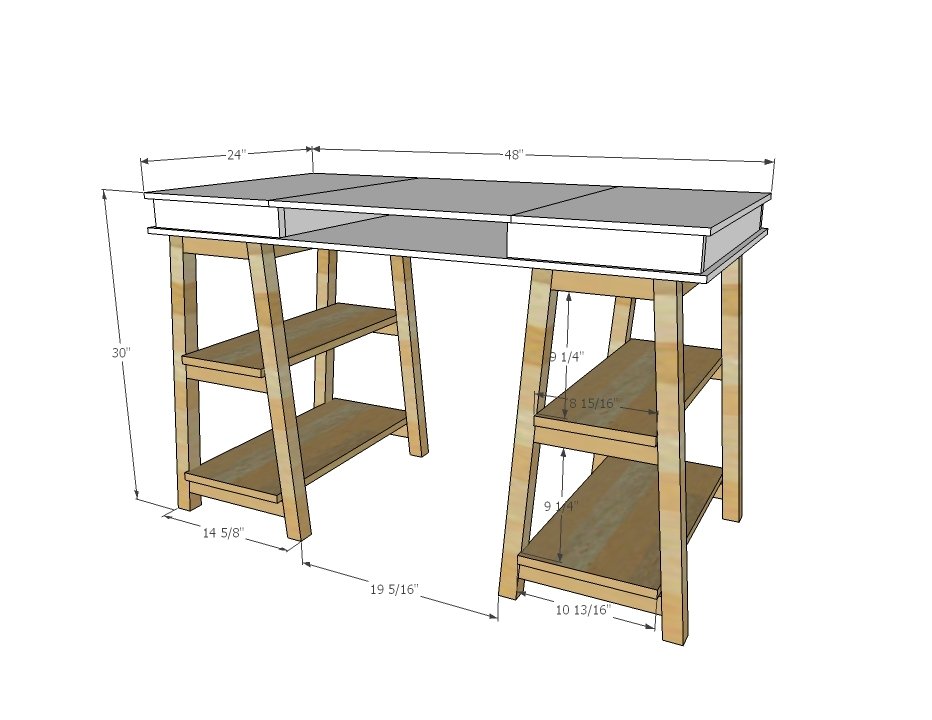
Shopping List
1 - 24" x 48" sheet of 1/2" thick plywood 6- 2x2 @ 8 feet long
Cut List
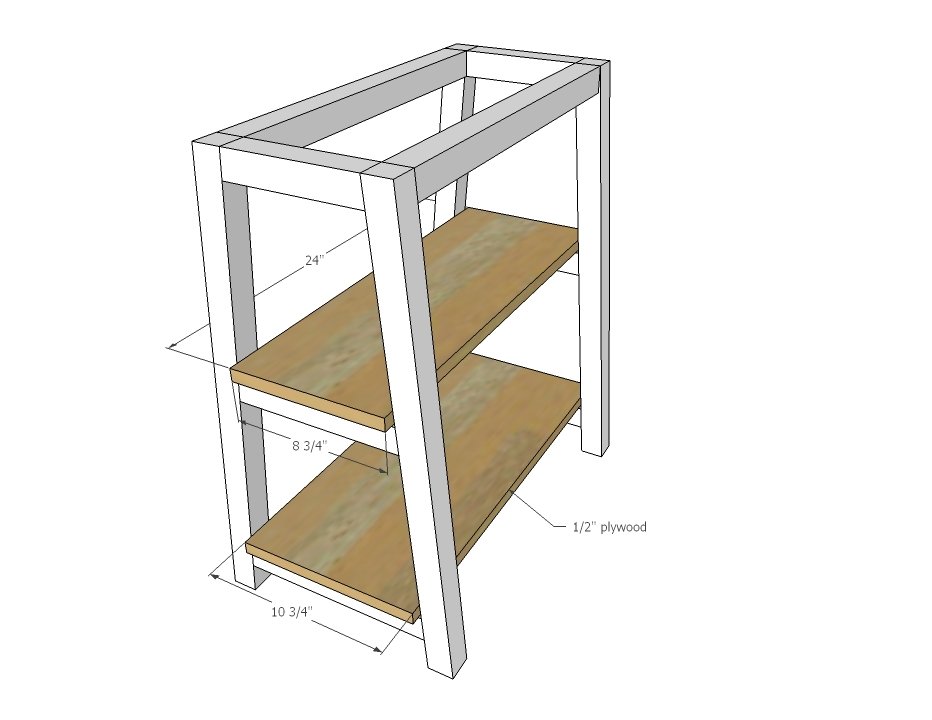
8 - 2x2 @ 26-5/8" with both ends cut at 5 degrees off square, ends ARE parallel, long point to short point measurement 4 - 2x2 @ 7-1/4" with both ends cut at 5 degrees off square, ends are NOT parallel, long point to long point measurement 4 - 2x2 @ 9-1/4" with both ends cut at 5 degrees off square, ends are NOT parallel, long point to long point measurement 4 - 2x2 @ 11-1/4" with both ends cut at 5 degrees off square, ends are NOT parallel, long point to long point measurement 8 - 2x2 @ 20" 2 - 1/2" plywood @ 24" x 8-3/4" 2 - 1/2" plywood @ 24" x 10-3/4"
Tools
- measuring tape
- square
- pencil
- safety glasses
- hearing protection
- kreg-jig
- drill
- compound miter saw
- table saw
- nailer
Step-by-step Instructions
Step 1
Build four of the leg sets with your Kreg Jig set for 1-1/2" pocket holes and attach with 2-1/2" pocket hole screws. Use glue. One pocket hole per joint should be enough. Once you build one, use it as a pattern for laying out the remaining three.
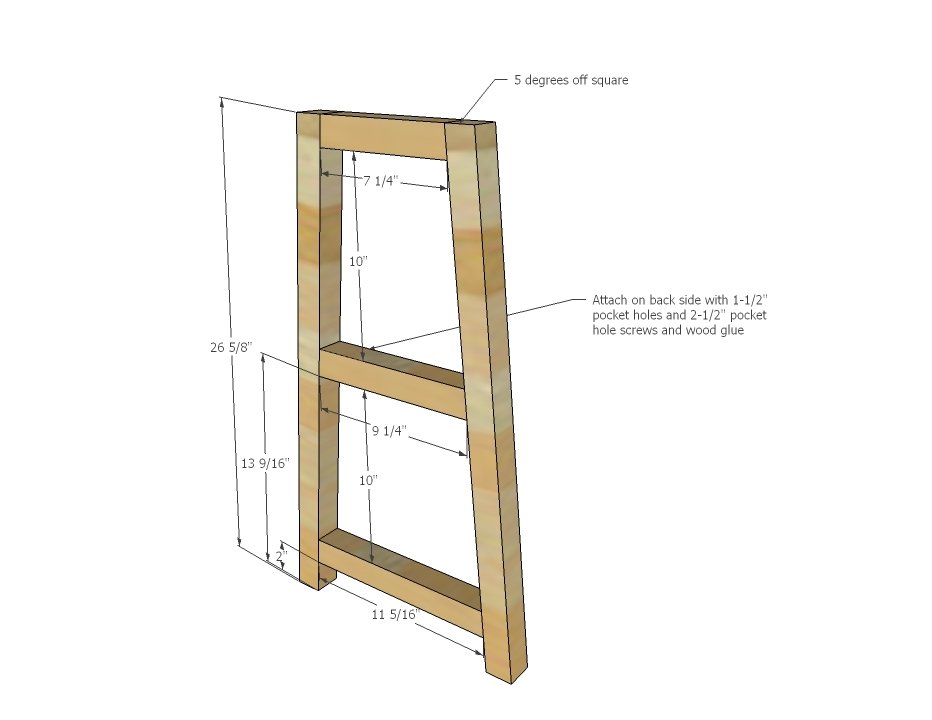
Step 2
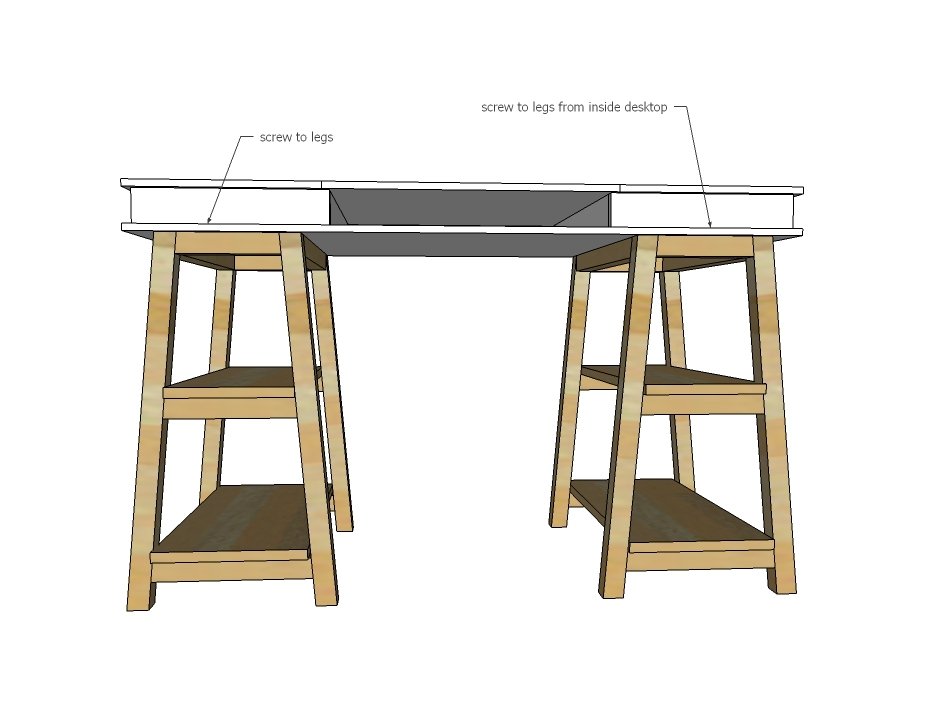
Attach leg sets together to create the sawhorse frame.
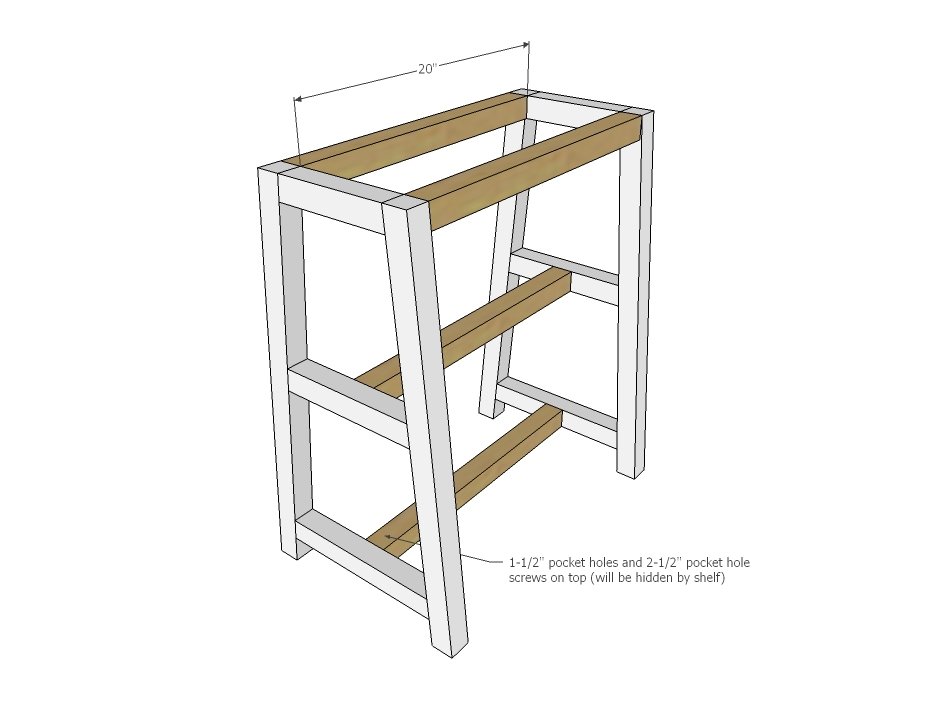
Step 3
Use the circular saw with Kreg Rip Cut or a table saw to cut the shelving pieces. Attach on top of 2x2s with glue and 1-1/4" nails or screws.
Step 4
From inside the desktop, attach to the 2x2 tops. Use 1-1/4" screws, at least 8 screws total.
Finishing
Sand all surfaces, starting with a medium grit and finishing with fine. Wipe off the dust, fill any holes or gaps with wood filler, and sand smooth once dry. Apply primer if you're painting, then finish with your choice of paint or stain and seal with a durable clear topcoat. For outdoor projects, use exterior-rated primer, paint or stain, and sealer so the piece stands up to the weather.
Source (temporary): https://www.ana-white.com/woodworking-projects/sawhorse-storage-leg-desk