Schoolhouse Chair with Writing Pad Desk
Plans for schoolhouse chair with writing pad desk.
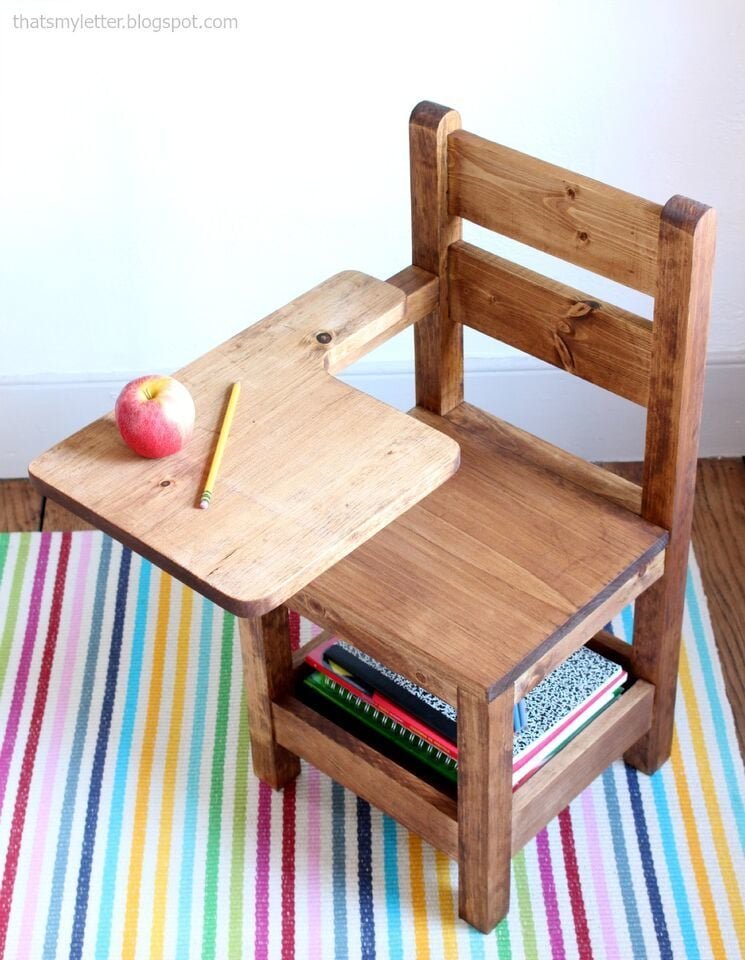
Specifications
| Project type | Toys |
|---|---|
| Room | Craftroom |
| Style | Farmhouse Furniture |
| Difficulty | Intermediate |
Dimensions
Use the size-specific shopping and cut lists below.
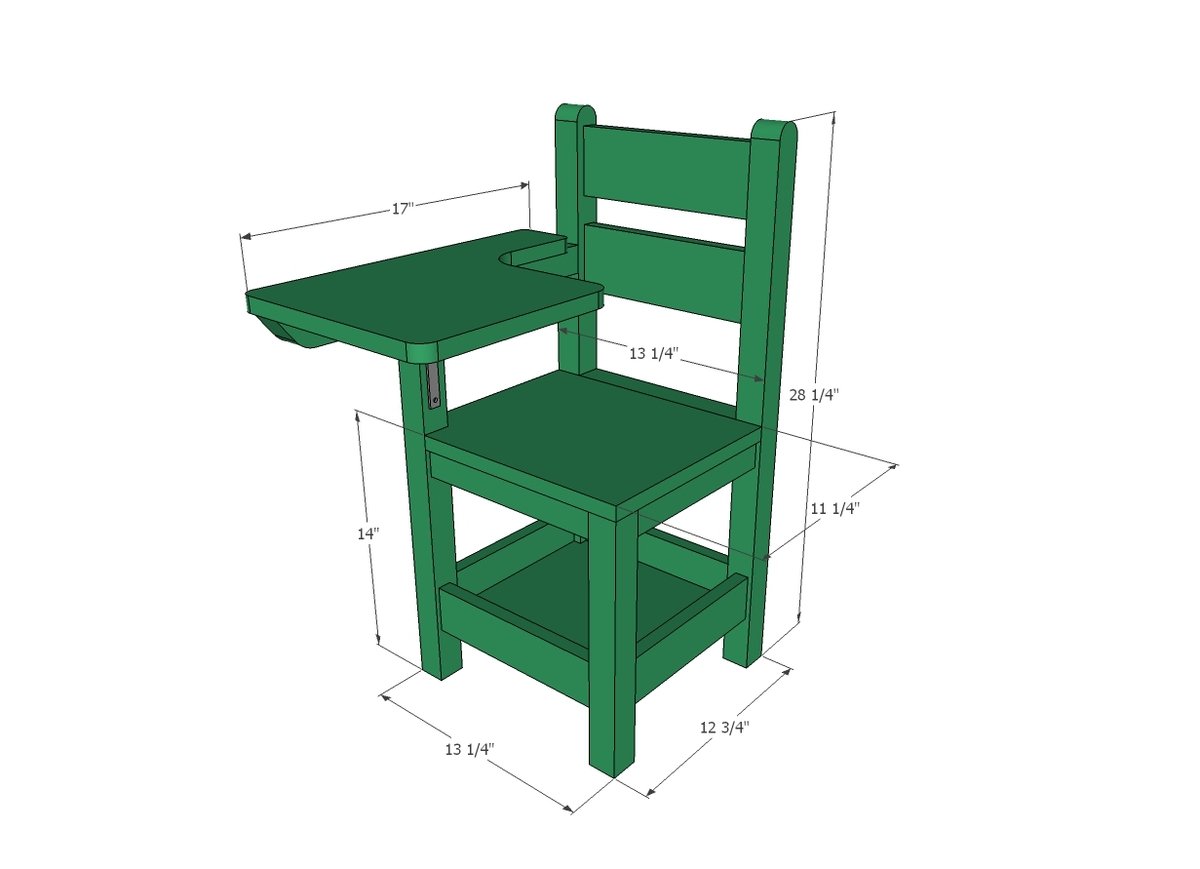
Shopping List
- 1 - 2x2 @ 10 feet long
- 1 - 1x4 @ 2 feet long
- 1 - 1x2 @ 6 feet long
- 1 - 1x3 @ 4 feet long
- 1 - 1x12 @ 4 feet long
- 1 - 6" L bracket
Cut List
- 2 - 2x2 @ 28-1/4" - back legs
- 2 - 1x4 @ 10-1/4" - chair back rungs
- 2 - 1x2 @ 10-1/4" - seat aprons
- 2 - 1x3 @ 10-1/4" - storage compartment
- 1 - 2x2 @ 13-1/4" - short front leg
- 1 - 2x2 @ 19-3/4" - long front leg
- 2 - 1x2 @ 9 - 3/4" - seat side aprons
- 2 - 1x3 @ 9-3/4" - storage compartment sides
- 1 - 1x12 @ 10-3/4" bottom shelf bottom - (can also use 1/2" or 3/4" thick plywood)
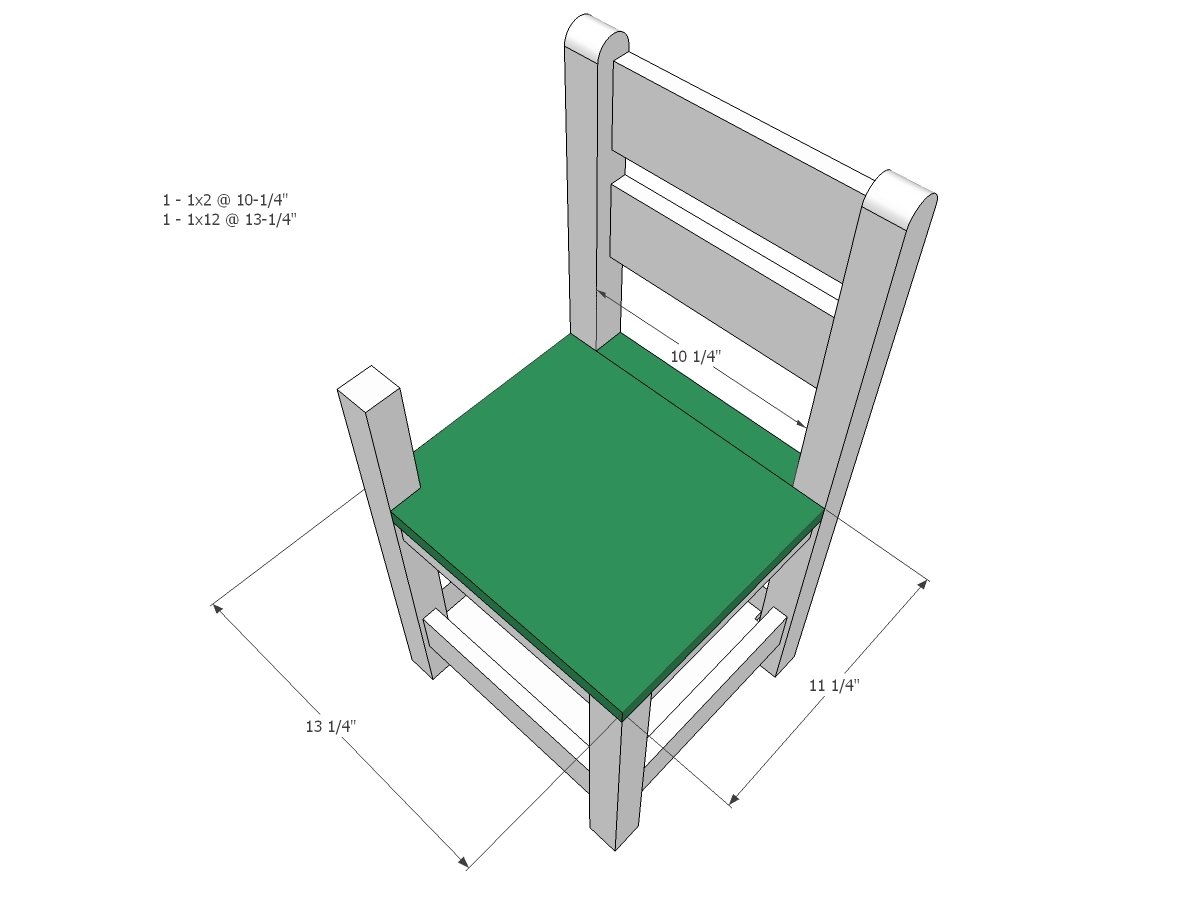
- 1 - 1x12 @ 13-1/4" - seat
- 1 - 1x2 @ 10-1/4" - seat back spacer
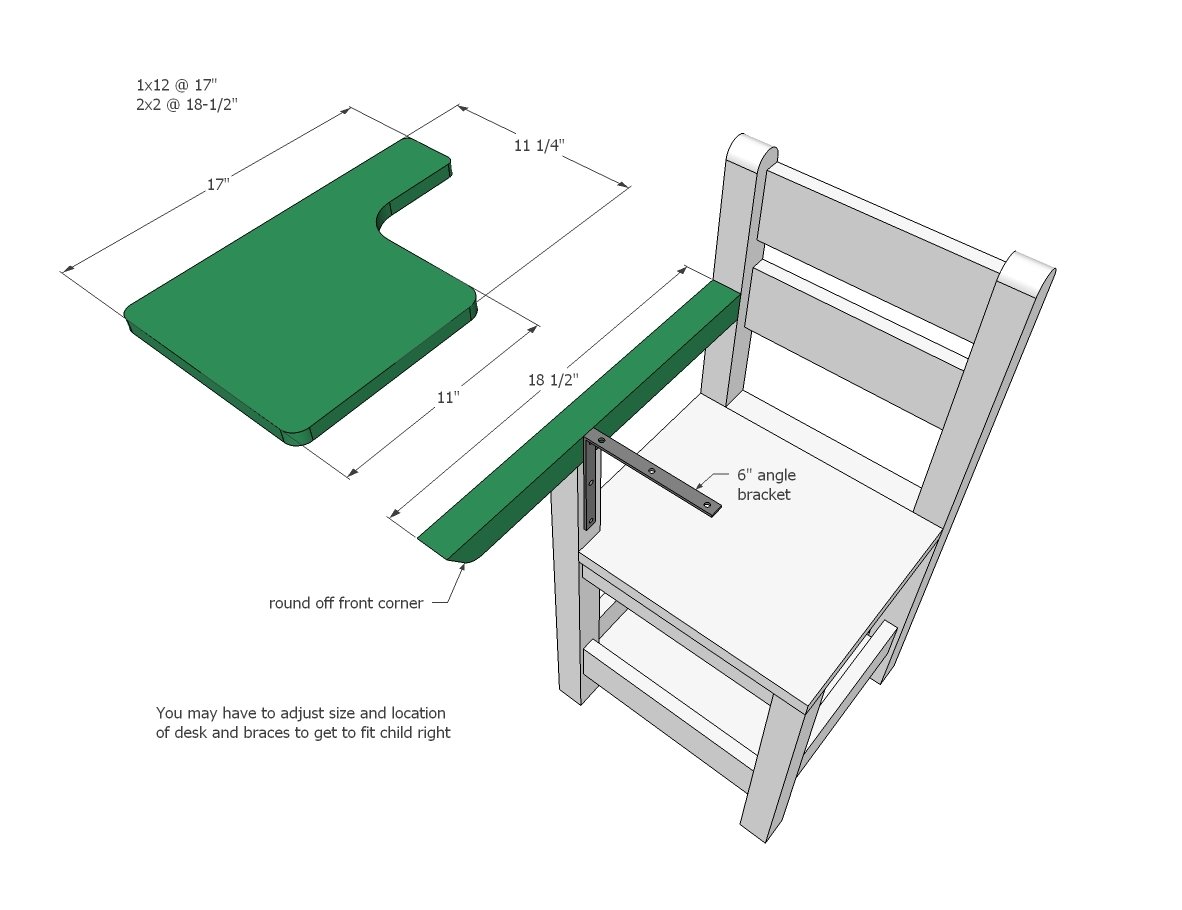
- 1 - 2x2 @ 18-1/2" - desk support (round front edge)
- 1 - 1x12 @ 17" - desk
Tools
- measuring tape
- square
- pencil
- safety glasses
- hearing protection
- kreg-jig
- drill
- compound miter saw
- nailer
- countersink drill bit
Step-by-step Instructions
Step 1
Use 3/4" pocket holes to build the back of the chair and the front supports. Use a 1/4" piece of plywood as a spacer to inset the aprons/supports on the 2x2 legs. Attach all pieces with glue and 1-1/4" pocket hole screws. SEAT ATTACHEMENT NOTE: For no exposed fasteners when attaching seat, drill 3/4" pocket holes facing upward on inside of aprons. Just two per apron is fine. DESK ATTACHMENT NOTE: In step 5, you will attach the desk support piece. To easily attach to front leg, you can drill a 1-1/2" pocket hole on outside of front leg. However, this will be very visible and is not recommended for a stained finish, but for a paint finish will work fine.
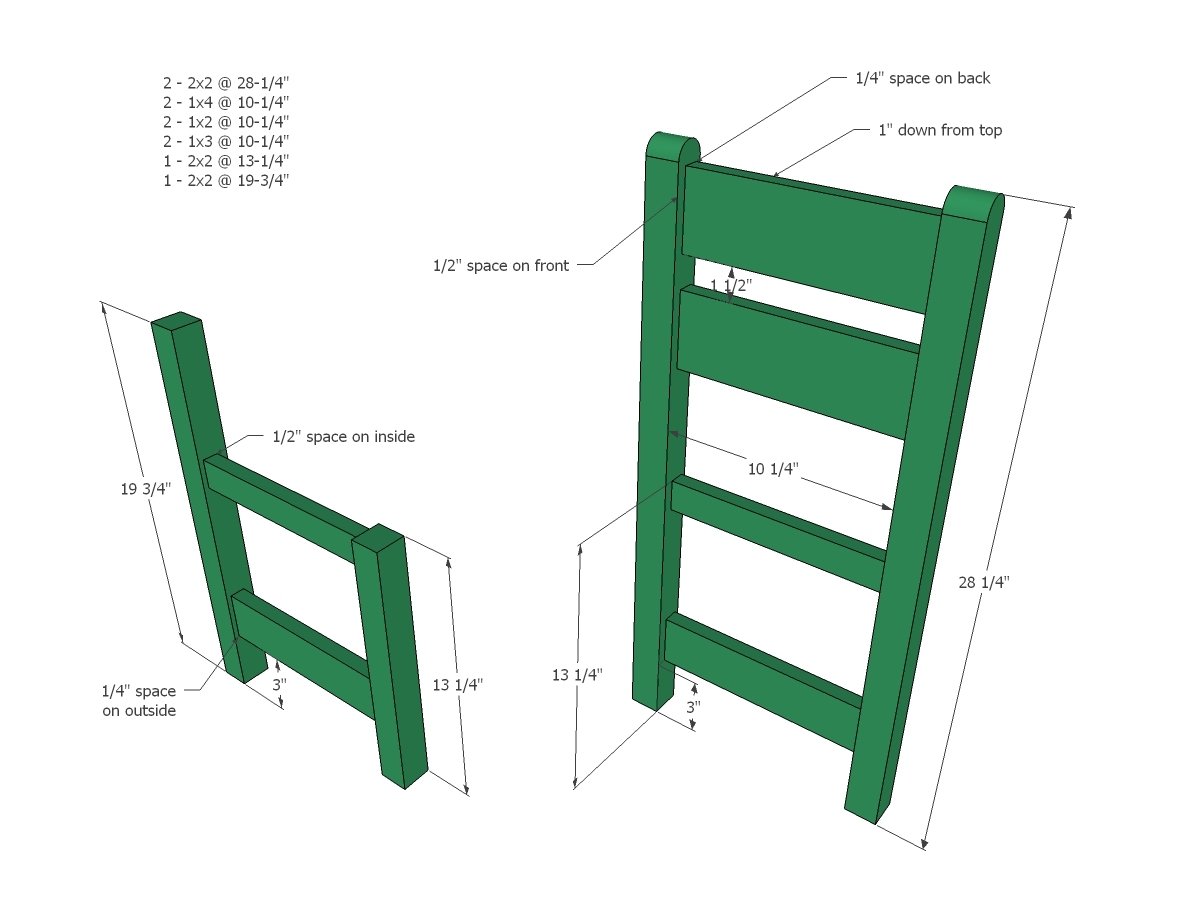
Step 2
Drill 3/4" pocket holes on ends of aprons and storage compartment sides. Attach to front and back pieces with glue and 1-1/4" pocket hole screws. Like back and front, these boards are all inset from outside on the 2x2 legs by 1/4". NOTE: For no exposed fasteners when attaching seat, drill 3/4" pocket holes facing upward on inside of aprons. Just two per apron is fine.
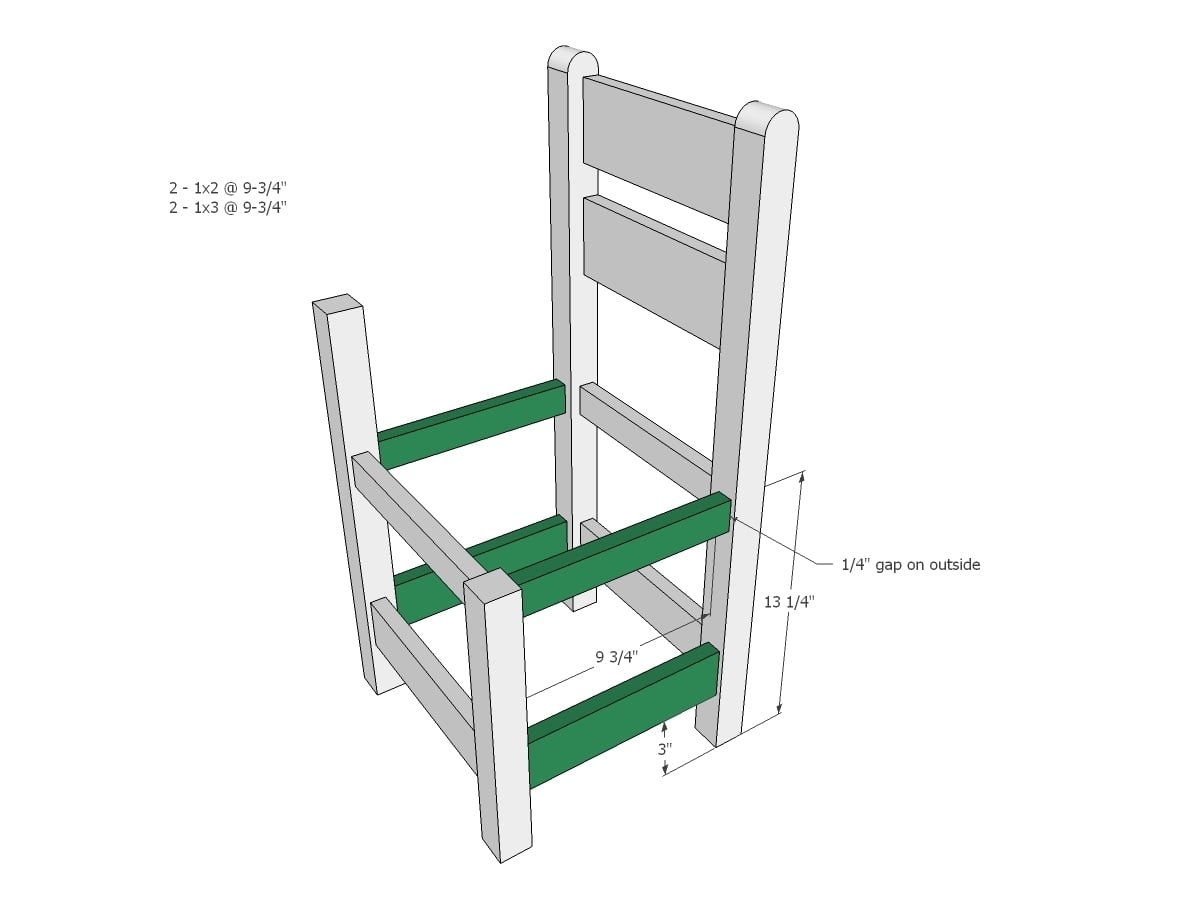
Step 3
Notch corners to fit inside legs. Drill 3/4" pocket holes around the edge of bottom shelf bottom and attach inside 1x3 sides with 1-1/4" pocket hole screws. Can also be nailed and glued in place. NOTE: If you wish to attach seat from underneath with no exposed fasteners, attach seat before attaching bottom shelf so that you can fit your drill inside.
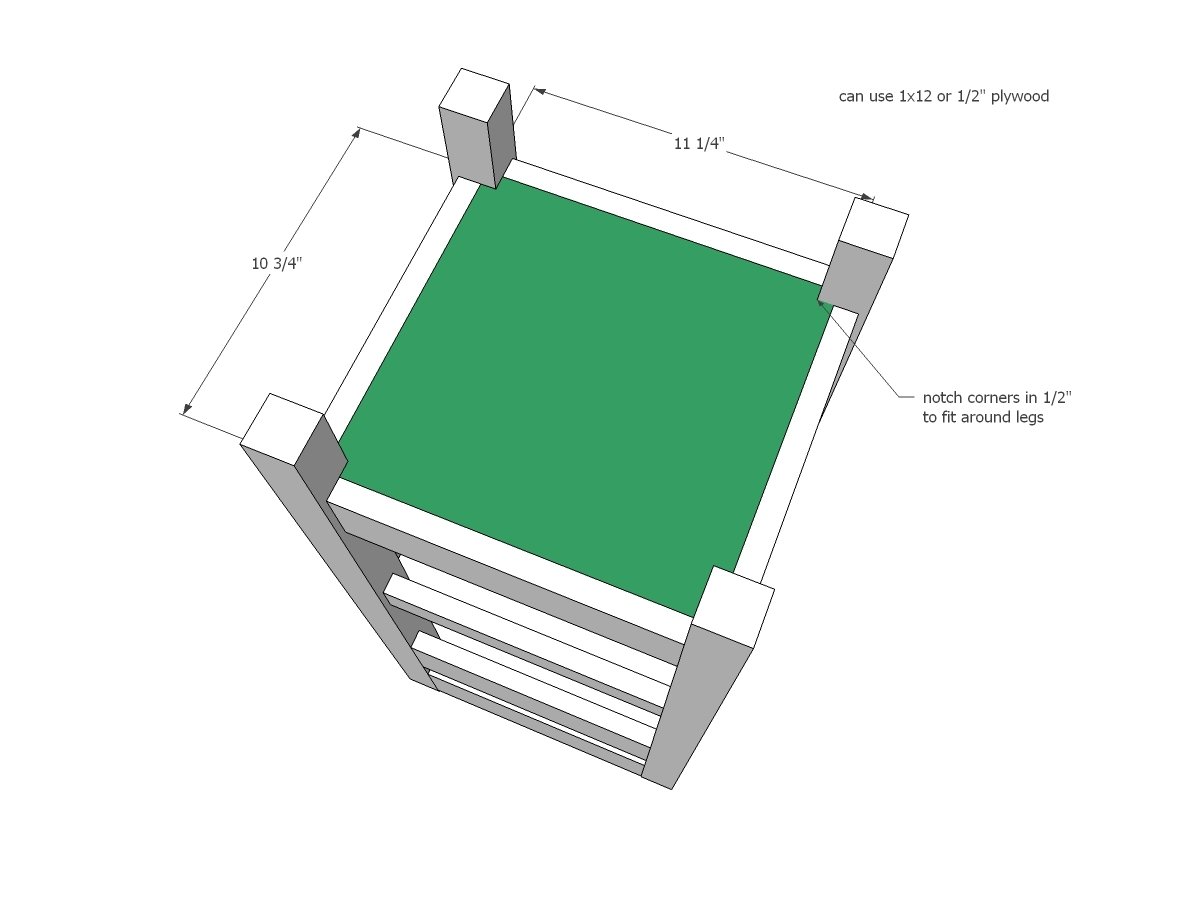
Glue and nail seat to aprons with 1-1/4" finish nails.
NO EXPOSED FASTERNER METHOD: Drill 3/4" pocket holes on insides of aprons (as instructed in steps 1 and 2) and attach seat from underneath with 1-1/4" pocket hole screws and glue.
Step 5
Finishing
Sand all surfaces, starting with a medium grit and finishing with fine. Wipe off the dust, fill any holes or gaps with wood filler, and sand smooth once dry. Apply primer if you're painting, then finish with your choice of paint or stain and seal with a durable clear topcoat. For outdoor projects, use exterior-rated primer, paint or stain, and sealer so the piece stands up to the weather.
Source (temporary): https://www.ana-white.com/woodworking-projects/schoolhouse-chair-writing-pad-desk