Schoolhouse Chalkboard
A large chalkboard, with cross bracing and a chalk ledge. Can be built to fold flat.
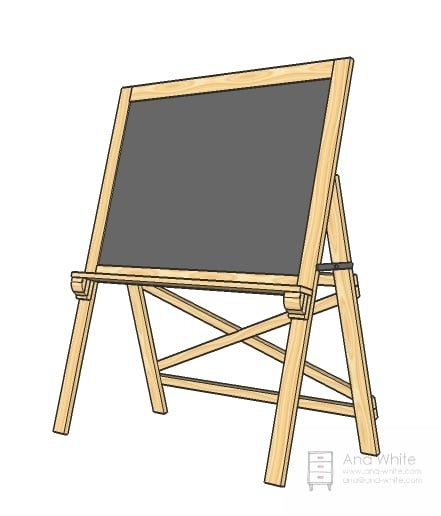
Specifications
| Project type | Toys |
|---|---|
| Room | Kids and Toys |
| Style | Children's and Kid's Room Furniture and Toy Plans |
| Difficulty | Intermediate |
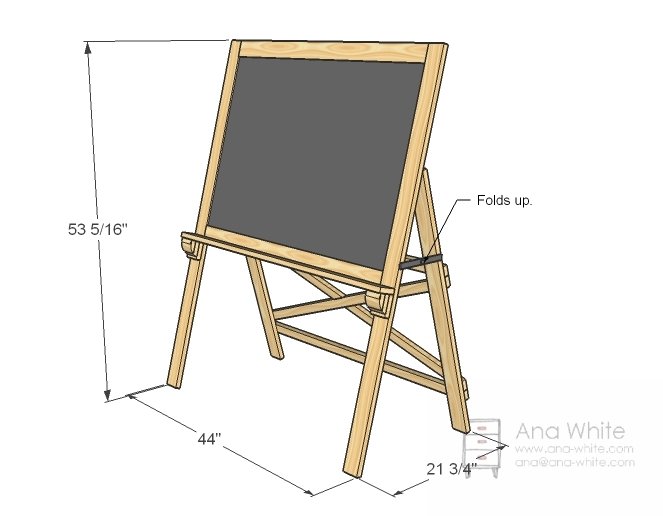
Dimensions
Use the size-specific shopping and cut lists below.
Shopping List
- 4 -1×3 @ 8 feet long
- 2 – 1×2 @ 8 feet long
- 1 1/4″ pocket hole screws
- 1 1/4″ screws
- 3/4″ screws
- wood glue
- finishing supplies
- 1/2 sheet of 1/4″ thick hardboard (backside of paneling works great chalkboard paint
- 1 set of 2 1/2″ wide hinges (door hinges would work or industrial hinge)
- 1 set of hinge for lift tops toy boxes – the longer the better.
Cut List
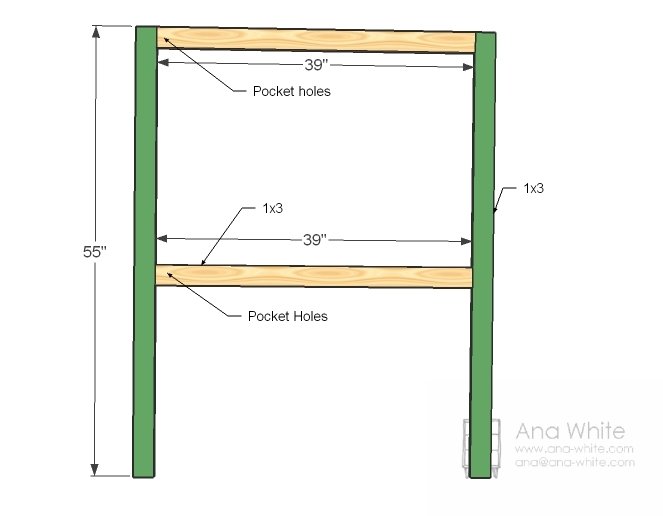
- 2 – 1×3 @ 39″ (Frame Top)
- 2 – 1×3 @ 55″ (Frame Sides)
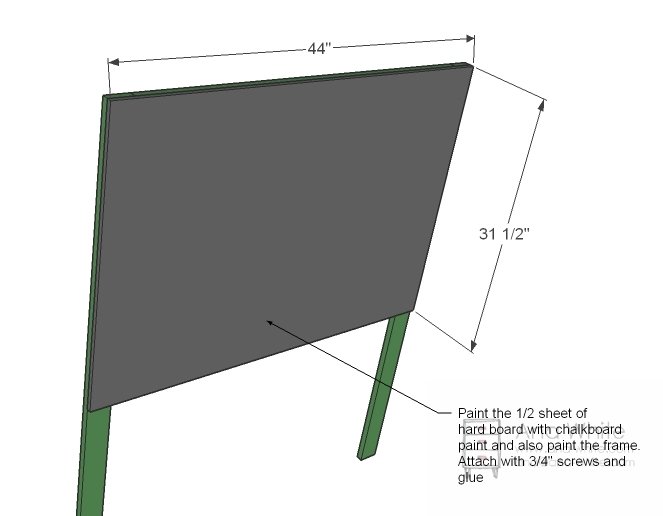
- 1 – 1/4″ hardboard @ 44″ x 31 1/2″ (Chalkboard)
- 1 – 1×3 @ 44″ (Tray)
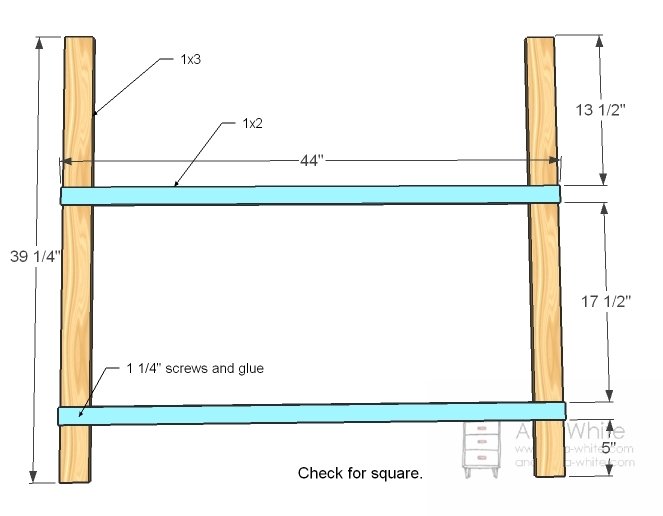
- 2 – 1×3 @ 39 1/4″ (back legs)
- 2 – 1×2 @ 44″ (horizontal back supports)
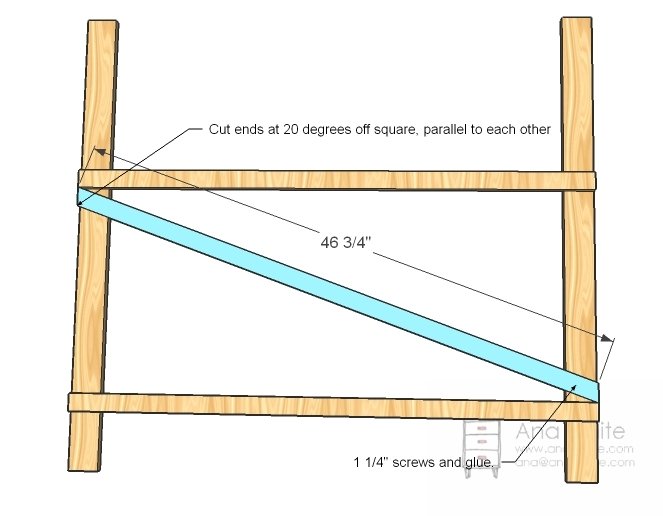
- 1 – 1×2 @ 46 3/4″ (first cross support – see diagram before cutting)
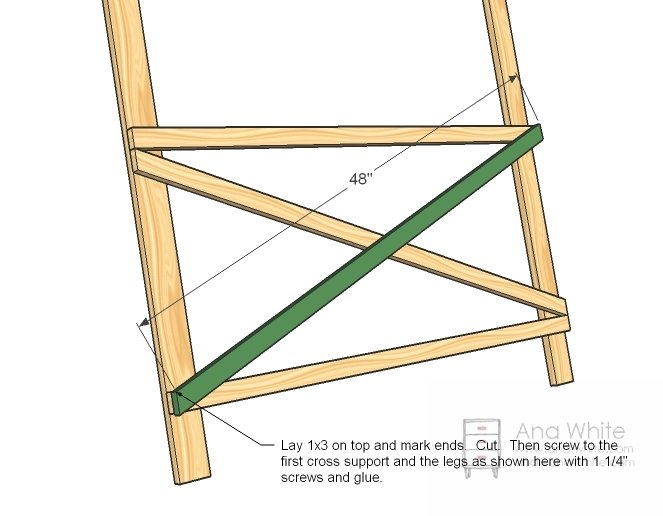
- 1 – 1×2 @ 48″ (second cross support – see diagram before cutting)
Tools
- measuring tape
- square
- pencil
- safety glasses
- hearing protection
- kreg-jig
- drill
- jigsaw
- compound miter saw
- sander
- level
- countersink drill bit
Step-by-step Instructions
Build the Frame
Drill pocket holes in both ends of the horizontal frame boards. Build the frame.
Chalkboard
After painting both the frame and the chalkboard, glue and screw the chalkboard to the frame using 3/4″ screws and glue.
Corbels
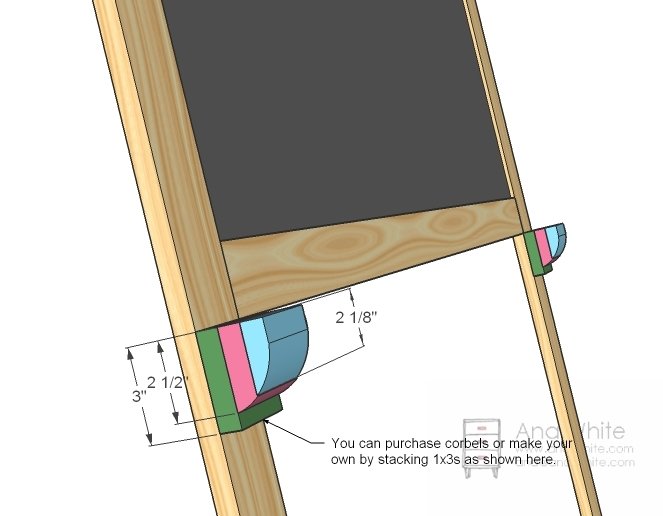
Attach corbels, or make your own as shown above. Glue and screw or use finish nails to secure.
Tray
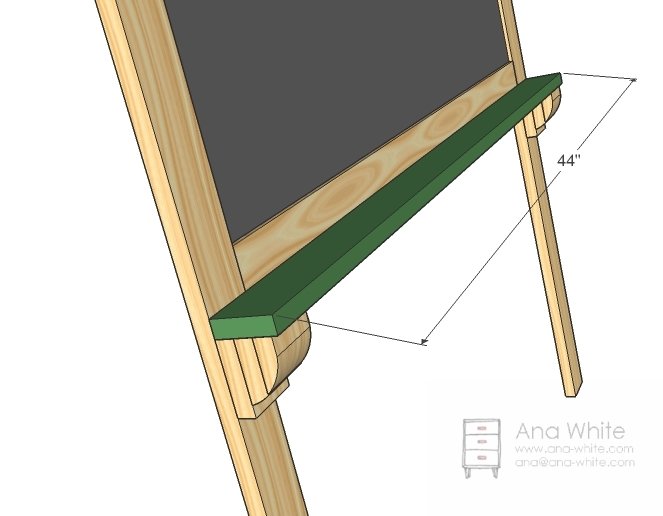
Now attach the tray to the corbels and screw through the back into the back side of the tray. Use 1 1/4″ screws and glue.
Step 5
Cross Support
The easiest method is to lay the 1×2 over the back and mark. Cut with a jigsaw, then glue and screw in place with 1 1/4″ screw and glue.
Top Cross Support
Now simply lay the top cross support on top, mark, cut and then glue and screw in plac
Assembly
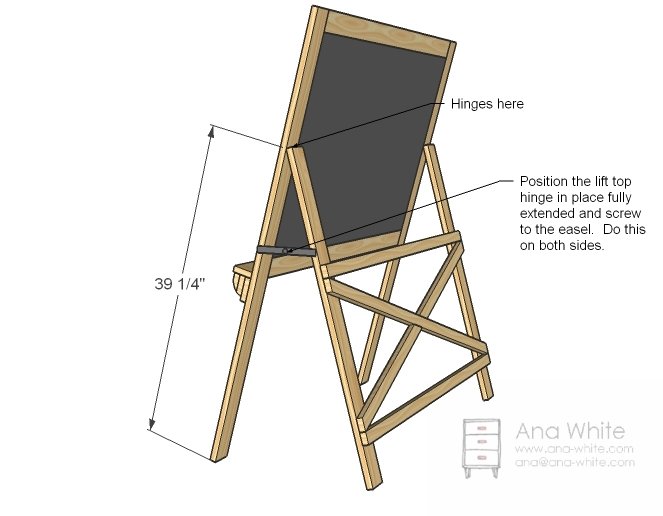
Hinge the back to the front as shown in the diagram. Then prop the chalkboard up in the position that works for you. With lift top hinges fully extended, screw in place on both sides where the hinges fit (longer ones will add more support).
Finishing
Sand all surfaces, starting with a medium grit and finishing with fine. Wipe off the dust, fill any holes or gaps with wood filler, and sand smooth once dry. Apply primer if you're painting, then finish with your choice of paint or stain and seal with a durable clear topcoat. For outdoor projects, use exterior-rated primer, paint or stain, and sealer so the piece stands up to the weather.
Source (temporary): https://www.ana-white.com/woodworking-projects/schoolhouse-chalkboard