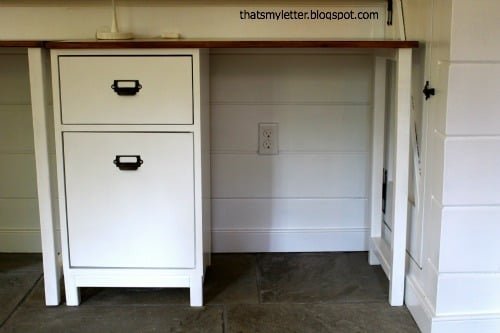
Schoolhouse Desk Single Pedestal
to make a schoolhouse style desk!
Specifications
| Project type | Desk, Desk Systems and Project Table Plans |
|---|---|
| Room | Storage Solutions |
| Style | Children's and Kid's Room Furniture and Toy Plans |
| Difficulty | Intermediate |
| Estimated cost | $20 - $50 |
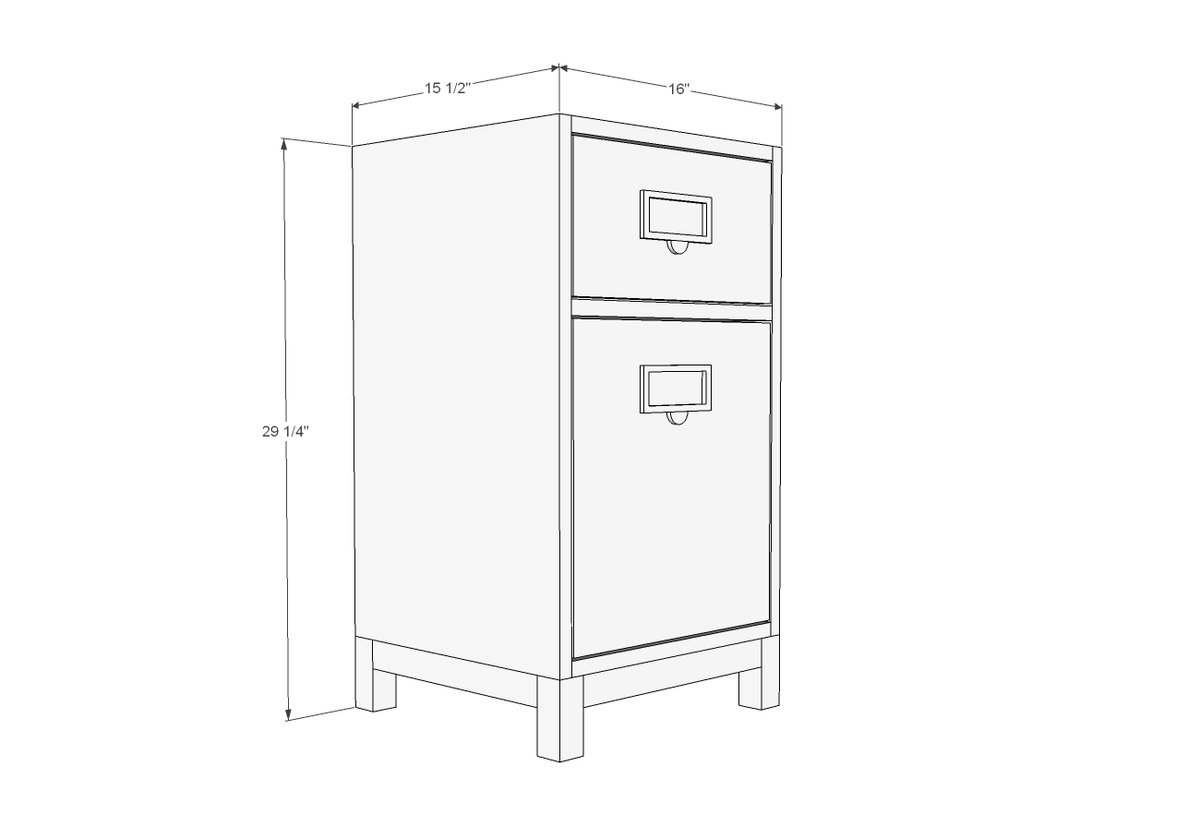
Dimensions
Use the size-specific shopping and cut lists below.
Shopping List
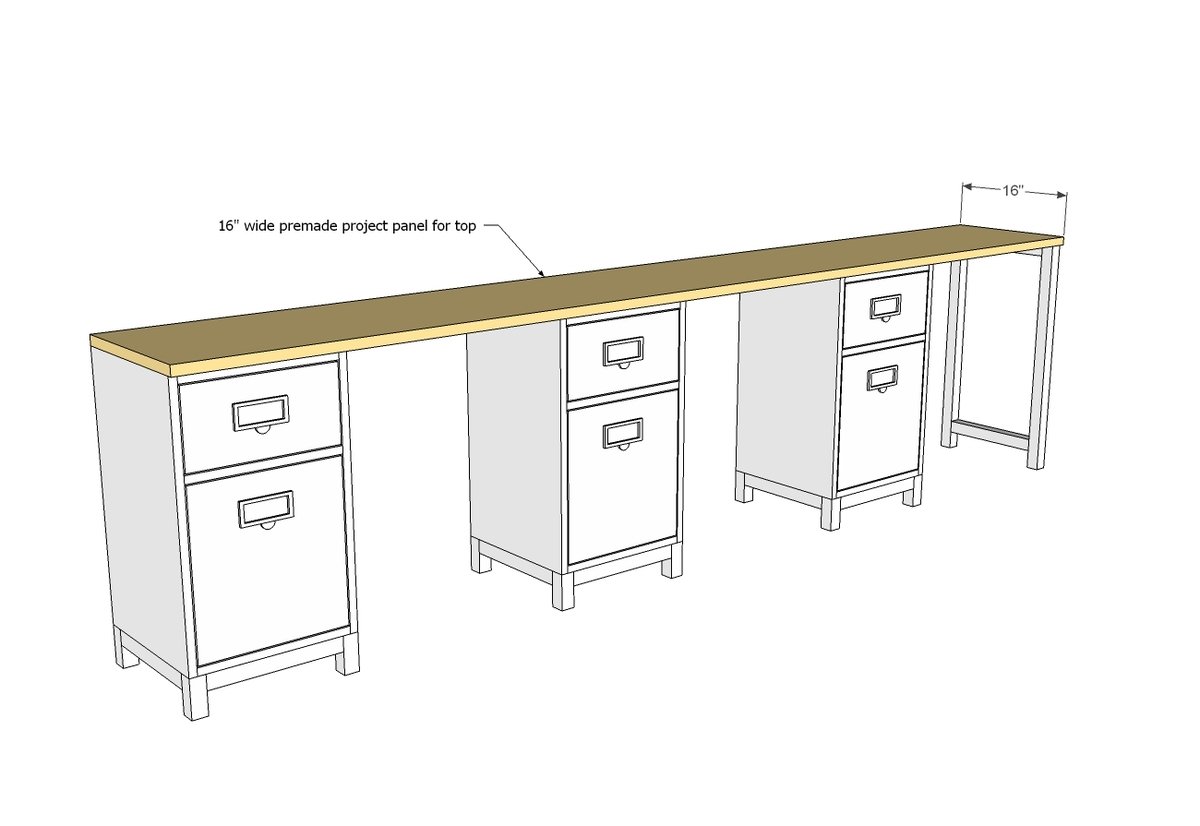
16” wide project panel 48” long for single desk (desktop)
1 set 14” white bottom corner mount euro drawer slides
2 knobs or handles
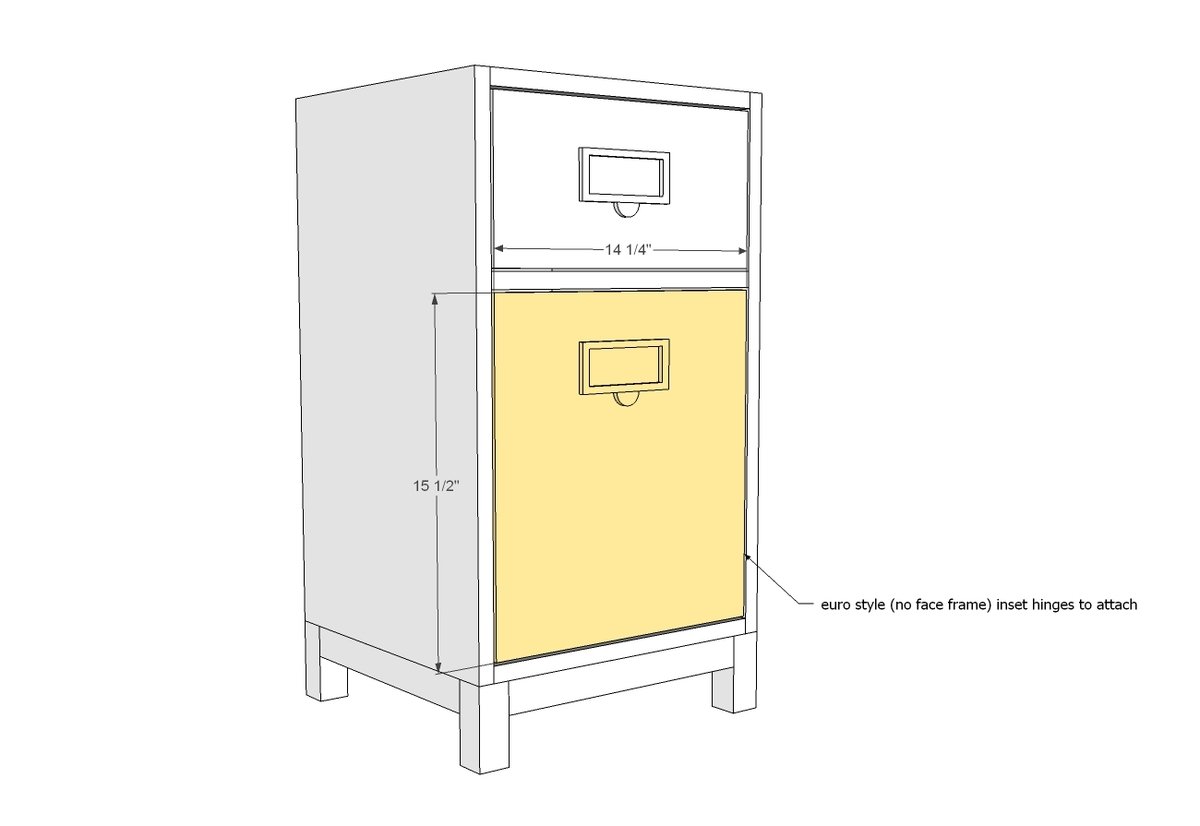
1 set inset hinges for frameless (euro style) cabinets)
For each pedestal, approximately 1/2 sheet 13” plywood, ripped into strips 15 1/2” wide (you may need to purchase a whole sheet to get the cuts)
1 - 1x2 @ 14 1/2” long
1 - 2x2 @ 8 feet long
1 - 1x6 @ 6 feet long
1 - 1x8 @ 14 1/2” long (1x8 is expected to be 7 1/4" wide)
1/4 sheet of 1/4” plywood
For end leg, you’ll need an extra 2x2
Cut List
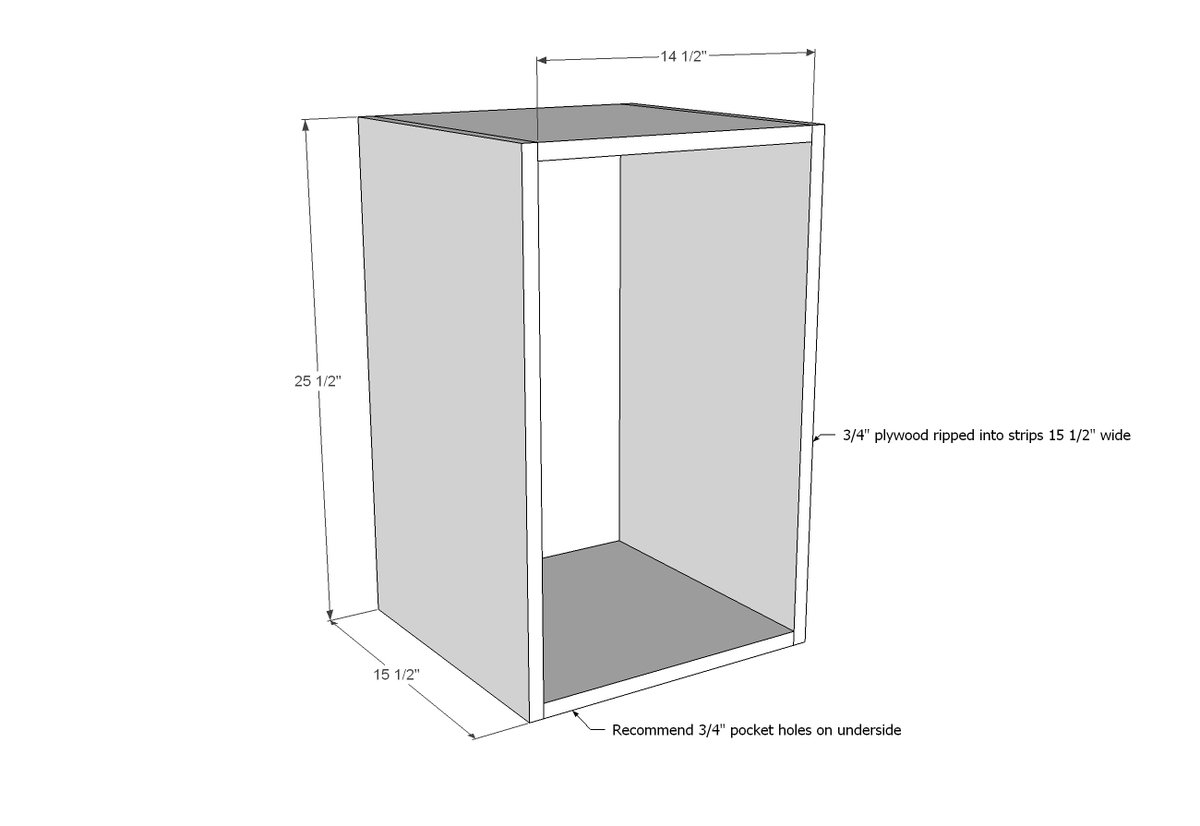
2 - 3/4” plywood 15 1/2” x 25 1/2”
2 - 3/4” plywood 15 1/2” x 14 1/2”
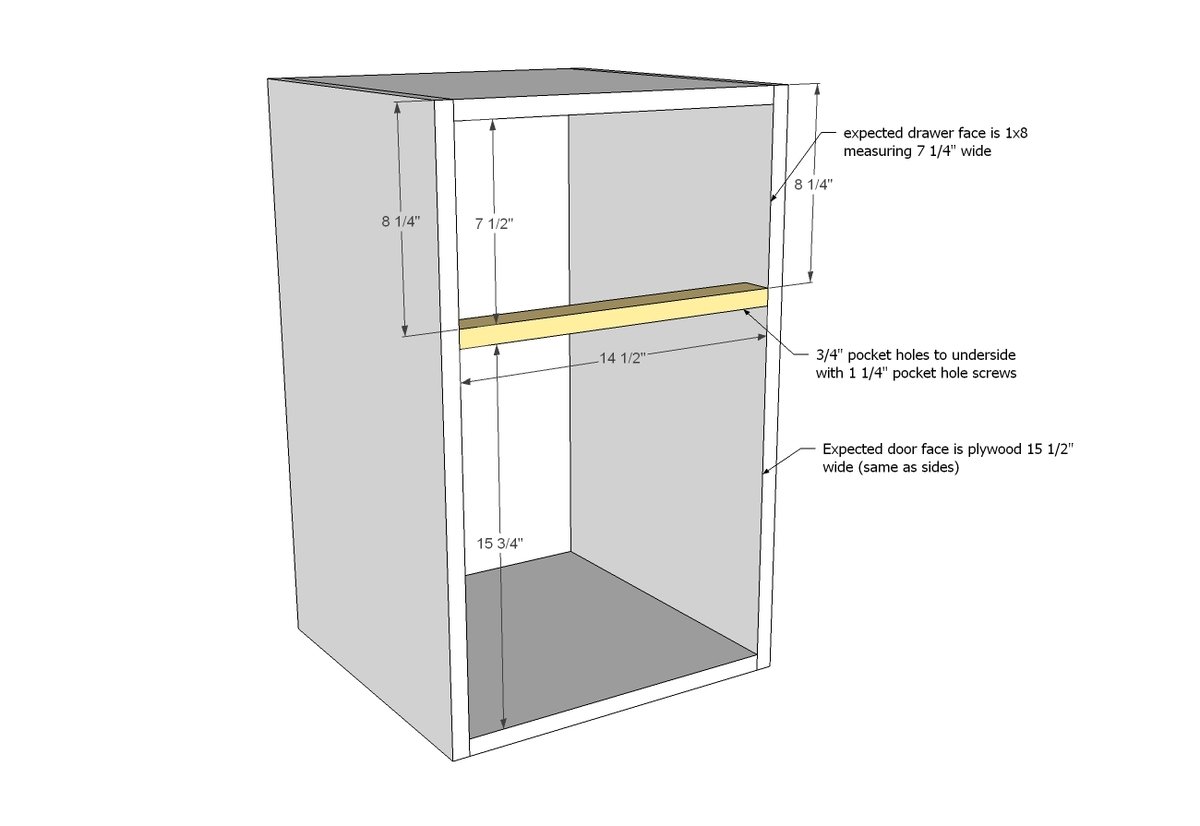
1 - 1x2 @ 14 1/2”
4 - 2x2 @ 3 3/4”
2 - 2x2 @ 12 1/2”
2 - 2x2 @ 13”
DRAWER - CUT TO FIT!!!
2 - 1x6 @ 12”
2 - 1x6 @ 14 1/2”
1 - 1/4” plywood @ 13 1/2” x 14 1/2”
1 - 1x8 @ 14 1/4”
DOOR
1 - 3/4” plywood @ 15 1/2” x 14 1/4”
For Shelves, use plywood pieces 14 1/2” x 14 1/2”
BACK
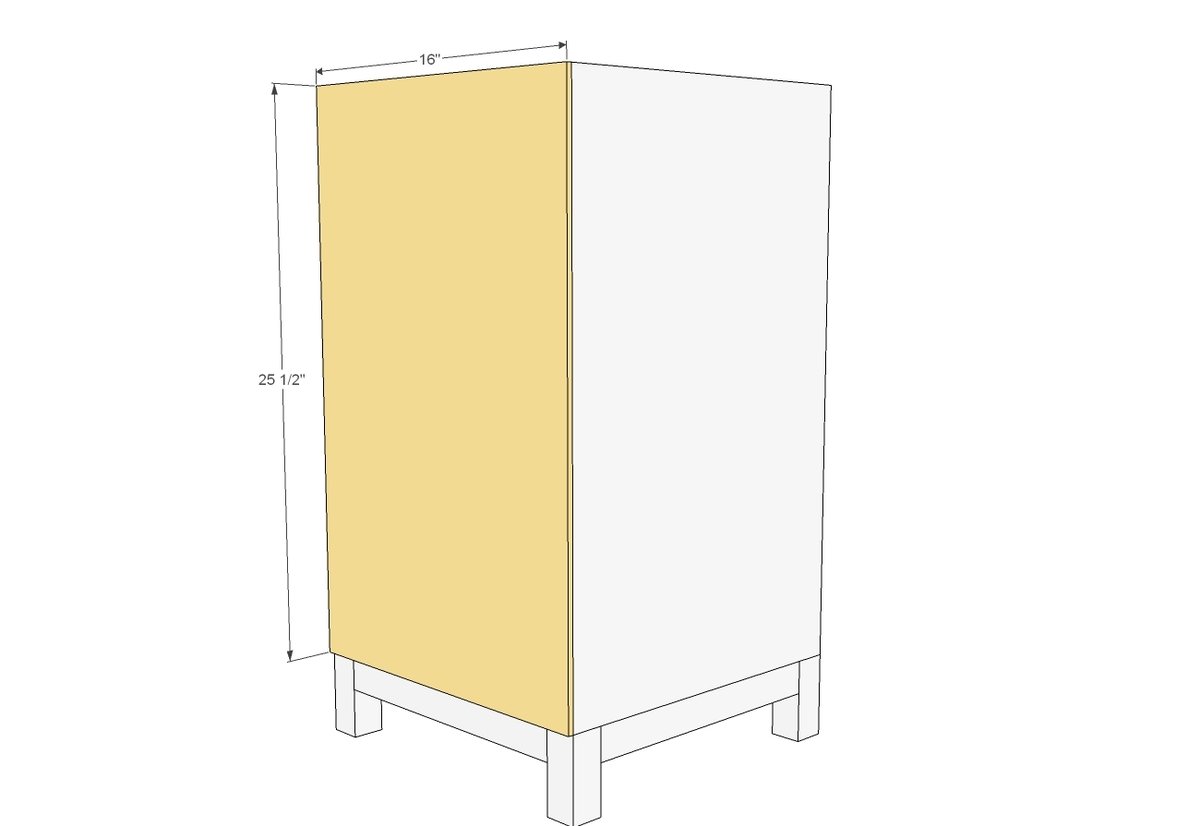
1/4” plywood 16” x 25 1/2”
END LEG
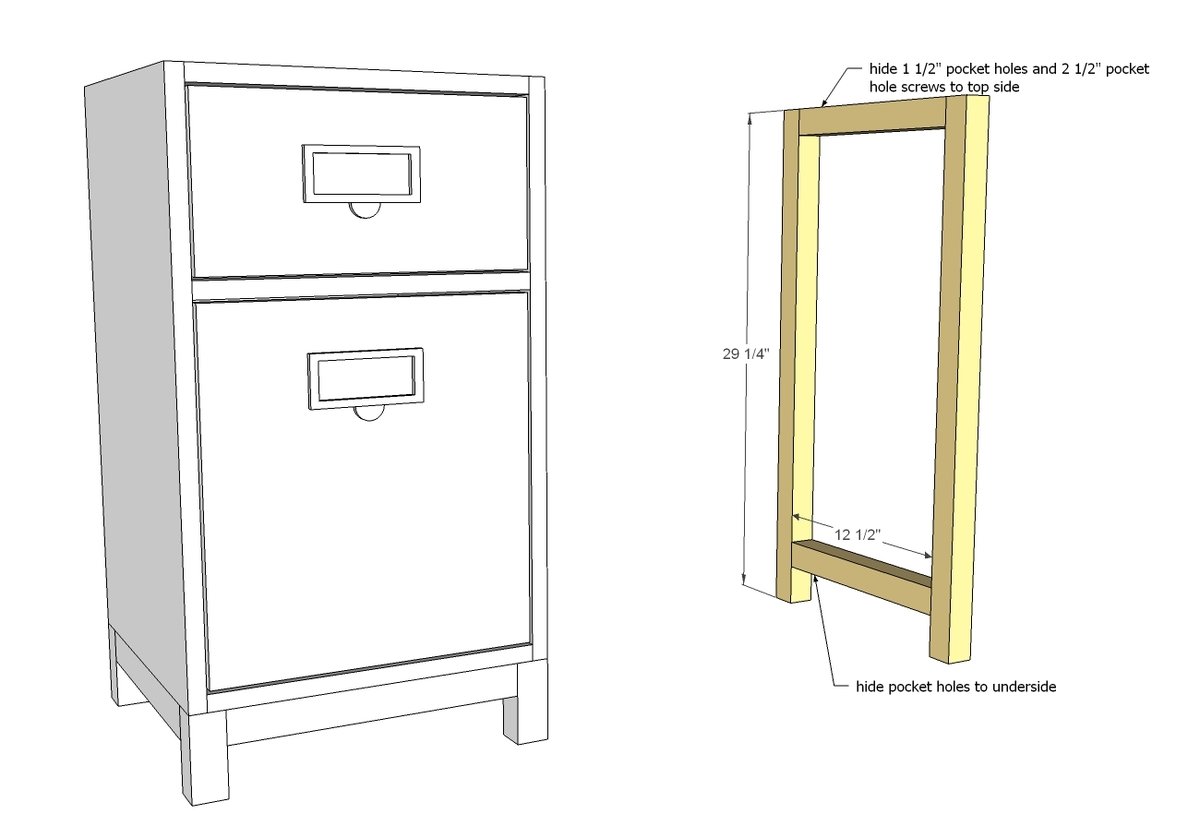
2 - 2x2 @ 12 1/2”
2 - 2x2 @ 29 1/4”
Tools
- measuring tape
- square
- pencil
- safety glasses
- hearing protection
- kreg-jig
- drill
- circular saw
- nailer
- sander
- countersink drill bit
Step-by-step Instructions
Step 1
Build the basic box out of the 3/4" plywood pieces.
Step 2
Attach the trim for between the door area and drawer area -
Step 3
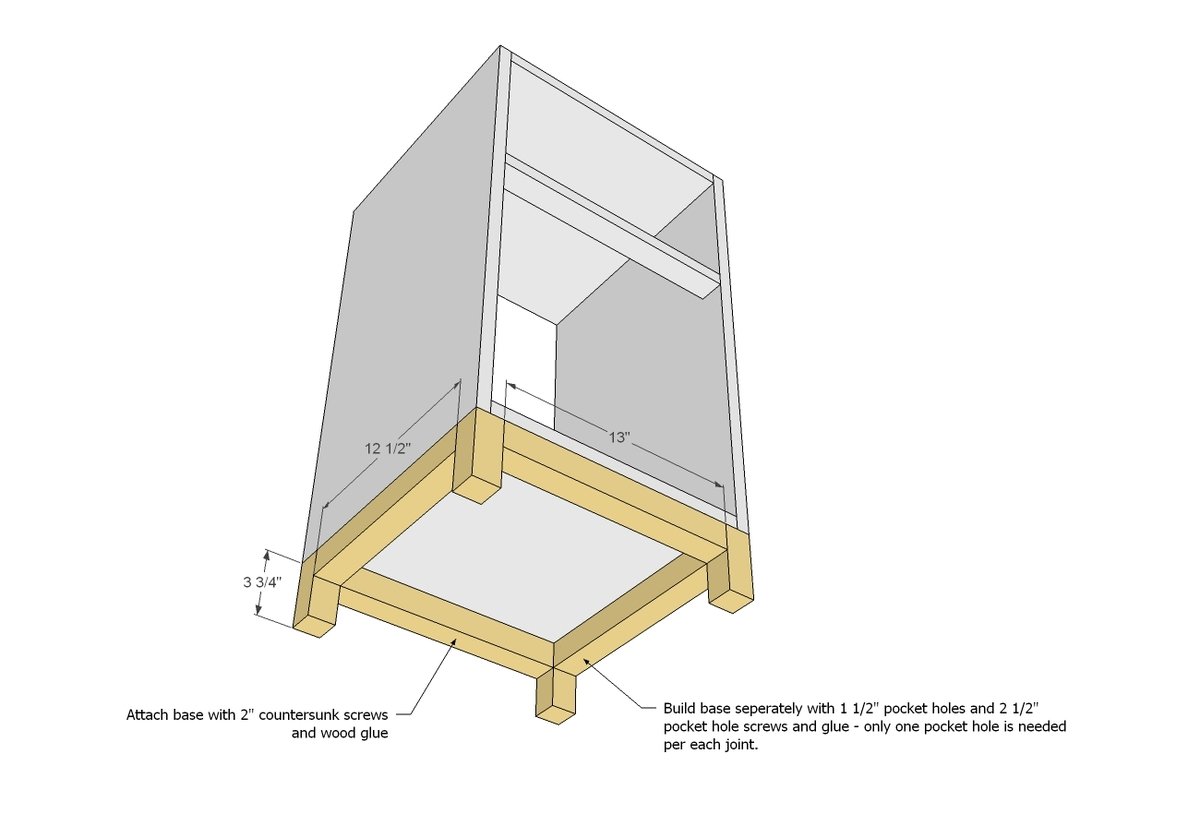
Build the base sepertely, then attach to bottom of the pedestal.
Step 4
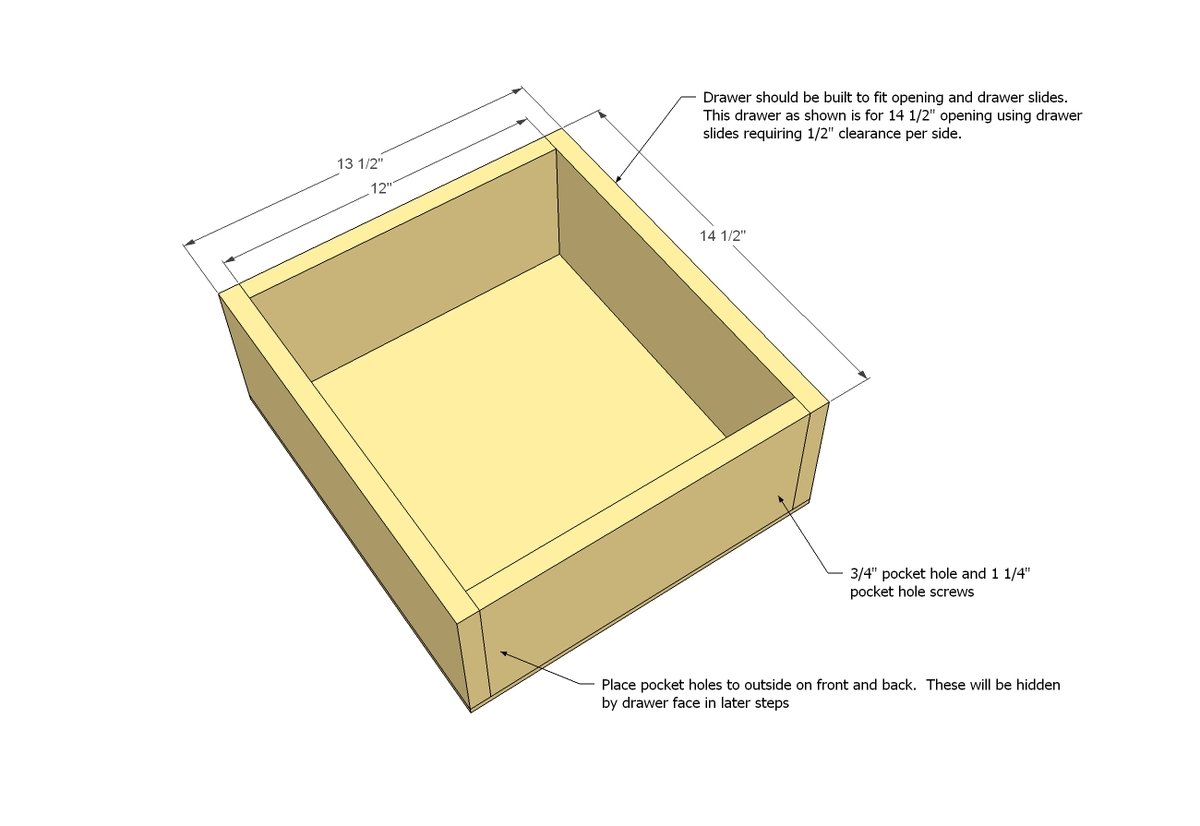
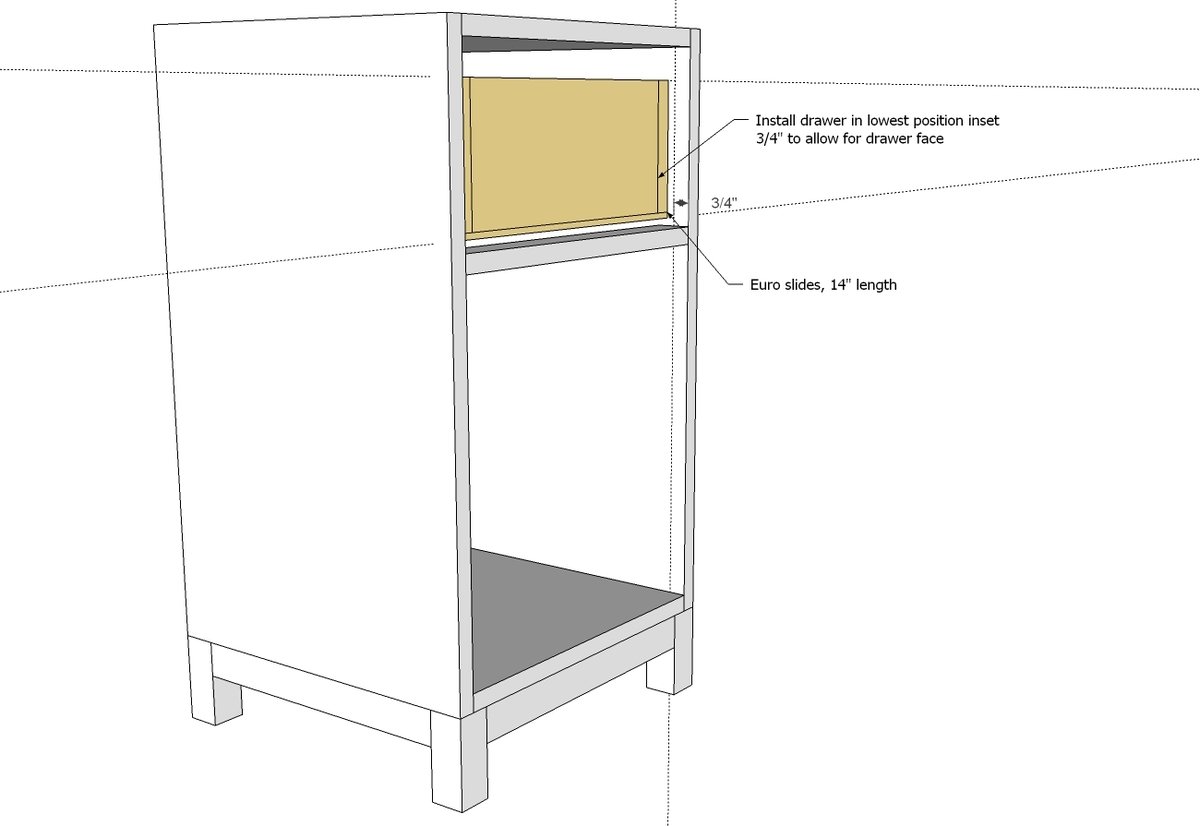
Measure the drawer area and read instructions included with your drawer slides. Build drawer to fit your cabinet and drawer slide clearances (as shown for 1/2" drawer slide clearances).
Step 5
Step 6
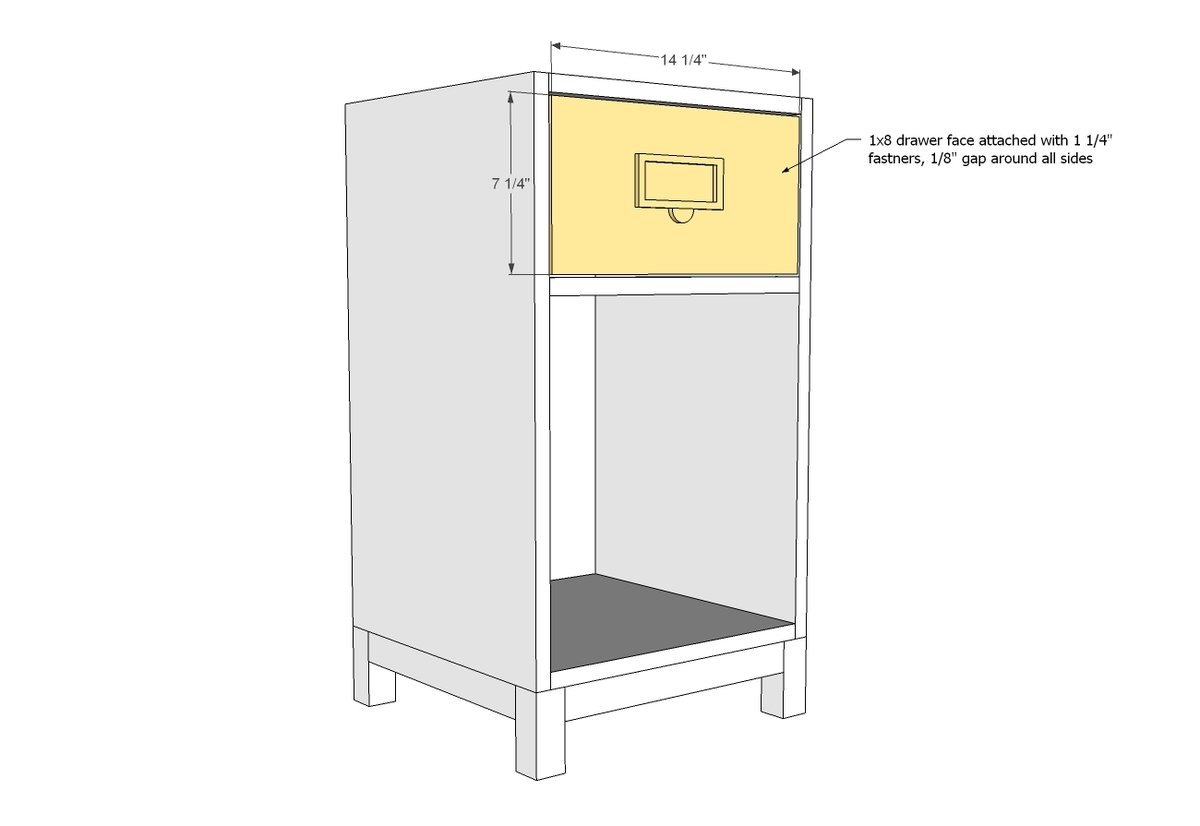
Attach drawer face, with an even 1/8" gap around all sides of drawer face.
Step 7
Attach door to base with inset hinges.
Step 8
Attach back to back, use glue and 1 1/4" finish nails.
Step 9
Build the support leg as shown in diagram.
Step 10
Attach tabletops - for wider tabletops, the back can extend past the pedestals.
Step 11
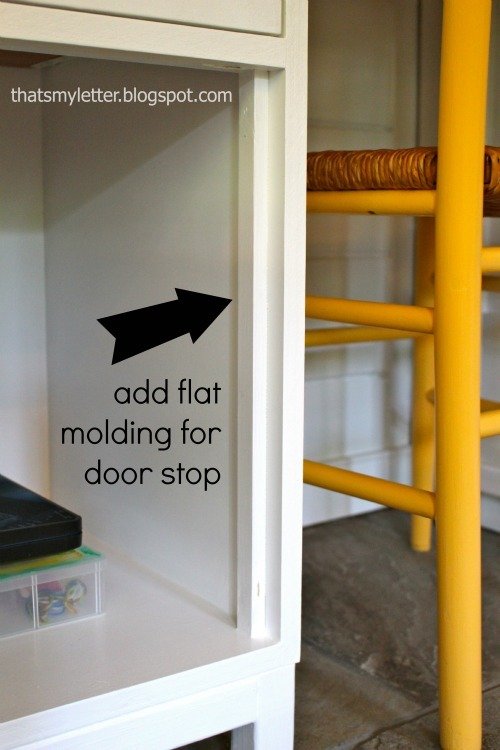
Jaime also added a strip of wood to the inside of the door to act as a door stop.
Finishing
Sand all surfaces, starting with a medium grit and finishing with fine. Wipe off the dust, fill any holes or gaps with wood filler, and sand smooth once dry. Apply primer if you're painting, then finish with your choice of paint or stain and seal with a durable clear topcoat. For outdoor projects, use exterior-rated primer, paint or stain, and sealer so the piece stands up to the weather.
Source (temporary): https://www.ana-white.com/woodworking-projects/schoolhouse-desk-single-pedestal