Schoolhouse Project Table Desk
Free schoolhouse craft table plans from
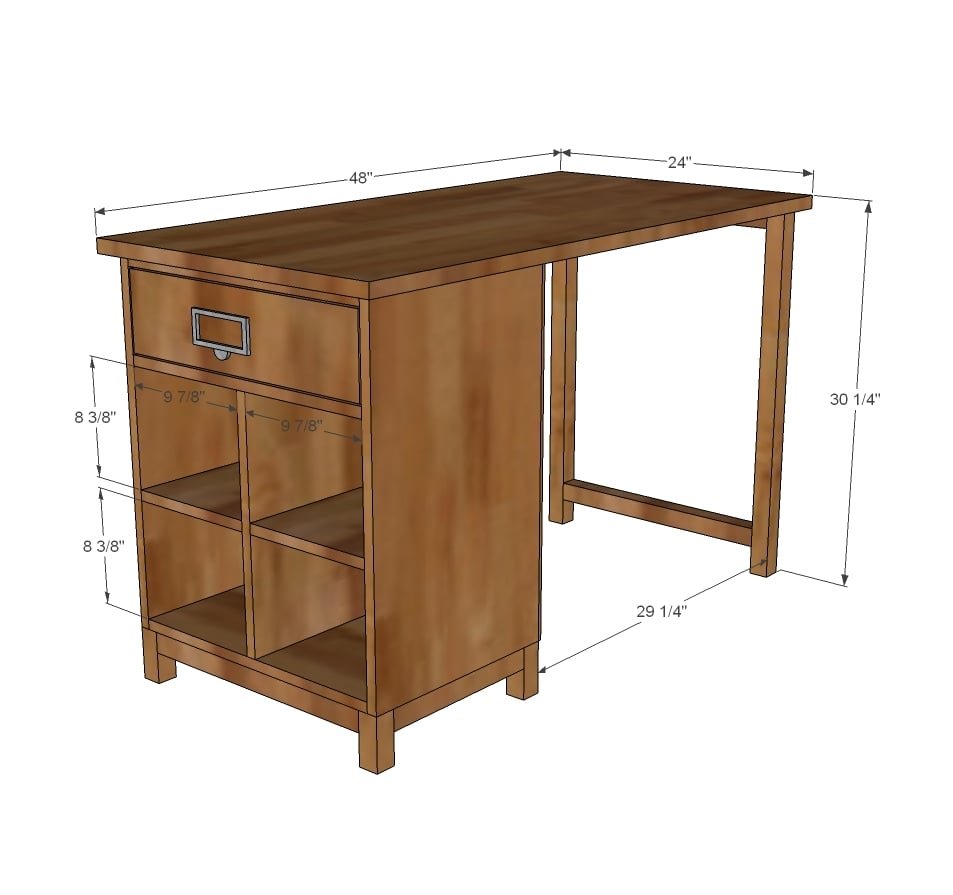
Specifications
| Project type | Desk, Desk Systems and Project Table Plans |
|---|---|
| Room | Storage Solutions |
| Style | Children's and Kid's Room Furniture and Toy Plans |
| Difficulty | Intermediate |
| Estimated cost | $50 - $100 |
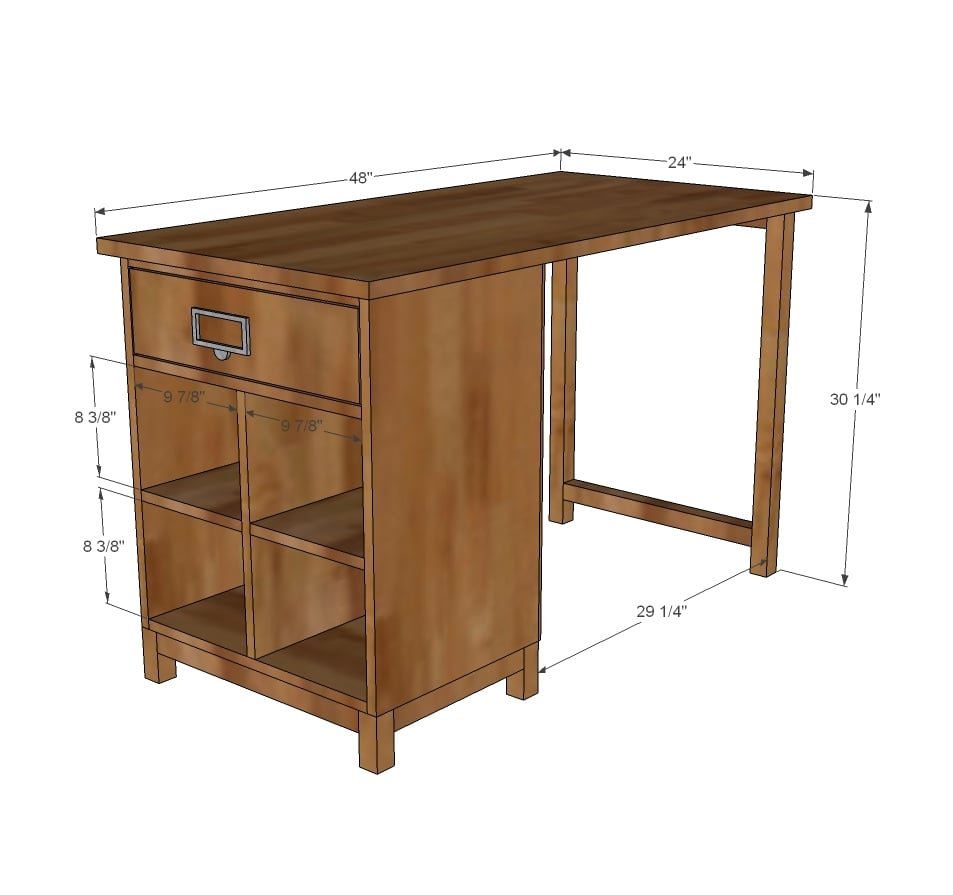
Dimensions
Use the size-specific shopping and cut lists below.
Shopping List
- 1 sheet of 3/4" hardwood plywood cut into strips 15 1/2" wide x 8 feet long (you'll get three strips but only need 2)
- 1 - 1x4 @ 6 feet long
- 1 - 24" x 48" piece of 1/4" plywood
- 2 - 2x2 @ 8 feet long
- 1 - 1x6 @ 2 feet long
- 1 1/4" and 2 1/2" pocket hole screws (recommended)
- 1 1/4" finish nails
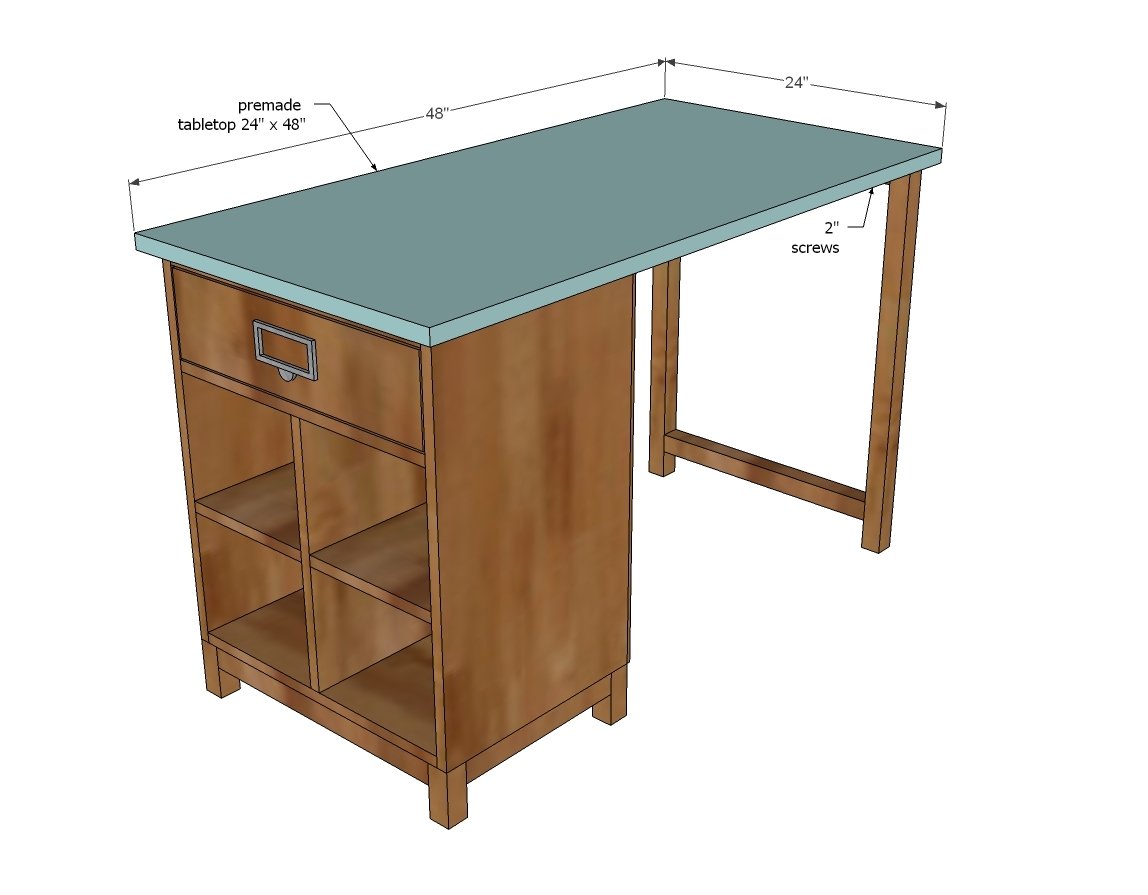
- 2" screws for attach tabletop and base (you'll just need a half dozen or so)
- 14" euro style drawer slides (bottom corner mount - usually white in color)
Cut List
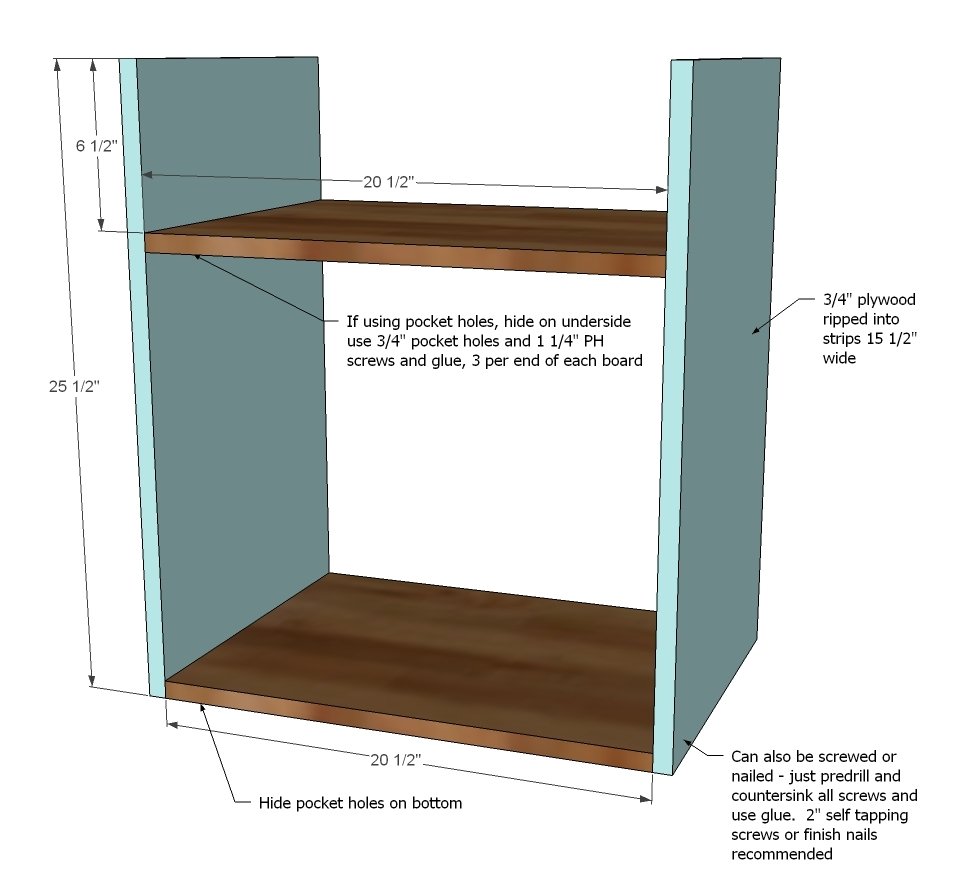
- 2 - 3/4" plywood @ 15 1/2" x 25 1/2" (sides)
- 3 - 3/4" plywood @ 15 1/2" x 20 1/2" (shelves)
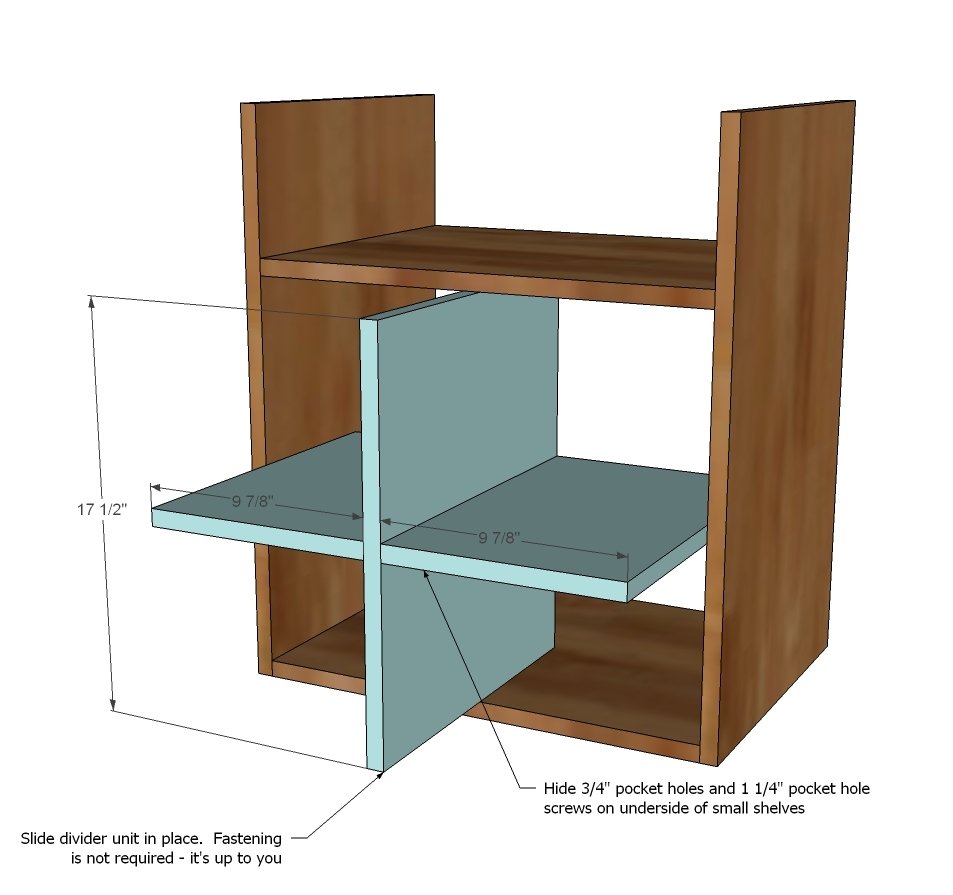
- 1 - 3/4" plywood @ 15 1/2" x 17 1/2" (center divider)
- 2 - 3/4" plywood @ 15 1/2" x 9 7/8" (small dividers)
DRAWER - CUT TO FIT OPENING AND DRAWER SLIDES!!!
- 2 - 1x4 @ 14"
- 2 - 1x4 @ 18"
- 1 - 1/4" plywood @ 19 1/2" x 14"
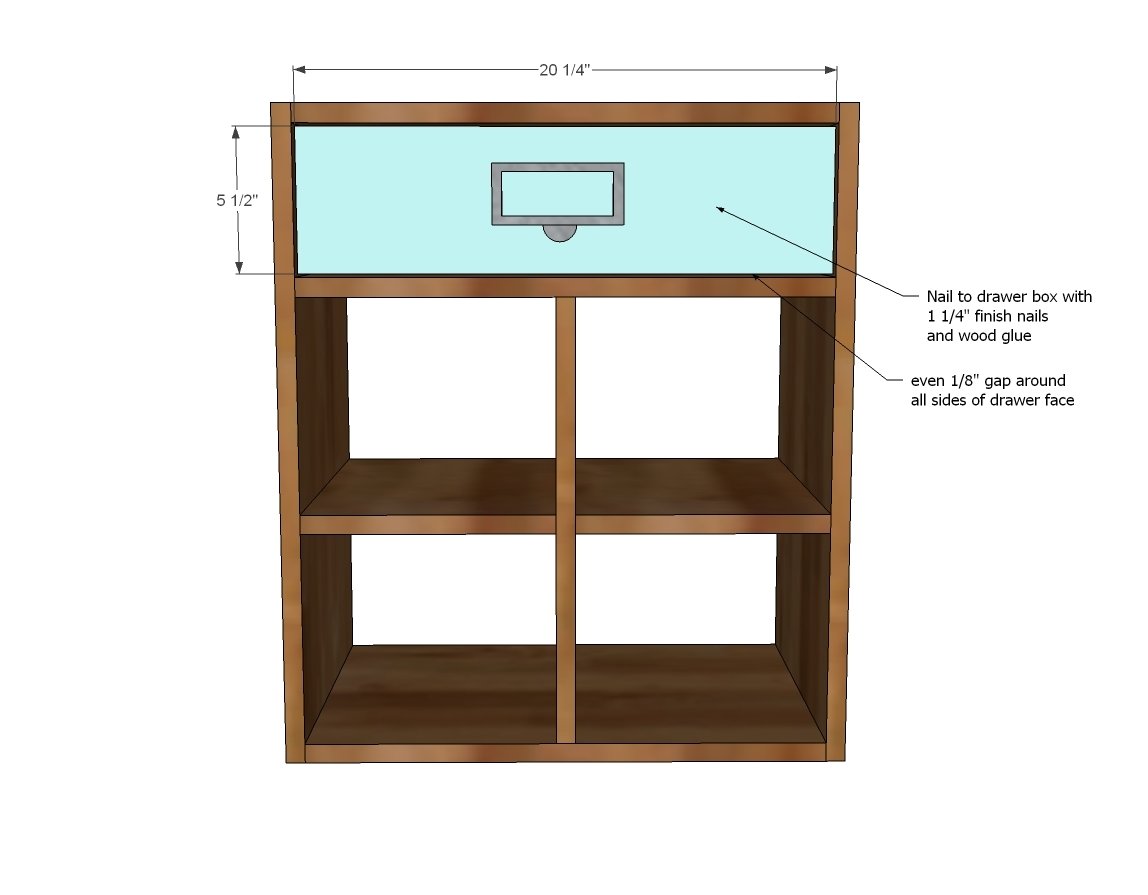
- 1 - 1x6 @ 20 1/4"
BASE
- 4 - 2x2 @ 3 3/4"
- 2 - 2x2 @ 12 1/2"
- 2 - 2x2 @ 19"
BACK
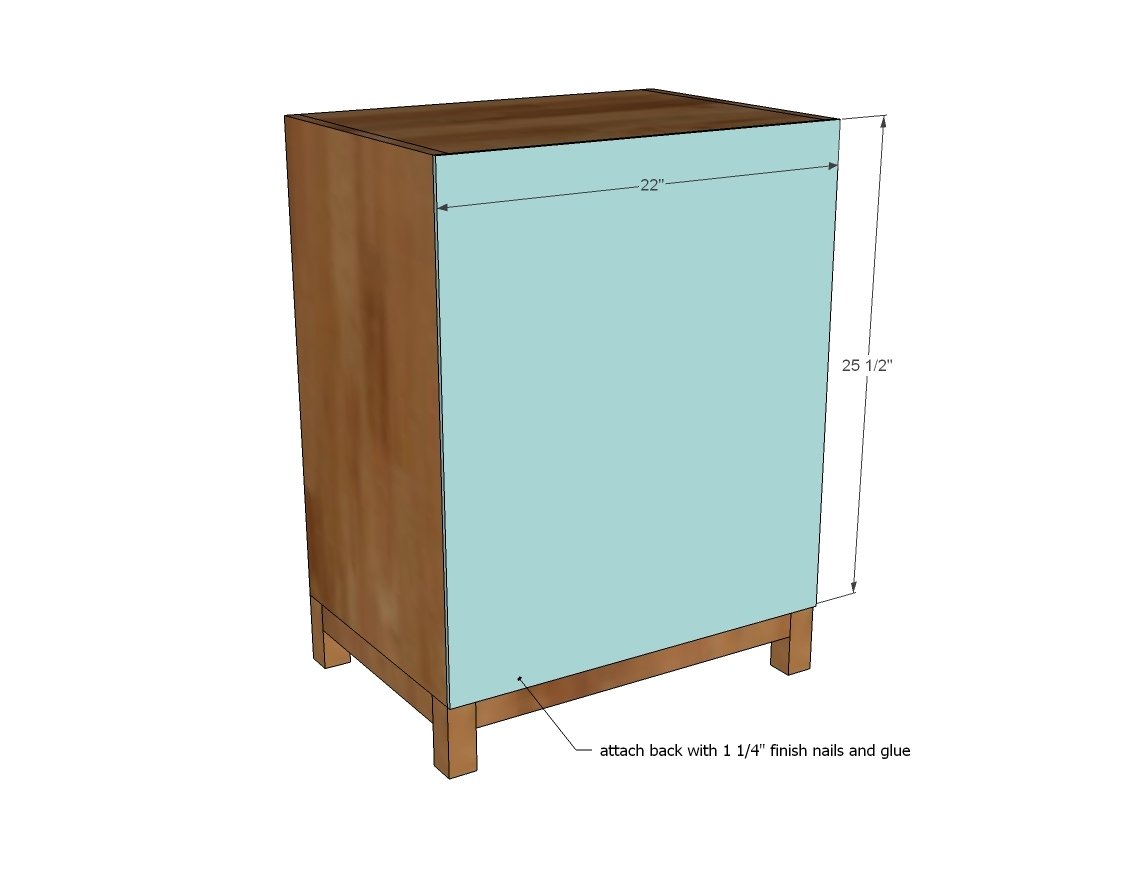
- 1 - 1/4" plywood @ 22" x 25 1/2"
LEG
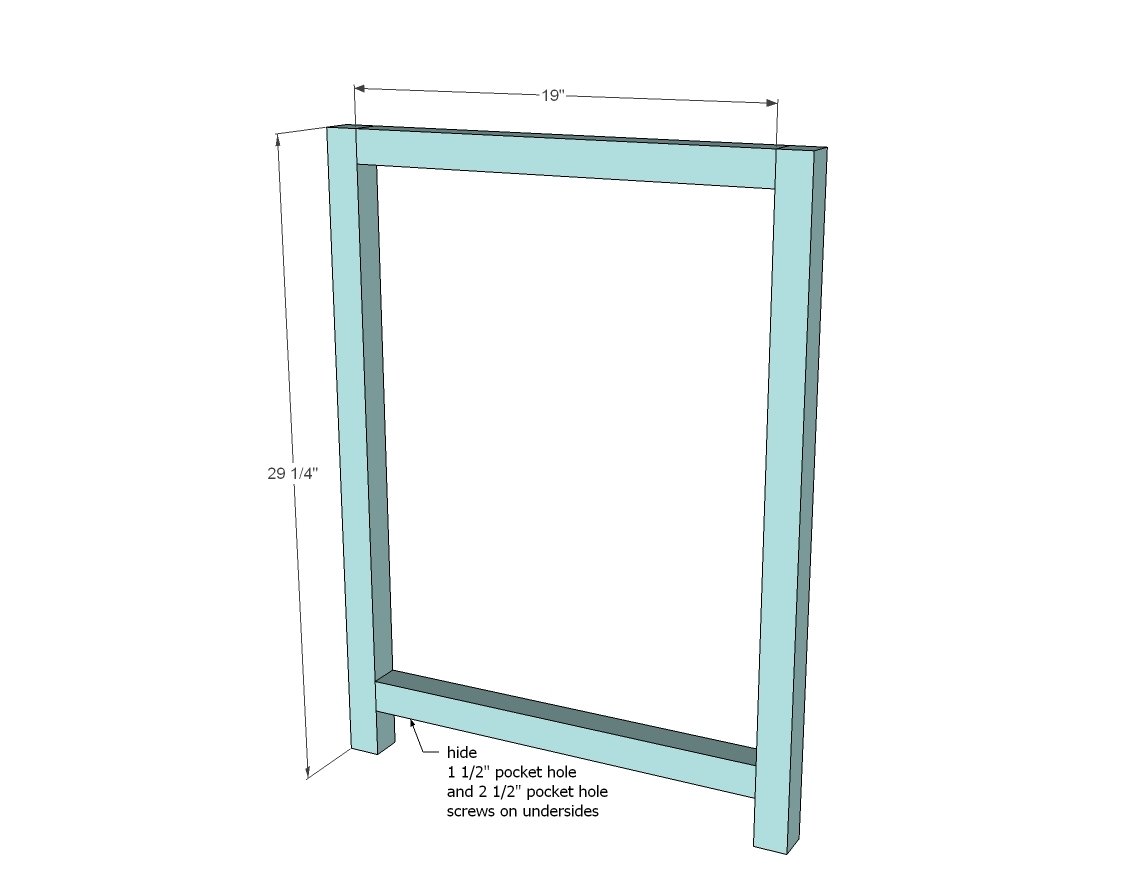
- 2 - 2x2 @ 19"
- 2 - 2x2 @ 29 1/4"
TOP
- 24" x 48" premade project panel top
Tools
- measuring tape
- square
- pencil
- safety glasses
- hearing protection
- kreg-jig
- drill
- circular saw
- nailer
- sander
- countersink drill bit
Step-by-step Instructions
Step 1
Start by building the basic box. I've left the top off for this step just to make it easier on you to install the drawer slides.
Step 2
You can make the divider section permanent, but once it's in there, it shouldn't need to be. Just slide in - that way if your storage needs change over time, you can change the shelving configuration too.
Step 3
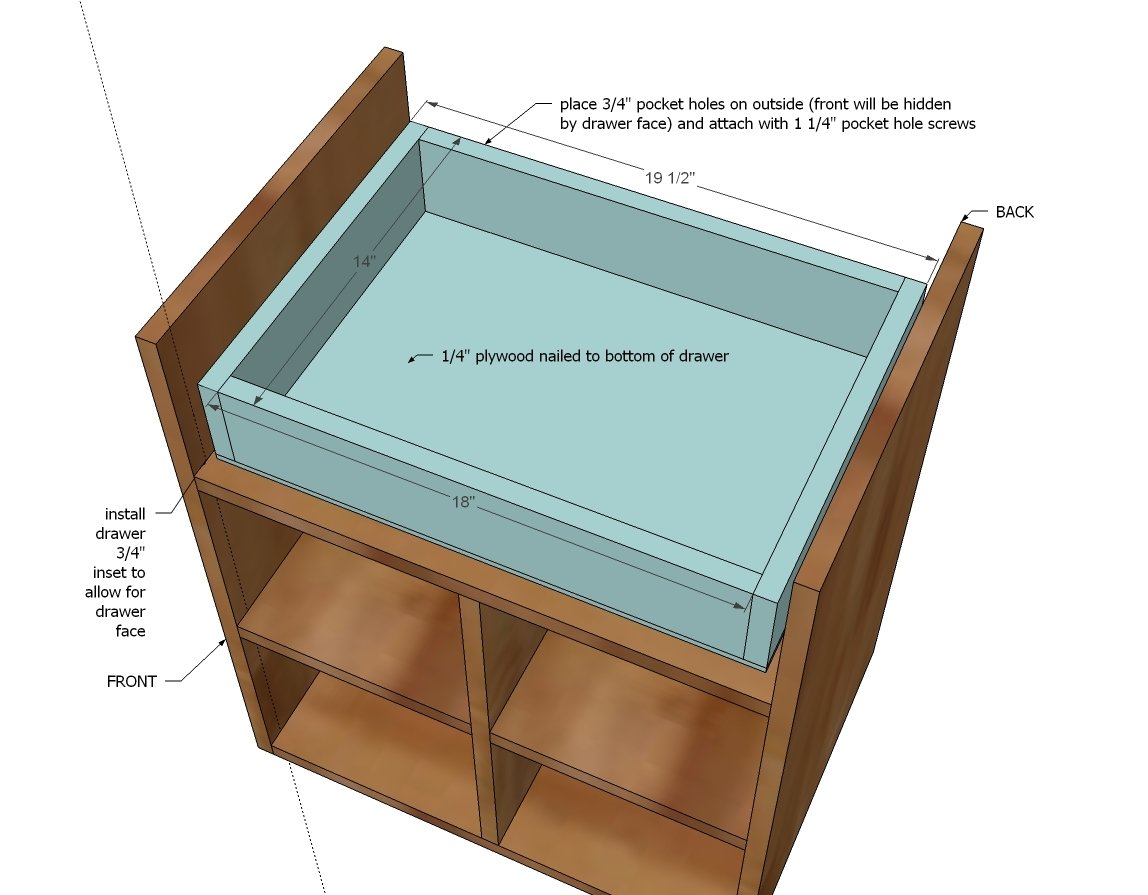
Build the drawer box to fit your opening and drawer slides - remember you'll need to leave 3/4" at the front for the drawer face (step 5). Install drawer in lowest possible position, 3/4" inset, with the drawer slides.
Step 4
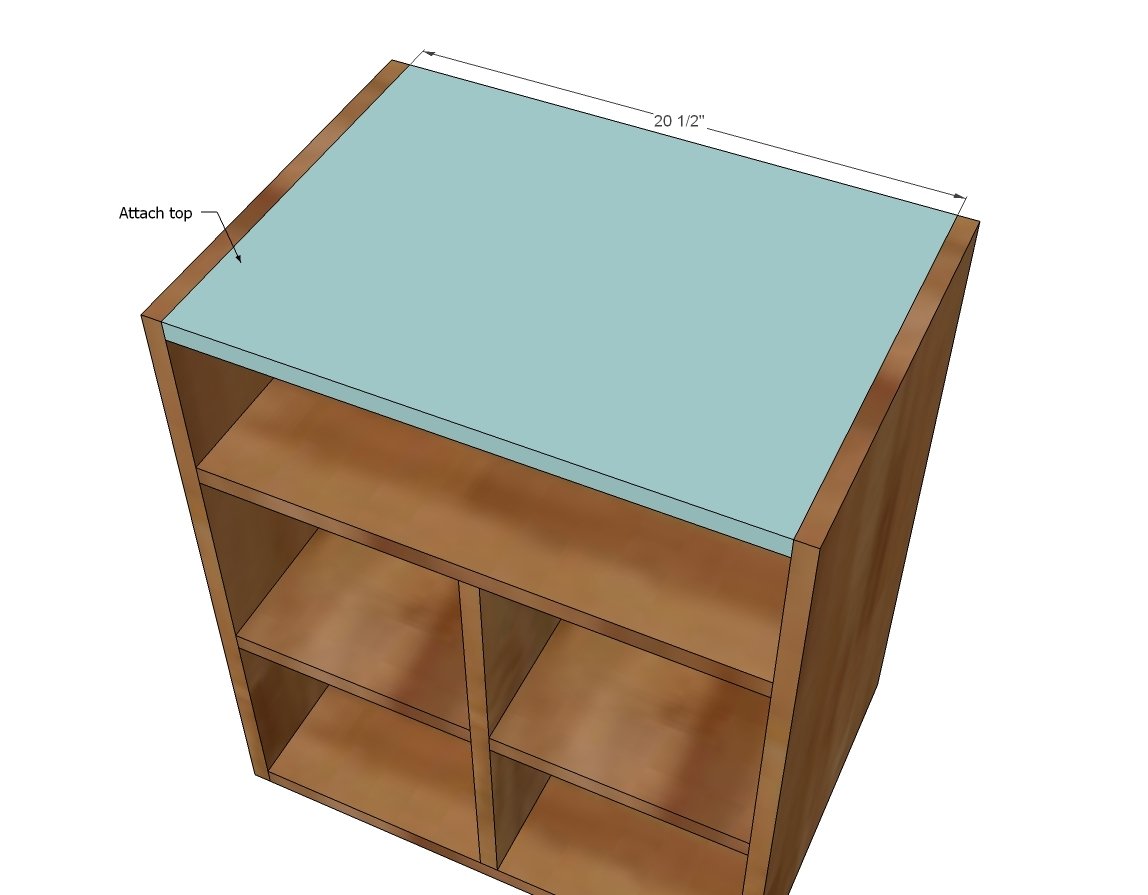
Attach top - if you are planning on only using this project with a tabletop, place pocket holes on top (will be hidden by top anyway).
Step 5
Step 6
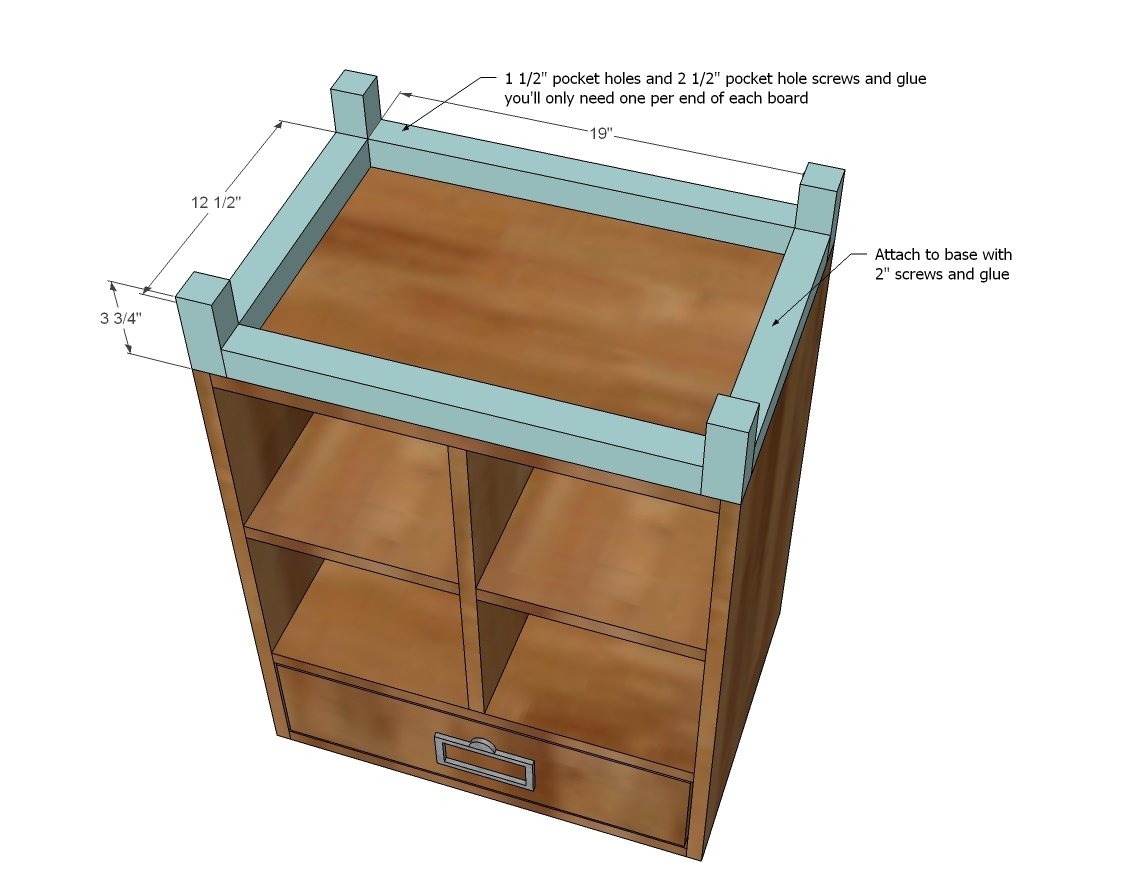
Build base first then attach to bottom of box.
Step 7
Attach back to base with finish nails and glue.
Step 8
Build leg.
Step 9
Attach base and leg to tabletop.
Finishing
Sand all surfaces, starting with a medium grit and finishing with fine. Wipe off the dust, fill any holes or gaps with wood filler, and sand smooth once dry. Apply primer if you're painting, then finish with your choice of paint or stain and seal with a durable clear topcoat. For outdoor projects, use exterior-rated primer, paint or stain, and sealer so the piece stands up to the weather.
Source (temporary): https://www.ana-white.com/woodworking-projects/schoolhouse-project-table-desk