Scrap Lap Desk
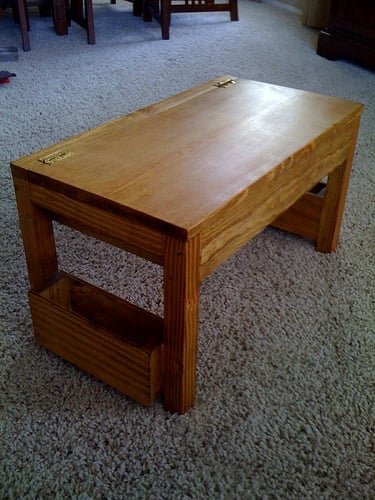
If you've built up a pile of scraps, this is the perfect project to take on. Perfect for your teen's room or even as a occasional work surface on the living room floor, this lap desk features sturdy construction and lift top storage.
Specifications
| Project type | Other Projects |
|---|---|
| Room | Storage Solutions |
| Style | Cottage Style Furniture Plans |
| Difficulty | Intermediate |
| Estimated cost | Under $20 |
Dimensions
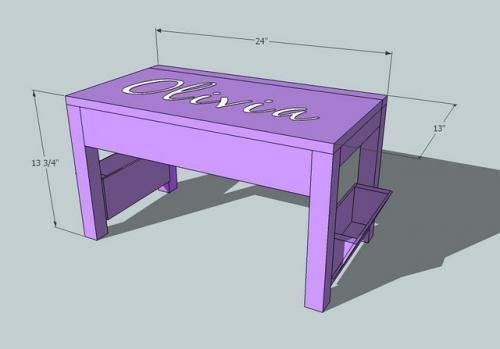
Use the size-specific shopping and cut lists below.
Shopping List
Standard Hinges 1 - 1x12 @ 4 feet long
1 - 1x4 @ 6 feet long
1 - 2x2 @ 6 feet long
1 - 1x3 @ 8 feet long
Cut List
A) 1 – 1×12 @ 19 1/2″ (Bottom of the top storage compartment) B) 2 – 1×4 @ 11 1/2″ (Sides of the top storage compartment)
C) 2 – 1×4 @ 21″ (Front and Backs of the top storage compartment)
D) 4- 2×2 @ 13″ (Legs)
E) 2 – 2×2 @ 10″ (Top Trim)
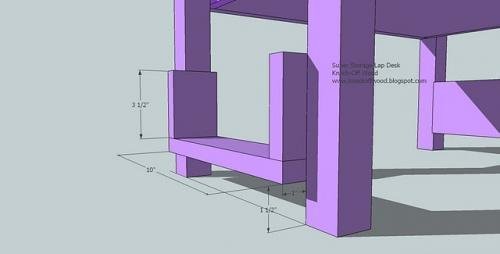
F) 2 – 1×3 @ 10″ (Bottom of the Side Compartments)
G) 4 – 1×3 @ 4″ (Sides of the Side Compartments)
H) 4 – 1/4″ Plywood cut at 10″ x 4 3/4″ (Front and Back of Side Compartments)
I) 1 – 1×3 @ 11 1/2″ (Divider for the top compartment)
J) 1 – 1×3 @ 6″ (Short Divider for the top compartment)
K) 1 – 1×2 @ 24″ (Top, Back, Fixed)
L) 1 – 1×12 @ 24″ (Hinged Top)
Tools
- measuring tape
- square
- pencil
- safety glasses
- hearing protection
- drill
- circular saw
- sander
Step-by-step Instructions
Step 1
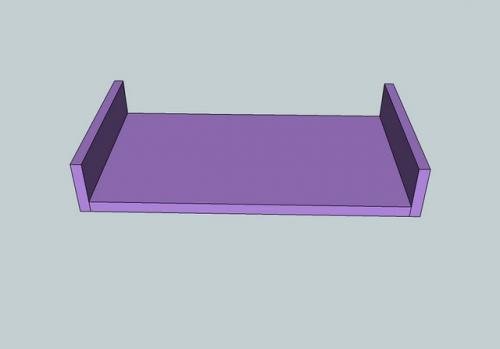
Nail boards B to board A, keeping outside edges flush, as shown above.
Step 2
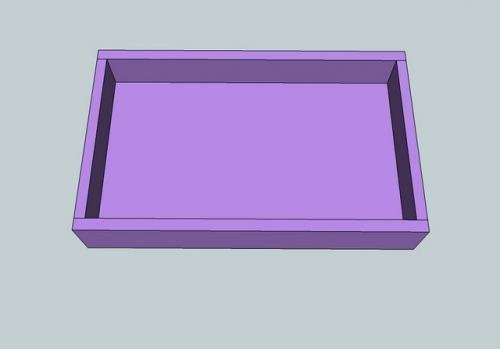
Nail boards C to boards A and B as shown above.
Step 3
Screw the legs to the top storage compartment, as shown above.
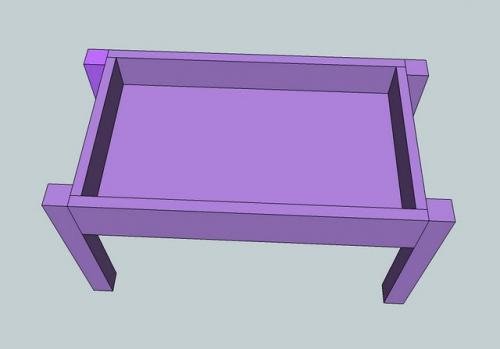
Step 4
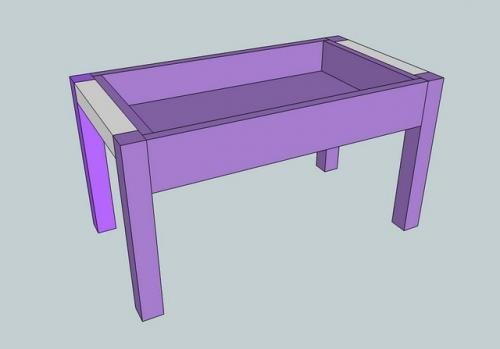
The Top Trim, E, is screwed to the top storage compartment with 2″ screws (you can also use 2″ nails). Make sure you also screw through the legs into the end edges of the Top Trim, E.
Step 5
Step 6
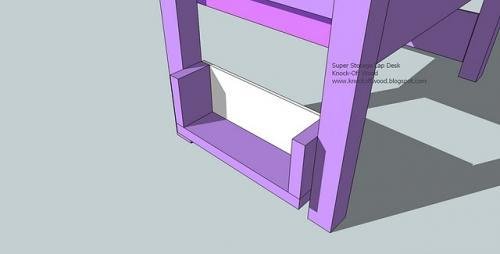
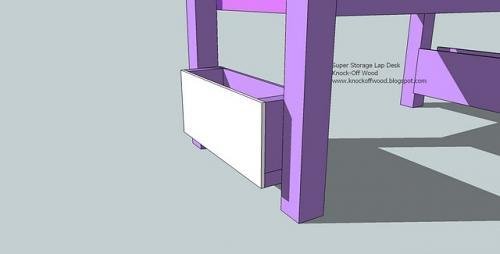
Add the plywood to the backs of the side storage compartments with nails.
Step 7
Then plywood the front, as shown above, again with nails and glue.
Step 8
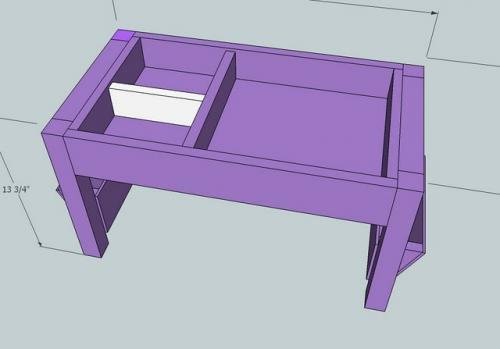
Add the dividers, I and J, to the storage compartment as shown above, using nails through the sides of the top storage compartment. You can adjust the dividers to suit your needs.
Step 9
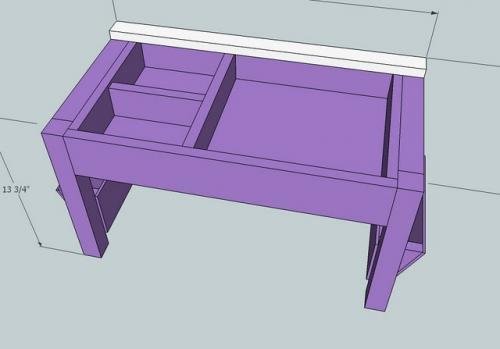
Nail the top back piece, K, to the top of the lap table, as shown above. Keep outside edges flush.
Step 10
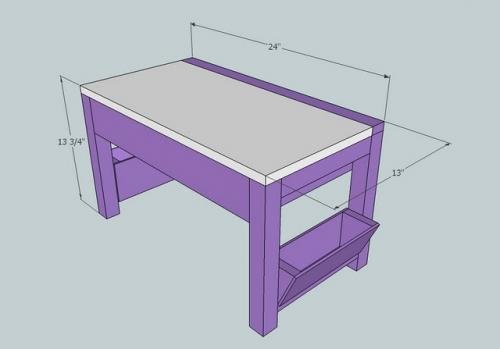
Use hinges to attach the hinged top, L, to the top back, K.
Finishing
Sand all surfaces, starting with a medium grit and finishing with fine. Wipe off the dust, fill any holes or gaps with wood filler, and sand smooth once dry. Apply primer if you're painting, then finish with your choice of paint or stain and seal with a durable clear topcoat. For outdoor projects, use exterior-rated primer, paint or stain, and sealer so the piece stands up to the weather.
Source (temporary): https://www.ana-white.com/woodworking-projects/scrap-lap-desk