Secretary from the Modular Office Collection
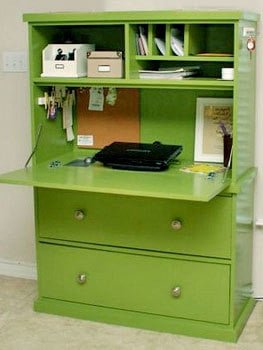
This simple beautiful secretary closes up to conceal your office workstation. Paint it a fun color for added pizazz and to make bill paying and mail sorting more glamorous. Special thanks to our readers for sharing their photos.
Specifications
| Project type | Cubby Project Plans |
|---|---|
| Room | Storage Solutions |
| Style | Farmhouse Furniture |
| Difficulty | Intermediate |
| Estimated cost | $20 - $50 |
Dimensions
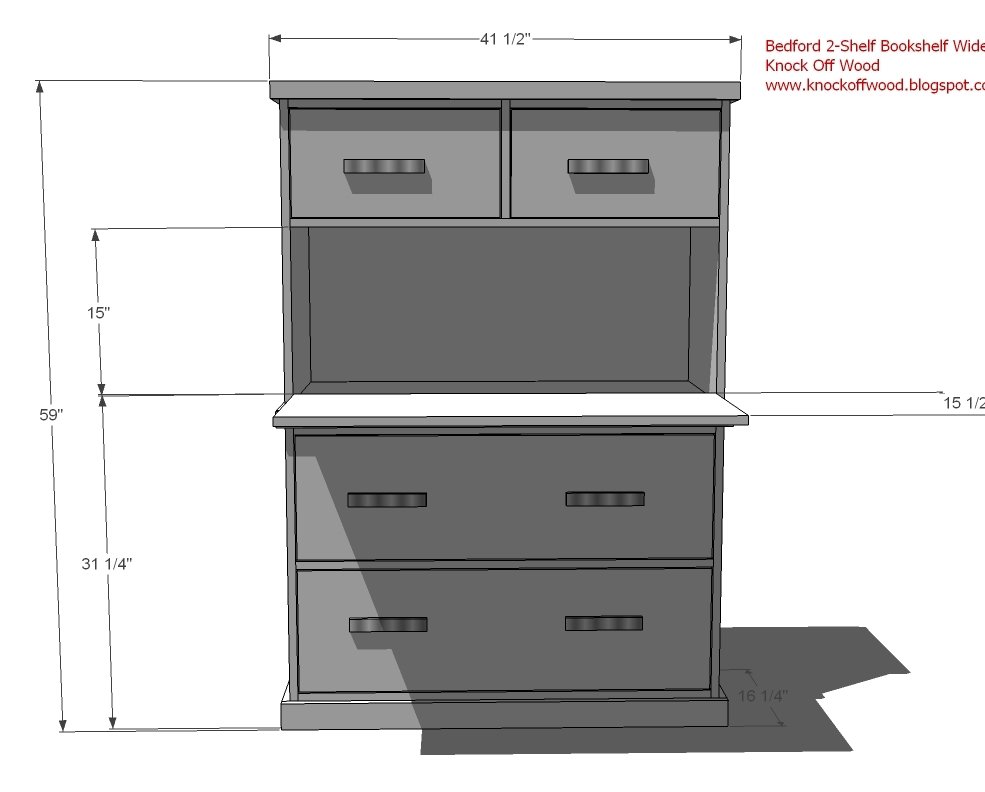
Use the size-specific shopping and cut lists below.
Shopping List
3 – Sets of Euro Style Hinges, Inset Mount, for Frameless Cabinets, 95 degree opening angle (can be more) 1 – Set of Support Hinges
1 – Sheet of MDF or A1 Plywood cut into 1×16 strips
2 – 1×2
4′ of 1×10 board
2″ Nails
Label Holders and Handles or Pulls
2″ Nails or Screws
1 1/4″ Nails
Wood Glue
Wood Filler
Sand Paper
Finishing Supplies
Cut List
2 – 1×16 @ 38 1/2″ (Shelves) 1 – 1×16 @ 40″ (Top)
2 – 1×16 @ 28 3/4″ (Sides)
1 – 1×16 @ 11 1/4″ (Divider for Top Shelves)
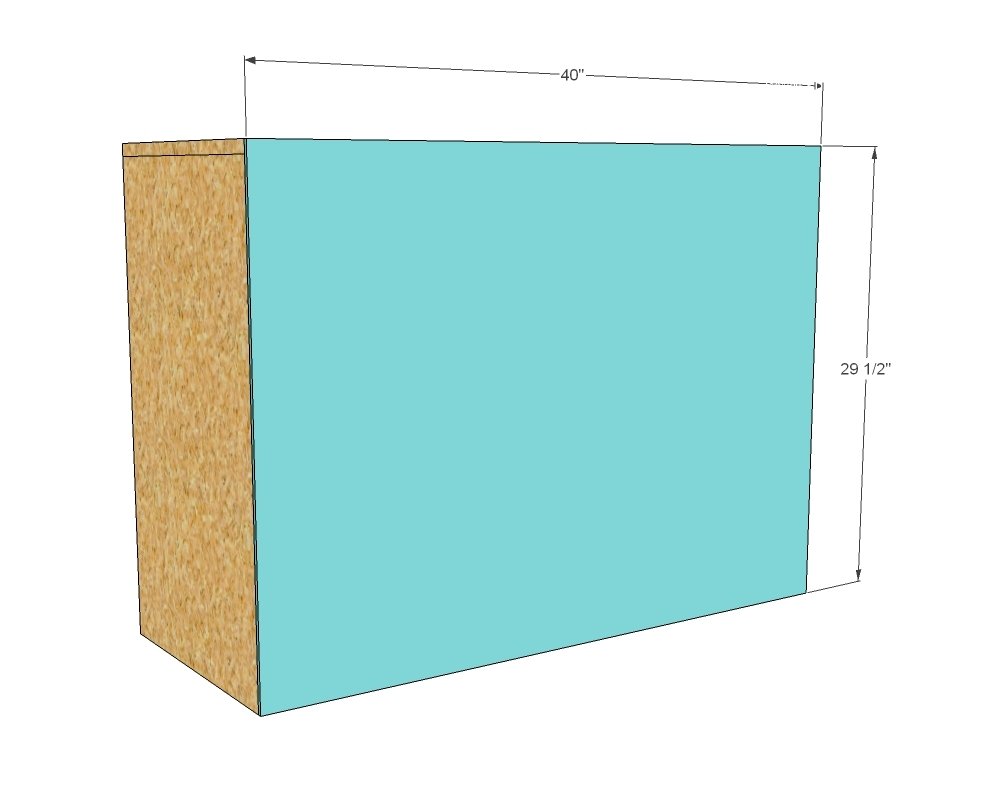
1 – 1/4″ Plywood @ 40″ x 29 1/2″ (Back)
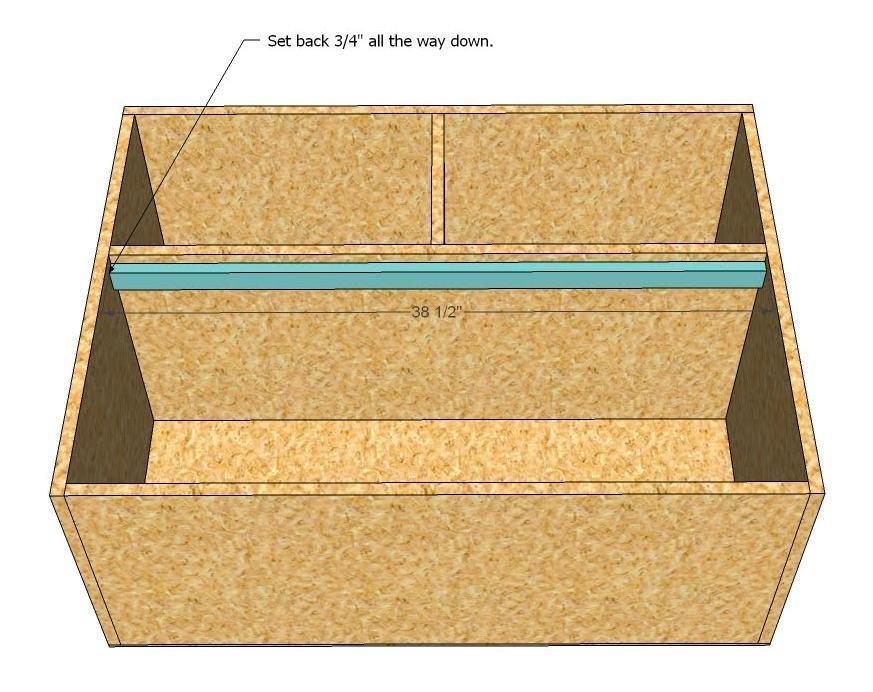
1 – 1×2 @ 38 1/2″ (Fold down top stopper)
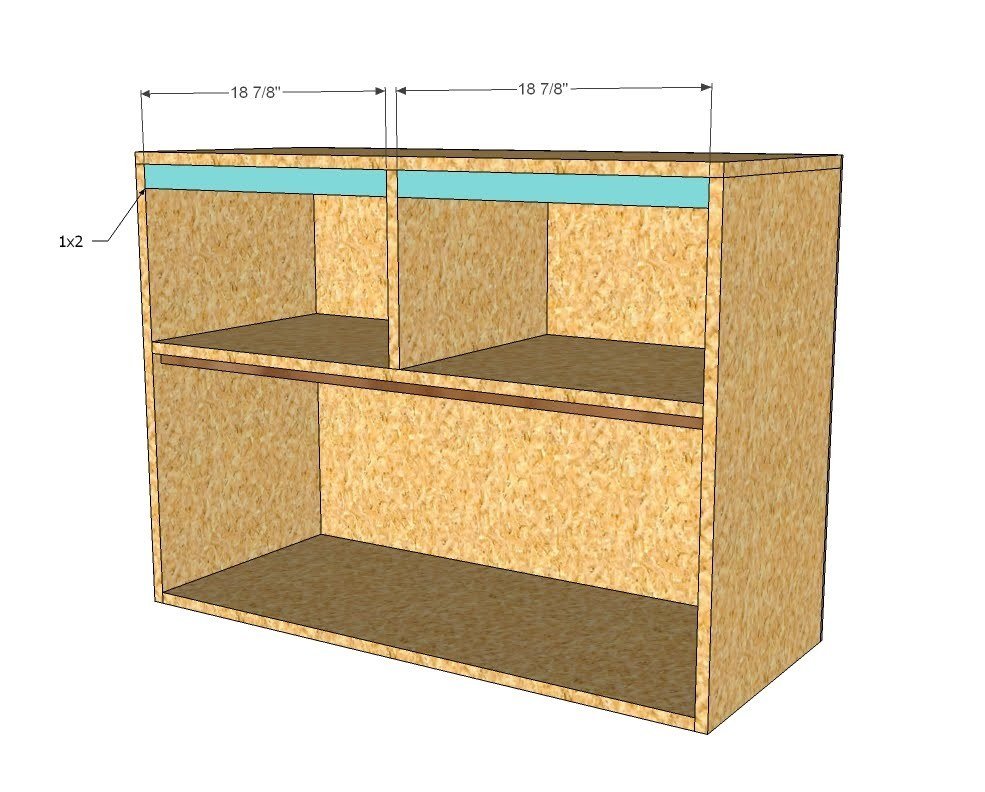
2 – 1×2 @ 18 7/8″ (Top Inside Trim)
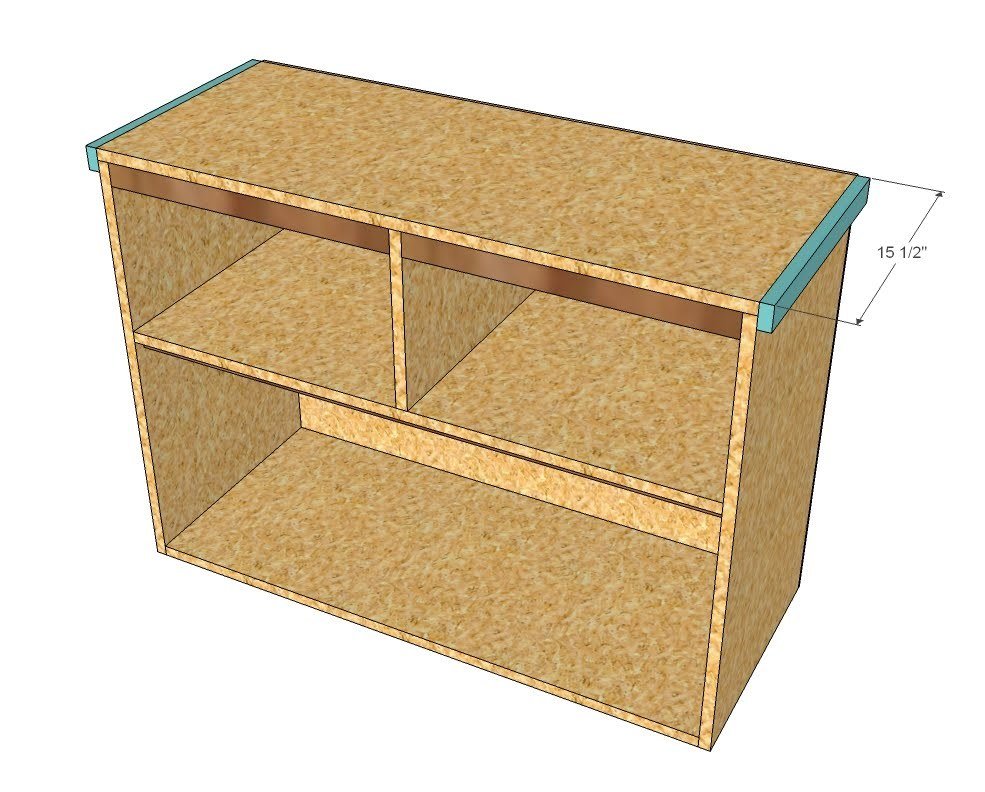
2 – 1×2 @ 15 1/2″ (Top Side Trim)
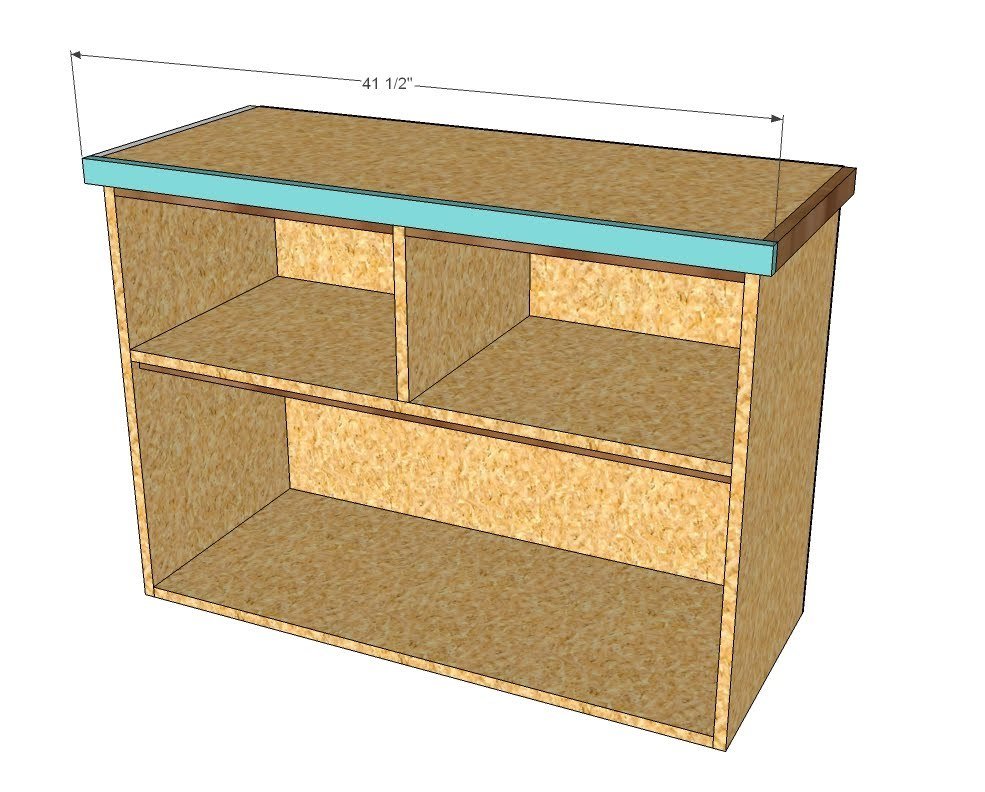
1 – 1×2 @ 41 1/2″ (Top Face Trim)
Doors
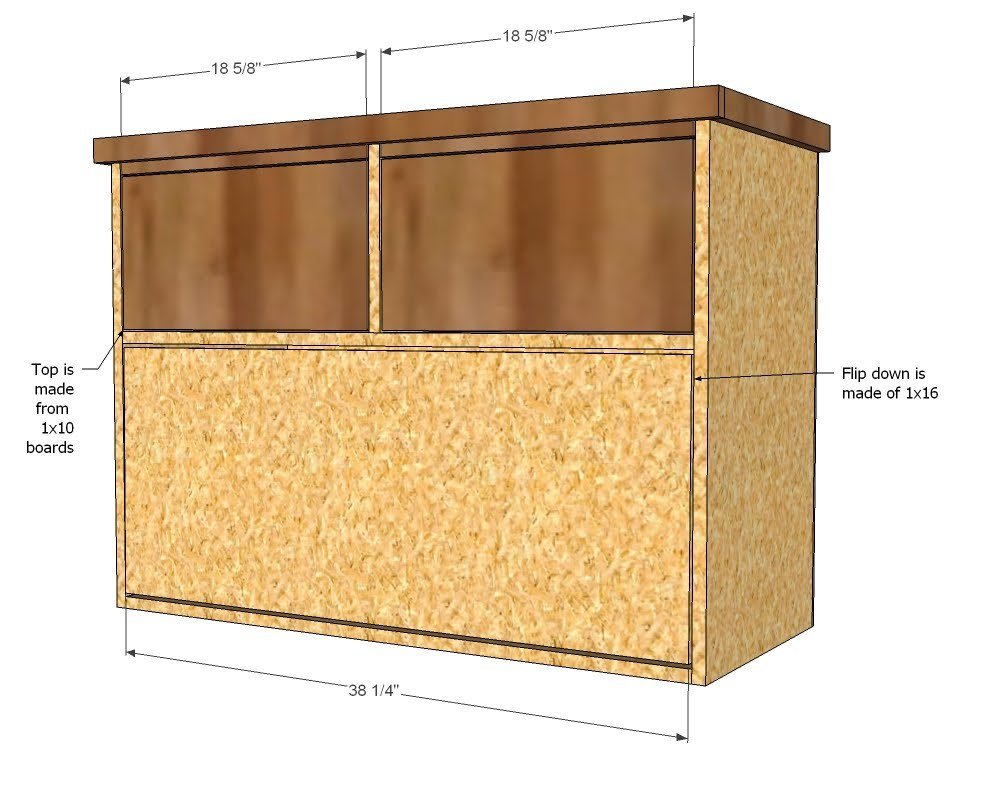
1 – 1×16 @ 38 1/4 (measure to fit. leave 1/8′ gap around all sides)
2 – 1×10 @ 18 5/8 (measure to fit, leave 1/8″ gap around all sides
Tools
- measuring tape
- square
- pencil
- safety glasses
- hearing protection
- kreg-jig
- drill
- circular saw
- table saw
- nailer
- sander
Step-by-step Instructions
Step 1
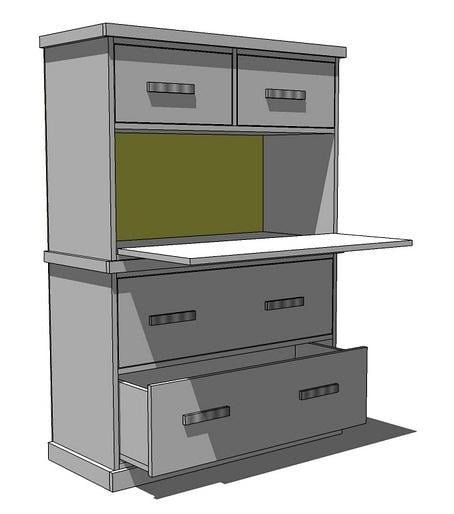
This plan is for the hutch and does not include the base unit.
Step 2
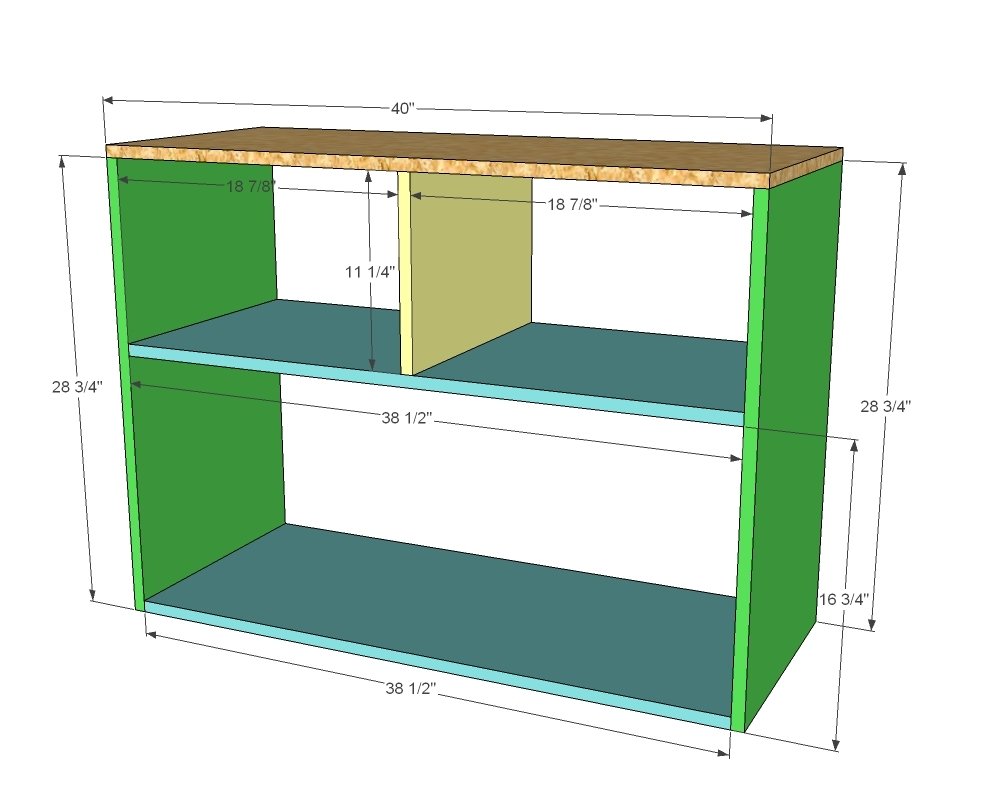
Build the Box. Begin by fastening the top divider to the top shelf, as shown above. Then fasten the shelves to the sides. And then fasten the top in place. Use glue and 2″ nails or screws.
Step 3
Back. Take a square of the project and fasten the back in place using 1 1/4″ nails and glue. Make sure you fasten to the center divider and top shelf, too.
Step 4
Flip Down Door Stop. Using the 1 1/4″ nails and glue, fasten the flip down door stop as shown above. Leave 3/4″ clearance from the front of the cabinet. Also fasten from the sides into the ends of the flip down door stop.
Step 5
Step 6
Side Trim. Using the 1 1/4″ nails and glue, fasten the side trim to the top, as shown above. Make sure you nail into both the top and the sides to reinforce the joints.
Step 7
Front Trim. As shown above, fasten the front trim in place with the 1 1/4″ nails and glue. Fasten to the top, divider, and the top trim pieces.
Step 8
Hinges. Fasten the flip down door with the inset euro style hinges, meant for frameless cabinets. Adjust the hinges until the flip down fits best. Then add the support hinges. Choose support hinges that have a total expansion less than 20″ but greater than 10″. Adjust the support hinges so that the flip down sits at a 90 degree angle to the cabinet. You can alternately use a continuous hinge, also called a piano hinge, 30″ in length, on the bottom edge. You will still need the support hinges. The pin edge in the continuous hinge will be visible when the door is closed.
Step 9
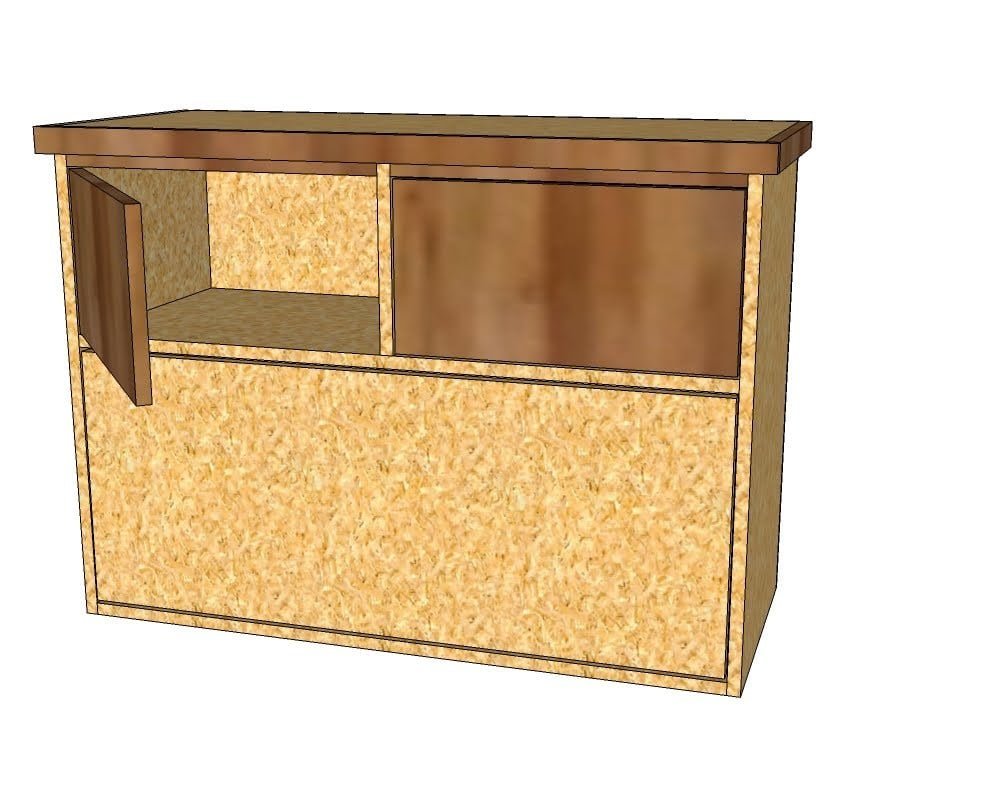
Top Doors. Wouldn’t this make more sense than those doors of Pottery Barn’s? Unless you like balancing on a chair that swivels and has wheels to get to your top drawer, I say the cabinet doors are smarter. Fasten the remaining 2 sets of euro style hinges to the doors. Adjust so the door faces fit centered in the openings. You could also leave the doors off and add baskets for a very functional top.
Finishing
Sand all surfaces, starting with a medium grit and finishing with fine. Wipe off the dust, fill any holes or gaps with wood filler, and sand smooth once dry. Apply primer if you're painting, then finish with your choice of paint or stain and seal with a durable clear topcoat. For outdoor projects, use exterior-rated primer, paint or stain, and sealer so the piece stands up to the weather.
Source (temporary): https://www.ana-white.com/woodworking-projects/secretary-modular-office-collection