Shanty Open Shelf Console
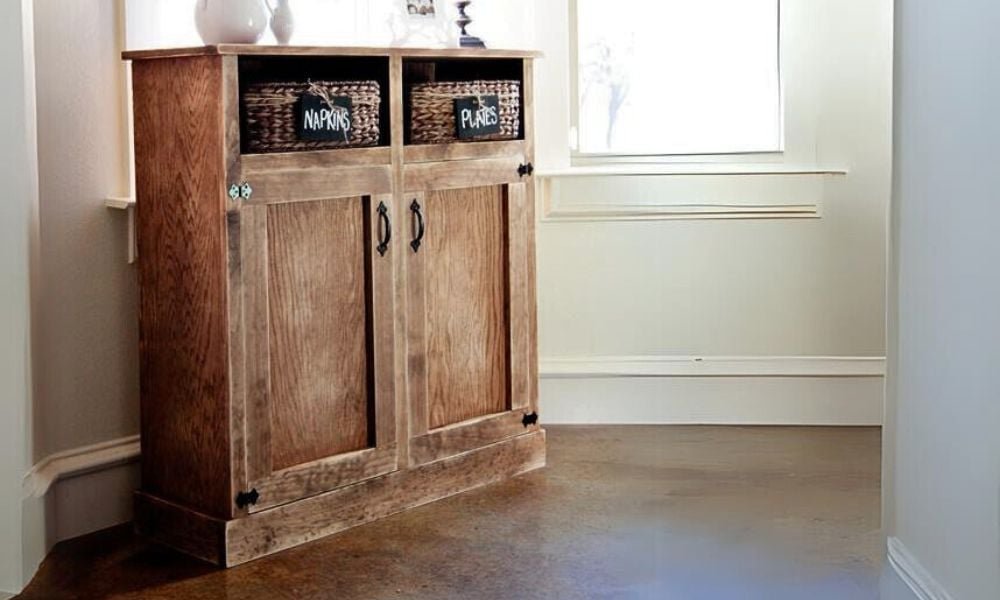
to build an open shelf console from This beautiful console features two cubbies for baskets and cabinet doors to hide more storage. Step by step plans include shopping and cut list, diagrams, and lots of reader submitted photos.
Specifications
| Project type | Buffet, Sideboard and Credenza Plans |
|---|---|
| Room | Storage Solutions |
| Style | Farmhouse Furniture |
| Difficulty | Intermediate |
Dimensions
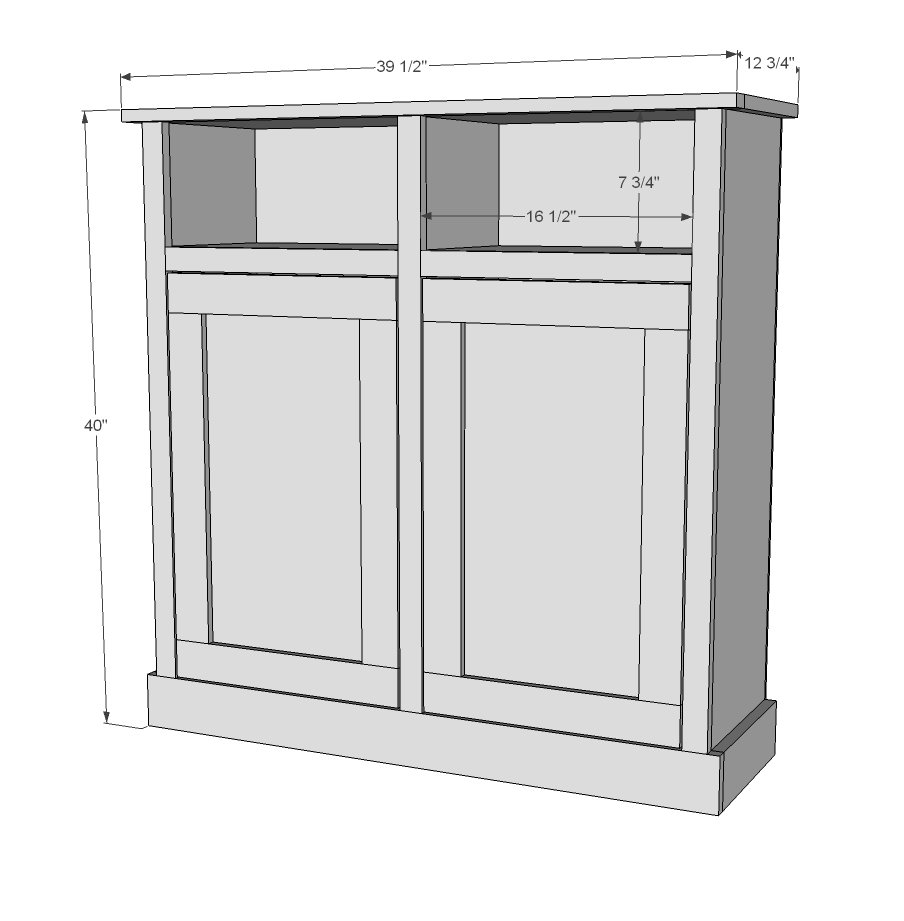
Use the size-specific shopping and cut lists below.
Shopping List
- 1 sheet 3/4" plywood cut into strips 11 1/4" wide (Whitney used PureBond Formaldehyde Free Plywood) or you can use 3 - 1x12 boards @ 8 feet long
- 1 - 1x4 @ 6 feet long
- 2 - 1x2 @ 8 feet long
- 2 - 1x3 @ 6 feet long
- 1/4 plywood (Whitney used PureBond) for back and door backs
- Recommend pocket hole construction with 1 1/4" pocket hole screws
- 1" and 1 1/4" brad nails for attaching face frame and 1/4" plywood
Cut List
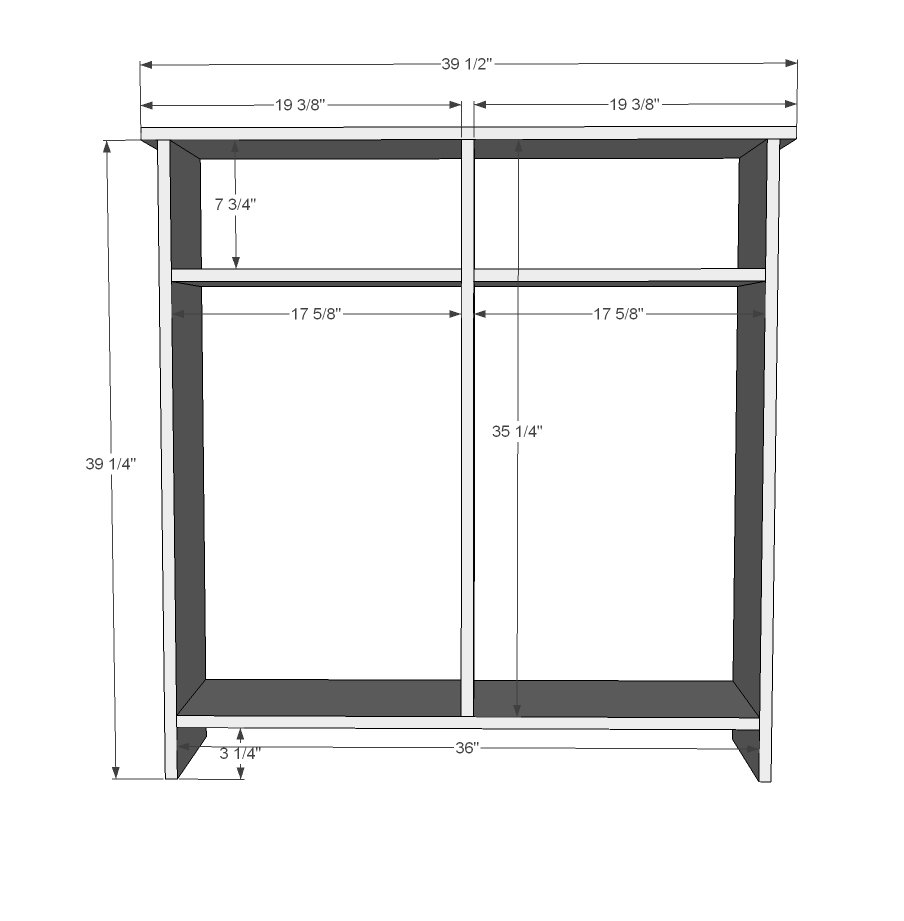
- Sides - 2- 1x12 @ 39 1/4"
- Top - 1- 1x12 @ 39 1/2"
- Bottom Shelf - 1- 1x12 @ 36" (I positioned this shelf where the top of the shelf is 7 3/4" from the top of the cabinet)
- Center Divider - 1- 1x12 @ 35 3/4"
- Shelves under baskets - 2 - 1x12 @ 17 5/8"
- Footer Front - 1- 1x4 @ 39"
- Footer sides - 2 - 1x4 @ 11 1/4"
- Front Trim - 3 - 1x2 @ 35 3/4"
- Top front - 1- 1x2 @ 39 1/2"
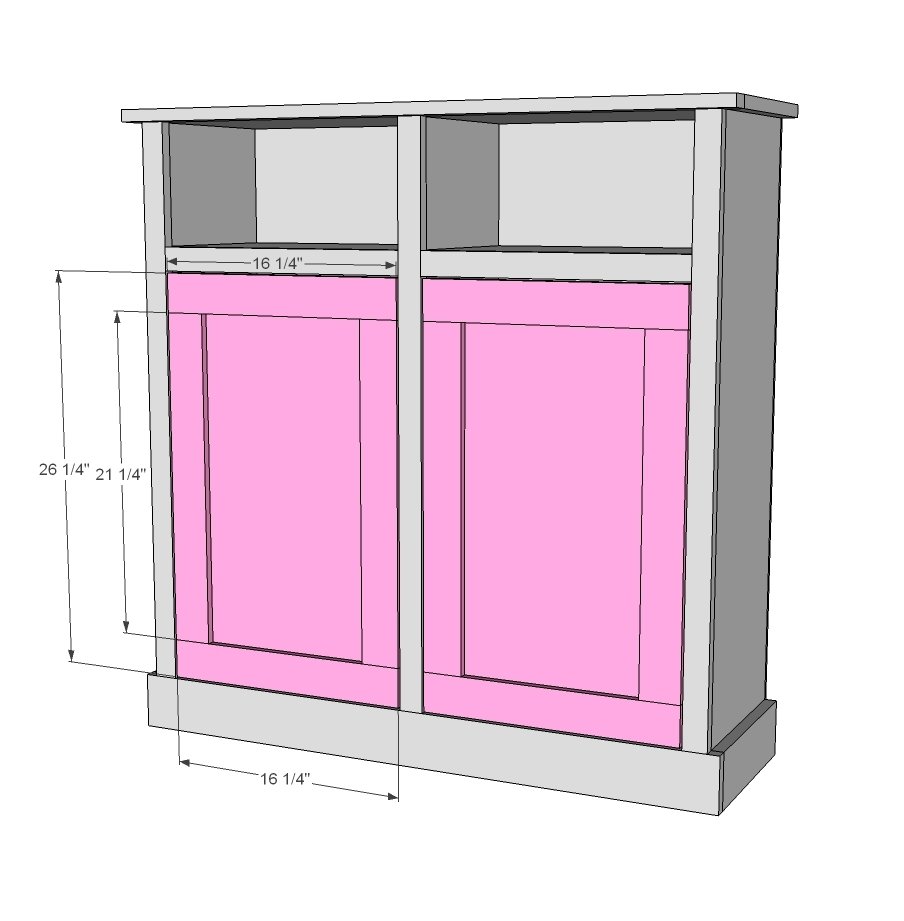
- Doors - Whitney used 1x3 for the doors.
- Door tops - 16 1/4"
- Door Sides - 21 1/4" 1/4"
- PureBond for the doors at 16"x26"
- Optional shelves on inside from scraps. If you use the 1x12 it will need to be cut down about an inch to make room for the flush doors.
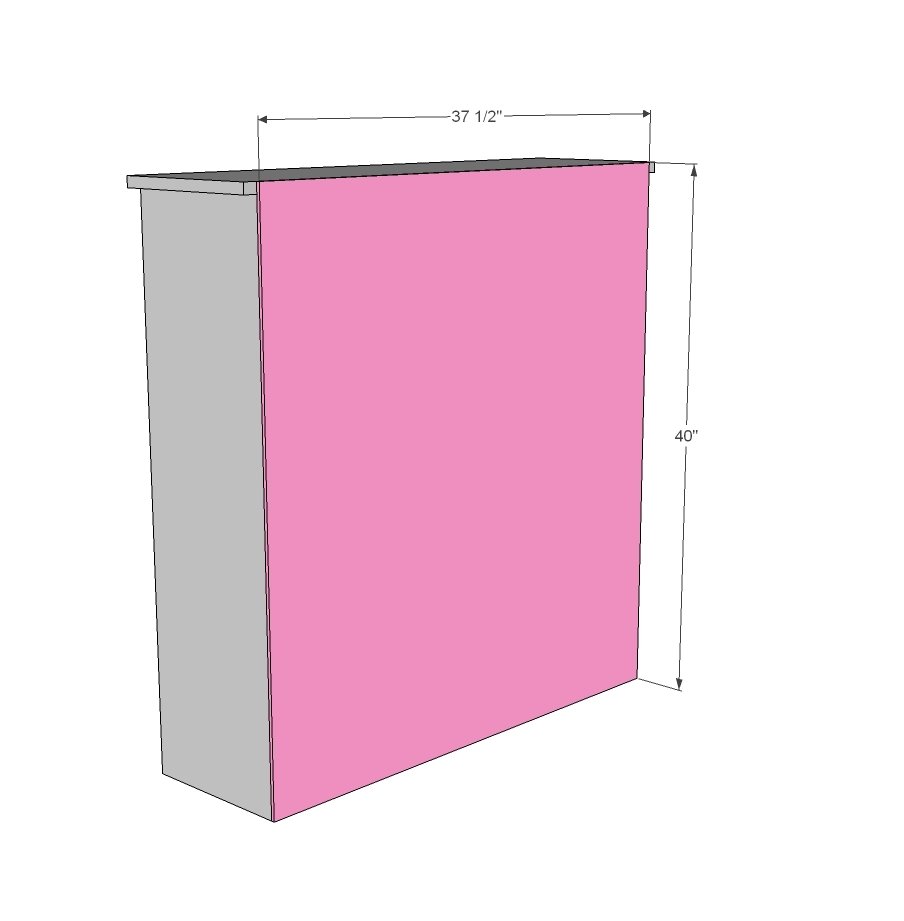
- Back - 1/4" PureBond @ 37 1/2 x 39"
Tools
- measuring tape
- square
- pencil
- safety glasses
- hearing protection
- kreg-jig
- drill
- circular saw
- compound miter saw
- nailer
- sander
Step-by-step Instructions
Step 1
Build the box first. I recommend using 3/4" pocket holes and 1 1/4" pocket hole screws and glue.
Step 2
Attach back with glue and finish nails. Attach to center divider and all fixed shelves.
Step 3
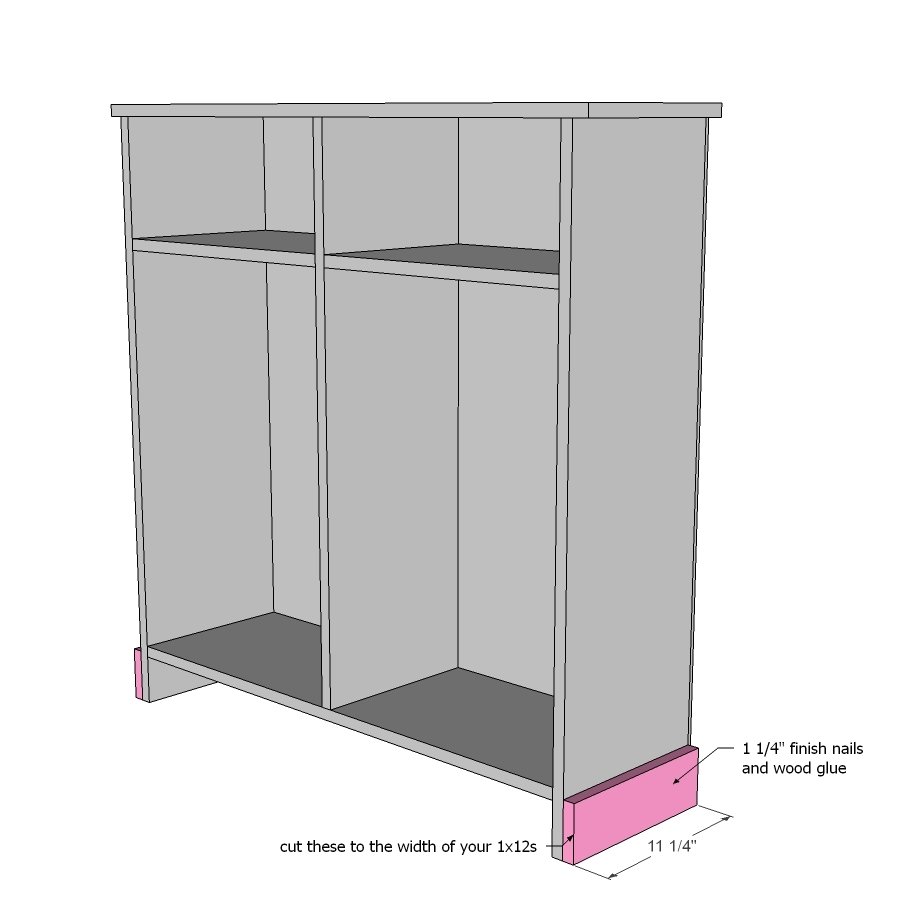
Attach footer sides with finish nails and glue.
Step 4
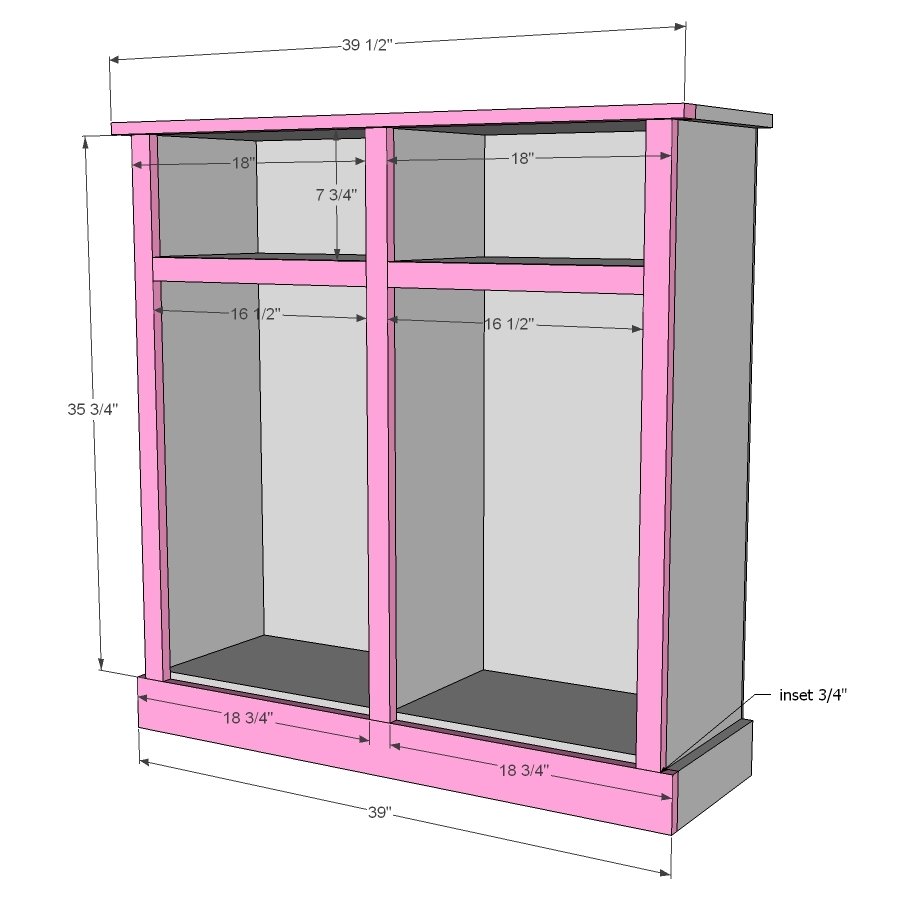
I recommend building face frame first with pocket holes, then attaching completed face frame to front of cabinet with glue and finish nails.
Step 5
Finishing
Sand all surfaces, starting with a medium grit and finishing with fine. Wipe off the dust, fill any holes or gaps with wood filler, and sand smooth once dry. Apply primer if you're painting, then finish with your choice of paint or stain and seal with a durable clear topcoat. For outdoor projects, use exterior-rated primer, paint or stain, and sealer so the piece stands up to the weather.
Source (temporary): https://www.ana-white.com/woodworking-projects/shanty-open-shelf-console